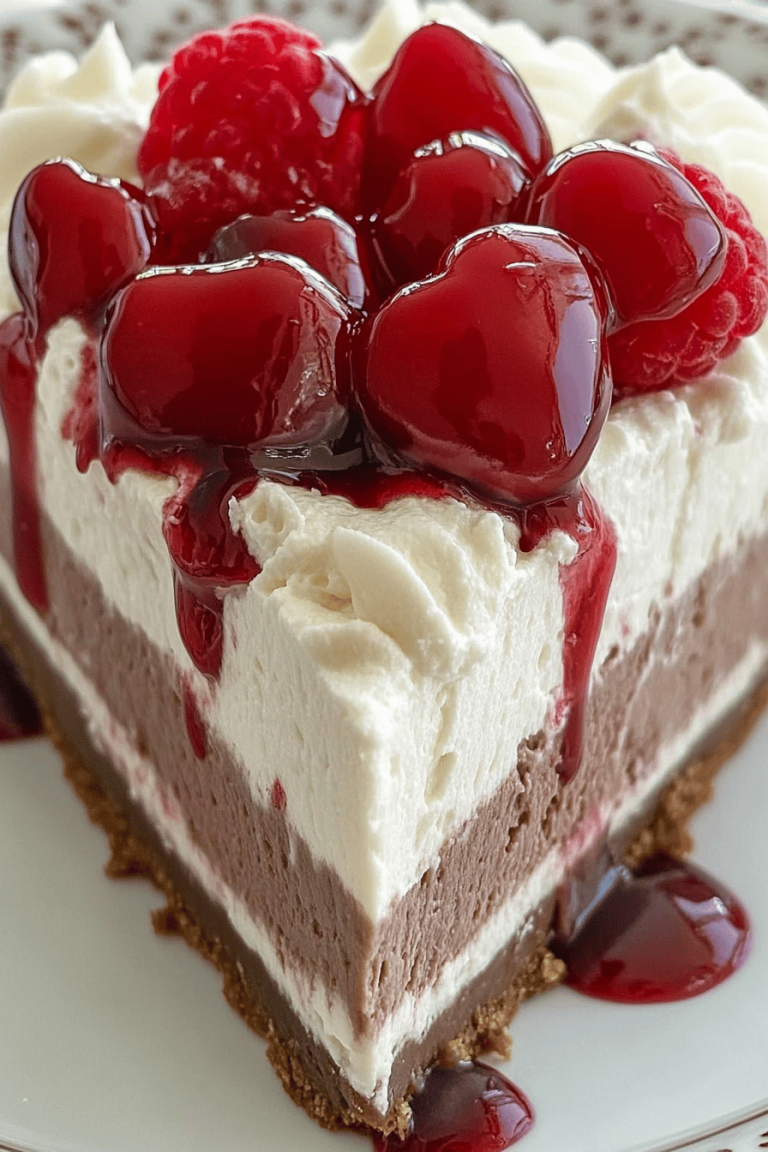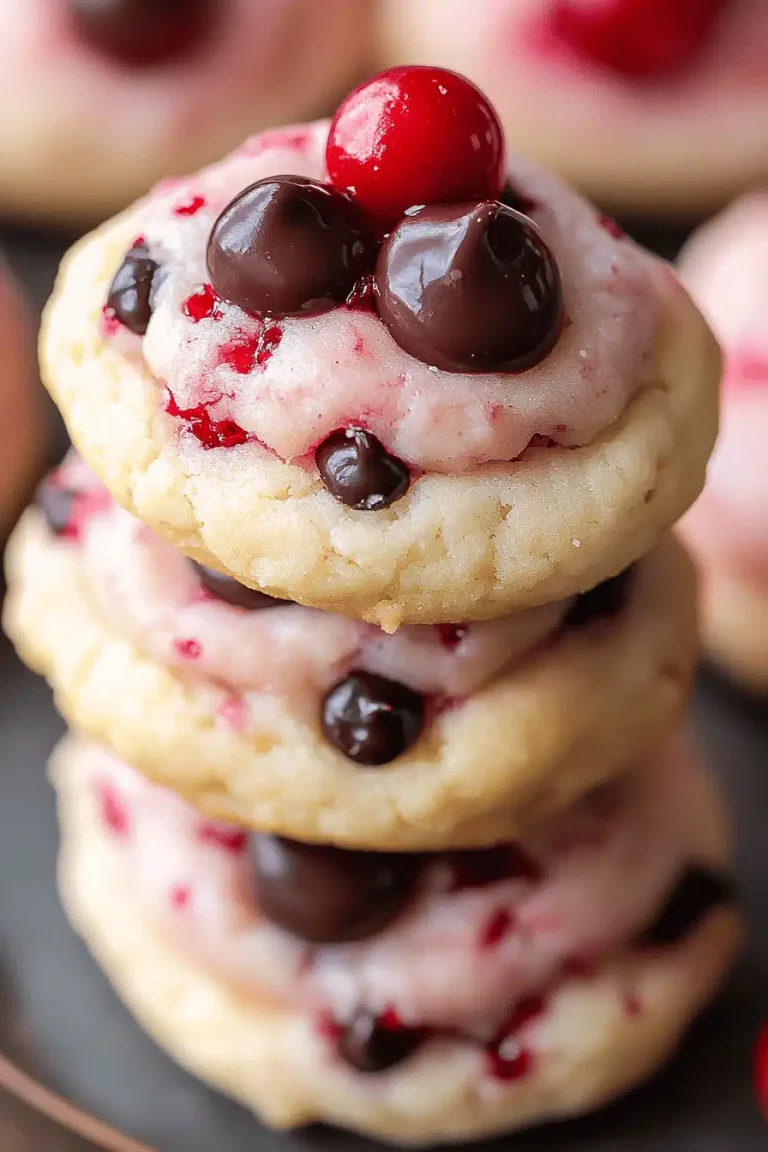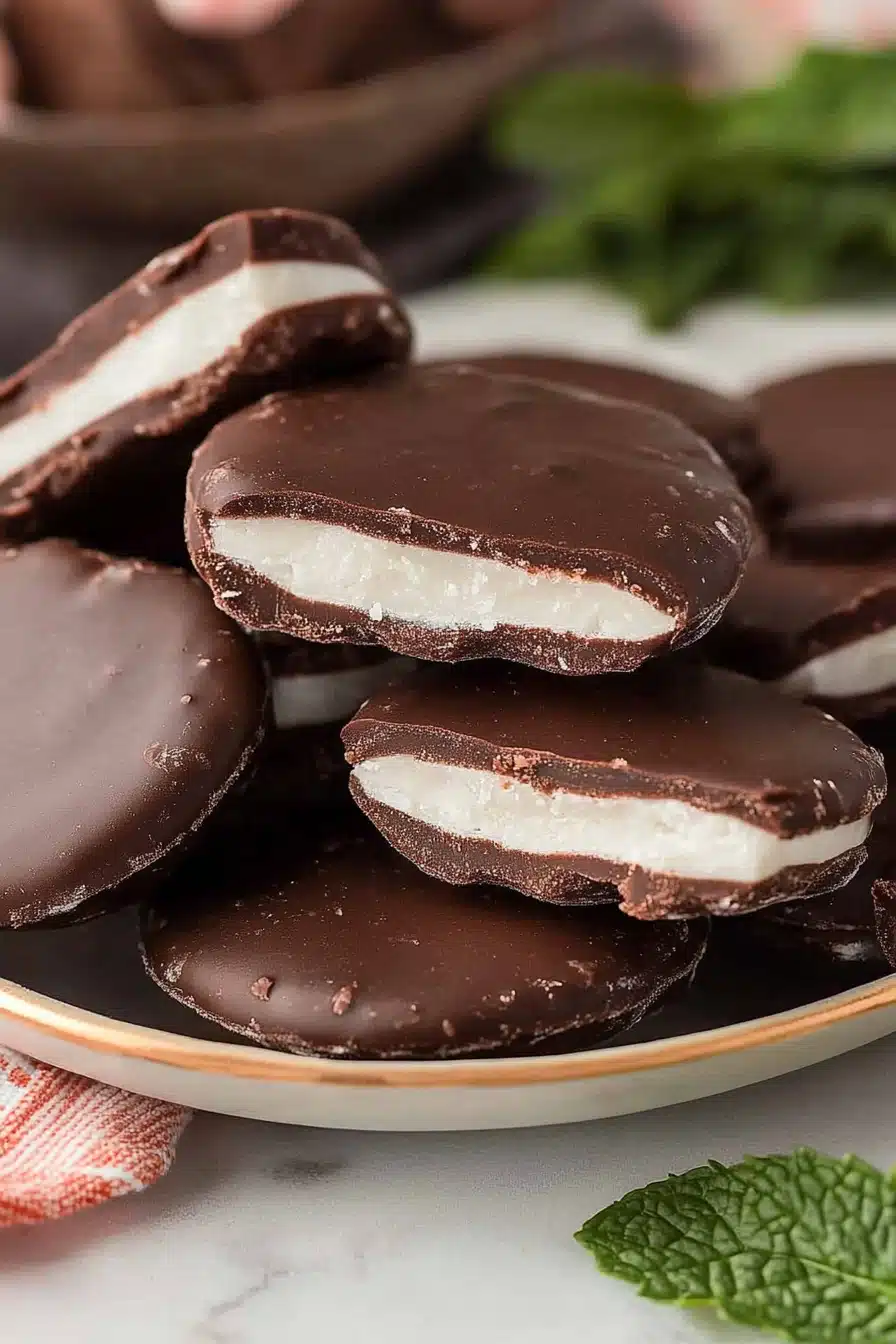
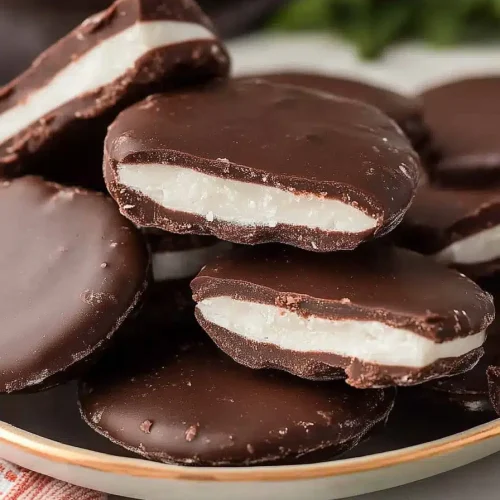
peppermint patties
There are some treats that just instantly transport you back to simpler times, aren’t there? For me, it’s those little discs of cool, minty joy, a perfect balance of rich chocolate and refreshing peppermint. I’m talking, of course, about peppermint patties. Now, I know what you might be thinking – “Can I really make those at home? Aren’t they complicated?” Let me tell you, I used to think the same thing! But then I discovered this recipe, and my whole world of homemade candy changed. This isn’t just any recipe; it’s the one I turn to when I need a little pick-me-up, when I want to impress friends without spending hours in the kitchen, or frankly, when a serious sweet craving hits at 10 PM and I don’t want to deal with baking a whole cake. This recipe for peppermint patties is a game-changer, and it’s so much easier than you’d ever imagine.
What are some good homemade peppermint patties?
So, what exactly are these delightful little treasures we’re diving into today? Think of them as the homemade, infinitely superior version of those store-bought candies. They’re essentially a smooth, creamy peppermint filling, enrobed in a shell of rich, dark chocolate. The magic is in that filling – it’s got this amazing melt-in-your-mouth texture with a bright, invigorating peppermint flavor that’s perfectly balanced. It’s not too sweet, not too overpowering, just *right*. My own version of these peppermint patties is slightly softer than some commercial ones, which I actually prefer because it feels a little more homemade and less like a mass-produced candy. The name itself, “peppermint patties,” is pretty straightforward, right? It’s a delightful little disc, a patty, infused with the glorious essence of peppermint. It’s simple, elegant, and oh-so-satisfying. This recipe takes that classic idea and brings it into your own kitchen, with love and a few of my own little secrets.
Why you’ll love this recipe?
What are some of the reasons why I love peppermint patty recipes?flavor. Oh, the flavor! It’s that incredible combination of dark chocolate and cool, crisp peppermint that just sings. It’s not overly sweet, which I appreciate, and the peppermint has this wonderful way of refreshing your palate. It’s like a little burst of happiness. Then there’s the simplicity. I’ve tested this recipe more times than I can count, and it consistently delivers. You don’t need any fancy equipment, just a few basic kitchen tools and some good quality ingredients. It’s surprisingly straightforward, even if you’re not an experienced candy maker. I’ve had friends who were intimidated by candy making try this, and they were absolutely thrilled with their results! Another huge plus is how cost-effective it is. Buying good quality peppermint patties can add up, but making them at home with this recipe is incredibly budget-friendly. You get so many more for a fraction of the price, and they taste so much better. And let’s talk versatility! While I love them just as they are, you can have so much fun with these. You can make them smaller for little bite-sized treats, or larger for a more substantial dessert. You can even experiment with the type of chocolate you use – milk chocolate or white chocolate can be fun variations, though dark is my personal favorite. What I love most about this recipe is that it feels like a real treat, something special, but it’s accessible enough for any weeknight. It’s a little bit of indulgence that doesn’t require a whole lot of fuss. If you’re a fan of my Chocolate Chip Cookie Bars: What are some of the best chocolate chip cookie bars? (another family favorite, by the way!), you’ll appreciate the same balance of amazing flavor and straightforward execution.
How to Make Peppermint Patties
Quick Overview
This recipe is wonderfully straightforward. You’ll essentially be making a smooth, sweet peppermint filling, shaping it, and then dipping it in melted chocolate. The key is to get that filling just right – creamy, firm enough to handle, but still melt-in-your-mouth delightful. We’ll mix up the filling ingredients, let them chill slightly so they’re easy to work with, form them into little patties, and then the fun part: dipping them in chocolate! It’s a process that feels a bit luxurious as you’re making it, but it comes together quite quickly. The result? Perfectly formed, intensely satisfying peppermint patties that will make you wonder why you ever bought them before.
Ingredients
For the Main Filling:
Okay, for the heart of our peppermint patties, we need some simple things that pack a punch. You’ll need about 3 cups of powdered sugar. Make sure it’s finely sifted so you don’t end up with any little lumps – I learned that the hard way years ago! Then we have 1/2 cup of unsalted butter, softened. It’s important that it’s softened, not melted, for the right texture. About 1/4 cup of milk or cream; I often use whole milk, but a good quality non-dairy milk like oat or almond milk works beautifully too and can even make it a touch creamier, which I discovered by accident one time when I ran out of dairy! For that signature zing, you’ll need 1 to 1.5 teaspoons of pure peppermint extract. Start with 1 teaspoon and taste, then add more if you like it stronger. A tiny pinch of salt will really help to balance the sweetness. Oh, and for that pretty green hue that everyone associates with peppermint patties, just a drop or two of green food coloring – completely optional, but it does add to the classic look!
For the Chocolate Coating:
This is where we create that glorious shell. I prefer using good quality semi-sweet or dark chocolate chips, about 12 ounces. You can also use a chopped chocolate bar, which tends to melt a bit smoother. Some people like to add a tablespoon of coconut oil or vegetable shortening to the chocolate as it melts; this isn’t strictly necessary, but it does help the chocolate to set up with a nice, clean snap and a beautiful shine. It also makes it a little easier to dip the patties. Make sure the chocolate you use is good quality; it really makes a difference in the final flavor and texture.
Step-by-Step Instructions
Step 1: Preheat & Prep Pan
This step is less about preheating an oven and more about getting your “assembly line” ready. You’ll want to line a baking sheet or a large platter with parchment paper or wax paper. This is crucial because our peppermint patties will be a bit sticky, and this paper will prevent them from adhering to the pan. Make sure you have plenty of space in your refrigerator, as these patties will need to chill. I usually clear out a shelf or two beforehand so I’m not scrambling later.
Step 2: Mix Dry Ingredients
In a medium-sized mixing bowl, whisk together your sifted powdered sugar and the pinch of salt. A quick whisk ensures everything is evenly distributed before we add the wet ingredients. If you’re using green food coloring in the filling, you can add a drop or two to your softened butter at this stage and mix it in well to distribute the color evenly. This is my little trick to avoid streaks of color later on.
Step 3: Mix Wet Ingredients
In a separate, larger bowl, cream together the softened butter (with the food coloring, if using) and the milk or cream. Beat them with an electric mixer until they’re well combined and look creamy. This is where we build the base for our smooth filling. Make sure your butter isn’t too cold or too melted – just perfectly softened so it incorporates easily.
Step 4: Combine
Now, it’s time to bring it all together! Gradually add the powdered sugar mixture to the wet ingredients, mixing on low speed at first until it starts to come together. Once it forms a cohesive dough, add the peppermint extract. Start with 1 teaspoon and mix well. Taste the filling carefully – if you want a stronger mint flavor, add another half teaspoon. You can also add the food coloring now if you didn’t pre-mix it with the butter. The dough should be thick and quite stiff, but still pliable. If it seems too dry, add a tiny splash more milk; if it’s too wet, add a little more powdered sugar, a tablespoon at a time, until it reaches the right consistency. It should be firm enough to roll into balls without being sticky.
Step 5: Prepare Filling
Once your filling mixture is ready, it’s time to form the patties. I like to use a small cookie scoop (about 1 tablespoon size) or just roll the dough into small balls, about 1-inch in diameter. Then, gently flatten each ball into a disc about 1/2-inch thick. You can use your fingers or the bottom of a small glass to get them nice and uniform. Arrange these shaped patties on your prepared parchment-lined baking sheet. Once they’re all shaped, pop the entire baking sheet into the refrigerator for at least 30 minutes, or until they are firm to the touch. This chilling step is super important; it makes them much easier to dip in chocolate and helps them hold their shape.
Step 6: Layer & Swirl
This step isn’t really applicable to this specific recipe as it’s a solid filling, but if you were making something like a marbled cake, this is where you’d incorporate that technique! For our peppermint patties, the “layering” is more about carefully arranging them on the parchment paper, ensuring they have a little space between them so they don’t stick together when they firm up.
Step 7: Bake
Good news – no baking required for the filling! The chilling step in the refrigerator is what sets the filling perfectly. So, you can move right on to the chocolate coating after the chilling time.
Step 8: Cool & Glaze
Once the peppermint centers are firm, it’s time for the chocolate. You can melt your chocolate chips (with the optional coconut oil or shortening) using a double boiler or in the microwave in 30-second intervals, stirring between each. Be careful not to overheat it! Once smooth and melted, you can dip each chilled peppermint patty into the chocolate. I use a fork or a dipping tool for this. Let the excess chocolate drip off back into the bowl, then carefully place the coated patty back onto the parchment-lined baking sheet. You can use a toothpick to gently nudge them into place if needed. If you want a fancy look, you can drizzle a little extra melted chocolate over the tops in a decorative pattern once they’ve set a bit. Let them sit at room temperature for a bit to set, or pop them back in the fridge for about 15-20 minutes to speed things up. The glaze (which is the chocolate coating in this case) should be fully set before you attempt to move them too much.
Step 9: Slice & Serve
Once the chocolate coating is completely set, gently peel your peppermint patties off the parchment paper. They are now ready to be enjoyed! You can serve them immediately, or store them in an airtight container. I like to serve them at room temperature so the chocolate is slightly yielding, but chilled ones are also delicious. They look so elegant on a simple white plate, or nestled in a pretty candy dish.
What to Serve It With
These peppermint patties are so versatile, they fit into almost any occasion! For Breakfast, they’re a little too indulgent for my everyday morning routine, but on a special holiday morning, a single, perfectly formed peppermint patty alongside a strong cup of coffee is just heavenly. It feels like a little secret treat to start the day. For Brunch, they make a beautiful addition to a dessert platter. Arrange them alongside mini tarts or fruit salad for a touch of chocolatey goodness. They look particularly elegant when dusted with a little cocoa powder or a tiny sprinkle of edible glitter. As Dessert, well, this is their natural habitat! They’re perfect after a hearty meal, offering that refreshing minty finish. Serve them with a scoop of vanilla bean ice cream, or alongside a slice of rich chocolate cake for the ultimate chocolate lover’s dream. My family also loves them as Cozy Snacks. On a chilly evening, curled up on the couch with a movie, a couple of these peppermint patties are just the ticket. They’re easy to grab and enjoy, and they feel so comforting. I’ve even made small ones and put them in little cellophane bags tied with ribbon as party favors – people absolutely adore them!
Top Tips for Perfecting Your Peppermint Patties
Over the years, I’ve picked up a few tricks that I think make a real difference when making these peppermint patties. For the Zucchini Prep, if you were making zucchini bread, you’d want to squeeze out moisture, but for these patties, we’re not using zucchini! My advice is to ensure your powdered sugar is very finely sifted. Any lumps can really affect the smoothness of the filling. Give it a good sift through a fine-mesh sieve. When it comes to Mixing Advice, the biggest pitfall here is overmixing once the powdered sugar is added. You want the filling to be just combined and smooth, not overworked. Overmixing can make the filling tough or oily. For Swirl Customization, since this is a solid filling, we’re not swirling here, but I’ve found that making the patties a consistent size and thickness makes for a much neater final product. Using a small cookie scoop helps a lot with uniformity. For Ingredient Swaps, if you don’t have milk, water works in a pinch for the filling, though milk or cream will give you a richer flavor. For the chocolate, if you can’t find good quality chips, a good baking bar chocolate chopped finely works wonders. If you want a less intense mint flavor, start with 3/4 teaspoon of extract and go from there. For Baking Tips, remember, no baking! The chilling time is your friend. Make sure those patties are thoroughly chilled and firm before dipping. This is probably the most important step for easy dipping. If your chocolate starts to seize up or get too thick while you’re dipping, gently rewarm it for a few seconds in the microwave. For Glaze Variations, I’ve experimented with different chocolates, and milk chocolate yields a sweeter patty, while dark chocolate gives a more intense, less sweet flavor. You could even try a white chocolate coating, though I find it can be a bit too sweet with the peppermint filling. Sometimes, I’ll add a tiny bit of black food coloring to the dark chocolate for an extra-deep, dramatic look. And my absolute biggest lesson learned? Don’t try to rush the setting process of the chocolate. Patience is key for a beautiful, clean finish on your peppermint patties!
Storing and Reheating Tips
Storing these homemade peppermint patties is pretty straightforward, but a few tips will keep them tasting their best. Room Temperature Storage is ideal for immediate enjoyment. Once the chocolate coating is fully set, you can store them in an airtight container at room temperature for up to 3-4 days. Make sure the container is truly airtight to prevent the mint filling from drying out or absorbing other odors. If your kitchen is particularly warm, though, it might be better to store them in the fridge to prevent the chocolate from softening. For Refrigerator Storage, they’ll keep beautifully for about 1-2 weeks. Again, use an airtight container. The texture of the filling might become a bit firmer when cold, but it softens up quickly at room temperature. Just let them sit out for 10-15 minutes before serving for the best texture. Freezer Instructions are great if you want to make a big batch and save them for later. Wrap each peppermint patty individually in plastic wrap, then place them in a freezer-safe bag or container. They can be frozen for up to 2-3 months. To thaw, simply unwrap them and let them come to room temperature on a plate for about 30-60 minutes. Be aware that condensation can sometimes form on the chocolate as it thaws, so placing them on a paper towel can help absorb any excess moisture. For Glaze Timing Advice, I always recommend fully setting the chocolate coating at room temperature or in the fridge before packing them away for any storage. If you try to pack them while the chocolate is still soft, they’ll stick together and the coating can get messy.
Frequently Asked Questions
Final Thoughts
Making these homemade peppermint patties is such a rewarding experience. It’s that moment when you take that first bite, and you get that perfect snap of chocolate followed by the cool, creamy mint burst, and you just think, “Wow, I made this!” It’s pure satisfaction. This recipe truly embodies what I love about home cooking – taking something familiar and making it special, and doing it all with ingredients you likely already have on hand. They’re not just candies; they’re little moments of joy that you can create and share. If you’re a fan of a good chocolate and mint combination, I honestly don’t think you can go wrong with this recipe. I hope you give these peppermint patties a try and that they become a beloved treat in your home too. I’d absolutely love to hear how yours turn out in the comments below, and if you discover any fun variations, please share them! Happy baking – or rather, happy candy making!
Easy Peppermint Candy Recipe
Ingredients
Main Ingredients
- 7 oz marshmallow cream (Fluff)
- 10 Tbsp unsalted butter softened
- 1.5 tsp vanilla extract
- 1 tsp peppermint extract
- 5.5 cups powdered sugar
- 16 oz Ghirardelli dark chocolate melting wafers
- 8 oz Ghirardelli white chocolate melting wafers optional for football shapes
Instructions
Preparation Steps
- In a large mixing bowl, beat marshmallow cream, softened butter, vanilla extract, and peppermint extract until fully combined. Gradually add powdered sugar and mix on medium speed until dough forms and is smooth.
- Line a baking sheet with parchment paper. Shape about 1 tablespoon of the peppermint mixture into balls and flatten for the traditional patty shape. For football shapes, pinch the ends of the ball to shape. Place on prepared baking sheet.
- Cover with plastic wrap and freeze patties for about 2 hours or overnight until firm.
- Melt dark chocolate wafers according to package instructions. Using a toothpick, dip each frozen peppermint patty into the melted chocolate and tap off excess. Place back on parchment paper to set.
- If desired, melt white chocolate wafers, pour into a small plastic bag, cut a corner, and pipe laces onto the football-shaped patties. Allow to set for a few minutes.
- Store peppermint patties at room temperature in an airtight container for up to two weeks.