peppermint cookies
There’s something about the crisp, cool scent of peppermint swirling through the kitchen that instantly takes me back to childhood holiday mornings. My grandma’s peppermint cookies had this magical way of wrapping us all up in joy – the slightly crunchy outside, chewy middle, and that unmistakable refreshing kick. Years later, I found myself tweaking her recipe a bit in my own kitchen—and honestly, these peppermint cookies became my family’s favorite little treat all year round, not just in December. If you’re anything like me and love the idea of a cookie that’s both festive and effortlessly delicious, this one’s for you. It’s like biting into a cozy hug, only better. Plus, the peppermint flavor takes it to a whole new level compared to your typical sugar cookie, and it’s surprisingly simple to make, even on those busy nights when you’re craving sweets but don’t want to spend hours baking.
What is Peppermint Cookies?
Peppermint cookies are essentially a soft, buttery cookie infused with refreshing peppermint flavor, often paired with a sweet glaze or crushed peppermint candies for that extra little crunch. Think of them as the winter cousin to classic sugar cookies, but with a cool, minty twist. The name comes from the star player here—the peppermint extract or crushed candy canes—that gives these cookies their signature bright and refreshing taste. They’re perfect for both the holidays and anytime you’re in the mood for something sweet but not too heavy. What I love most is that they balance the comforting warmth of vanilla and sugar with that breath-freshening peppermint zing, making them super approachable and, honestly, a little addictive. You don’t have to be an expert baker to whip these up, which makes them great for home cooks of all skill levels!
Why you’ll love this recipe?
I have to tell you — this peppermint cookies recipe quickly became a staple in my house for a few big reasons. First, the flavor combo: peppermint and buttery cookie is such a charming pairing. It’s like your classic cookie, but with a twist that perks you right up. The subtle minty freshness keeps you from feeling weighed down by too much sweetness, and the glaze on top? Pure magic. Then, the ease! Seriously, it’s one of those recipes where you can get the dough ready in under 15 minutes, bake it off, and have fresh cookies cooling on your rack while your coffee’s brewing.
Cost-wise, it’s super budget-friendly—simple pantry staples with an occasional peppermint twist, which means no need for fancy ingredients or special shopping trips. Plus, versatility is a big win here. You can dress them up with holiday sprinkles, add chocolate chips, or keep them classic. I’ve even shared this recipe with friends who swapped peppermint extract for orange or almond extract for an entirely new vibe. And don’t get me started on how well they pair with everything from a strong cup of black coffee to hot cocoa on a chilly evening!
What really seals the deal for me is the family reaction. My kids ask for these peppermint cookies all the time, especially after school or during holiday movie marathons. Their cookie snacking adventures gave me plenty of times to test and tweak, so I’m confident this version will be a hit in your kitchen, too.
How do I make Peppermint Cookies?
Quick Overview
Making these peppermint cookies is delightfully simple: you mix up a soft, vanilla-scented cookie dough, infuse it with peppermint extract, and then swirl in or top with crushed candies or glaze for that extra fun. The dough comes together in just a few minutes, no fancy tools needed, and baking time is pretty forgiving, meaning you don’t have to worry about burning them if you get distracted (we’ve all been there). The result is a batch of cookies that smell incredible and taste even better—soft, chewy, with just the right peppermint pop to make you smile with every bite.
Ingredients
For the Main Batter:
- 1 cup unsalted butter, softened (I always use room temp butter for that lovely creamy texture)
- 3/4 cup granulated sugar
- 1 large egg (room temperature for better mixing)
- 1 1/2 teaspoons peppermint extract (don’t skimp here; this is the star flavor)
- 2 1/4 cups all-purpose flour (spooned and leveled for accurate measurement)
- 1/2 teaspoon baking powder
- 1/4 teaspoon salt
For the Filling (Optional):
- 1/2 cup crushed peppermint candies or candy canes (adds that festive crunch but you can skip if you want them plain)
- 2 tablespoons unsalted butter, melted (to help candies stick in the swirl)
For the Glaze:
- 1 cup powdered sugar, sifted
- 2-3 tablespoons milk or cream (start with less, add more to get desired drizzle consistency)
- 1/2 teaspoon peppermint extract
- A few drops of red or green food coloring (if you want a little festive flair!)
Step-by-Step Instructions
Step 1: Preheat & Prep Pan
Start by preheating your oven to 350°F (175°C). Line one or two baking sheets with parchment paper or a silicone baking mat — this keeps the bottoms from crisping too much and makes cleanup a breeze. If you don’t have parchment, a light buttering works, but I always prefer parchment for the clean release.
Step 2: Mix Dry Ingredients
In a medium bowl, whisk together the flour, baking powder, and salt. This ensures your leavening is evenly distributed, which is something I learned the hard way after a few lumpy cookie disasters (lesson: don’t skip this step!). Set this aside while you prep your wet ingredients.
Step 3: Mix Wet Ingredients
Beat the softened butter and sugar together until creamy and light, usually about 2-3 minutes with a mixer. You’ll notice it turns a pale yellow—that’s a good sign! Add in the egg and peppermint extract, beating just until combined. I always crack my egg into a separate bowl just in case, to avoid a soggy dough surprise.
Step 4: Combine
Gradually add the dry ingredients to the wet, mixing on low speed or folding by hand. This part is key: don’t overmix! Stir just until you don’t see flour. Overworking the dough makes cookies tough, and nobody wants that. The dough will be soft, and if it feels sticky, that’s perfectly normal.
Step 5: Prepare Filling
If you’re using crushed peppermint candies for a swirl or filling, toss them briefly with melted butter. This keeps them from hardening up too much while baking and helps them stick to the dough. This step can totally be skipped if you prefer your cookies smooth and simple.
Step 6: Layer & Swirl
Scoop half the dough into your prepared pan in an even layer. Sprinkle your peppermint candy pieces evenly on top, then dollop the remaining dough over in blobs. Grab a butter knife or skewer and gently swirl the layers together. The idea is to get that beautiful marbled peppermint effect—don’t over-swirl or you’ll lose the pretty contrast!
Step 7: Bake
Bake for about 12–15 minutes or until the edges are set and the top looks slightly cracked but still soft. I usually test by gently pressing the center—the cookie should bounce back. Remember, these are better slightly underbaked than overdone, since they continue to firm up as they cool.
Step 8: Cool & Glaze
Let cookies cool on the baking sheet for 5 minutes, then transfer to a wire rack. Once completely cool, whisk together your glaze ingredients and drizzle over the top using a spoon or a piping bag for neat lines. I like mine just thin enough to drizzle without puddling, but feel free to adjust.
Step 9: Slice & Serve
Once the glaze sets (takes about 20 minutes), slice or serve whole. These cookies pair wonderfully with anything warm or cold—think a cup of tea or a frosty glass of milk. Yum!
What to Serve It With
For Breakfast: Pair your peppermint cookies with a robust cup of black coffee or a frothy cappuccino. I love to serve them alongside a simple yogurt parfait for a breakfast that feels like a treat but still gives you a kickstart.
For Brunch: Bring these cookies out with brunch by plating them with fresh fruit slices and mimosas. The crisp peppermint contrasts beautifully with light, bubbly drinks and fresh citrus flavors for a festive spread.
As Dessert: Serve peppermint cookies with vanilla ice cream or a light chocolate drizzle after dinner. They’re a wonderful palate cleanser and feel fancy without fuss, especially when paired with a warm mug of peppermint hot cocoa.
For Cozy Snacks: These cookies are my go-to comfort food during winter evenings. I usually have them with a cozy blanket and a mug of herbal tea or mulled cider—something that warms you just as much as the cookie’s perfect minty bite.
My family has this tradition where we make a batch every December, then enjoy one each night after our evening read-aloud time. It’s become such a sweet, simple way to celebrate a busy day, and if you give these peppermint cookies a try, I bet you’ll find your own special moments too.
Top Tips for Perfecting Your Peppermint Cookies
Dough Texture: Make sure your butter is softened but not melted; that balance keeps cookies soft yet structured. Also, measuring flour correctly (using a spoon and level) prevents dry, crumbly dough.
Mixing Technique: Be gentle when combining wet and dry ingredients. I’ve learned over the years that a light hand during mixing helps retain a tender crumb.
Swirl Customization: For a dramatic peppermint swirl, use a toothpick to gently drag through the layers in a figure-eight motion. This trick makes every cookie look like a tiny work of art.
Ingredient Swaps: Want to switch things up? Almond extract pairs beautifully with peppermint for a nutty nuance. For a dairy-free option, replace butter with coconut oil—I’ve done this before, and it adds a subtle tropical twist that’s surprisingly lovely.
Baking Tips: Oven temperatures vary, so keep an eye on the first batch. Move the tray halfway through baking for even heat distribution. If your cookies start browning too quickly, lower the oven by 10 degrees and add a minute or two to cook time.
Glaze Variations: You can leave out the peppermint extract in the glaze and just add vanilla for a softer taste. Or mix in a little crushed peppermint candy for texture. If you want colorful cookies, a few drops of food coloring can turn them festive in a flash.
One mistake I made early on was adding too much peppermint extract, which made the cookies taste almost bitter—trust me, less is more here. Also, don’t skip the cooling time; glaze needs that moment to set for the best presentation and bite.
Storing and Reheating Tips
Room Temperature: Store your peppermint cookies in an airtight container at room temperature for up to 3 days. Line the container with parchment paper between layers to keep them from sticking.
Refrigerator Storage: You can refrigerate for up to a week, but bring back to room temp before serving to soften the texture. Keep them sealed tightly to prevent them from absorbing fridge odors.
Freezer Instructions: Peppermint cookies freeze beautifully! Wrap each cookie individually in plastic wrap then place in a sealed freezer bag or container. They’ll last up to 3 months. When ready to enjoy, thaw on the counter for an hour or pop them in a warm oven for 5 minutes.
Glaze Timing Advice: If you plan to freeze, I recommend freezing cookies without glaze, then glazing after thawing for best texture. Glazing before freezing can cause the icing to crack or discolor.
I’ve tested these storage methods multiple times (usually because I bake too big a batch *wink*), and following these tips keeps the peppermint flavor fresh and the cookies delightfully tender.
Frequently Asked Questions
Final Thoughts
These peppermint cookies hold a special spot in my heart—not just for their bright, fresh flavor but for the memories made biting into warm, minty cookies around the kitchen table. They’re the kind of cookie that feels cozy and festive without fuss, which suits my sometimes-too-busy life perfectly. If you try them, you might find yourself making batches well beyond the holiday season, like me.
Once you’ve nailed these, why not explore similar flavor adventures? My peppermint chocolate chip cookies or even a peppermint swirl brownie might be your next late-night baking project. I’d love to hear how your batch turns out—don’t be shy about leaving a comment, sharing tweaks, or even photos. Happy baking and here’s to many sweet, minty moments!
Easy Peppermint Candy Cookies Recipe
Ingredients
Main Ingredients
- 10 cups confectioners' sugar (divided, plus extra for dusting)
- 0.5 cup light corn syrup
- 0.33 cup water
- 2 tsp peppermint extract
- 0.25 cup unsalted butter softened
- 0.25 tsp kosher salt
- 24 oz semi-sweet chocolate chips 2 bags
- 2 tbsp vegetable oil
Instructions
Preparation Steps
- Line a baking sheet with parchment paper and set aside.
- In a stand mixer with paddle attachment, combine 9 cups confectioners' sugar, corn syrup, water, peppermint extract, softened butter, and kosher salt. Mix on medium speed until just combined.
- Dust a clean work surface with remaining 1 cup confectioners' sugar. Place mixture on surface and knead until smooth.
- Place patty mixture on a sheet of parchment paper. Sprinkle the top with additional confectioners' sugar.
- Cover with a second parchment paper sheet and roll out to about 0.5 inch thickness.
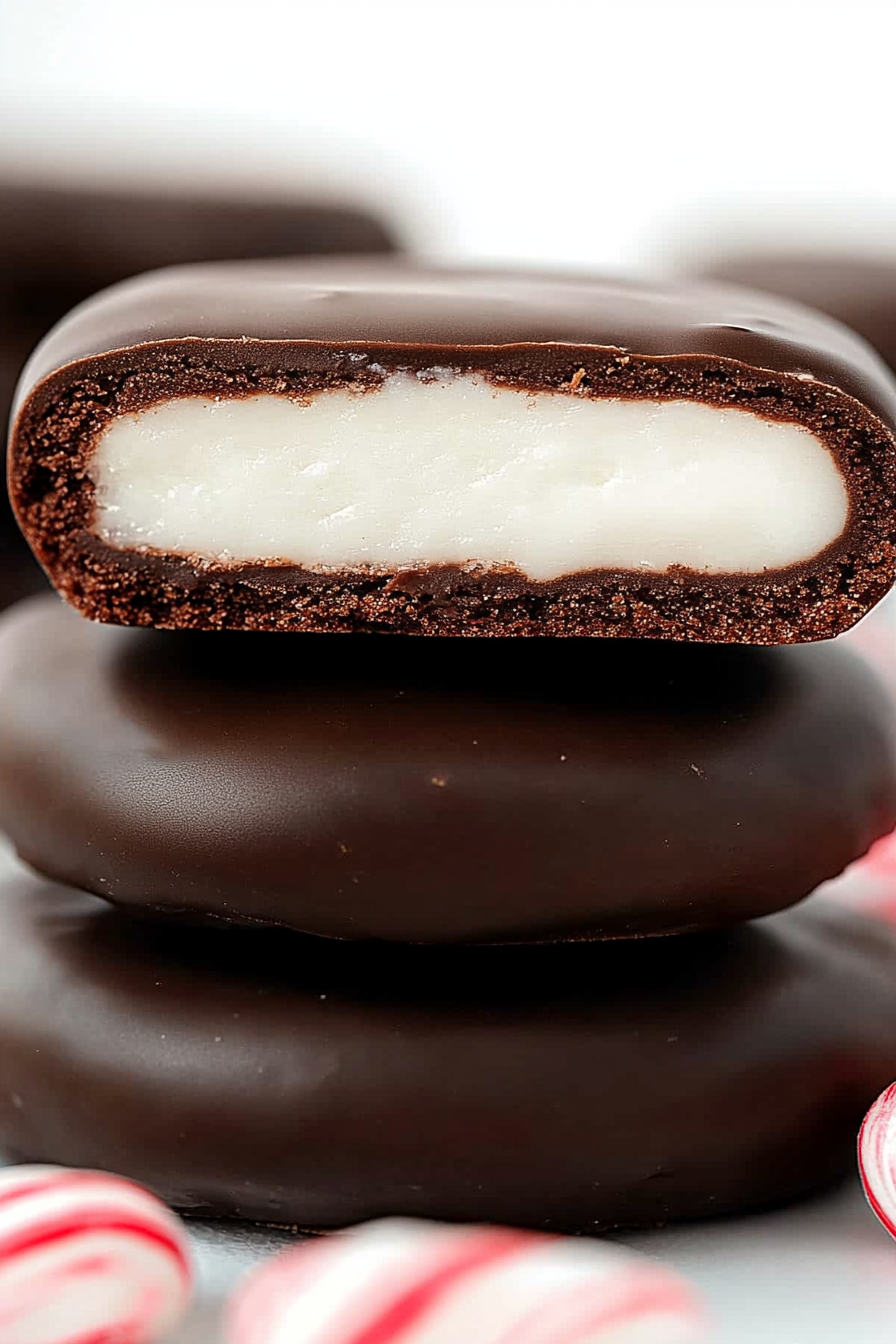
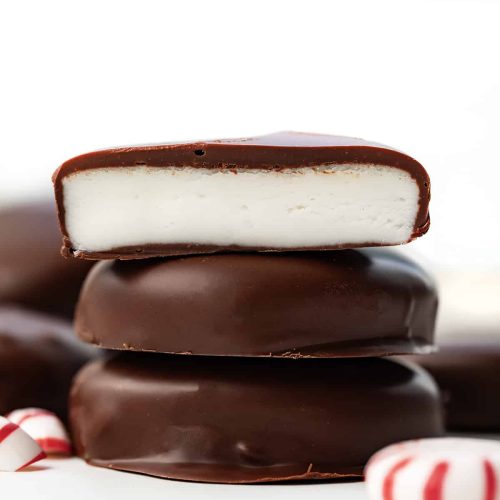
- Using a 2-inch round cookie cutter, cut circles and transfer them to the lined baking sheet. Gather scraps, re-roll, and cut until all patties are made (about 40).
- Freeze patties for about 15 minutes until firm. Prepare chocolate coating while chilling.
- In a microwave-safe bowl, melt chocolate chips with vegetable oil in 15-second intervals, stirring until smooth.
- Dip each chilled patty into the melted chocolate using a fork, allowing excess to drip off. Scrape fork edge to remove excess chocolate.
- Place coated patties back on parchment-lined baking sheet.
- Freeze dipped patties for at least 10 minutes or until chocolate is set. Enjoy your peppermint candy cookies!