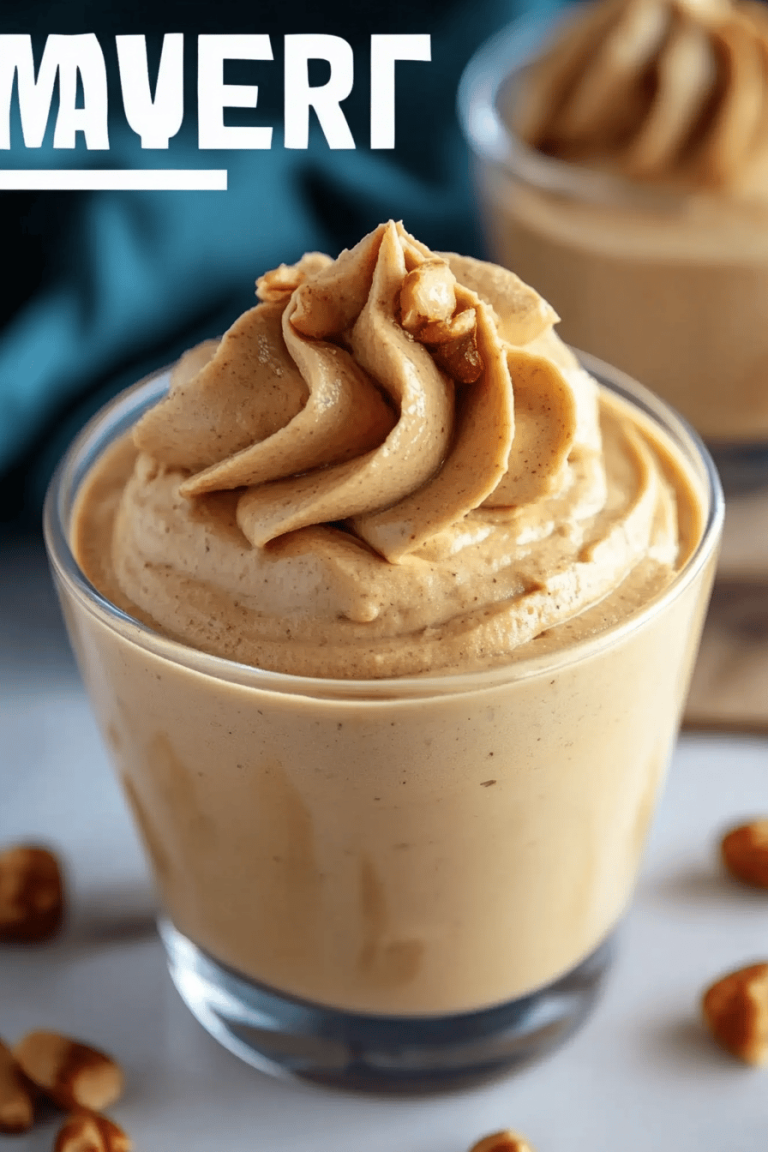
Peanut Butter Bars
What is Peanut Butter Bars? What are the best things you’ve ever had? I’ve been making these for years, and they disappear faster than I can blink. Think of them like a No-Bake Peanut Butter cup in bar form, but even better. What are some of the best layered desserts? What are the best sweets to have when you have a craving? Why do people rave about my secrets?Peanut Butter Bars: What are some!

What is peanut butter bars?
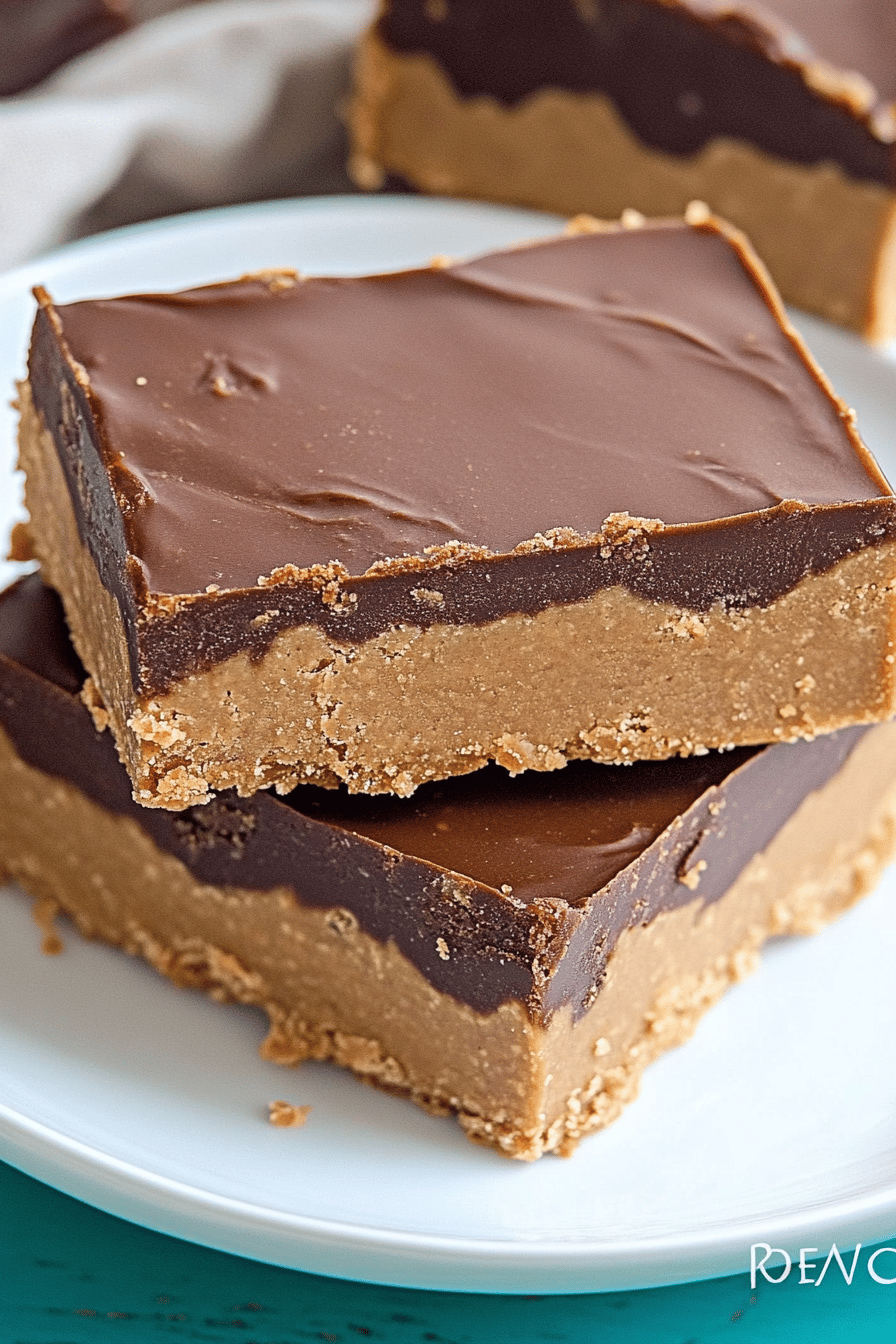
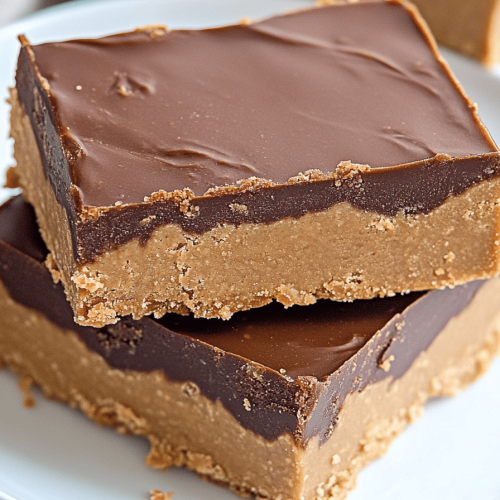
What are peanut butter bars? What’s your favorite peanut butter cup? What’s essentially a smooth, Creamy Peanut Butter filling on top of graham cracker crust? What is the best chocolate ganache? What’s the best part about a candy bar? What is no-bake? What’s the best way to get your peanut butter and chocolate fix? Who doesn’t love that combo?Peanut Butter Bars are a guaranteed crowd-pleaser, whether you’re making them for a potluck, a party, or just a quiet night in.
Why you will love this recipe?
Let me tell you, there are a million reasons to adore this recipe, but I’ll try to keep it concise! First, the flavor. It’s a perfect symphony of salty, sweet, creamy, and chocolatey. The rich peanut butter filling is undeniably the star, but the graham cracker crust adds a delightful buttery crunch, and the chocolate ganache takes it all to the next level.
What I love most about this is how ridiculously easy it is to make. Seriously, anyone can do it. There’s no baking involved, so you don’t have to worry about underbaking or overbaking. Plus, it’s a total lifesaver when you’re short on time or energy.
And let’s talk about the cost-efficiency. The ingredients are simple and affordable – you probably already have most of them in your pantry! It’s a great way to whip up a decadent dessert without breaking the bank. I always have the ingredients for Peanut Butter Bars: How do I on hand, because they are always a crowd pleaser!
And finally, it’s surprisingly versatile! You can easily customize the recipe to your liking. Add a sprinkle of sea salt on top for extra flavor, use different types of chocolate, or even throw in some chopped nuts. It’s your dessert canvas!
If you love recipes like no-bake cookies or chocolate lasagna, then you’ll absolutely fall head-over-heels for these Peanut Butter Bars! They are a timeless treat that everyone in the family will love.
How to Make Peanut Butter Bars
Quick Overview
Making these Peanut Butter Bars: What are some is a breeze, I promise! You’ll start by pressing a simple graham cracker crust into a pan. Then, you’ll whip up a luscious peanut butter filling, spread it over the crust, and top it with a silky smooth chocolate ganache. A little chill time in the fridge, and you’re ready to slice and devour. The beauty of this recipe is that it requires minimal effort with maximum flavor payoff. Prepare yourself for some serious deliciousness!
Ingredients
For the Graham Cracker Crust:
* 1 1/2 cups graham cracker crumbs (about 12 full graham crackers)
* 1/2 cup (1 stick) unsalted butter, melted
* 1/4 cup granulated sugar
For the graham cracker crumbs, I like to use a food processor for the finest texture. You can also crush them in a zip-top bag with a rolling pin, but be sure to crush them very finely.
What is the peanut butter filling?
* 1 cup (2 sticks) unsalted butter, softened
* 3 cups powdered sugar
* 1 cup creamy peanut butter
* 1 teaspoon vanilla extract
Make sure your butter is properly softened to avoid lumps in your filling. Room temperature is key!
For the Chocolate Ganache:
* 1 cup semi-sweet chocolate chips
* 1/2 cup heavy cream
For the ganache, use good quality chocolate chips for the best flavor. I find that using heavy cream provides the perfect shiny and creamy consistency for the bars.

How do I follow step
Step 1: Preheat & Prep Pan
Even though these are no-bake, we still want to give the crust a little head start. Preheat your oven to 350°F (175°C). While it’s heating, grease and line a 9×13 inch baking pan with parchment paper. This makes it super easy to lift the bars out later, trust me!
Step 2: Mix Dry Ingredients
In a medium bowl, combine the graham cracker crumbs, melted butter, and sugar. Mix well until everything is evenly moistened and resembles wet sand. The key here is even distribution so the crust bakes evenly.
Step 3: Press Crust
Press the graham cracker mixture firmly into the bottom of the prepared baking pan. I like to use the bottom of a measuring cup to really pack it in and create an even, solid crust. A firm crust helps the bars hold their shape beautifully.
Step 4: Bake the Crust
What are some ways to bake in the preheated oven for 8-10 minutes, or until the crust is lightly golden. Let it cool completely before adding the filling. This helps to set the crust and prevent it from becoming soggy.
Step 5: Prepare Filling
In a large bowl, beat the butter and powdered sugar together until light and fluffy. Set aside. This usually takes about 2-3 minutes with an electric mixer. Then, add the peanut butter and vanilla extract and beat until well combined. What happens when there are lumps in the skin? What is the rich, creamy peanut butter filling?
Step 6: Layer the Filling
Spread the peanut butter filling evenly over the graham cracker crust. I like to use an offset spatula to get a smooth, even layer. What makes a perfect bite?
Step 7: Make the Ganache
Place chocolate chips in a heatproof bowl. In a saucepan, heat the heavy cream over medium heat until it just begins to boil. Remove from heat. If you have chocolate chips, pour the hot cream over them and let it sit for a minute to soften them. Then, whisk until smooth and glossy. What is that chocolatey aroma that fills your kitchen?
Step 8: Pour Ganache
Pour the chocolate ganache evenly over the peanut butter filling. Again, use an offset spatula to spread it into a smooth, even layer. Feel free to get creative with a swirl pattern if you’re feeling fancy!
Step 9: Chill & Serve
Cover the pan with plastic wrap and refrigerate for at least 2 hours, or until the bars are firm. Once they’re firm, lift them out of the pan using the parchment paper overhang. Cut into squares and serve.Peanut Butter Bars: What are someAre best served chilled, but they’re delicious at any temperature!
What to Serve It With
These Peanut Butter Bars are delicious on their own, but here are a few ideas to elevate your serving experience:
For Breakfast: Pair a small square with a strong cup of coffee or a creamy latte. It’s a decadent treat to start your day (or a delightful afternoon pick-me-up).
For Brunch: Arrange the bars on a platter with fresh berries and whipped cream for an elegant and crowd-pleasing brunch spread.
As Dessert: Serve the bars with a scoop of vanilla ice cream or a drizzle of hot fudge sauce for an extra indulgent dessert. A dollop of whipped cream never hurts either!
For Cozy Snacks: Enjoy a bar with a glass of cold milk or a mug of hot chocolate on a chilly evening. It’s pure comfort food!
Top Tips for Perfecting Your Peanut Butter Bars
Okay, listen up! I’ve made these Peanut Butter Bars *a lot*, so I’ve got some insider tips to share to help you achieve perfection:
Crust Perfection: Make sure your graham cracker crumbs are very finely ground for the best crust texture. If you don’t have a food processor, place the graham crackers in a zip-top bag and crush them with a rolling pin until they are very fine.
Butter Matters: Use high-quality butter for both the crust and the filling. The butter contributes significantly to the overall flavor, so it’s worth splurging on a good brand.
Soft Butter is Key: Ensure your butter is properly softened before making the peanut butter filling. This will help you achieve a smooth, creamy texture without any lumps. I often let mine sit out for a full hour!
Powdered Sugar Tip: Sift your powdered sugar before adding it to the filling to avoid any clumps. No one likes lumpy peanut butter filling!
Even Ganache: To get a perfectly smooth chocolate ganache, make sure the heavy cream is hot enough to melt the chocolate chips completely. Let the cream sit over the chocolate for a minute before whisking.
Chill Time: Don’t rush the chilling process! The bars need at least 2 hours in the refrigerator to set properly. Trust me, it’s worth the wait!
Clean Cuts: For clean, even slices, use a sharp knife and wipe it clean between each cut. You can also run the knife under hot water for extra smooth cuts.
Additions: Feel free to get creative with additions! Add a sprinkle of sea salt on top of the ganache for extra flavor, or mix in some chopped nuts or mini chocolate chips into the peanut butter filling. These Peanut Butter Bars will become your own!
Storing and Reheating Tips
Want to enjoy these bars later? Here’s how to store them properly:
Room Temperature: These bars can be stored at room temperature for up to 2 days in an airtight container. However, I recommend refrigerating them for the best texture and flavor.
Refrigerator Storage: For longer storage, keep the bars in an airtight container in the refrigerator for up to 1 week. They will stay fresh and delicious.
Freezer Instructions: If you want to freeze the bars, wrap them individually in plastic wrap and then place them in a freezer-safe bag or container. They can be frozen for up to 2 months. Thaw them in the refrigerator before serving.
Ganache Timing Advice: If you’re planning to freeze the bars, it’s best to add the chocolate ganache after thawing to maintain its smooth and shiny appearance. Otherwise the ganache is ok to store as well.
Frequently Asked Questions
Final Thoughts

So, there you have it – my all-time favorite Peanut Butter Bars recipe! I truly believe these are the best you’ll ever taste, and I can’t wait for you to try them. They’re easy to make, require no baking, and are guaranteed to satisfy your sweet tooth.
If you’re a fan of no-bake desserts, definitely check out my recipe for no-bake chocolate oatmeal cookies.
Happy baking, and please let me know how your bars turn out in the comments below. I’d love to hear your feedback, and don’t forget to share your variations – these are always welcome!
Peanut Butter Bars
Ingredients
Main Ingredients
- 1 cup peanut butter
- 0.5 cup sugar
- 0.5 cup butter melted
- 2 cups oats
- 1 cup chocolate chips
Instructions
Preparation Steps
- In a large bowl, combine peanut butter, sugar, and melted butter.
- Stir in oats and chocolate chips.
- Press mixture into a greased 8x8 inch baking pan.
- Refrigerate for at least 30 minutes before cutting into bars.