Oreo cheesecake recipe
When I think about comfort in a bite, this Oreo Cheesecake Recipe is what comes to mind. The way the crust stays crisp yet melts into the creamy filling is a little magic I’ve chased in countless dessert experiments, and somehow this one always wins hearts—my family included. I’ll admit, it’s a kid-pleaser in the very best way: chocolatey aroma swirling through the kitchen, a sturdy yet pillowy slice waiting on the plate, and that familiar “oh wow” that says you nailed it. It’s not just an Oreo cheesecake recipe; it’s a memory-maker. This is the kind of dessert that compares nicely to your classic cheesecake but adds that playful cookie crumb crunch that makes it feel special without being fussy. I love making this on weekends, and it always feels like a warm hug when friends stop by. I’ve learned a few tricks over the years, like how to keep the center perfectly smooth and how a gentle water bath saves you from cracks. Grab a glass of cold milk or coffee, and let’s bake something that tastes like a family reunion in a pan.
What is the Oreo Cheesecake recipe?
Think of this as a cheesecake that wears a cookie-crisp coat. The name says it all: an Oreo cheesecake recipe built on a buttery, crunchy Oreo crust, a rich Cream Cheese filling studded with chopped Oreos, and a chocolatey glaze that ties everything together. It’s essentially a cheesecake that leans into the beloved cookie’s flavor and texture, giving you that familiar cookie crumb bite with every spoonful. The concept isn’t complicated: intensify the Oreo flavor through the crust and by folding crushed cookies into the filling, then bake slowly to set with a glossy, luscious center. It’s a crowd-pleaser, a showstopper for special occasions, and honestly, a lifesaver on busy weeknights when you want something impressive but not overly complicated. In my kitchen, this Oreo cheesecake recipe is the end result of countless tests, and I love how forgiving it feels once you’ve got the hang of balance between richness and lightness.
Why you’ll love this recipe?
What I love most about this Oreo cheesecake recipe is how it blends texture and mood in one slice. It’s got a flavor profile that’s unmistakably chocolatey and creamy, but not cloying. The crust stays crisp, the filling stays smooth, and the Oreo pieces add little pops of sweetness that keep every bite interesting. It’s also one of those desserts that seems to cook more evenly when you bake it in a water bath, which means fewer cracks and a glossy surface that photographs beautifully. This is a dish that travels well, too—great for potlucks or holiday gatherings, because you can bake it ahead and still have a showpiece on the table. Another big win: the ingredients are simple and affordable, so you don’t have to break the bank to get something memorable. I’ve tested this with a few variations—adding a touch of espresso powder for depth, swapping half of the Cream Cheese for a lighter version, or using gluten-free cookies for the crust—and the outcome remains deliciously indulgent. What I love most about this Oreo cheesecake recipe is that it feels special without feeling intimidating. It’s a trusted favorite that my kids actually ask for, and that never fails to disappear quickly at family gatherings.
How do I make Oreo Cheesecake
Quick Overview
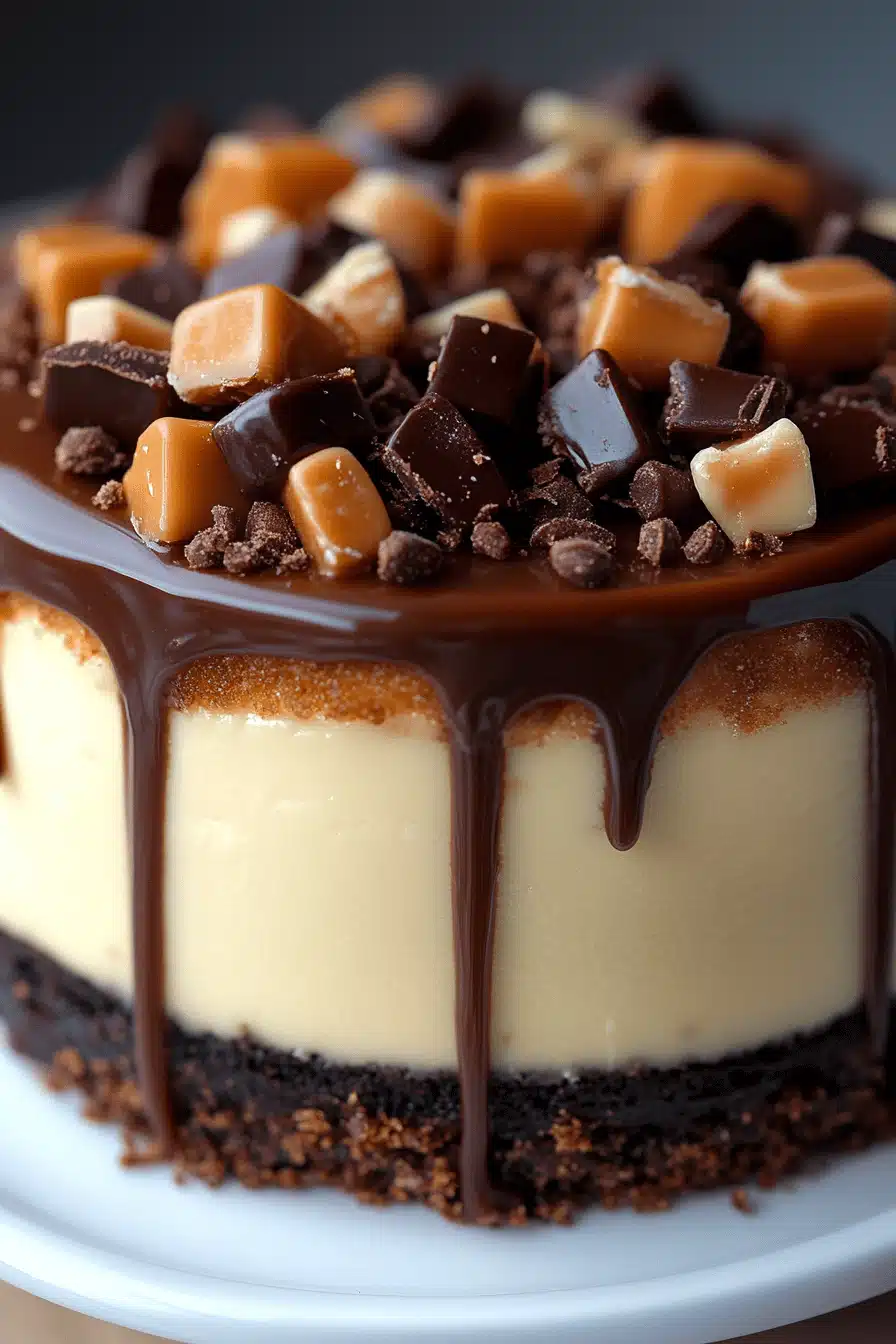
This Oreo cheesecake recipe is all about building a sturdy crust, whipping a smooth, glossy filling, and then baking with a gentle hand to keep everything tender inside. Start with a crispy crust using crushed Oreo cookies and melted butter, then fold chopped Oreos into a rich Cream Cheese filling. Bake in a water bath to prevent cracking, let it cool slowly, and finish with a silky chocolate glaze if you like. It sounds fancy, but the steps are straightforward, and the payoff is total comfort in every bite. I’ll guide you through each stage, from preheating your oven to slicing that first perfect piece, and I’ll share the little tricks I’ve learned along the way to keep it balanced and dreamy. This is the kind of recipe where your kitchen scent alone tells you you’ve nailed it—vanilla, cocoa, and butter weaving through the air like a cozy invitation to dessert.
Ingredients
For the Main Batter:
– 2 cups crushed Oreo cookies (about 24 cookies) with a touch of sugar to bloom the flavor
– 4 tablespoons unsalted butter, melted (a bit more if your crust needs it)
For the Filling:
– 24 ounces (three 8-ounce blocks) Cream Cheese, softened to room temperature
– 1 cup granulated sugar
– 1/2 cup sour cream
– 1/4 cup heavy cream
– 3 large eggs + 1 teaspoon vanilla extract
– 1 cup roughly chopped Oreo cookies (reserve a few for topping, if you like)
For the Glaze:
– 6 ounces semi-sweet chocolate, chopped or chips
– 1/2 cup heavy cream
– Optional: 1 tablespoon corn syrup or light corn syrup for shine
Step-by-Step Instructions
Step 1: Preheat & Prep Pan
Set your oven to 325°F (165°C). Line a 9-inch springform pan with parchment on the bottom and grease the sides well. To help with the water bath, wrap the bottom of the pan with two layers of heavy-duty aluminum foil so no water sneaks in. I always double-wrap—it’s a small thing, but it saves you from a soggy crust and a soggy kitchen. A quiet tip I learned the hard way: start the water bath before you pour the filling. It’s easier to manage the timing and you won’t risk the cake sitting in hot air after the bake is done.
Step 2: Mix Dry Ingredients
For the crust, mix the crushed Oreo cookies with the melted butter until the mixture resembles wet sand. The texture should cling together when you pinch it, but not be greasy. If it’s too dry, add another teaspoon of melted butter; if it’s too wet, add a bit more cookie crumb. Press this into the bottom of the pan, making sure it’s even and compacted. I use the bottom of a glass to press the crust firmly so you get a clean edge and a sturdy base that won’t crumble when you slice later. Bake the crust for about 10 minutes, just until it set and you can smell that toasty Oreo aroma. Remove and let cool while you prepare the filling. The fragrance alone is enough to make you smile.
Step 3: Mix Wet Ingredients
In a large bowl, beat the cream cheese on medium speed until it’s smooth and creamy—no lumps. Scrape down the sides, then add the sugar and beat until light and fluffy. The goal is a satin texture, not a fluffy whipped cream. Mix in the sour cream and heavy cream, then add the vanilla. The mixture should look glossy and hold a soft peak when you lift the beater. If it looks grainy, keep mixing a bit longer; smoothing out the texture makes a huge difference in the final look of the cheesecake. This is where the Oreo cheesecake recipe earns its reputation for a luxuriously creamy center, especially when you’ve achieved a bench of air that’s just right.
Step 4: Combine
With the mixer on low, gently blend in the eggs one at a time. Overmixing at this stage can cause cracks or a dense texture, so patience is key. Fold in the chopped Oreos with a spatula, just until evenly distributed. You want pockets of cookie pieces in every bite, not a cookie avalanche in the batter. If you’re a fan of extra cookie crunch, reserve a few pieces to press into the top after you pour the filling into the crust. The contrast of smooth cheesecake with chewy cookie bits is a signature move in this Oreo cheesecake recipe.
Step 5: Prepare Filling
Pour the filling over the cooled crust. Tap the pan gently to settle any air bubbles. If you’re craving a swirl pattern, sprinkle a few more chopped Oreos on top and give a gentle swirl with a skewer or knife to create a marbled effect. This is optional but pretty and delicious. You’ll want to bake this in a water bath: place the filled pan in a larger roasting pan, then pour hot water halfway up the sides of the springform pan. The water bath keeps the surface from cracking and helps the cheesecake bake evenly. I know it seems like a big step, but trust me—this is what gives the cheesecake that ultra-smooth, bakery-style finish you’re after.
Step 6: Layer & Swirl
If you saved extra cookie pieces, press them into the top of the filling after pouring. Use a chopstick or skewer to make subtle swirls that look pretty but don’t disrupt the smooth surface too much. The goal is a few decorative lines and little pockets of crunch. Remember, you’re building texture as much as flavor here, so don’t worry about perfection—this is a comforting dessert, not a chemistry experiment. The Oreo bits will soften slightly as the cheesecake bakes, giving you that perfect balance between creamy and crisp with every bite.
Step 7: Bake
Bake for 50-60 minutes, or until the edges are set and the center still has a slight wiggle—a sign that it will firm up as it cools. Don’t be alarmed if the middle jiggles a touch; cheesecake often firm up more as it cools. If the top looks too browned, tent loosely with foil to prevent further browning. Once baked, turn off the oven, crack the door open, and let the cheesecake cool in the oven for about an hour. This gradual cooling helps prevent cracks and gives you a silkier finish. Then remove the cake from the water bath, take off the foil, and let it come to room temperature before chilling. I like to chill it overnight; the flavors mellow and the texture tightens beautifully.
Step 8: Cool & Glaze
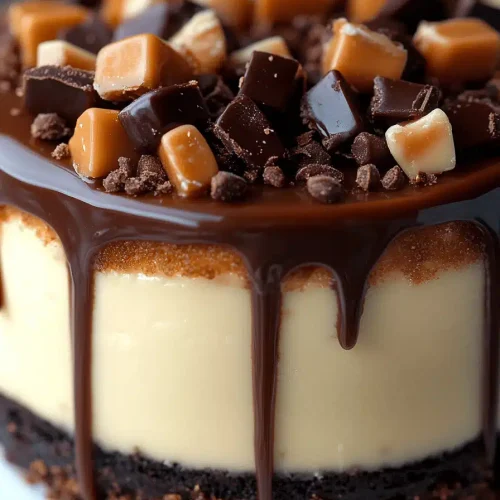
After chilling, you can drizzle a glossy glaze if you like a chocolate sheen. For the glaze, warm the heavy cream and pour over chopped chocolate, whisking until smooth and shiny. Stir in a touch of corn syrup for extra gloss, if you prefer. The glaze should be barely warm and silky. Pour it over the chilled cheesecake and spread evenly. If you want a lighter finish, you can skip the glaze and dust with a light shower of cocoa powder or cocoa nibs for a bit of bitter bite. Either way, this is where the Oreo cheesecake recipe earns its final layer of indulgence—the glaze makes the surface gleam and gives a professional finish.
Step 9: Slice & Serve
When you’re ready to serve, use a hot, dry knife for clean slices. Wipe the blade between cuts for the neatest results. I like serving slices with a small dollop of whipped cream and a couple of Oreo halves on top for flair, plus a few raspberries for color and brightness. The contrast between the creamy center and the crisp crust is what makes this Oreo cheesecake recipe feel like a special treat. If you’re not ready to serve all at once, this freezes well in individual portions wrapped tightly in plastic film and stored in a freezer bag; thaw overnight in the fridge for a quick dessert on a busy night. A well-made cheesecake like this is a friend in the kitchen—always there, always comforting, and almost always a hit with guests.
What to Serve It With
This Oreo cheesecake recipe pairs beautifully with a range of accompaniments, depending on the moment and the meal. Here are some ideas that fit different occasions and moods:
For Breakfast: A dollop of mascarpone whipped with a hint of vanilla, plus a strong espresso or a creamy latte. The rich flavors of the cheesecake make a luxurious start to a weekend morning, especially when you pair it with fresh berries and a light dusting of cocoa powder. The contrast between the calm of morning and the indulgence of this dessert makes breakfast feel like a celebration.
For Brunch: Thin slices with a citrus zest syrup and a sparkling beverage. The bright note of citrus cuts the richness just enough to keep it lively for a mid-morning crowd.
As Dessert: Serve with a scoop of vanilla bean ice cream or a few fresh berries. A light coffee or a glass of milk on the side can balance the chocolatey richness perfectly. My family loves a warm caramel sauce drizzled over a slice, adding that extra touch of nostalgia to the Oreo cheesecake recipe moment.
For Cozy Snacks: Cut small cubes and serve with hot chocolate or chai. It’s a great late-night treat when you want something comforting but not too heavy. This is the kind of dessert that disappears in minutes at my house, especially when there are friends around and laughter in the air.
Top Tips for Perfecting Your Oreo Cheesecake Recipe
Here are the nuggets I’ve gathered after many batches, all focused on making your Oreo cheesecake recipe sing without turning it into a headache.
Crust Prep: Make sure the crust is pressed evenly and compactly. A dense crust holds the whole slice together and prevents crumbling when you cut into it. If you’re worried about the crust crumbling, chill the crust a bit longer before pouring the filling. Also, consider a quick pre-bake to set the crust; it helps a lot with stability and flavor.
Mixing & Texture: Room-temperature ingredients are your friend. Cold cream cheese doesn’t blend as smoothly and can create lumps. Beat until it’s satin-smooth, then fold in the eggs gently. This is where the texture magic happens—avoid overmixing once the eggs go in, or you’ll risk a tough bite.
Swirl & Flavor Depth: The crushed Oreos folded into the filling are perfect, but a light espresso powder mixed with a teaspoon of vanilla can deepen the chocolate notes without making it taste coffee-forward. If you want a more intense chocolate flavor, add a tablespoon of melted dark chocolate to the filling in addition to the cookies.
Sweetness Control: If you’re sensitive to sweetness, you can reduce sugar by a quarter cup and add a small amount of orange zest to brighten the flavor. The orange notes complement the Oreo flavor beautifully and keep the cheesecake from feeling heavy.
Baking & Doneness: The center may jiggle slightly after you remove it from the oven. It will set as it cools. If the edges crack, cover with foil immediately after baking to let the heat escape gradually. If you run into cracks, a little glaze will hide that imperfection and still give you a glossy finish.
Glaze Variations: The chocolate glaze adds shine and extra flavor, but you can swap it for a white chocolate drizzle for a lighter finish or a coffee syrup for a deeper contrast. I’ve also enjoyed a simple dusting of cocoa powder for a rustic look.
Ingredient Swaps: Want to make it gluten-free? Use gluten-free Oreo cookies or another chocolate wafer with a gluten-free label. You’ll still get the same creamy texture and cookie crunch. For dairy-free friends, you can experiment with dairy-free cream cheese and coconut cream, keeping the ratios stable and testing for texture as you go. Some readers have even tried almond milk in place of regular milk for a slightly lighter filling—worth trying if you’re curious, though it changes the mouthfeel a touch.
Storing and Reheating Tips
Cheesecake is one of those desserts that actually tastes better after chilling, which makes it ideal for make-ahead plans. Here’s how I keep it at its best:
Room Temperature: Don’t leave cheesecake out for more than two hours. It’s rich and creamy, and warmer temps aren’t ideal for safety or texture. If you’re serving it as part of a party spread, keep it in the fridge and slice just before serving.
Refrigerator Storage: Store in a covered container or tightly wrapped in plastic wrap to prevent the surface from drying out. It will stay fresh for 3-4 days, with the best texture still intact within that window.
Freezer Instructions: For longer storage, freeze slices individually wrapped in plastic and placed in a freezer-safe bag. They’ll stay good for up to 2-3 months. Thaw overnight in the refrigerator, then bring to room temperature for a few minutes before serving to regain that silky texture.
Glaze Timing Advice: If you plan to freeze, skip the glaze or apply it just before serving after thawing. The glaze can take on a slightly dull look after freezing, but a quick warm-glaze touch-up will bring back that glossy finish.
Frequently Asked Questions
Final Thoughts
This Oreo cheesecake recipe isn’t just about a dessert; it’s a memory you pull out for celebrations and cozy nights alike. The crust gives you a confident crunch, the filling delivers a velvet-smooth bite, and the Oreo pieces remind you that treats can be playful as well as comforting. I’ve served it as the star at birthday dinners and as a crowd-pleasing end to weeknight meals, and it never fails to trigger that familiar, satisfying reaction: “This is amazing.” If you’re new to cheesecakes, this is a gentle, forgiving place to start—you’ll gain confidence with every bake. If you’re a seasoned baker, you’ll appreciate the balance of texture and flavor that makes this Oreo cheesecake recipe feel timeless. Give it a try, share a slice with someone you love, and tell me in the comments how you might customize it. Happy baking, friends, and may this creamy, cookie-crunchy dream bring a smile to your table.
Oreo cheesecake recipe
Ingredients
Main Ingredients
- 1.5 cup finely crushed Oreo cookies About 18 regular Oreos, including the filling
- 0.25 cup granulated sugar
- 5.3333333333333 tbsp unsalted butter, melted
- 24 oz cream cheese, softened Full-fat, at room temperature
- 0.75 cup sour cream At room temperature
- 0.75 cup granulated sugar
- 3 tbsp all-purpose flour
- 1 tsp vanilla extract
- 3 large eggs At room temperature
- 12 tbsp Oreo cookies, coarsely chopped About 12 regular Oreos, hand broken into chunks
Instructions
Preparation Steps
- Preheat the oven to 325°F (163°C). Wrap the bottom and sides of a 9-inch springform pan with 2 large pieces of heavy-duty aluminum foil to prevent water leakage if using a water bath.
- In a medium bowl, mix the crushed Oreo cookies, 0.25 cup sugar, and melted butter. Press the mixture firmly into the bottom and slightly up the sides of the prepared pan. Bake for 10 minutes, then set aside to cool.
- In a large bowl, using a hand mixer or stand mixer, beat the cream cheese until smooth and creamy, about 2 minutes. Add sugar and flour and beat until well combined and fluffy.
- Mix in the sour cream and vanilla extract until just combined. Beat in the eggs one at a time, mixing until fully incorporated before adding the next. Do not overmix.
- Stir in the chopped Oreos by hand. Pour the batter over the pre-baked crust and smooth the top with a spatula.
- Place the springform pan inside a larger roasting pan. Carefully pour hot water into the outer pan, halfway up the sides of the springform pan. Bake for 60 minutes or until the center is set but slightly jiggly.
- Turn off the oven and crack the door open with a wooden spoon. Let the cheesecake cool in the oven for 1 hour to prevent cracking.
- Remove from the water bath, remove foil, and cool completely at room temperature. Then chill in the refrigerator for at least 6 hours or overnight.
- Before serving, gently release the pan. Garnish with extra Oreo crumbs and whipped cream if desired.