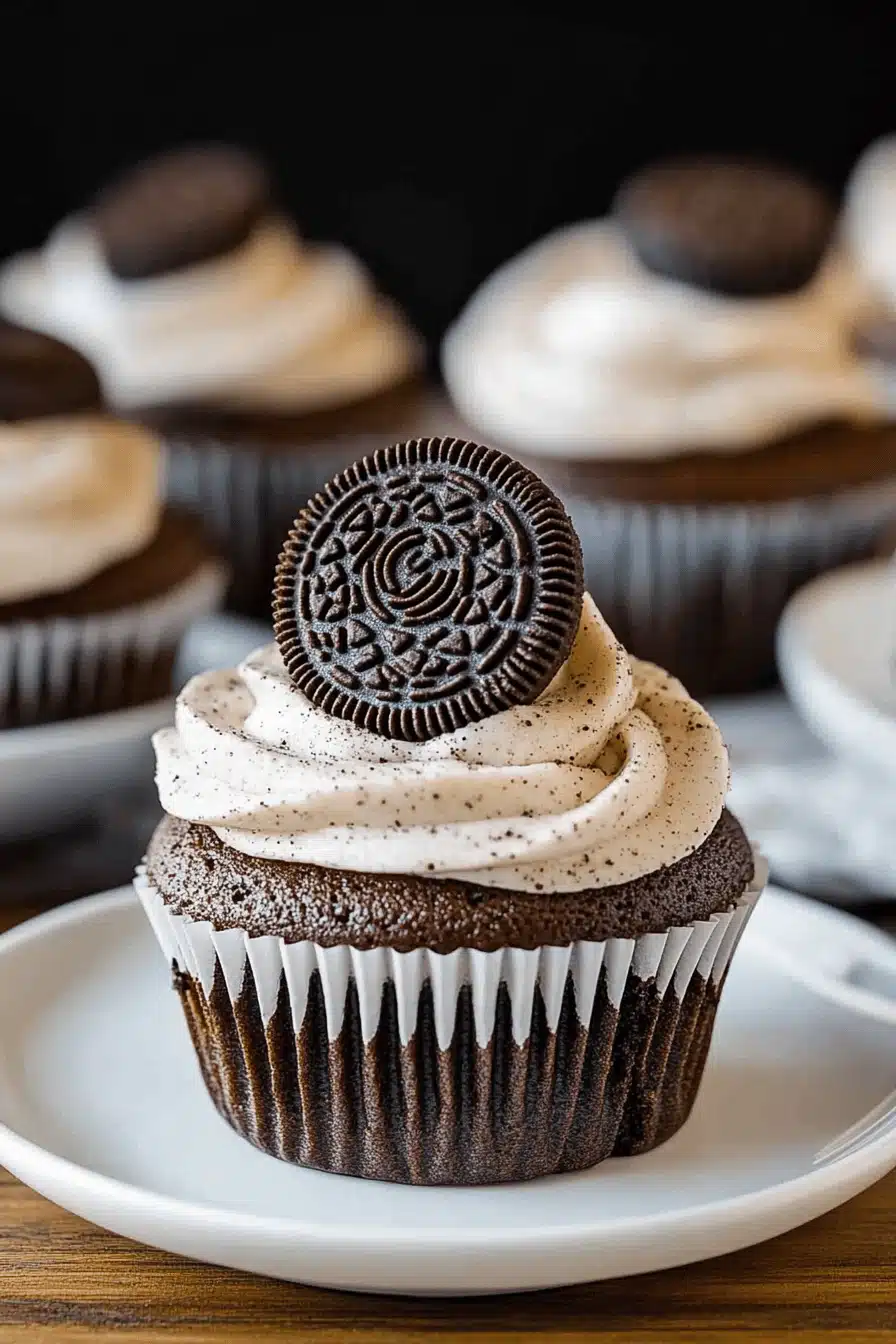
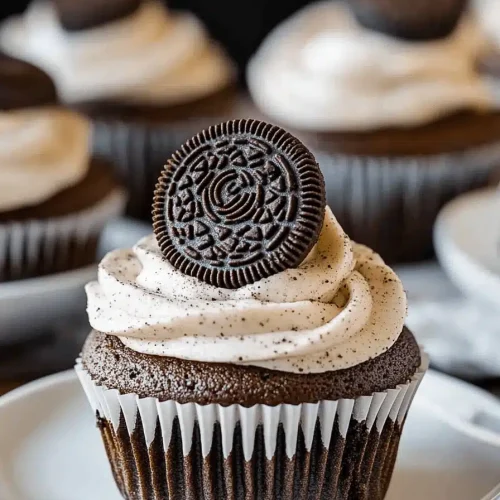
Oreo cake
Honestly, every time I bake this Oreo cake, it takes me right back to a cozy Sunday afternoon filled with laughter, messy hands, and the irresistible aroma of chocolate and cream wafting through the house. It’s not just a cake—it’s a little celebration wrapped in chocolatey goodness and Oreo crunch that my kids beg me to make whenever we have friends over. I remember the first time I stumbled upon an Oreo cake recipe years ago, thinking, “Could this be better than a classic chocolate fudge cake?” Spoiler: it absolutely is, at least in our house. The balance of creamy frosting, soft moist cake, and crispy cookie bits makes it such a unique treat that everyone instantly loves. If you’re an Oreo fan or just craving something that feels like a hug on a plate, this cake will quickly become a staple in your baking arsenal.
What is an Oreo cake?
Think of Oreo cake as the ultimate mash-up of two crowd-pleasers: a soft, tender chocolate (or vanilla) cake packed with crushed Oreo cookies, layered and topped with a luscious cream cheese or buttercream frosting studded with even more cookie crumbs. It’s essentially a cookies-and-cream dream in cake form—familiar yet totally special. The “Oreo” part comes from the iconic black-and-white cookies that add crunch and chocolate flavor, while the “cake” is your cozy, fluffy base that turns this into a proper dessert. The concept is simple but wildly flexible; whether you bake it as layers, a bundt, or even cupcakes, the star remains those nostalgic Oreo bites throughout. It’s approachable for anyone who’s baked before and delicious for anyone lucky enough to taste it.
Why you’ll love this recipe?
What I love most about this Oreo cake is how it strikes that perfect flavor chord—rich, creamy frosting paired with the chocolatey crunch of Oreos, all wrapped up in a moist cake that’s never dry or too sweet. It’s a texture and flavor party in every bite! Plus, you don’t need to be a professional baker to pull it off. This recipe is straightforward and uses common pantry staples that won’t break the bank, which makes it great for last-minute celebrations or just a dessert fix. The cookies do a lot of the heavy lifting in flavor, so the cake itself is easy and forgiving.
Another thing: I’ve made countless chocolate cake recipes before, but adding Oreos adds such a fun twist that instantly upgrades it to a “wow” dessert. Versatility is a win here too—I’ve swapped out the frosting for a simple whipped cream frosting or even a chocolate ganache when I’m feeling fancy, and it’s just as delightful. If you enjoy recipes like classic chocolate drizzle cake or even a homemade cookie dough cake, you’ll really appreciate how Oreos blend into the batter and frosting to make something that feels totally nostalgic yet fresh. Also, bonus—it’s a solid crowd-pleaser, whether you’re serving picky kids or adults who consider themselves dessert connoisseurs. And trust me, this disappeared in minutes at my last family brunch!
How do I make Oreo cake?
Quick Overview
This Oreo cake basically comes down to three main parts: the cake batter, the Oreo filling, and the glaze or frosting that pulls it all together. You mix your dry ingredients first, then the wet, fold in some crushed Oreos, and before you know it, you’re swirling that creamy filling right on top. It’s the kind of recipe where you can see progress fast, which is great when that sweet tooth kicks in unexpectedly. Baking is forgiving here—you don’t have to stress over exact techniques, and the result is a moist, flavorful cake with those iconic Oreo bursts that make it anything but ordinary.
Ingredients
For the Main Batter:
- 1 and 3/4 cups all-purpose flour – fresh is best, and make sure to sift it for a light crumb
- 3/4 cup unsweetened cocoa powder – Dutch-processed if you want a richer chocolate flavor
- 1 and 1/2 tsp baking powder
- 1 and 1/2 tsp baking soda
- 1/2 tsp salt
- 2 cups granulated sugar (feel free to scale down a bit if you want less sweet)
- 2 large eggs – room temperature for better mixing
- 1 cup buttermilk (I once tested this with almond milk, and it made it even creamier! Totally worth trying)
- 1/2 cup vegetable oil – keeps the cake moist
- 2 tsp pure vanilla extract – trust me, vanilla makes a huge difference here
- 1 cup boiling water – don’t skip this, it blooms the cocoa and makes the cake super tender
- 1 cup crushed Oreo cookies – don’t over-crush; little chunks add amazing texture
For the Filling:
- 8 oz cream cheese, softened – this gives a tangy, creamy base for your filling
- 1/4 cup unsalted butter, softened
- 1 and 1/2 cups powdered sugar – sifted for smoothness
- 1 tsp vanilla extract
- 1 cup finely crushed Oreos – use the finest crumbs you can get for mixing, but leave a few little chunks for texture
For the Glaze (or Frosting):
- 1 cup heavy cream – chilled, for whipping
- 2 tbsp powdered sugar – adjust to sweetness preference
- 1/2 cup finely crushed Oreos – sprinkle as a topper or gently fold in for speckled goodness
- Optional: 2 tbsp melted white chocolate or chocolate ganache if you want a drizzle
Step-by-Step Instructions
Step 1: Preheat & Prep Pan
Start by preheating your oven to 350°F (175°C). I always line my 9-inch round cake pans with parchment paper, then lightly grease and dust with cocoa powder to avoid any sticky surprises when I take the cake out. You want the pans ready early because the batter comes together quickly!
Step 2: Mix Dry Ingredients
In a large bowl, sift together the flour, cocoa powder, baking powder, baking soda, and salt. This is the moment where you calm your batter’s texture—if you skip sifting, you risk lumps and uneven mixing. Give it a quick stir to blend everything evenly. I like to smell the cocoa now; it’s like a little promise of the chocolatey goodness ahead.
Step 3: Mix Wet Ingredients
In another bowl, whisk together the sugar, eggs, buttermilk, oil, and vanilla extract until smooth and slightly frothy. The eggs and sugar bonding here give the cake that lovely rise and fluffiness—take your time and don’t rush it. When the mix looks silky and homogeneous, you’re ready for the next step.
Step 4: Combine
Slowly add the wet ingredients to the dry, mixing gently with a spatula or hand mixer on low speed. Once combined, carefully pour in the boiling water—it will loosen the batter, but don’t freak out, that’s how you get it extremely moist. Fold in the crushed Oreos now, gently but thoroughly, so they’re evenly spread without squishing them all.
Step 5: Prepare Filling
While the batter rests for a moment, beat together the cream cheese and butter until silky smooth. Gradually add powdered sugar and vanilla, beating well. Fold in those Oreo crumbs slowly, so the filling stays creamy with bursts of cookie crunch. You want a spreadable but firm filling—not too runny or too stiff.
Step 6: Layer & Swirl
Pour half the batter into your prepared pan, spread it evenly, then dollop half the filling on top. Using a butter knife or skewer, gently swirl the filling into the batter for a marbled effect—don’t overdo it! Repeat with the second layer. I love how those soft waves of cream peek through after baking; it’s like the cake’s little secret.
Step 7: Bake
Bake for about 40-45 minutes, or until a toothpick inserted comes out clean or with just a few moist crumbs—not wet batter. Ovens vary, so start checking at 35 minutes to avoid drying it out. You’ll know it’s done when the edges start slightly pulling away from the pan and the smell makes the whole house cozy.
Step 8: Cool & Glaze
Let your cake cool in the pan on a wire rack for about 15 minutes before removing the sides. Once fully cooled, whip the heavy cream and powdered sugar until soft peaks form—gently fold in the crushed Oreos and spread the glaze on top like whipped clouds. If you want to go fancy, drizzle some melted chocolate over the top now for a pretty finish.
Step 9: Slice & Serve
Use a warm, sharp knife to slice—warm it under hot water before cutting to get clean edges without tugging. Serve this cake at room temp for the best flavor and texture. It looks stunning on a simple white plate with an extra sprinkle of cookie crumbs, and the first bite is always that perfect blend of creamy, crunchy, and cake-y heaven.
What to Serve It With
For Breakfast: I know it sounds wild, but a small slice with a nice cup of freshly brewed coffee or even a creamy latte can start your day with a little indulgence. The bitterness of the coffee balances the sweetness beautifully without overwhelming your morning.
For Brunch: Try serving slices alongside a fresh fruit salad—something tart like raspberries or pomegranate seeds works wonders to cut through the richness. Add a sparkling mimosa, and you have a brunch centerpiece that everyone will ask about.
As Dessert: This cake shines after dinner, especially if you whip up a scoop of vanilla bean ice cream or serve it with a drizzle of caramel sauce. For holiday dinners, I arrange fresh mint leaves and crushed Oreos around the slices—it makes everything pop on the plate and tastes just as festive as it looks.
For Cozy Snacks: When life calls for comfort food, just a couple of forkfuls of this Oreo cake with a glass of cold milk or hot cocoa is all you need. I swear, the kids ask for seconds every time we have movie nights at home, and it never lasts long.
At family gatherings, it’s become tradition for us to make this cake because it’s a guaranteed crowd-pleaser no matter the occasion. I also love that it stays moist even a day later, so you can look forward to leftovers (if there are any!).
Top Tips for Perfecting Your Oreo Cake
Zucchini Prep: Wait, zucchini? That’s only if you’re experimenting with a healthier twist! If you decide to sneak some in, make sure to grate it finely and squeeze out as much moisture as possible to keep your cake from getting soggy. Fresh zucchini works best—older veg can be watery and less flavorful.
Mixing Advice: The trick I learned early on is to avoid overmixing once the wet and dry ingredients come together—this keeps your crumb light and prevents toughness. Mix just until you can’t see flour anymore. I usually stop a little earlier than I think I should and have been rewarded every time!
Swirl Customization: When you’re doing the filling swirl, go slow and gentle. Too much swirling can make the layers muddy instead of beautifully marbled. I sometimes use a toothpick to create spirals or zigzags. This step is as much art as science and lends a gorgeous visual your guests will admire.
Ingredient Swaps: Want to try something different? Substitute buttermilk with plain yogurt or sour cream for an even creamier texture, but add a splash of milk to thin it out as needed. I’ve used coconut sugar in place of granulated sugar once, and while the flavor was a bit nuttier, it was a fun upgrade. For vegan versions, swapping eggs with flax eggs works—expect subtle changes in texture but delicious results.
Baking Tips: Always position your cake rack in the center of the oven for even heat distribution. If your oven runs hot, turn the temperature down by 10 degrees, and keep an eye on the bake time. When you tap the top, it should spring back lightly—a sure sign that it’s ready. No one wants a dry cake, so err on the side of moistness.
Glaze Variations: Feel free to mix crushed Oreos straight into the whipped cream, or fold in mini chocolate chips. Adding a splash of espresso powder to the glaze gives a surprising depth. I like to add a pinch of sea salt on top—it brightens the whole thing beautifully. Spreading the glaze while the cake is slightly warm helps it settle just right without melting away.
I learned most of these tips the hard way—like realizing too much swirling can disappoint visually or that warm knives are an absolute must for slicing. Trust me on these little tricks; they make every bake feel like you’re nailing it!
Storing and Reheating Tips
Room Temperature: Store the cake covered loosely with a cake dome or large bowl at room temp for up to 2 days. This keeps it moist and the frosting soft, but beware of warm environments that can cause the glaze to soften too much.
Refrigerator Storage: If you need it to last longer, pop it into an airtight container or wrap it well with plastic wrap, and it’ll keep beautifully for up to 5 days. I usually bring it back to room temp before serving because chilling can dull the flavors and make the frosting firmer.
Freezer Instructions: Wrap individual slices or the whole cake tightly in plastic, then in foil, and freeze for up to 3 months. To thaw, move it to the fridge overnight, then let it come to room temperature for a couple of hours. Freeze leftovers if you think the party’s over—they thaw surprisingly well!
Glaze Timing Advice: If you’re freezing, it’s best to glaze after thawing to keep that fresh whipped texture. For short-term storage, glaze right after cooling and keep refrigerated or covered. The texture holds up best when applied fresh.
Frequently Asked Questions
Final Thoughts
So here’s the deal—I’ve baked this Oreo cake for both casual family dinners and festive celebrations, and it never fails to bring smiles and happy chatter to the table. It’s one of those recipes you come back to because it’s comforting but exciting, simple but special. The way the cookies peek through the creamy layers, the rich cocoa aroma filling your kitchen, and that first melt-in-your-mouth bite… it’s pure joy. If you love this, you might want to explore my other cake recipes that mix classic flavors with unexpected twists, like salted caramel chocolate cake or peanut butter swirl cheesecake. And hey, I’m genuinely excited to hear how you make it your own! Drop me a line in the comments, share your tweaks, or just say hi. Happy baking!
Oreo Brookie Layer Cake
Ingredients
Main Ingredients
- 0.75 cup unsalted butter room temperature
- 0.75 cup brown sugar
- 0.25 cup granulated sugar
- 1 large egg
- 2 tsp vanilla extract
- 2 cups all purpose flour
- 2 tsp cornstarch
- 1 tsp baking soda
- 0.5 tsp salt
- 1.25 cups semi-sweet chocolate chips
- 0.5 cup unsalted butter for brownie
- 6 oz semi-sweet chocolate chopped
- 1.25 cups granulated sugar for brownie
- 3 large eggs for brownie
- 0.75 cup all purpose flour for brownie
- 2 tbsp natural unsweetened cocoa for brownie
- 0.25 tsp salt for brownie
- 1.67 cups all purpose flour for Oreo cake
- 1 cup granulated sugar for Oreo cake
- 1.25 tsp baking powder for Oreo cake
- 0.5 tsp salt for Oreo cake
- 3 large egg whites room temperature
- 0.5 cup sour cream room temperature
- 0.5 cup milk room temperature
- 2 tsp vanilla extract for Oreo cake
- 0.75 cup unsalted butter melted and cooled
- 0.5 cup Oreo crumbs
- 6 units Oreos chopped
- 1.5 cups unsalted butter for frosting
- 1.25 cups shortening for frosting
- 9.75 cups powdered sugar for frosting
- 2 tsp vanilla extract for frosting
- 1.25 cup natural unsweetened cocoa powder for frosting
- 5 tbsp water/milk for frosting, use as needed
- 10 units Oreos crushed for frosting and decorating
- 4 oz semi sweet chocolate chips for ganache
- 5 tbsp heavy whipping cream for ganache
- units Chocolate chip cookies for decorating
- units Oreos for decorating
Instructions
Preparation Steps
- Preheat oven to 350°F. Line and grease a 9-inch cake pan for each cake layer.
- In a bowl, cream butter and sugars until light and fluffy. Add egg and vanilla, mix well.
- Whisk together flour, cornstarch, baking soda, and salt. Add to the wet ingredients and mix to form thick cookie dough. Stir in chocolate chips. Press dough evenly into pan and bake 21-24 minutes until edges are golden. Cool completely.
- For brownie: Melt butter and chopped chocolate over simmering water until smooth. Cool slightly. Whisk sugar, vanilla, and eggs together. Combine dry ingredients separately, then stir into chocolate mixture. Pour into pan and bake 35-38 minutes until toothpick shows moist crumbs. Cool completely.
- For Oreo cake: Whisk flour, sugar, baking powder, and salt. In another bowl, mix egg whites, sour cream, milk, and vanilla. Add to dry ingredients and mix just until smooth. Stir in melted butter, Oreo crumbs, and chopped Oreos. Bake 34-36 minutes. Cool on rack.
- Make frosting: Beat butter and shortening until smooth. Gradually add powdered sugar, mixing well. Add vanilla, cocoa powder, and 4 tbsp water or milk. Beat to smooth frosting. Add remaining powdered sugar and more liquid if needed for consistency.
- Assemble cake: Level cookie cake, Oreo cake, and brownie layers. Place cookie cake on plate; spread 1 cup frosting. Sprinkle half crushed Oreos, press gently. Add Oreo cake layer and frosting; repeat crushed Oreos. Top with brownie. Apply crumb coat and frost entire cake smoothly.
- Make ganache: Heat heavy cream to boiling, pour over chocolate chips in bowl. Cover 5 minutes, then whisk smooth. Drizzle ganache over cake sides and spread on top in center swirls.
- Decorate cake with chocolate chip cookies and halved Oreos around the edges and top.