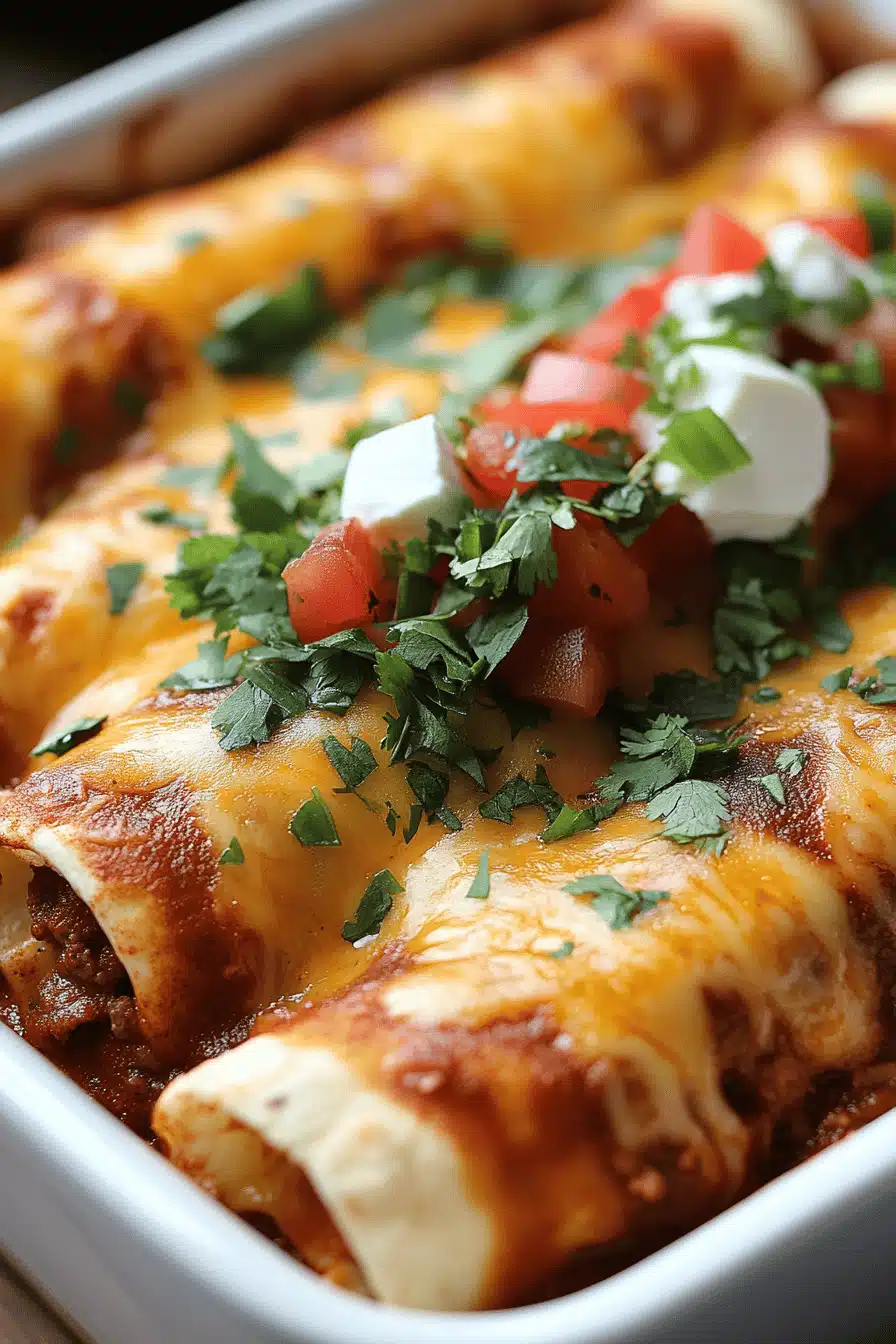
one pan enchiladas
The smell hits you first: smoky peppers, melting cheese, a little heat that makes you lean in closer, like you’ve just heard a secret family trick. I’ve been making something like this for years—the kind of weeknight dinner that vanishes off the table in minutes because everyone’s too busy shouting for seconds to wait. This is what I reach for when I want something comforting, satisfying, and not fussy. And yes, this is the One Pan enchiladas you’ve been craving—everything layered, baked, and ready from a single, sizzling skillet. My kids actually ask for this all the time, and I love that it scales up without a fuss. It’s a little indulgent, a little practical, and totally doable even on a busy Tuesday. I’ve tinkered with this so many times, and I swear the simple swaps—whether you go with chicken, beans, or veggies—only deepen the flavor. If you’ve got a crowd to feed or you just want leftovers you’re excited to eat again tomorrow, you’ve found the right dish. Trust me, this is the dish that brings everyone to the kitchen.
What is one pan enchiladas?
Think of one pan enchiladas as everything you love about traditional enchiladas, but simplified and streamlined for a weeknight. It’s essentially a saucy, cheesy casserole built in one sturdy skillet rather than a bunch of individual rolled tortillas. The name gives it away: you assemble, bake, and serve from the same pan—no frantic oven juggling, no extra dishes to wash after. It’s a forgiving concept, too. You can swap proteins, swap veggies, even switch up the heat level by choosing a red, verde, or mole sauce. The idea is comfort food that feels fancy enough for a small celebration but friendly enough for a family dinner. When I say this is “one pan” magic, I really mean it: you prep, you simmer a little, you pour, you bake, and you’re done. It’s a little bit casserole, a little bit skillet dinner, and a whole lot of cozy, cheesy goodness in every bite.
Why you’ll love this recipe?
What I love most about this dish is how forgiving it is while still delivering a punch of flavor. It’s the kind of recipe that makes weeknights feel like a hug. Here’s why you’ll grab for it again and again:
- Flavor: The enchilada sauce mingles with melted cheese, a touch of cream, and your choice of filling to create a luscious, saucy bite every time. It’s smoky, a little tangy, and delightfully comforting—the kind of flavor that lingers on your palate long after the last forkful.
- Simplicity:One pan, fewer steps, minimal fuss. I used to juggle multiple skillets and stray ingredients, and this method saves
- Cost-efficiency: What is the best way to measure cost-efficiency? You can stretch a pound of ground meat into a generous filling or switch to beans for a vegetarian version. A few pantry staples and a couple of toppings make a big impact, and you won’t break the bank in the process.
- Versatility: This recipe invites tweaks—from the protein to the heat level. I’ve tested it with chicken, turkey, black beans, and roasted vegetables, and it always comes together beautifully. If you want a smoky edge, a little chipotle in the sauce never hurts. If you want it milder, stick with a classic tomato-based enchilada sauce.
What I also love is that the texture stays wonderfully intact. The edges crisp a bit against the pan, while the center stays saucy and soft. And the aroma alone is enough to bring everyone to the kitchen with a grin. If you’ve got a picky eater in the house, this dish tends to win hearts because you can tailor the fillings to suit their tastes without changing the core idea—one pan, big flavor, little cleanup.
How to Make One Pan Enchiladas
Quick Overview
Here’s the quick version: you whip up a creamy, zippy batter to braid through the pan, brown a flavorful filling, pour everything together with a glossy glaze, and bake until the cheese has melted into a bubbly, irresistible layer on top. The beauty is in the layering and the way the sauce and cheese mingle with the filling, creating pockets of creamy goodness in every bite. It’s simple enough for a weeknight, but the result feels special enough for guests. If you’re short on time, you can assemble and refrigerate for later, then bake when you’re ready. One pan enchiladas truly shine when you let the flavors talk to each other—no need to overthink it, just season confidently and let the oven work its magic.

Ingredients
For the Main Batter:
- 2 cups enchilada sauce (red or green), warm
- 1/2 cup sour cream or cream cheese, softened
- 1/2 cup shredded cheese (a mix of cheddar and Monterey Jack works beautifully)
- 1 large egg, lightly beaten
- 1 teaspoon ground cumin
- 1/2 teaspoon garlic powder
- 1/2 teaspoon smoked paprika (optional for a deeper color and a touch of warmth)
For the Filling:
- 1 pound ground chicken, turkey, or a can of black beans for a vegetarian version
- 1 small onion, finely minced
- 2 garlic cloves, minced
- 1 cup corn kernels (fresh or frozen, thawed)
- 1 cup chopped bell pepper (any color)
- 1 teaspoon chili powder
- 1/2 teaspoon ground cumin
- Salt and pepper to taste
For the Glaze:
- 1 cup enchilada sauce
- 1/2 cup shredded cheese (for extra ooze)
- 1 tablespoon sour cream (optional, for extra creaminess)
Step-by-Step Instructions
Step 1: Preheat & Prep Pan
Preheat your oven to 375°F (190°C). Lightly oil a 9×13-inch skillet or a similar ovenproof pan. If you’re using a wider dish, just keep an eye on the bake time so the edges don’t dry out. I like to line the bottom with a thin layer of the main batter to start a delicious foundation. It’s the little trick that keeps the texture cohesive and helps the sauce cling to every layer.
Step 2: Mix Dry Ingredients
In a small bowl, mix the spices that will perfume the filling later on—cumin, chili powder, garlic powder, and a pinch of salt. This helps you build flavor quickly without overthinking it at the stove. I’ve learned that a well-seasoned filling makes all the difference when you’re layering everything in one pan.
Step 3: Mix Wet Ingredients
In another bowl, whisk together the main batter ingredients: enchilada sauce, sour cream or Cream Cheese, shredded cheese, egg, and the optional smoked paprika. The goal is a smooth, pourable mixture with enough body to hold the layers together but not so thick it clumps. If you’re using a mild sauce, this step adds a gentle creaminess that lightens the heat while boosting flavor.
Step 4: Combine
Fold half of the wet mixture into the dry ingredients just until combined. You don’t want to overmix; a few streaks of color show you’ve kept it light. This batter is what will help everything stay cohesive as it bakes. The texture should be creamy but not runny.
Step 5: Prepare Filling
Heat a drizzle of oil in a skillet over medium heat. Add the onion and garlic, cooking until translucent and fragrant. Stir in your protein (or beans), followed by the spices, corn, and pepper. Cook until everything is heated through and a bit of color develops. Taste and adjust salt. The filling should be bold but balanced—think savory, not flat.
Step 6: Layer & Swirl
Spread a thin layer of the batter on the bottom of the pan. Spoon the filling over the batter in an even layer, then swirl a little of the remaining batter over the top. If you like, you can gently swirl some extra enchilada sauce into the surface for a marbled look, but don’t overdo it—this step is about letting the flavors blend as they bake.
Step 7: Bake
Pour the rest of the batter evenly over the filled pan, smoothing the top with a spatula. Bake for 22–28 minutes, until the center is set and the edges are bubbling. If you like a deeper color on top, broil for an extra 1–2 minutes, watching carefully so nothing burns. The cheese should be gooey and the sauce darkly glossy, inviting you to scoop up the first bite.
Step 8: Cool & Glaze
Let the pan rest for 5–10 minutes after removing from the oven. This heartbeats the flavors and makes slicing easier. While it rests, whisk together a quick glaze: a little extra enchilada sauce with a splash of Sour Cream, warmed just enough to loosen it. Drizzle (or dollop) it over the top for a silky finish and a touch of brightness that cuts through the richness.
Step 9: Slice & Serve
Slice into generous wedges with a sharp knife, wiping the blade between cuts for clean lines. Serve with a scattering of chopped cilantro, a squeeze of lime, and a dollop of crema if you’re feeling extra indulgent. This dish shines with a simple side salad or some cumin-lime roasted vegetables. My trick is to plate the first portion with a little extra glaze on top for a glossy finish that makes all your photos pop.
What to Serve It With
This one pan enchiladas are generous on their own, but they come alive with the right accompaniments. Here are a few ideas that fit different moments:
For Breakfast: Warm them up and top with a fried egg, avocado slices, and a dusting of cotija. A fresh tomato salsa on the side adds brightness that wake-ups crave. Pair with a strong cup of coffee and you’re set for a day that starts with a comforting, spicy note.
For Brunch: Serve wedges with a crisp green salad, a tangy lime crema, and a sparkling beverage. Arrange a few bowls of pickled onions and cilantro for a pop of color that makes the dish feel festive.
As Dessert: Okay, not literally dessert, but try a sweet-savory approach: top with a dollop of lime-scented yogurt and a pinch of Cinnamon Sugar on the side for an unusual, delightful contrast after a savory course. It’s not traditional, but it’s a surprising finish your guests will remember.
For Cozy Snacks: Let the pan cool to warm-lukewarm and serve with tortilla chips for dipping, plus a mango-salsa dip. It’s perfect for movie nights or casual hangouts when you want something hearty that still feels light enough to snack on.
We always serve this family-style, scooping generous portions onto plates and letting everyone decide how they want to dress theirs. My grandmother would have loved this for its simplicity; I swear you can hear her approving from the next room every time the cheese stretches in that perfect, gooey line.
Top Tips for Perfecting Your One Pan Enchiladas
These little refinements have made all the difference at my house. I’ve learned them from testing and tasting with friends and family, and I’d hate for you to miss out on the tiny details that elevate this from okay to heavenly.
Zucchini Prep: If you’re adding zucchini, grate it and let it rest in a colander with a light pinch of salt for 10 minutes. Squeeze out excess moisture before mixing with the filling. Moisture is the enemy of crisp edges and well-defined layers, so this step saves you from a soggy pan.
Mixing Advice: Don’t overmix the batter after you combine wet and dry ingredients. A few small lumps are fine and keep the texture tender. Overmixing leads to toughness, which is the last thing you want when you’re aiming for that soft, comforting bite.
Swirl Customization: For a more dramatic marbling effect, reserve a portion of the glaze and dot it across the top with a spoon before baking. A quick swirl with a knife creates a pretty, oven-kissed finish that looks as good as it tastes.
Ingredient Swaps: I’ve swapped Greek yogurt for Sour Cream in a pinch, and it adds a tangy brightness that some folks actually prefer. For a dairy-free route, use unsweetened almond milk yogurt or coconut yogurt in the batter and glaze. It won’t be exactly the same, but it stays delicious and creamy in its own way.
Baking Tips: If your oven runs hot, drop the temperature to 365°F (185°C) and check a bit earlier. Center doneness is king here, so a gentle bake prevents a crusty top while leaving the middle perfectly set. If you have a convection option, you can use it for a crisper edge, but keep an eye on it so the surface doesn’t scorch.
Glaze Variations: Try adding roasted bell peppers to the glaze for a deeper, sweeter note. If you want a sharper finish, a splash of lime juice or a pinch of cayenne can wake up the flavors nicely. The glaze is where you can really tailor the dish to your mood and your pantry.
I’ve learned this dish by doing, failing forward, and embracing the little disasters that taught me what to adjust. The result is a friendly, forgiving recipe that still tastes like a celebration—because home cooking should feel like a hug, even when you’re feeding a crowd. And yes, the one pan concept makes cleanup almost invisible, which I appreciate more than I can say on busy nights.
Storing and Reheating Tips
These enchiladas store surprisingly well, and the flavors intensify a little with time. Here’s how I keep them at their best, whether you’re planning for tomorrow’s lunch or a few days of leftovers.
Room Temperature: If you’ve just baked a batch for tonight, you can leave leftovers covered on the counter for up to two hours. After that, move them to the refrigerator to keep their texture and flavor intact.
Refrigerator Storage: Store tightly wrapped or in an airtight container for up to 3–4 days. Reheat gently in a skillet with a splash of water or a quick rewarm in the microwave with a damp paper towel to keep moisture balanced. The skillet method helps the cheese melt again and preserves the edges’ softness.
Freezer Instructions: These freeze beautifully. Cut into portions, wrap tightly, and freeze for up to 2–3 months. Thaw overnight in the fridge, then reheat in a skillet covered to trap steam and keep the filling moist. You may want to whisk in a touch more sauce when reheating to restore creaminess.
Glaze Timing Advice: If you’re freezing, I’d suggest adding the glaze after reheating to preserve its bright shine and prevent texture changes. When you’re serving from the freezer, you can brush a little extra glaze on top after warming for a glossy finish.
In my kitchen, these leftovers are still comforting the next day—soft, saucy, and delightfully cheesy. The freezer friendly aspect makes this a fantastic make-ahead option for busy weeks, and the flexibility means you can tailor it to whatever’s in your fridge without losing the soul of the dish.
Frequently Asked Questions
Final Thoughts
This one pan enchiladas recipe has earned a permanent spot in my weekly rotation. It’s not precious or complicated, but it’s undeniably satisfying—the kind of dish that makes a kitchen feel like home. The layers, the sauce, the way the cheese pulls—it’s all about comfort without fuss. If you’ve got kids, you know the magic of a dish they’ll actually finish. If you’re cooking for a crowd, this scales up beautifully and stays incredibly forgiving. I love that you can switch proteins, tweak the heat, and still land on something comforting and delicious every time. So, grab a pan, some tortillas, and a couple of simple ingredients, and make this your own. I can’t wait to hear how yours turns out—leave a note, share your tweaks, and tell me what you served it with. Happy baking!
Easy One-Pan Enchiladas So Delicious
Ingredients
Main Ingredients
- 2 tablespoons olive oil
- 0.75 cup diced sweet yellow onion
- 4 ounces can mild diced green chilies
- 2 teaspoons chili powder
- 0.5 teaspoon ground cumin
- 0.5 teaspoon smoked paprika
- 0.5 teaspoon garlic powder
- 0.5 teaspoon salt
- 0.25 teaspoon black pepper
- 3.5 cups mild red enchilada sauce (or a 10 ounce and a 19 ounce can)
- 3 cups shredded rotisserie chicken
- 8 tortillas white corn tortillas (6 inch) cut into 0.75 - 1 inch thick strips
- 2.5 cups shredded cheddar-jack cheese (from an 8 ounce block)
Garnish
- Fresh cilantro roughly chopped
- Hass avocado cut into slices
Instructions
Preparation Steps
- Preheat oven to 425° F.
- Place a large (12 inch) heavy duty skillet over medium-high heat and add the oil. When the oil is hot, add the diced sweet yellow onion and saute for 2-3 minutes or until the onions are tender and translucent.
- To the skillet, add the mild diced green chilies, chili powder, ground cumin, smoked paprika, garlic powder, salt and black pepper. Stir to combine all the spices with the onions and green chilies.
- Add the mild red enchilada sauce to the skillet and stir to incorporate all the spices into the sauce. Add the shredded rotisserie chicken and stir to evenly coat all the chicken with the sauce.
- Cook the sauce and chicken for 3-4 minutes or just until the sauce starts to come to a low boil.
- Turn off the heat to the skillet and gently stir, or fold, in the strips of white corn tortillas until they are evenly distributed and fully coated in the sauce.
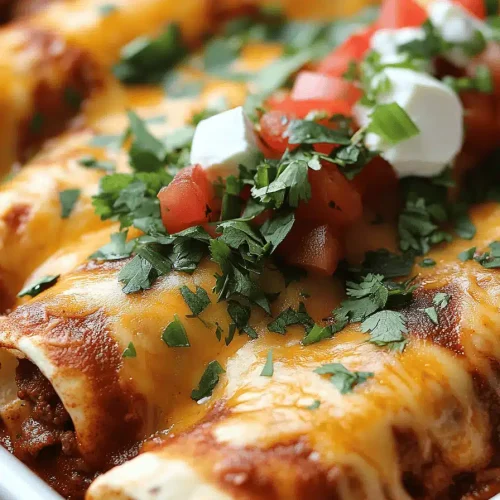
- Top the skillet enchilada mixture with the shredded cheddar-jack cheese and place into the preheated oven for 10-12 minutes or until the cheese has melted and the sauce is bubbly.
- Garnish the skillet enchiladas with fresh cilantro and avocado slices and serve while warm.