Mini Apple Pies Delight Your Taste Buds
Oh, you guys. I’ve been holding out on you! There are certain recipes that just… make your heart sing. They’re the ones you whip up when you need a little bit of sunshine, a whole lot of comfort, or when you unexpectedly have people dropping by. For me, that recipe is these mini apple pies. Seriously, forget those giant, unwieldy pies that take ages to bake and even longer to cool. These little gems are the perfect bite-sized dose of apple-cinnamon bliss, and they come together so much faster than you’d think. I remember the first time I made them for a neighborhood potluck; people were practically fighting over them! They’re like the more approachable, cuter cousins of a full-sized Apple Pie, and if you’re anything like me, you’re going to fall head over heels. They’re just so utterly charming, and the smell that fills your kitchen while they bake? Pure magic.
What are mini apple pie?
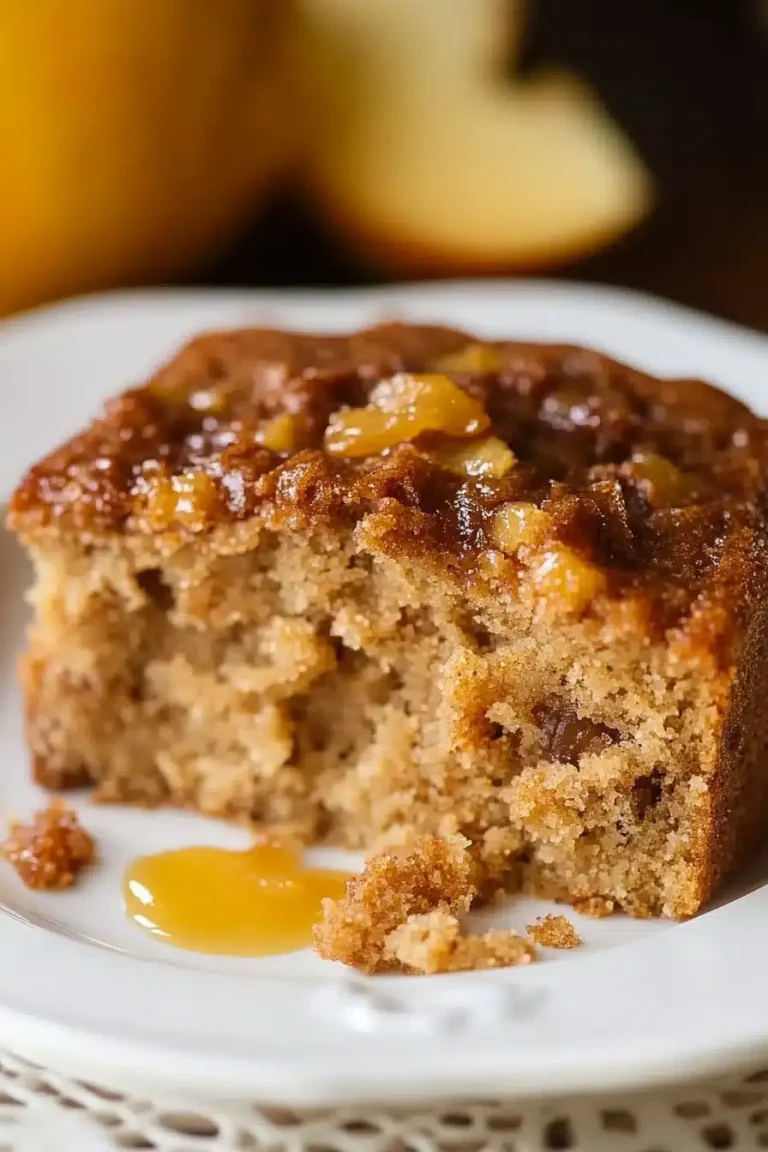
So, what exactly *are* these little wonders? Think of them as individual servings of pure Apple Pie joy. Instead of one big pie, we’re talking about perfectly portioned, handheld delights. Each one is a little golden cup filled with tender, spiced apples, all snug under a flaky pastry crust. The name itself, “mini apple pies,” pretty much says it all, but it’s the execution that makes them so special. They’re not just miniature versions; they’re their own delightful entity. We’re talking about a sweet, slightly tart apple filling, kissed with cinnamon and nutmeg, nestled in a buttery, tender crust, all baked to a perfect golden brown. It’s essentially all the best parts of a classic apple pie, miniaturized for your eating pleasure. And trust me, there’s something incredibly satisfying about picking up your very own pie!
Why you’ll love this recipe?
Let me tell you, there are SO many reasons why this recipe has earned a permanent spot in my recipe box, and why I’m practically bouncing off the walls to share it with you. First and foremost, the flavor. It’s that quintessential Apple Pie taste we all crave – warm, comforting, and just sweet enough. The apples are tender but still have a little bite, and the spice blend is just perfect, not too overpowering. Then there’s the simplicity factor, which is huge for me. While a full-sized pie can feel like a production, these mini apple pies are genuinely achievable, even on a weeknight when you’re feeling the bake-a-thon blues. The ingredients are super budget-friendly too! You likely have most of them in your pantry right now. No fancy, expensive stuff needed here. And the versatility! Oh, my goodness. I’ll get into more ideas later, but these are fantastic for breakfast, dessert, a sweet snack, or even a special brunch treat. What I love most about this recipe, though, is how *approachable* it is. It feels like a special occasion treat, but it’s so easy to make that you can enjoy it anytime. It’s like giving yourself a little present, one delicious mini pie at a time. If you’ve ever struggled with making a full pie crust or found the filling intimidating, this recipe is your gateway. It’s forgiving and incredibly rewarding.
How do I make mini apple pie?
Quick Overview
The process is surprisingly straightforward. We’ll whip up a simple dough, prepare a quick and delicious apple filling, then assemble and bake these little beauties. The key is keeping things manageable: making individual portions means less fuss and faster baking. You’ll be amazed at how quickly these go from ingredients to golden perfection. It’s a streamlined approach that still delivers all the classic apple pie flavor you adore. Just imagine, in less time than it takes to make a full pie, you’ll have a dozen (or more!) of these adorable little treasures ready to be devoured.
Ingredients
For the Pastry Dough: What is the best way to make it?
Here’s where we keep it simple and effective. You want a dough that’s tender, flaky, and easy to work with. I always use all-purpose flour for this, but a good quality unbleached flour works wonders. Keep your butter and shortening nice and cold – this is the secret to that flaky texture! About 2 ½ cups of all-purpose flour, 1 teaspoon of salt, 1 cup of cold, unsalted butter (cut into cubes), and ½ cup of cold vegetable shortening (or more butter if you prefer, but shortening adds that extra tenderness). You’ll also need about ½ cup of ice water, added gradually. The colder everything is, the better your pastry will be!
For the Apple Filling:
This is where the magic happens! I swear by a mix of apples for the best flavor and texture. Tart apples like Granny Smith are a must for that classic tang, but I love throwing in a sweeter apple like Honeycrisp or Fuji for a bit of complexity. About 4-5 medium apples, peeled, cored, and diced into small, bite-sized pieces. You’ll also need ½ cup of granulated sugar (you can adjust this based on the sweetness of your apples and your preference), 2 tablespoons of all-purpose flour (to thicken the juices), 1 teaspoon of ground cinnamon, ¼ teaspoon of ground nutmeg, and a squeeze of fresh lemon juice (about 1 teaspoon) to brighten everything up and prevent browning.
For the Egg Wash and Optional Glaze:
A simple egg wash (1 egg whisked with 1 tablespoon of water) is your golden ticket to a beautiful, shiny crust. For an optional, but highly recommended, glaze: ½ cup powdered sugar sifted, 1-2 tablespoons milk (or apple juice for extra flavor), and a tiny splash of vanilla extract. Whisk it all together until smooth and pourable – but not too thin!
Step-by-Step Instructions
Step 1: Preheat & Prep Pan
First things first, let’s get your oven ready and your pans prepped. Preheat your oven to 375°F (190°C). This is a nice moderate temperature that allows the crust to bake up golden and the apples to become tender without burning. You’ll want to grab a muffin tin or a mini muffin tin – whatever size you prefer for your mini apple pies. If you’re using a standard muffin tin, you might get about 8-10 pies. If you use a mini muffin tin, you’ll get closer to 20-24. Lightly grease or spray your muffin tin with non-stick cooking spray. This is super important to ensure your lovely little pies don’t stick! For extra security, you can also line them with mini cupcake liners, but I find a well-greased tin works perfectly. Make sure you’ve got your apples peeled, cored, and diced relatively small – about ¼ to ½ inch pieces. This helps them cook evenly and makes for a better bite.
Step 2: Mix Dry Ingredients
In a large bowl, whisk together your flour and salt. This might seem super basic, but it’s crucial for an even texture. You want to make sure the salt is distributed throughout the flour so you don’t get salty pockets. Now, add your cold, cubed butter and shortening (or all butter). Using a pastry blender, your fingertips, or even a food processor (pulsing in short bursts), cut the fat into the flour until the mixture resembles coarse crumbs with some pea-sized pieces of butter still visible. Don’t overwork it! Those little butter pieces are what create those lovely flaky layers in your crust. Think of it like making little pockets of steam that will puff up during baking. It should look a bit like coarse cornmeal with some larger, buttery lumps.
Step 3: Mix Wet Ingredients
Now, for the liquid. Gradually add the ice water, a tablespoon at a time, while gently tossing the dough with a fork. You’re looking for the dough to just start coming together. You might not need all the water, or you might need a tiny bit more, depending on your flour and humidity. The goal is for the dough to hold together when you squeeze a handful, but not be sticky. Once it starts to clump, stop adding water. The dough should be shaggy but cohesive. Overwatering will make it tough, so go slow! You want just enough moisture to bind everything together.
Step 4: Combine
Turn the dough out onto a lightly floured surface. Gently bring it together with your hands, just enough to form a cohesive ball. Don’t knead it like bread! We’re not developing gluten here; we want a tender crust. Flatten the ball into a disc, wrap it tightly in plastic wrap, and refrigerate it for at least 30 minutes. This is a really important step, as it allows the gluten to relax, the fat to firm up again, and the dough to become easier to roll out. Skipping this can lead to a tough or difficult-to-handle dough.
Step 5: Prepare Filling
While the dough is chilling, let’s get to that glorious apple filling. In a medium bowl, combine your diced apples, granulated sugar, flour, cinnamon, nutmeg, and lemon juice. Toss everything together gently until the apples are evenly coated. The flour acts as a thickener, so you don’t end up with a watery pie. The cinnamon and nutmeg give you that warm, cozy spice profile, and the lemon juice adds a touch of brightness and prevents the apples from turning an unappealing brown color. Taste a piece of apple (raw, of course!) and see if you think it needs a little more sugar or spice. It’s your pie, after all!
Step 6: Layer & Swirl
Once your dough is chilled, unwrap it and let it sit at room temperature for about 5-10 minutes if it’s very firm, just so it’s easier to roll. On a lightly floured surface, roll out the dough to about ⅛-inch thickness. Use a round cookie cutter or the rim of a glass that’s slightly larger than the diameter of your muffin cups to cut out circles. Gently press each dough circle into the greased muffin cups, fitting it snugly against the bottom and up the sides. Don’t worry if it’s not perfect; rustic charm is part of the appeal! Spoon the apple filling into each dough-lined cup, filling them about ¾ full. You don’t want them overflowing, or the filling might bubble out too much. If you want to get fancy, you can cut out small shapes (like leaves or stars) from leftover dough to place on top of the filling for extra decoration. Or, you can simply make a few small slits in the dough lining with a sharp knife before adding the apples to allow steam to escape.
Step 7: Bake
Now for the best part – baking! Place your prepared muffin tin into the preheated oven. Bake for 20-25 minutes for standard muffin tin sizes, or 15-20 minutes for mini muffin tin sizes, or until the crust is a beautiful golden brown and the filling is bubbly. You can peek at the apples – they should be tender when pierced with a toothpick. If the crust starts to brown too quickly before the filling is cooked, you can loosely tent the tin with aluminum foil. Keep an eye on them; ovens can be finicky! The aroma that fills your house during this stage is truly divine. It’s that unmistakable scent of warm apples and cinnamon that just screams comfort.
Step 8: Cool & Glaze
Once baked, carefully remove the muffin tin from the oven. Let the mini apple pies cool in the tin for about 10-15 minutes. This is important because they are delicate when hot. After they’ve cooled a bit, you can gently run a thin knife or offset spatula around the edges to loosen them and then carefully lift them out of the tin to cool completely on a wire rack. While they’re cooling, you can whisk together your glaze ingredients (powdered sugar, milk/juice, vanilla) until you reach a drizzly consistency. Once the pies have cooled down significantly (but are still a little warm is nice!), you can drizzle the glaze over the tops. If you’re serving them warm and don’t want the glaze to completely melt, let them cool a bit more before applying. For a fully set glaze, let them cool completely.
Step 9: Slice & Serve
These mini apple pies are best served slightly warm, allowing the flavors to really shine. They’re absolutely delightful on their own, but can also be served with a dollop of whipped cream, a scoop of vanilla Ice Cream, or even a drizzle of caramel sauce. They’re perfect for individual enjoyment, making them a wonderful option for entertaining or just a special treat for yourself. The crust should be tender and flaky, the apples soft and sweet with just a hint of tartness, and the glaze adds a delightful finishing touch. Enjoy every single bite of these little portable pies!
What to Serve It With
The beauty of these mini apple pies is their incredible versatility! They really do fit into so many occasions. For breakfast, they are a dream served warm alongside a hot cup of coffee or tea. I like to lightly dust them with powdered sugar if I’m not using the glaze, making them feel a little bit special without being over the top. For a weekend brunch, they are a showstopper! Arrange them on a pretty platter with some fresh berries and a mimosa. They look so elegant and make a delightful sweet contrast to savory brunch items. As a dessert, well, that’s almost a given, right? Serve them warm with a scoop of good quality vanilla bean ice cream or a dollop of freshly whipped cream. A drizzle of caramel sauce is never a bad idea either! And for those cozy snack moments when you just need something sweet and comforting? These are perfect. They’re easy to grab and enjoy while curled up on the couch with a book or watching a movie. My family loves them after dinner, especially when there’s a slight chill in the air. We’ve also found they’re a big hit at potlucks and BBQs because everyone can easily grab their own without needing forks and knives!
Top Tips for Perfecting Your Mini Apple Pies
Over the years, I’ve learned a few tricks that really elevate these mini apple pies from good to absolutely stellar. For the apples, don’t be afraid to mix varieties! Using just one type can sometimes lead to a one-dimensional flavor. A blend of tart and sweet gives you that perfect balance of acidity and sweetness. Also, dice the apples relatively small – about ¼ to ½ inch. This ensures they cook through evenly and become tender in the shorter baking time required for mini pies. If you chop them too large, you risk the crust burning before the apples are soft. When it comes to the pastry dough, the key is cold ingredients and minimal handling. If your butter and shortening are warm, your dough will be greasy and tough. I always have a bowl of ice water ready and add it a tablespoon at a time. And please, please, please, don’t overwork the dough when you bring it together. Just gently press it until it forms a ball; overmixing develops gluten and makes the crust tough instead of tender and flaky. For the filling, don’t skip the flour! It might seem like a small amount, but it’s crucial for thickening the apple juices and preventing a soggy bottom crust. If your apples seem particularly juicy, you can add an extra teaspoon of flour. When it comes to swirling, it’s mostly for aesthetics, but a few small slits in the top crust (if you add one) or decorative cutouts can make them extra special. Remember to grease your muffin tins thoroughly! I learned this the hard way early on and ended up with some very stuck pies. Using a pastry brush to get into all the nooks and crannies is a good idea. If you want to get creative with the glaze, try adding a pinch of cinnamon or a drop of maple extract for a different flavor profile. And finally, baking time is just a guideline. Ovens vary wildly! Keep an eye on them and look for that beautiful golden-brown crust and bubbling filling. Trust your eyes and your nose!
Storing and Reheating Tips
These mini apple pies are best enjoyed fresh, but they do store quite well, which is another reason I love them! If you find yourself with leftovers (which is rare in my house!), here’s how to keep them tasting their best. For room temperature storage, they can be kept in an airtight container at cool room temperature for about 1-2 days. Make sure they’ve cooled completely before storing, otherwise, condensation can make the crust soggy. If you’ve glazed them, the glaze might soften a bit at room temperature. If you plan to store them for longer than a couple of days, or if your kitchen is on the warmer side, definitely pop them in the refrigerator. In the fridge, they’ll stay fresh in an airtight container for up to 4-5 days. The crust might soften slightly over time in the fridge, but they’ll still be delicious. When you want to reheat them, I highly recommend a quick stint in a moderate oven (around 300°F or 150°C) for about 5-10 minutes. This will help crisp up the crust beautifully. A toaster oven works great for just a couple of pies. If you’re in a rush, a short zap in the microwave can work, but be warned: it can make the crust a bit chewy. For freezing, these are surprisingly freezer-friendly! You can freeze them either baked or unbaked. For baked pies, let them cool completely, then wrap them individually in plastic wrap, followed by a layer of foil or a freezer-safe bag. They can be stored in the freezer for up to 2-3 months. To reheat frozen baked pies, just pop them directly into a 350°F (175°C) oven for about 15-20 minutes, or until heated through and crisp. If you’re freezing unbaked pies, assemble them completely, then place them on a baking sheet in the freezer until firm, then transfer to a freezer bag. Bake them directly from frozen, adding a few extra minutes to the baking time. For the glaze, it’s usually best to add it *after* reheating, especially if you’ve frozen them, to keep it looking its best. Just a quick whisk and drizzle!
Frequently Asked Questions
Final Thoughts
So there you have it – my absolute go-to recipe for the most delightful mini apple pies! I genuinely believe these little treasures have the power to brighten any day. They capture all the warm, comforting flavors of a classic apple pie but in a perfectly portioned, fuss-free package. Whether you’re making them for a special occasion, a cozy afternoon treat, or just because you deserve something sweet, I promise they won’t disappoint. They’re a labor of love, for sure, but the kind of love that’s incredibly rewarding and utterly delicious. If you love these mini apple pies, I think you might also enjoy my [Link to another relevant recipe, e.g., “Spiced Pear Tartlets”] or my [Link to another relevant recipe, e.g., “Easy Cinnamon Scones”]. They share that same comforting, homemade vibe! I can’t wait to hear what you think when you make them. Please leave a comment below and let me know how yours turned out, or if you have any fun variations you tried! Happy baking, everyone!