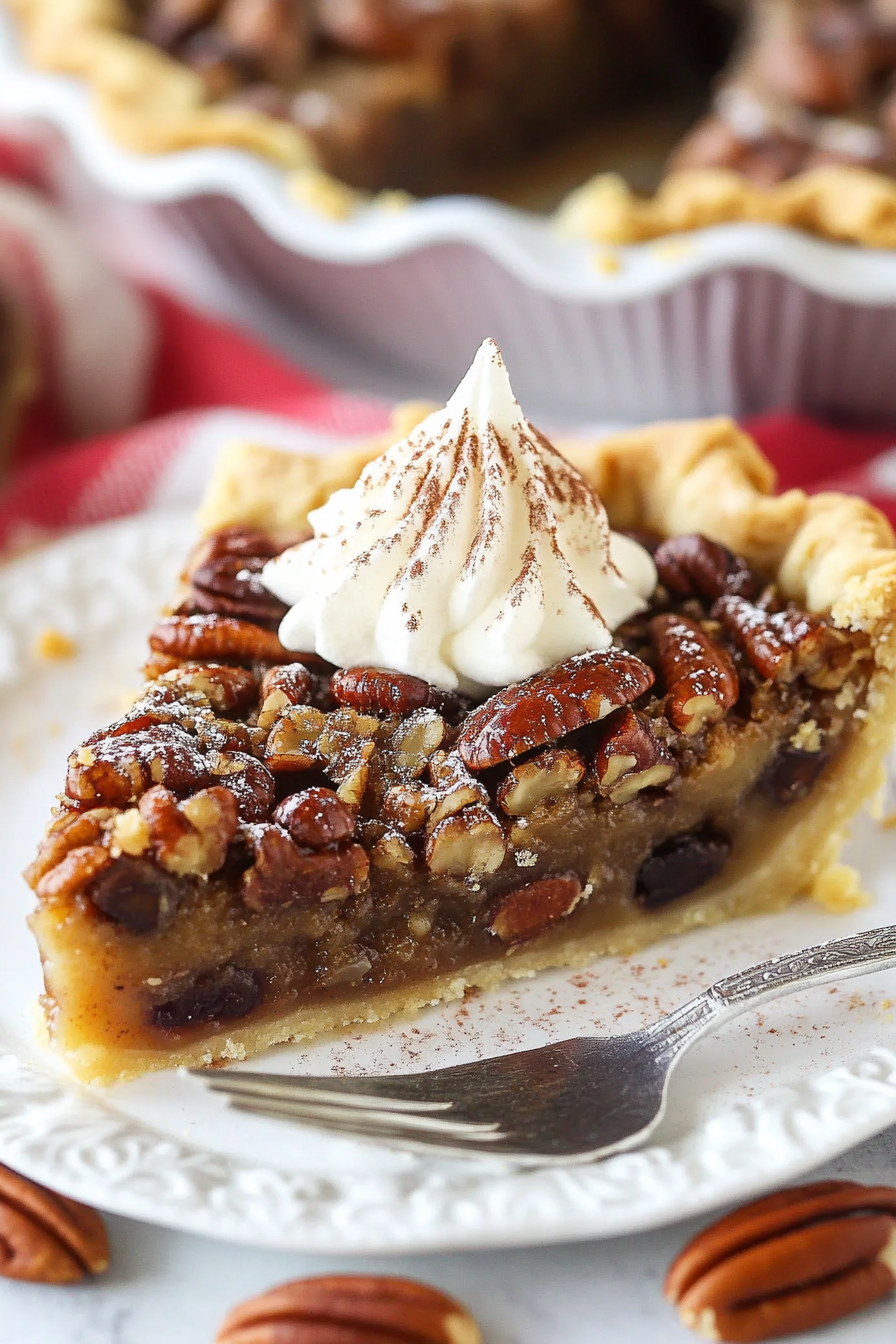
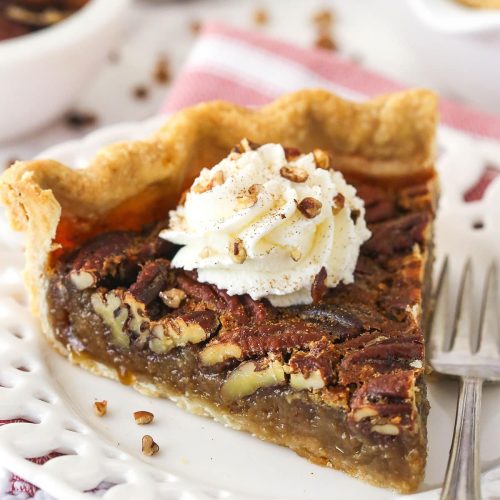
maple pecan pie
There’s something about the smell of warm maple syrup mingling with toasted pecans that instantly transports me back to chilly fall afternoons at my grandmother’s kitchen. I still remember sneaking bites off her cooling pie plate, the sticky sweetness melting on my tongue while the flaky crust crumbled delightfully between my fingers. This maple pecan pie recipe is a little piece of that magic, and honestly, it’s become my go-to when I want to impress guests or simply enjoy a cozy moment at home. It’s like taking the classic southern pecan pie and giving it a sweet, earthy hug with real maple syrup—so much richer and warmer. If you’ve loved pecan pie before but wonder if it could get better, trust me, this maple twist will change your mind.
What is Maple Pecan Pie?
Think of maple pecan pie as the classic pecan pie’s charming cousin who brings a richer, deeper sweetness to the party. Instead of just relying on corn syrup and brown sugar, this version swaps in real maple syrup—yes, the good stuff straight from the tree! The maple syrup adds layers of caramel-y, woodsy flavor that pair perfectly with the buttery crunch of toasted pecans nestled in a tender pie crust. It’s essentially a gooey, nut-studded pie that’s sweet but not overpowering, with a hint of sophistication that’s surprisingly easy to pull off. If you love traditional pecan pie but want something a little different (and trust me, you’ll want it), this maple pecan pie is an absolute keeper.
Why you’ll love this recipe?
What I love most about this maple pecan pie is how it hits every note just right without any fuss. First off, the flavor is truly something special—the natural maple syrup bumps up that sweetness without letting it get cloying, and the toasted pecans add this perfect contrast of crunch and warmth. It’s like the perfect balance of cozy and fancy.
Secondly, despite it feeling like a fancy dessert, it’s surprisingly simple to make. If you can mix, pour, and bake, you’ve got this covered. No complicated steps or weird ingredients that make you run to three specialty stores. Just honest, good stuff you probably already keep on hand.
Another great perk? The ingredients are budget-friendly. Maple syrup might seem like a splurge, but a little goes a long way and feeling fancy is worth it for special treats. I also appreciate that this recipe is pretty versatile—you don’t have to save it for holidays. I’ve made it for weeknight dinners (because sometimes you just want a cozy pie) and for celebrations.
And if you’re a fan of other nut-based desserts, this maple pecan pie plays nicely next to my favorite maple walnut bread pudding or classic pumpkin pie. It’s become the star in my rotation because it delivers big on flavor but is forgiving in the kitchen, perfect for both beginners and folks who bake like it’s second nature.
How do you make a maple pecan pie?
Quick Overview
Making this pie is basically a two-part dance: preparing a rich, velvety filling soaked in maple syrup, then folding in heaps of toasted pecans before settling it all into your pie crust. The real magic comes from the way the filling sets with that sweet, sticky maple glaze embracing crunchy pecans. You don’t need any fancy tools—just a mixing bowl, whisk, and a trusty baking dish. I love how this recipe lets you feel like a pro without stressing the details, especially when the aroma starts filling your kitchen and you realize wow, that’s going to be amazing.
Ingredients
For the Main Batter:
- 1 cup pure maple syrup (look for Grade A, amber for best flavor)
- 3 large eggs (room temperature is key for smooth mixing)
- 1/2 cup unsalted butter, melted and slightly cooled
- 1/2 cup packed light brown sugar (adds depth and softness)
- 1 teaspoon pure vanilla extract (trust me, don’t skip this!)
For the Filling:
- 1 1/2 cups pecan halves, toasted (toast them in a dry pan for 5–7 minutes until fragrant)
- 1/4 teaspoon salt (balances the sweetness)
- Optional: a pinch of cinnamon or nutmeg for a warm touch
For the Glaze:
- 2 tablespoons maple syrup (for a light glossy finish post-bake)
- 1 tablespoon butter, melted (helps seal the glaze and adds shine)
Step-by-Step Instructions
Step 1: Preheat & Prep Pan
First things first, preheat your oven to 350°F (175°C). Grab a 9-inch deep-dish pie pan and give it a nice buttering or use a little non-stick spray. If you’re feeling fancy, a dusting of flour in the pan helps the crust release cleanly later. I always do this when I’m worried the crust might stick, and it saves me a tiny anxiety attack at serving time!
Step 2: Mix Dry Ingredients
Toast your pecans in a dry skillet just until they start smelling nutty (not smoky). While they cool, whisk together brown sugar and salt—and if you’re adding cinnamon or nutmeg, toss them in here too. You want these flavors evenly distributed so every bite is perfectly sweet and warm.
Step 3: Mix Wet Ingredients
In a separate bowl, crack your eggs and beat them gently but thoroughly. Pour in the maple syrup, melted butter, and vanilla extract, whisking until everything is smooth and glossy. I always watch for the filling to look shiny and silky, which means it’s ready for the dry ingredients.
Step 4: Combine
Slowly pour your dry mixture into the wet ingredients, stirring gently. Don’t overmix here—you want the filling silky but not beaten to death. This helps the pie set just right, with a custardy center that still holds a little jiggle.
Step 5: Prepare Filling
Fold in those toasted pecans last—reserving a handful to sprinkle on top if you want extra crunch and a pretty finish. Folding gently keeps every pecan intact and ensures bites with great texture.
Step 6: Layer & Swirl
Pour the filling into your prepared pie crust. If you want to get creative, try swirling a touch of maple syrup or even a drizzle of heavy cream on top, then gently swirl it with a knife for a marbled look. I’ll admit, I usually eat it straight, but on special occasions, the swirl adds a gorgeous touch.
Step 7: Bake
Pop the pie in the oven for 50–60 minutes. The trick is to watch for the edges to be firm and the center to have a slight wobble—kind of like a set custard that’s still a little jiggly. If you bake until too firm, it gets dry, so keep that delicate wobble in mind. I usually check at 50 and then every 5 minutes after until spot-on.
Step 8: Cool & Glaze
Let the pie cool completely on a wire rack—this step is key for the filling to finish setting. Once cool, brush the glaze of maple syrup and melted butter over the top for that signature glossy finish that makes it irresistible. Waiting can feel tough because the smell is heaven, but trust me on this one.
Step 9: Slice & Serve
Use a sharp serrated knife to cut neat slices; dipping the knife in warm water before slicing makes the job easier. Serve at room temperature or lightly warmed with a scoop of vanilla ice cream or a dollop of whipped cream. My kids actually ask for seconds just with a plain fork, no accompaniments needed!
What to Serve It With
For Breakfast: This pie pairs beautifully with a cup of strong black coffee or a chai latte—perfect for weekend brunch when you want something special but not overly heavy.
For Brunch: Present slices on a rustic wooden board with fresh fruit like sliced pears or figs, and a sparkling apple cider to make things feel festive and fresh.
As Dessert: Serve warm with a generous scoop of vanilla bean ice cream or whipped cream. Add a sprinkle of flaky sea salt to heighten the maple flavor and balance the sweetness for an extra wow factor.
For Cozy Snacks: Grab a wedge, curl up with a good book or binge-watch your favorite show, and pair it with hot tea or cocoa—this pie turns any snack time into a mini celebration.
At family gatherings, my maple pecan pie is always the unexpected star. We eat it all up before dessert even officially starts. That warm, sweet smell pulling everyone into the kitchen is something I treasure—and can’t wait to share with you.
Top Tips for Perfecting Your Maple Pecan Pie
Pecan Toasting: Never skip toasting your pecans. It wakes up their flavor and adds a crunch that’s just unmatched. Toast in a dry skillet over medium heat for 5–7 minutes, shaking the pan often to avoid burning.
Mixing Advice: When combining your wet and dry ingredients, stir just until blended. Overmixing can make your filling tough or rubbery. Look for a smooth, glossy batter that holds a soft jiggle.
Swirl Customization: If you want to swirl patterns on top, use a butter knife or skewer and dip it in warm water between strokes for cleaner lines. Avoid mixing too much or you lose the pretty marbling effect.
Ingredient Swaps: I’ve tested this with brown butter instead of melted plain butter for a nutty depth that’s incredible, though it’s a bit richer. For a vegan version, swap eggs with flax eggs (1 tablespoon ground flax + 3 tablespoons water per egg, chilled) and butter with coconut oil. The texture changes slightly but it still tastes fantastic.
Baking Tips: Place your pie on the middle rack for even baking. If your crust browns too fast, cover the edges with foil after 30 minutes to prevent burning. Use a toothpick or thermometer (175°F) to check doneness in the center.
Glaze Variations: For a creamier finish, mix your glaze with a tiny splash of heavy cream or almond milk before brushing. You can also sprinkle a pinch of coarse sugar on top before baking for a sparkly crust. I’ve done this for holiday dinners, and it adds an upscale touch.
One lesson I learned the hard way was to never skip the cooling period. Pulling the pie out early leaves the filling runny, and it’s heartbreaking to watch it slide off your fork. Patience pays off here every time.
Storing and Reheating Tips
Room Temperature: Keep your maple pecan pie covered loosely with foil or a pie keeper on the counter for up to 2 days. This maintains the crust’s crunch and filling’s creaminess.
Refrigerator Storage: For longer storage (up to 5 days), wrap the pie tightly with plastic wrap or place it in an airtight container. The crust might soften a bit, but the flavors deepen wonderfully. Bring it back to room temp before serving for best taste.
Freezer Instructions: You can freeze the pie for up to 3 months. Wrap it tightly in plastic wrap and then foil to prevent freezer burn. Thaw overnight in the fridge and warm slightly—10 minutes at 325°F works well without drying it out.
Glaze Timing Advice: If you plan to store the pie for more than a day, hold off on glazing until just before serving. The glaze stays shiny and fresh and won’t soften if applied too early.
I always find pre-planning helps—especially if you’re taking it to gatherings. Make ahead, store properly, and you’ll be the rockstar with a pie ready to wow at any moment.
Frequently Asked Questions
Final Thoughts
Honestly, this maple pecan pie feels like a warm hug on a plate. It’s rich and buttery but never too heavy, with a sweetness that’s deep and satisfying—not the kind that leaves you overwhelmed but rather pleasantly nostalgic. Every time I bring this pie to the table, it sparks that special “mmm” moment among family and friends, the kind that makes you pause and savor. Whether you’re new to baking pies or a seasoned pro, this recipe has a way of making the kitchen feel cozy and the whole experience joyful.
If you’re into this, you might want to explore some of my other favorites like the maple walnut bread pudding or my take on classic pumpkin pie—both carry those lovely warm flavors perfect for this season. Don’t forget to leave a comment sharing your tweaks or special memories tied to this recipe—those stories truly make my day. Happy baking, and here’s to many delicious maple pecan moments ahead!
Golden Pecan Maple Pie Recipe
Ingredients
Main Ingredients
- 1.25 cups all-purpose flour divided for crust
- 0.5 tsp salt divided for crust and filling
- 0.5 cup unsalted butter cold, cut into 1/2-inch cubes
- 0.25 cup ice water approximate, adjust as needed
- 3 large eggs
- 1 cup maple syrup pure maple syrup
- 0.75 cup dark brown sugar packed
- 1 tbsp all-purpose flour
- 2 tsp vanilla extract
- 0.25 cup butter melted
- 2 cups pecan halves
Instructions
Preparation Steps
- In a large food processor, pulse 0.75 cup flour and 0.25 tsp salt together 2-3 times.
- Add cold cubed butter and pulse until mixture forms coarse crumbs, about 15 seconds.
- Add remaining 0.5 cup flour and pulse a few more times until the mixture looks sandy with a few doughy pieces.
- Transfer mixture to a bowl, gradually add ice water one tablespoon at a time, folding gently until dough holds together when pinched.
- Shape dough into a disc, wrap in plastic wrap, and refrigerate for at least 1 hour.
- Roll out chilled dough between parchment paper and transfer to a 9-inch pie plate. Dock crust with a fork and chill for 2-3 hours or freeze for 1 hour.
- Preheat oven to 350°F (180°C). Line crust with parchment and fill with pie weights, bake for 20-25 minutes until edges just begin to brown. Remove weights and parchment.
- In a bowl, whisk eggs, maple syrup, brown sugar, vanilla extract, melted butter, 0.25 tsp salt, and 1 tbsp flour until smooth.
- Spread pecan halves evenly on the bottom of the crust. Pour filling over pecans.
- Bake pie for 40-45 minutes, covering edges with foil halfway to prevent overbrowning, until the filling is set but slightly jiggly in the center.
- Cool pie on a wire rack for 1 hour, then refrigerate 3-4 hours until firm. Serve chilled or at room temperature.
- Pie can be made 1-2 days ahead and kept refrigerated up to 5 days.