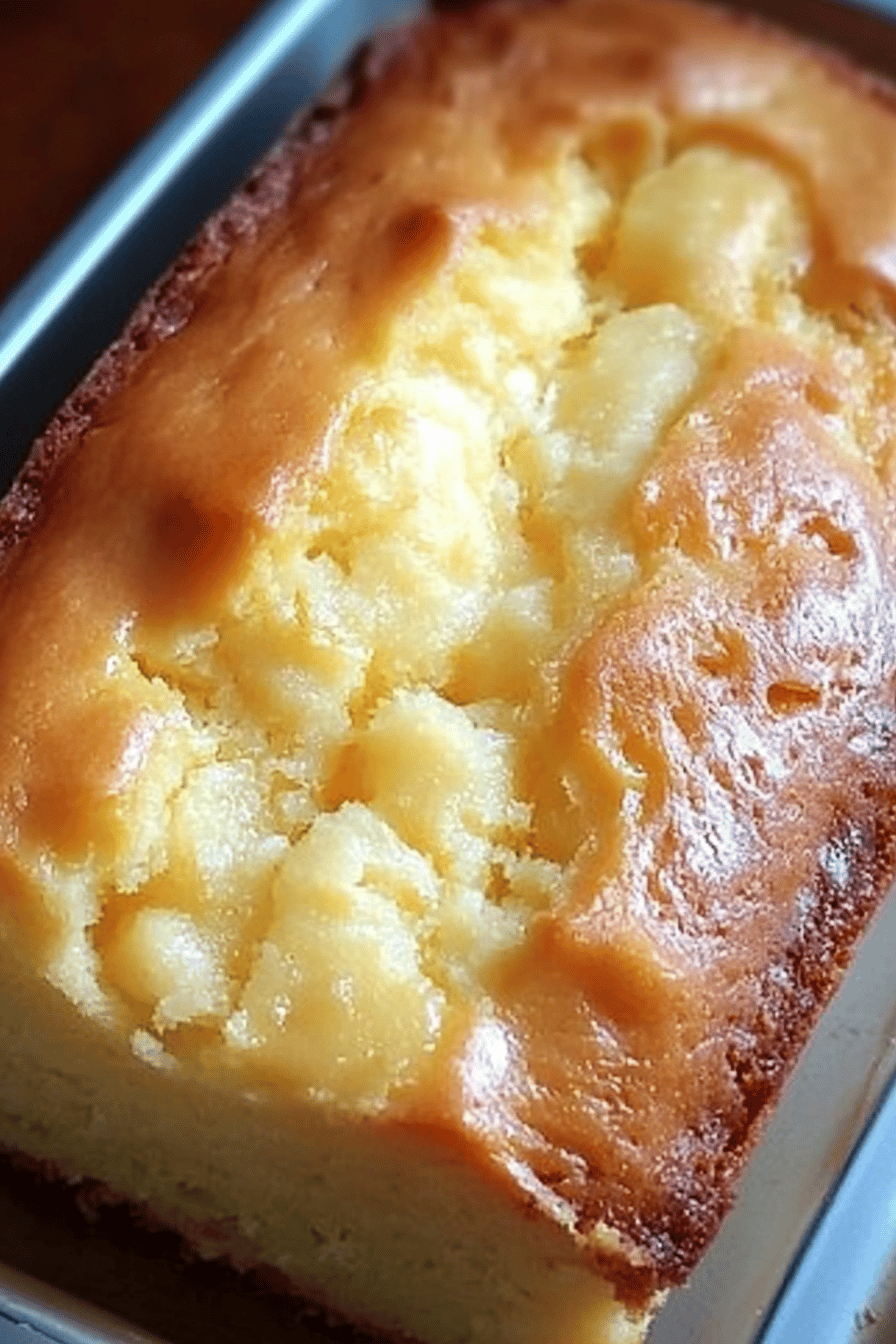
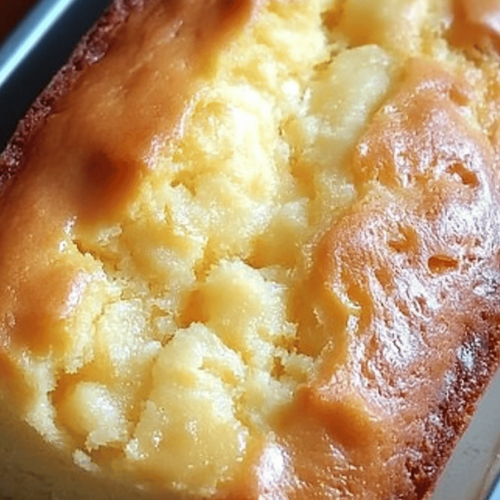
lemon lava cakes
There’s something almost magical about the moment you cut into a lemon lava cake and watch that warm, gooey lemon center ooze out like sunshine on a plate. I still remember the first time I made these — it was a rainy afternoon, and I was craving something bright but comforting. If you’ve ever fallen in love with molten chocolate lava cakes, trust me, these lemon lava cakes will twist your heart in a totally different, tangy way that’s just as irresistible. They’re little bursts of citrus happiness wrapped in tender cake, and they disappear in minutes whenever I serve them. This recipe has been my secret weapon when friends drop by unexpectedly or when I need a sweet pick-me-up that’s fresh and zesty without a ton of fuss. If you like desserts that are sweet but not too heavy, this one’s definitely going to become your new favorite!
What is lemon lava cake?
Think of lemon lava cakes as the lovechild of a lemon soufflé and a molten chocolate cake — but with a twist that’s all about bright, tangy citrus. The name “lava” comes from that beautiful molten center that just flows out when you cut into the cake, creating a luscious pool of lemony goodness. It’s essentially a small, individual cake that’s fluffy on the outside but filled with a gooey, creamy lemon filling on the inside. These cakes have that perfect balance of sweetness and tartness that makes you keep coming back for one more bite. Plus, they’re impressive enough to serve at a dinner party but surprisingly easy to throw together after a long day. If you’re used to heavier desserts, lemon lava cakes will feel like a fresh breeze in your dessert rotation.
Why you’ll love this recipe?
What I love most about this lemon lava cakes recipe is how it hits just the right note between bright and indulgent without overwhelming your palate. The flavor is unbelievably fresh — the zing of lemon zest and juice cuts through the sweet batter, creating this incredible contrast that feels like sunshine on a dessert plate. And seriously, it’s easier than it looks. Once you get the whisking rhythm down, it’s smooth sailing; these cakes bake quickly and don’t require a fancy stand mixer or complicated steps. Plus, the ingredients are straightforward and budget-friendly — I bet you have most of them right in your pantry already.
Another reason I keep coming back to this recipe is its versatility. You can dress up lemon lava cakes with fresh berries for brunch, dust them with powdered sugar for a simple after-dinner treat, or swirl in some lavender or vanilla for a grown-up twist. I once swapped out the lemon curd for raspberry jam in a pinch, and the results were shockingly good! If you’re a fan of classics like molten chocolate lava cakes, these lemon ones refresh your dessert game like nothing else. And my kids? They ask for seconds every time — the citrus sweetness feels light but satisfying, and it’s a great way to sneak some real fruit flavor into their day.
How do I make lemon lava cake?
Quick Overview
Making lemon lava cakes might sound fancy, but it’s really just about mixing a simple batter, preparing a luscious lemon filling, then layering and swirling it all before a quick bake. The highlight, of course, is that melty center that sets these apart from regular cupcakes or cakes — but it’s surprisingly easy to nail with just a few tips. The whole process only takes about 30 minutes from start to finish, which makes these perfect for those moments when you want something extraordinary without spending hours in the kitchen. You essentially whip up a lemon-flavored cake batter, prepare a bright lemon curd or filling, then bake until the edges are set and the middle is liquid gold.
Ingredients
For the Main Batter:
- 1 cup all-purpose flour — go for fresh, sifted flour for the lightest texture
- ¾ cup granulated sugar — I usually keep it the same but feel free to adjust for sweetness
- 2 tsp lemon zest — use unwaxed organic lemons to avoid that bitter pith
- ¼ tsp salt — balances the sweetness beautifully
- ½ tsp baking powder — for that slight lift
- 3 large eggs — room temperature works best for fluffiness
- ½ cup unsalted butter, melted — I always use real butter here; it lends the best richness
- ½ cup buttermilk — it adds a subtle tang and keeps the cake moist
For the Filling:
- ½ cup lemon curd — homemade or store-bought works, just make sure it’s thick and tangy
- 1 tbsp powdered sugar — to mellow out the tartness if your curd is extra sharp
- Optional: a tiny pinch of vanilla extract to round out flavors
For the Glaze:
- 1 cup powdered sugar — sifted for smoothness
- 2-3 tbsp fresh lemon juice — add slowly until desired glaze consistency is reached
- Optional: a pinch of salt to cut the sweetness
- Optional: lemon zest or edible flowers for garnish
Step-by-Step Instructions
Step 1: Preheat & Prep Pan
Preheat your oven to 350°F (175°C). I always butter my ramekins or muffin tins generously and then give them a light dusting of flour or sugar — this last little trick helps the cakes release cleanly with a nice crust on the edges. Set the prepared pans on a baking sheet to catch any drips and make it easier to slide in and out of the oven.
Step 2: Mix Dry Ingredients
In a medium bowl, whisk together the flour, sugar, lemon zest, salt, and baking powder. You’ll want to spread and fluff the mixture with your whisk to avoid any lumps. This step makes all the difference in the cake’s texture; a well-aerated dry mix means lighter cakes.
Step 3: Mix Wet Ingredients
In a separate bowl, beat the eggs until frothy and pale — this aerates the batter and helps it rise. Add the melted butter and buttermilk, mixing thoroughly but gently. If your butter is too hot, the eggs can scramble, so always let it cool before combining. You’ll notice the batter start to glide smoothly at this stage.
Step 4: Combine
Pour the wet ingredients into the dry mix and fold gently with a spatula. Don’t overmix! A few small lumps are okay — overdoing it can toughen the cake. The batter should be thick but pourable, with a velvety texture that holds together. This is where you start smelling that wonderful lemon aroma — it’s like a little promise of what’s to come.
Step 5: Prepare Filling
While the batter rests for a few minutes, mix your lemon curd with powdered sugar and vanilla, if using. The goal is a slightly sweeter, smooth curd that isn’t too runny. If it’s too thick, you can thin it a tiny bit with lemon juice to make it easier to swirl.
Step 6: Layer & Swirl
Spoon a few tablespoons of batter into each ramekin (or muffin tin). Add a dollop of lemon filling in the center, then top with more batter to cover. Use a toothpick or the tip of a knife to swirl the lemon layer into the cake just a bit — you want pretty marbling, not a full mix. Watching the bright yellow swirl peek through the pale cake batter is pure kitchen joy.
Step 7: Bake
Bake the cakes for about 15–18 minutes. The edges should be firm and springy, but the center will still feel soft — that’s exactly what you want. Overbaking is the biggest mistake I made early on; your goal is a liquid center that floods out once cut, not a solidified middle. Oven temps can vary, so check starting at 14 minutes to find your perfect timing.
Step 8: Cool & Glaze
Let the lemon lava cakes cool for about 5 minutes before applying the glaze. While still warm but no longer hot, drizzle the lemon glaze over the top so it seeps just a little into cracks — this adds a glossy, tangy sweetness that’s irresistible. If you add the glaze too soon, it can run off and be watery, so timing is key!
Step 9: Slice & Serve
Cut into your cake straight from the ramekin or turn it out onto a plate for a dramatic presentation. Serve warm so the molten center is still oozy and luscious. I love garnishing with a few fresh berries or a sprig of mint for a pop of color. These really shine with a cup of tea or your favorite morning brew.
What to Serve It With
For Breakfast: This is a little gem with your morning coffee or a light herbal tea. I love serving lemon lava cakes alongside fresh fruit salad or plain Greek yogurt to balance the sweetness and give it a fresh contrast.
For Brunch: Dress these up on a pretty platter with edible flowers and whipped cream or mascarpone cheese. Add a sparkling mimosa or lemonade for a bright, refreshing brunch combo that feels fancy but is super easy.
As Dessert: Pairing lemon lava cakes with vanilla bean ice cream or a dollop of crème fraîche lets the warm and cold contrast shine. Add a drizzle of honey or a spritz of fresh lemon zest right before serving for an extra zingy kick.
For Cozy Snacks: When I’m craving a small afternoon treat with my favorite book, I grab one of these warm lava cakes with a glass of iced green tea or sparkling water. The citrusy tang lifts me right out of the afternoon slump.
We’ve had so many family traditions revolve around these cakes — my kids secretly call them “sunshine cakes” because they brighten even the gloomiest days. It’s fun to try different fruit additions, but honestly, the classic lemon version always steals the spotlight.
Top Tips for Perfecting Your Lemon Lava Cakes
Lemon Zest: Use a microplane to zest just the yellow part — the white pith is bitter and can throw off the balance. Fresh zest makes all the difference, so zest your lemons right before mixing for that intense brightness.
Mixing Advice: Folding gently is your best friend here. I’ve learned the hard way that overmixing leads to dense, chewy cakes instead of light and tender ones. When combining wet and dry ingredients, stop as soon as they come together — a few lumps won’t hurt.
Swirl Customization: Don’t be shy with swirling — a loose, uneven swirl looks way more appetizing and creates pockets of surprise molten lemon gush. Use a toothpick or skewer in a gentle zigzag or circular motion, but don’t mix too much or you’ll lose the lava effect.
Ingredient Swaps: Tried this with almond milk instead of buttermilk and it actually made things creamier, plus it’s great for anyone avoiding dairy. I’ve also swapped the all-purpose flour for a gluten-free blend, but results vary depending on the brand — expect a slightly different texture, but pure lemon flavor still shines through.
Baking Tips: Preheat the oven fully and bake on the middle rack for even heat distribution. If your oven runs hot, lower the temperature by 10 degrees and bake a little longer. Insert a toothpick around the edges — it should come out clean or with a tiny bit of moist cake, never wet batter.
Glaze Variations: If you want a sweeter glaze, add a touch of honey or a splash of vanilla extract. For a thinner drizzle that seeps deeper, mix in a bit more lemon juice, but be cautious not to make it too runny or the glaze will slide right off your cake.
One thing I’ve learned after dozens of batches: don’t rush the glaze. Letting the cakes cool just the right amount before glazing ensures it sticks beautifully. And trust me, that first oozy bite after all these little details comes together? It’s pure joy.
Storing and Reheating Tips
Room Temperature: These lemon lava cakes are best eaten fresh but can sit covered at room temp for up to 24 hours. Cover tightly with plastic wrap or keep in an airtight container to keep that moisture locked in without drying out.
Refrigerator Storage: Leftovers chill nicely for up to 3 days when stored in airtight containers. The cake firms up a bit in the fridge (no lava center, unfortunately), so I recommend warming gently in the microwave for 20-30 seconds before serving to revive some softness.
Freezer Instructions: You can freeze these cakes, but it’s best to do so before glazing. Wrap each cake tightly in plastic wrap and place in a zip-top bag or airtight container. Freeze for up to 2 months. When ready to eat, thaw overnight in the fridge and warm gently before adding fresh glaze.
Glaze Timing Advice: If you’re storing ahead, wait to add the glaze until right before serving to keep its glossy texture. Glaze stored on cakes can soften and drip unexpectedly during refrigeration or freezing.
I’ve found that reheating with a light spritz of water under a paper towel and microwaving in short bursts keeps the cakes moist and gooey — much nicer than the dry microwaves I endured early on! This little tip saved me after a busy night when I prepped these in advance but wanted that molten magic still intact.
Frequently Asked Questions
Final Thoughts
These lemon lava cakes have become a little treasure in my recipe box because they manage to feel both special and effortlessly achievable. Every time I make them, it’s like gifting sunshine in a small cake — that glorious molten center just lights up everyone’s faces. If you’re a dessert lover who’s craving something light but full of flavor, these are worth pulling out your mixing bowls for. Plus, they’re fun to share, whether you’re surprising loved ones or treating yourself after a long day. I’d love to hear how yours turn out or if you’ve experimented with any fun twists — drop a comment or rating below! Happy baking, and may your kitchen be filled with the smell of fresh lemon and sweet memories.
Zesty Molten Cakes How to Bake Them
Ingredients
Main Ingredients
- 1 cup white chocolate baking chips
- 0.5 cup unsalted butter cubed
- 0.67 cup all-purpose flour
- 0.58 cup granulated sugar
- 0.67 cup lemon curd
- 2 tbsp lemon zest from 2 lemons
- 1 tsp pure vanilla extract
- 4 large eggs
- 4 large egg yolks
- 2 tbsp powdered sugar for dusting (optional)
Instructions
Preparation Steps
- Preheat oven to 425°F. Spray six 6-ounce ramekins with nonstick spray and place on a baking sheet.
- In a microwave-safe bowl, melt white chocolate chips and cubed butter for 1 minute. Stir and continue microwaving in 15-second intervals until smooth.
- Stir in flour, granulated sugar, lemon curd, lemon zest, and vanilla extract just until combined.
- Add eggs and egg yolks, mixing until well incorporated.
- Divide batter evenly among ramekins, filling each about two-thirds full.
- Bake for 20 to 25 minutes until tops are browned and spring back when lightly touched.
- Let cakes rest in ramekins for 5 minutes.
- Run a knife around ramekin edges to loosen cakes. Invert onto plates, let rest 1 minute, then carefully remove ramekins.
- Dust with powdered sugar if desired before serving.