kipflikeef croissant rolls
Oh, you guys! I’ve been meaning to share this with you for ages. It feels like spilling a precious family secret, but honestly, these kipflikeef croissant rolls are just too good not to spread around. I remember the first time I tasted something like this – it was at a little bakery tucked away on a side street during a trip to Austria, and it just blew my mind. The flaky, buttery layers of a croissant married with a slightly sweet, impossibly tender roll? It was pure magic. For years, I tried to recreate that feeling, that perfect bite, and I think I’ve finally cracked it. These aren’t your everyday breakfast rolls, but they’re not so fussy that you can only make them for special occasions either. They strike that perfect balance, offering a little bit of everyday indulgence that always feels special. If you’ve ever had those amazing Cinnamon Rolls that just melt in your mouth, imagine that texture but with a more refined, subtly sweet flavor profile and an almost ethereal lightness. That’s what we’re aiming for here, and trust me, we’re going to get there together.
What are Kipflikeef Croissant Rolls?
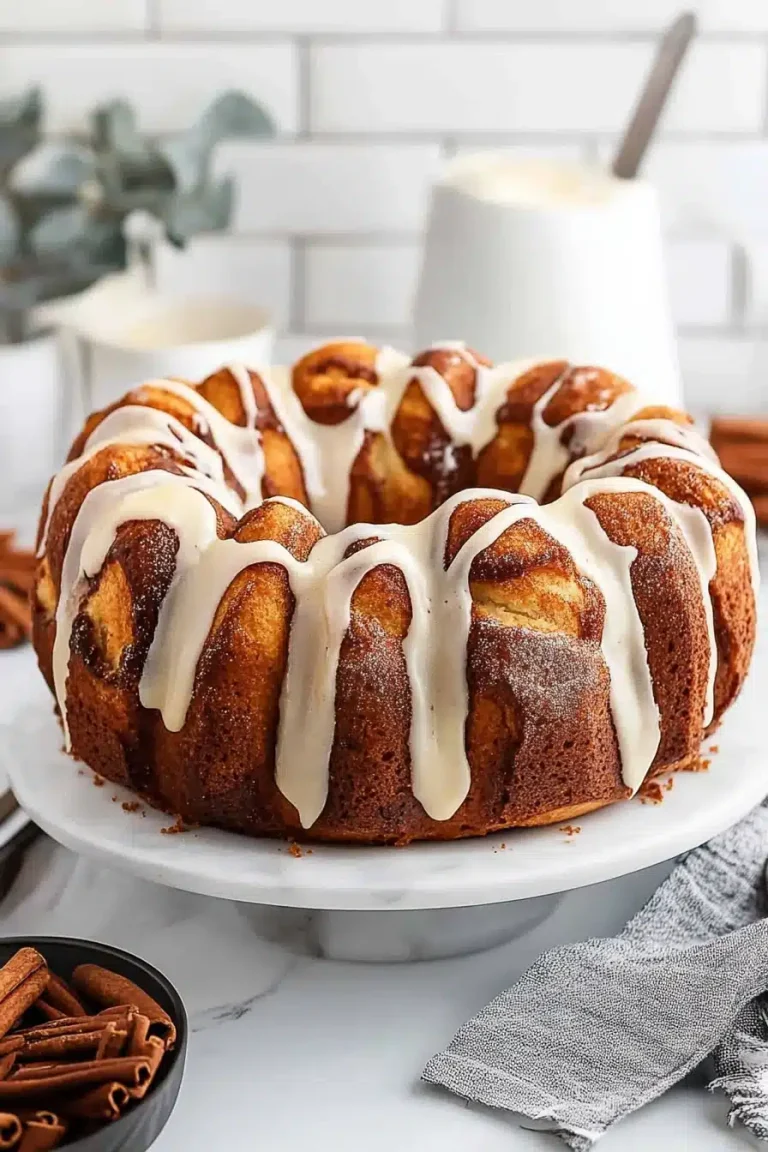
So, what exactly *are* kipflikeef croissant rolls? It’s a name that sounds fancy, I know, but the concept is beautifully simple. Think of it as a delightful hybrid. Imagine the airy, shatteringly crisp layers of a traditional croissant, but instead of being rolled into a crescent, the dough is formed into a slightly more substantial, pillow-like roll. The “kipflikeef” part, loosely translated, points to this characteristic shape and texture – a bit like a small loaf or a soft bread roll, but with that undeniable croissant magic in every bite. It’s essentially a laminated dough, meaning layers upon layers of butter and dough are folded and rolled out many times, creating those signature flaky layers. But instead of a plain croissant, we’re shaping it into a roll, often with a delicate swirl of sweetness and perhaps a hint of spice baked right in. It’s less about being a sweet pastry like a Cinnamon Roll and more about achieving an incredibly light, buttery bread that has the *soul* of a croissant. It’s the kind of thing you might find at a high-end bakery, but I promise, it’s totally achievable in your own kitchen.
Why you’ll love this recipe?
Honestly, where do I even begin? There are so many reasons why these kipflikeef croissant rolls have become a staple in my baking rotation. First and foremost, the flavor is just out of this world. We’re talking about that rich, buttery goodness that only comes from a well-made laminated dough, but it’s balanced with just the right amount of sweetness. It’s not cloying; it’s more of a subtle, elegant sweetness that makes you want to savor every single bite. And the texture! Oh my goodness, the texture. They are impossibly light and airy, with those delicate layers that practically dissolve on your tongue. When they’re fresh out of the oven, the outside has a slight crispness, while the inside is soft, tender, and unbelievably flaky. It’s a textural masterpiece. What I also love is how surprisingly approachable this recipe is. I know laminated dough can sound intimidating, but I’ve broken it down into manageable steps, and with a little patience, you’ll be amazed at what you can create. Plus, these are wonderfully cost-effective compared to buying them from a bakery – you get so many for the price of just a couple from a fancy shop. And the versatility! They’re perfect on their own with a cup of coffee, but they also hold up beautifully when paired with jam or a smear of butter. I’ve even enjoyed them alongside a light, savory brunch, believe it or not! They have this inherent elegance that makes them feel special, but they’re also comforting and familiar. They’re the kind of thing that makes people ooh and aah when you bring them out, and you get to feel like a baking rockstar without all the stress.
How do I make a Kipflikeef Croissant Roll?
Quick Overview
Making these involves creating a rich, buttery dough, laminating it with more butter to develop those signature flaky layers, forming them into beautiful rolls, and then baking them to golden perfection. It’s a process that requires a bit of chilling time to keep the butter firm, which is key to achieving those distinct layers. Don’t worry, though; most of the time is hands-off! You’ll be folding and chilling, folding and chilling, which allows the gluten to relax and the butter to stay distinct. The shaping is also quite straightforward, and the final bake results in the most incredible aroma filling your kitchen. It’s a labor of love, for sure, but the payoff is absolutely worth every minute.
Ingredients
For the Main Dough:
You’ll need about 4 cups of all-purpose flour. I always opt for a good quality, unbleached all-purpose flour; it makes a difference in the texture. You’ll also want 1/2 cup of granulated sugar for a touch of sweetness in the dough itself, 1 teaspoon of salt to balance the flavors, and 1 packet (about 2 1/4 teaspoons) of active dry yeast. For the liquid, 1 cup of whole milk, warmed slightly (think lukewarm bathwater, not hot!), and 1/4 cup of unsalted butter, melted and slightly cooled. And don’t forget 1 large egg, lightly beaten, to enrich the dough.
For the Butter Block:
This is where the magic happens! You’ll need 1 cup (2 sticks) of unsalted butter. It’s crucial that this butter is very cold. I usually pop it in the freezer for about 15-20 minutes before I’m ready to use it. You want it firm but not rock-solid, so it can be rolled out easily. I like to give it a quick pulse in a food processor with a tablespoon of flour to help bind it slightly, but you can also just pound it into a flat rectangle with a rolling pin between parchment paper.
For the Filling (Optional but Recommended!):
This is where you can really play. A simple filling can be made with 1/4 cup of softened unsalted butter, 1/4 cup of Brown Sugar (light or dark works!), and 1 teaspoon of ground cinnamon. For a bit of extra flair, you can add a pinch of nutmeg or even a bit of finely chopped zest from an orange or lemon. If you want to keep it super simple, you can even just brush the dough with melted butter and sprinkle with sugar and cinnamon. Some people even love a poppy seed filling – it’s all up to you!
For the Glaze:
A simple glaze is usually best to let the croissant roll flavor shine. You’ll want about 1 cup of powdered sugar, sifted to avoid lumps. Add 2-3 tablespoons of milk or cream (heavy cream makes it extra rich!) and a tiny splash of vanilla extract. You can also add a little lemon juice for a hint of tang, which is really lovely. Whisk it all together until smooth. You want a consistency that’s thick enough to coat, but thin enough to drizzle easily.
Step-by-Step Instructions
Step 1: Preheat & Prep Pan
First things first, preheat your oven to 375°F (190°C). While the oven is warming up, get your Baking Pan ready. I usually use a 9×13 inch baking pan. Lightly grease it with butter or non-stick cooking spray, or line it with parchment paper. If you’re lining with parchment, make sure it has a little overhang on the sides; this makes it super easy to lift the baked rolls out later.
Step 2: Mix Dry Ingredients
In a large mixing bowl, whisk together the all-purpose flour, granulated sugar, salt, and active dry yeast. Make sure everything is well combined. This ensures the yeast is evenly distributed and ready to do its job. It’s a simple step, but it’s important for a good, consistent rise.
Step 3: Mix Wet Ingredients
In a separate, smaller bowl or a liquid measuring cup, combine the lukewarm milk, melted and slightly cooled butter, and the lightly beaten egg. Whisk it all together until it’s just combined. The milk needs to be warm enough to activate the yeast but not so hot that it kills it – think comfortable bathwater temperature. If it’s too hot, let it cool down a bit!
Step 4: Combine
Pour the wet ingredients into the dry ingredients. Stir with a wooden spoon or a sturdy spatula until a shaggy dough starts to form. Then, turn the dough out onto a lightly floured surface and knead for about 5-7 minutes. You’re looking for a dough that’s smooth, elastic, and slightly tacky, but not sticky. If it’s too sticky, add a tiny bit more flour, a tablespoon at a time. If it’s too dry, add a tiny bit more milk. The goal is a soft, pliable dough.
Step 5: Prepare Butter Block & First Fold (Lamination)
While the dough is resting for a few minutes, prepare your butter block. Place your very cold butter between two sheets of parchment paper and pound it with a rolling pin or a meat mallet until it forms an even rectangle, about 6×8 inches. If you’re using a food processor, pulse the butter with a tablespoon of flour until it just starts to come together. Lightly flour your work surface and roll out your dough into a rectangle that’s roughly 10×12 inches. Place the butter block onto one half of the dough rectangle (so it covers about 6×8 inches). Fold the other half of the dough over the butter, like closing a book. Pinch the edges to seal the butter inside. Now, very gently, roll this package out into a long rectangle, about 8×16 inches. Try to keep the pressure even to avoid the butter breaking through. Now, perform your first “fold.” Fold one-third of the dough over the middle section, and then fold the remaining third over that, like folding a letter. You’ve just done your first fold! Wrap this dough package tightly in plastic wrap and refrigerate for at least 30 minutes. This chilling step is crucial for keeping the butter firm and separate, which creates those flaky layers.
Step 6: Repeat Folds
After the dough has chilled for 30 minutes, take it out and place it on a lightly floured surface with the seam facing you. Roll it out again into a long rectangle, about 8×16 inches. Perform another letter fold (fold one-third, then the other third). Wrap and refrigerate for another 30 minutes. Repeat this rolling, folding, and chilling process two more times, for a total of four folds. After the final fold and chill, your dough should be smooth, pliable, and have visible layers when you cut into a scrap piece. Refrigerate for at least 1 hour, or preferably overnight, before shaping.
Step 7: Prepare Filling
While the dough is chilling for its final rest, you can make your filling. In a small bowl, combine the softened butter, Brown Sugar, and cinnamon. Mix until it forms a spreadable paste. If you’re using zest or other flavorings, mix them in here. If you’re going super simple, just have your melted butter and sugar ready.
Step 8: Roll & Swirl
Once the dough has chilled sufficiently (it should be firm but still pliable), take it out and roll it into a large rectangle, about 12×18 inches. Spread the filling evenly over the dough, leaving about a 1/2 inch border along one of the long edges. Now, starting from the long edge *opposite* the border, carefully roll the dough up tightly into a log. Pinch the seam to seal it. Trim off the uneven ends if you like. Then, using a sharp knife or a bench scraper, cut the log into 12 equal pieces, about 1.5 inches thick. These are your rolls! Place the cut rolls cut-side up into your prepared baking pan, leaving a little space between them as they will expand.
Step 9: Bake
Cover the pan loosely with plastic wrap and let the rolls rest at room temperature for about 30-60 minutes, or until they look slightly puffy. This is their final proof. Preheat your oven to 375°F (190°C) if you haven’t already. Bake the rolls for 20-25 minutes, or until they are golden brown and puffed up beautifully. The kitchen will smell absolutely divine at this point – it’s one of my favorite parts!
Step 10: Cool & Glaze
Once they’re out of the oven, let the rolls cool in the pan for about 10-15 minutes. While they’re still warm, you can prepare your glaze. Whisk together the sifted powdered sugar, milk/cream, and vanilla extract until smooth. You want a drizzly consistency. Drizzle the glaze generously over the warm rolls. The glaze will melt slightly and create a lovely sweet coating. Let them cool a bit more before serving.
Step 11: Slice & Serve
These are best served warm, when the buttery layers are at their most tender and the glaze is slightly gooey. You can serve them right from the pan, or carefully lift them out using the parchment paper overhang. They are perfect for breakfast, brunch, or even a special afternoon treat.
What to Serve It With
Oh, the possibilities are endless, and honestly, they’re so good they don’t *need* anything else. But if you want to elevate the experience, here are some of my favorite ways to enjoy these kipflikeef croissant rolls:
For Breakfast: The absolute classic is a steaming mug of coffee. Seriously, it’s a match made in heaven. The rich coffee cuts through the butter beautifully. A good quality black coffee, a creamy latte, or even a strong espresso all work wonders. I also love them with a glass of freshly squeezed orange juice. For a slightly more substantial breakfast, pair them with a side of scrambled eggs or some crispy bacon. It’s a lovely contrast between the sweet, flaky roll and the savory egg and pork.
For Brunch: These rolls really shine at a brunch spread. They add a touch of elegance without being fussy. Imagine them alongside some fresh fruit salad – the sweetness of the berries and melon is a perfect complement. They’re also fantastic with a light quiche or a frittata. For beverages, think mimosas, bellinis, or even a nice sparkling rosé. They add that little something special to make a brunch feel like a real occasion.
As Dessert: Don’t be afraid to serve these as a dessert! They are wonderful with a scoop of good quality vanilla bean ice cream. The warm, soft roll with cold, creamy ice cream is divine. A drizzle of warm caramel sauce or a berry coulis takes them to another level. They are also lovely served with a simple cup of tea, especially an Earl Grey or a fragrant herbal blend.
For Cozy Snacks: On a chilly afternoon, there’s nothing better than one of these rolls with a warm cup of hot chocolate. The rich chocolate and buttery pastry are pure comfort. They’re also fantastic on their own for an afternoon pick-me-up when you need a little treat to get you through the rest of the day. My kids absolutely love them as an after-school snack, especially with a glass of cold milk!
Top Tips for Perfecting Your Kipflikeef Croissant Rolls
I’ve learned a few things over the years of making these, and I’m happy to share them so you can achieve bakery-quality results right in your own kitchen. These aren’t super complicated, but a few key techniques really make all the difference.
Dough & Butter Temperature is Key: This is probably the MOST important tip for laminated doughs. The butter needs to stay cold and distinct from the dough throughout the folding process. If your kitchen is warm, don’t hesitate to pop the dough back into the fridge for an extra 15-20 minutes between rolling and folding if it starts to feel soft or sticky. This prevents the butter from melting into the dough, which would result in a less flaky texture. I always keep a bag of ice water handy to quickly cool down my hands if they get too warm.
Gentle Rolling, Even Pressure: When you’re rolling out the dough and the butter block, use gentle, consistent pressure. You don’t want to press too hard, which can tear the dough and force the butter out. Imagine coaxing the dough into shape rather than forcing it. Aim for even thickness across the rectangle to ensure uniform layers.
Don’t Skip the Chilling Times: I know it’s tempting to rush through the chilling steps, but they are absolutely essential. The resting periods allow the gluten in the flour to relax, making the dough easier to roll without shrinking back. More importantly, they ensure the butter stays cold and firm. Patience here will pay off in spectacular flaky layers.
Sharp Knife for Clean Cuts: When you’re cutting the dough log into rolls, use a very sharp knife or a bench scraper. A dull knife will mash the layers, squishing out the beautiful structure you’ve worked so hard to create. A clean cut will help the rolls maintain their shape and rise better in the oven.
Watch the Bake, Not Just the Clock: Ovens can vary so much! While the recipe gives a baking time, always keep an eye on your rolls. They should be beautifully golden brown and puffed. If you notice one side browning faster than the other, you can carefully rotate the pan halfway through baking. The centers should feel firm to the touch when they’re done, not jiggly.
Glaze Consistency is Personal: The glaze is designed to be drizzled, but you can adjust it to your liking. If it’s too thick, add a tiny bit more milk or cream, a teaspoon at a time, until it reaches your desired drizzling consistency. If it’s too thin, add a little more sifted powdered sugar. I often like to make a slightly thicker glaze and use a spoon to dollop it on top, which gives a nice, thick sweet topping.
Ingredient Swaps: While I love this recipe as is, I’ve experimented a bit! If you want a slightly different flavor profile in the dough, you can substitute up to half of the all-purpose flour with bread flour for a chewier texture. For the filling, if you don’t have brown sugar, granulated sugar mixed with a teaspoon of molasses will work in a pinch. For the glaze, you can use water instead of milk for a thinner, less rich icing, or even a splash of lemon juice for a tangy finish.
Storing and Reheating Tips
These rolls are truly at their absolute best when they’re fresh, ideally within a few hours of baking. The flaky layers are at their peak crispness, and the inside is soft and tender. But I know life gets busy, and sometimes you just can’t eat them all at once!
Room Temperature: If you have leftovers and your kitchen isn’t too warm, you can store them in an airtight container at room temperature for up to 24 hours. They might lose a little bit of their crispness, but they’ll still be wonderfully soft and flavorful. I try to keep them covered to prevent them from drying out. If you’re in a humid climate, it’s probably best to refrigerate them sooner rather than later.
Refrigerator Storage: For longer storage, wrap the cooled rolls tightly in plastic wrap, then place them in an airtight container or a freezer-safe bag. They should keep well in the refrigerator for up to 3-4 days. The texture will change slightly; they’ll become denser and less flaky, but still quite delicious, especially when reheated.
Freezer Instructions: These freeze beautifully! Once completely cooled, wrap each roll individually and tightly in plastic wrap, then place them in a freezer-safe bag or container. They can be stored in the freezer for up to 2-3 months. Thaw them overnight in the refrigerator, or on the counter for a few hours. For the best results, I always recommend reheating them.
Glaze Timing Advice: If you plan to store them, I highly recommend glazing them *after* they have cooled slightly and are ready to be served, or just before serving. If you glaze warm rolls and then store them, the glaze can become sticky and messy. If you freeze them, I’d suggest freezing them *un-glazed* and then glazing them after reheating when you’re ready to serve. It keeps the glaze fresh and prevents it from becoming gummy.
Reheating: My favorite way to reheat these is in a moderate oven. Place the rolls on a baking sheet and bake at around 300°F (150°C) for 5-10 minutes, or until warmed through and slightly crisped up again. This really revives that lovely flaky texture. You can also gently reheat them in a toaster oven or even in a skillet on low heat for a few minutes, being careful not to burn them. Microwaving is an option for a quick warm-up, but it can make them a bit soft and chewier, so it’s not my top choice for texture.
Frequently Asked Questions
Final Thoughts
There you have it, my friends! My go-to recipe for kipflikeef croissant rolls. I truly hope you give these a try. They represent that perfect blend of comfort and elegance, something that feels special enough for a weekend treat but manageable enough for when you just need a little something delicious to brighten your day. The process of making laminated dough can seem a bit daunting at first, but trust me, once you get the hang of it, it’s incredibly rewarding, and the results are just spectacular. The smell alone when they’re baking is enough to make your entire house feel like home. If you try these, please, please let me know how they turn out! I love hearing about your baking adventures. Tag me on social media or leave a comment below – I’m always so eager to see your creations and hear your thoughts. And if you enjoyed these, you might also love my recipe for [link to another buttery pastry recipe, e.g., Sourdough Cinnamon Rolls] or my easy [link to a simpler sweet bread recipe, e.g., Brioche Buns]. Happy baking, and I can’t wait to hear what you think!

Easy Kipflikeef Croissant Sesame Seed Rolls
Ingredients
Dough Ingredients
- 0.05 cup active dry yeast
- 1 tablespoon sugar
- 0.75 cup warm water
- 6 cups all purpose flour
- 1 cup warm milk
- 0.5 cup vegetable oil
- 1 teaspoon salt
- 3 large eggs
Filling and Topping
- 8 tablespoons butter melted
- 1 cup finely crumbled Feta cheese
- 1 cup Ricotta Cheese
- 2 eggs beaten for glaze
- 1 tablespoon water for glaze
- 0.25 cup sesame seeds
Instructions
Preparation Steps
- Activate the yeast: In a small bowl, combine the yeast, sugar, and warm water. Let it sit in a warm place for about 15-20 minutes until it becomes frothy.
- In a large mixer bowl, add the flour, warm milk, vegetable oil, salt, and eggs. Make a well in the center.
- Pour the activated yeast mixture into the well in the flour mixture. Mix with a large spoon until combined.
- Knead the dough using a dough hook on a stand mixer for about 2-3 minutes, or until the dough pulls away from the sides of the bowl. Add a tablespoon of milk if too dry, or a tablespoon of flour if too wet. The dough should not be sticky.
- Shape the dough into a ball. Lightly grease a large bowl with cooking spray and sprinkle with flour. Place the dough in the bowl, turning to coat. Cover and let rise in a warm spot for 30 minutes.
- Prepare the filling by combining the crumbled feta cheese and ricotta cheese in a bowl. Set aside.
- Preheat the oven to 400°F (200°C).
- Punch down the dough and turn it onto a lightly floured surface. Divide the dough into 6 equal pieces. Shape each piece into a ball.
- Roll out each dough ball into a round circle, about the size of a medium pizza. Flour your work surface as needed to prevent sticking.
- Cut each dough circle into 8-12 slices, depending on desired roll size.
- Place about 1/2 to 1 tablespoon of the cheese filling on the widest part of each dough slice, near the center. Be careful not to overfill.
- Fold the sides of the dough over the filling and roll up to enclose. Repeat with the remaining dough slices.
- Transfer the rolls to baking sheets. Place a pat of melted butter on top of each roll and bake for 5 minutes.
- In a small bowl, beat together the 2 eggs and 1 tablespoon of water for the glaze.
- Remove the rolls from the oven, brush them with the egg glaze, and sprinkle with sesame seeds. Continue baking for another 11-13 minutes, or until golden brown.
- Serve warm, optionally with an extra pat of butter on top. Enjoy!