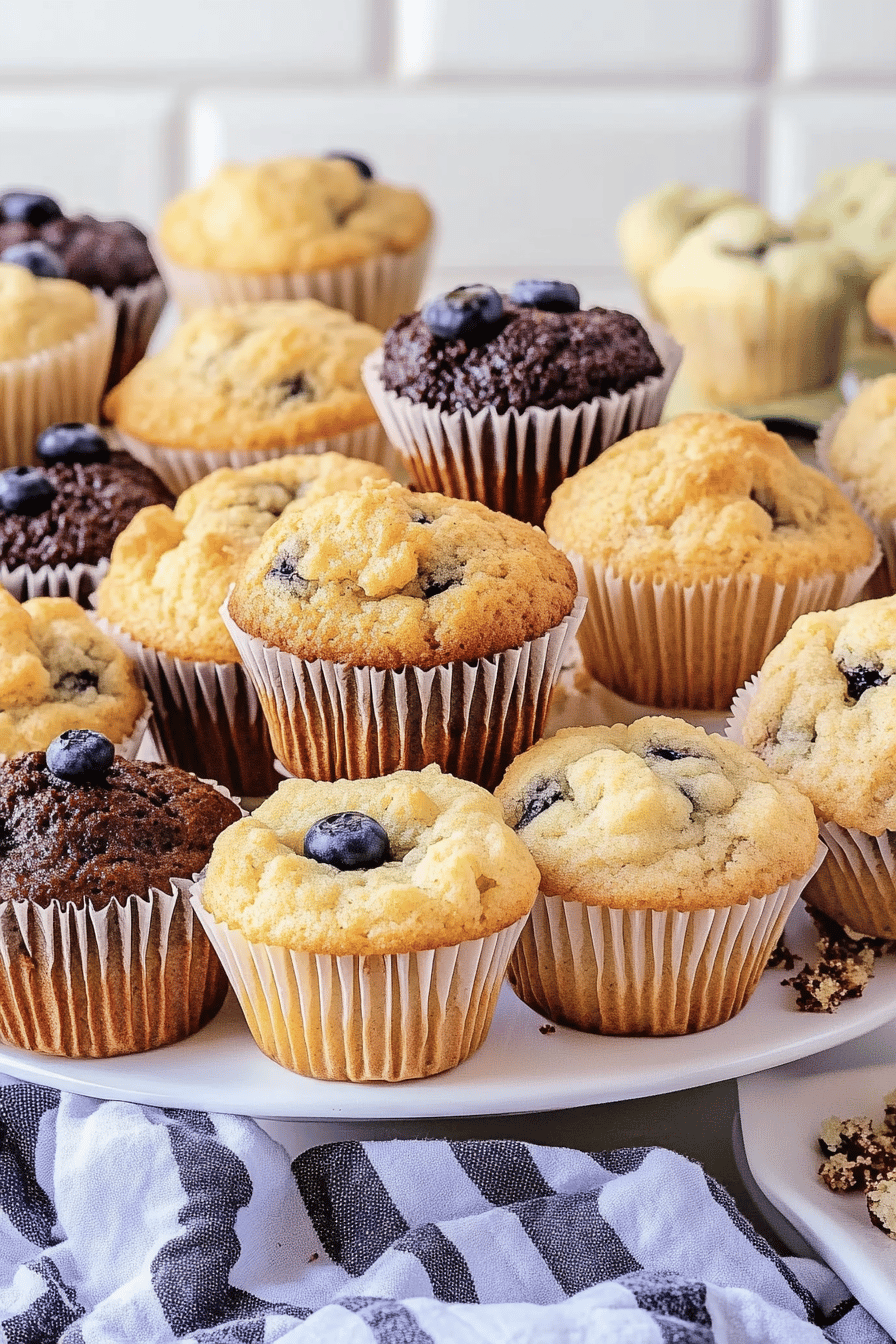
Homemade Muffins Recipe
There are certain recipes that just feel like coming home, aren’t there? For me, that’s this homemade Muffins Recipe. It’s not just about the taste, though oh my goodness, the taste is divine. It’s about the comfort, the nostalgia, and the sheer, unadulterated joy of pulling a batch of these beauties out of the oven. I remember my grandma making muffins like these when I was little, the whole house filling with this warm, sweet aroma that was always followed by a chorus of happy sighs. This particular version is my own adaptation, honed over years of baking for busy mornings, impromptu coffee dates, and those late-night cravings when only something homemade will do. It’s a lifesaver, truly. If you’ve ever felt intimidated by baking, or just want a reliable, delicious go-to, you’re in the right place. Forget those store-bought imposters; these homemade muffins are about to become your new best friend. They’re like a hug in edible form, and honestly, who doesn’t need more of that?

What are homemade muffins?
So, what exactly are these homemade muffins that I’m raving about? Think of them as your personal, portable slices of happiness. They’re essentially individual-sized quick breads, leavened with baking soda or baking powder, resulting in a tender, moist crumb. Unlike cupcakes, which are often richer and frosted, muffins tend to be a bit more rustic and wholesome, though mine definitely lean towards the deliciously decadent side. The name “muffin” itself has an interesting history, possibly deriving from the Old French word “moufflet,” meaning soft. And soft they are! This recipe creates a muffin that’s delightfully light but still substantial enough to feel like a real treat. It’s the perfect balance between a dense, cake-like muffin and a lighter, scone-like texture. It’s the kind of thing you can whip up with pantry staples, making it incredibly accessible for anyone who wants to bake something special without a fuss.
Why you’ll love this recipe?
What is the secret behind this homemade muffin recipe?
The Flavor Explosion: What is the Flavor Explosion? Oh, the taste! Each bite is a perfect harmony of sweetness, with a wonderfully tender texture that just melts in your mouth. There’s a subtle warmth from the spices that just makes you want to curl up with a good book and a cup of tea. It’s complex enough to be interesting, but familiar enough to be comforting.
Unbelievable Simplicity: This is the part that always surprises people. I’ve stripped away all the unnecessary fuss, so even if you’re a total beginner, you’ll find this straightforward. It’s a “dump and stir” kind of recipe for the most part, which is exactly what I need on those chaotic mornings. No fancy techniques, just pure deliciousness made easy.
Budget-Friendly Bliss: We all know how grocery prices can add up. The beauty of this recipe is that it uses everyday ingredients you likely already have in your pantry or can grab without breaking the bank. Flour, sugar, eggs, a little bit of oil – it’s surprisingly economical for how incredibly satisfying it is. This is a lifesaver for feeding a crowd without feeling the pinch.
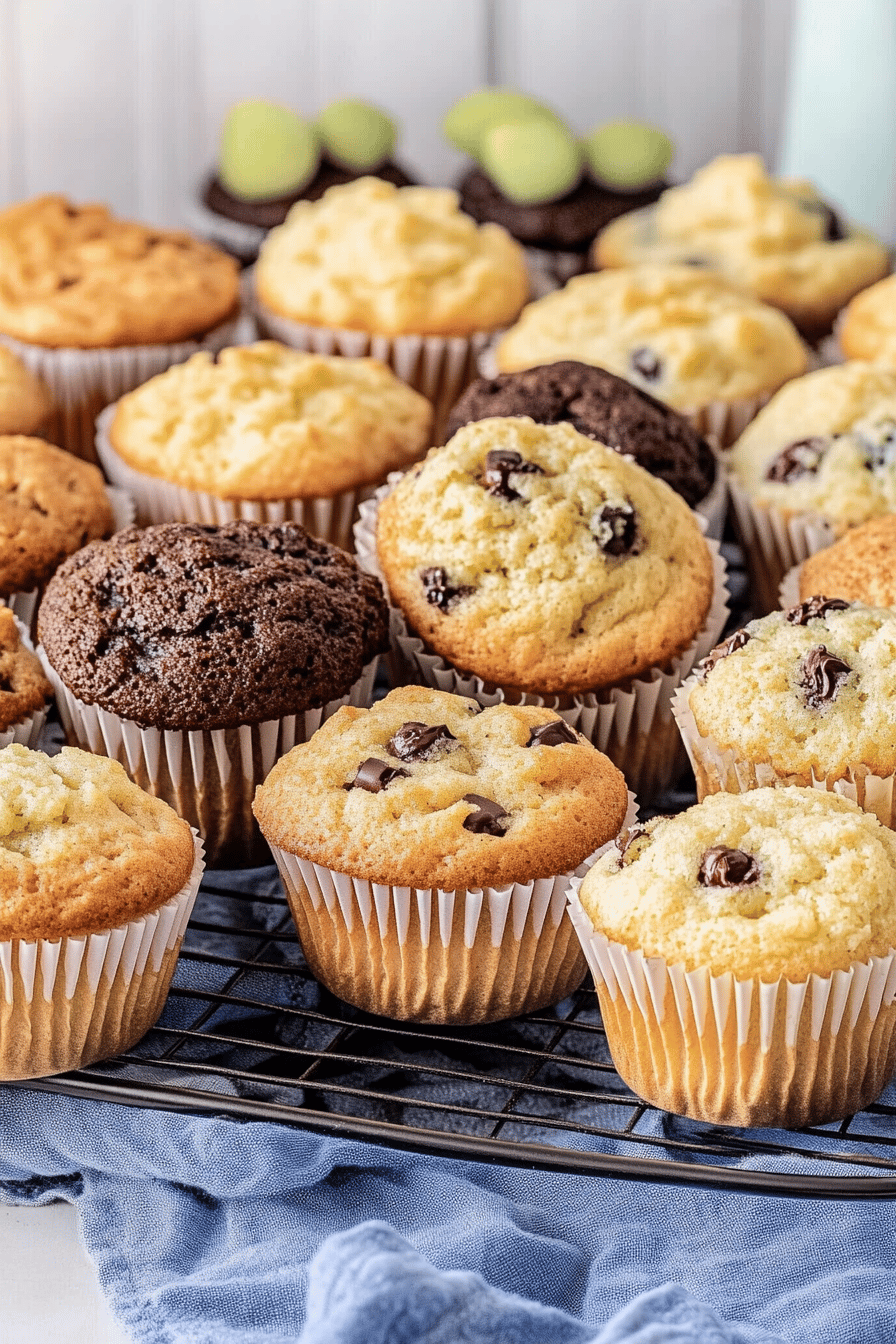
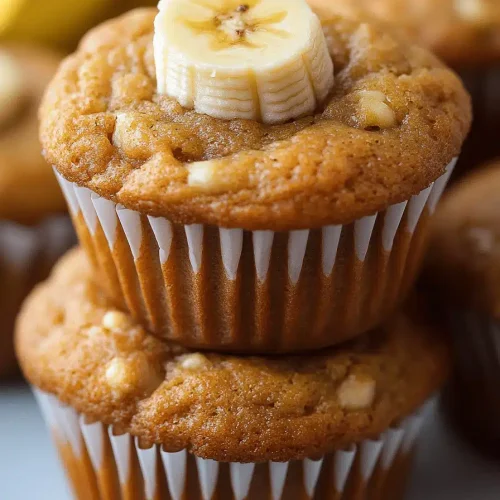
Endless Versatility: This is my absolute favorite part. This recipe is like a blank canvas. While I adore it as is, it’s also the perfect base for so many add-ins. Think blueberries, chocolate chips, nuts, dried fruit, even a swirl of jam. You can customize it to your heart’s content. It’s also fantastic for using up ripe bananas or a handful of berries that are past their prime. What I love most about this is its adaptability; it fits into any meal, any time of day. It’s the kind of recipe that truly shines, no matter how you dress it up. If you’re looking for something similar but perhaps a bit more breakfast-focused, my Easy Banana Bread Recipe is another family favorite!
How to Make Homemade Muffins
Quick Overview
Making these homemade muffins is incredibly simple. You’ll basically whisk together your dry ingredients, then whisk together your wet ingredients, and then combine them until just mixed. The magic really happens when you layer in the flavorful filling and give it a gentle swirl. Bake until golden and fragrant, then finish with a simple glaze. That’s it! The beauty of this method is how it minimizes overmixing, which is key to achieving that wonderfully tender crumb. It’s designed for maximum flavor with minimum effort, and I’ve tested it countless times on busy weeknights.
Ingredients
For the Main Batter:
All-Purpose Flour: 2 cups. I always use unbleached all-purpose flour for the best texture. Make sure to spoon it into your measuring cup and level it off, rather than scooping directly from the bag, which can pack it in too tightly.
Granulated Sugar: 3/4 cup. This gives us that lovely sweetness without being overpowering. If you prefer a less sweet muffin, you can dial this back slightly, but I find this to be the perfect balance.
Baking Powder: 2 teaspoons. This is our main leavening agent, giving the muffins their lift and airy texture. Make sure it’s fresh! Old baking powder can lead to flat, dense muffins, and trust me, nobody wants that.
Salt: 1/2 teaspoon. Salt is crucial for enhancing all the other flavors and balancing the sweetness. Don’t skip it!
Ground Cinnamon: 1 teaspoon. This adds that warm, cozy spice note that makes these muffins so inviting.
Large Eggs: 2. Room temperature eggs incorporate better into the batter. If you forget to take them out ahead of time, you can quickly warm them by placing them in a bowl of warm water for about 5 minutes.
Milk: 1 cup. Whole milk gives the richest flavor and texture, but you can absolutely use 2% or even a non-dairy milk like almond or oat milk. I tested this with almond milk once, and it actually made the batter even creamier!
Vegetable Oil: 1/2 cup. Vegetable oil keeps these muffins incredibly moist. You can also use canola oil or a light-flavored Olive Oil. Melted butter works too, but oil tends to yield a more consistently tender crumb.
Vanilla Extract: 1 teaspoon. Pure vanilla extract makes a huge difference in the depth of flavor. It’s that little something that elevates everything.
For the Filling:
Cream Cheese: 4 ounces, softened. Full-fat cream cheese is best for a rich, decadent filling. Make sure it’s truly softened to room temperature so it mixes smoothly.
Powdered Sugar: 1/4 cup. This sweetens the Cream Cheese filling and gives it a lovely, smooth texture.
Lemon Zest: 1 teaspoon (optional, but highly recommended!). This adds a bright, fresh note that cuts through the richness. It’s a game-changer!
For the Glaze:
Powdered Sugar: 1 cup. Sifted to ensure a smooth, lump-free glaze.
Milk or Cream: 2-3 tablespoons. Start with 2 tablespoons and add more, a teaspoon at a time, until you reach your desired consistency.
Vanilla Extract: 1/2 teaspoon. For that classic sweet finish.
Step-by-Step Instructions
Step 1: Preheat & Prep Pan
First things first, preheat your oven to 375°F (190°C). This ensures the oven is nice and hot when your muffins go in, which helps them rise beautifully. Grab a standard 12-cup muffin tin. I like to use paper liners for easy cleanup, but you can also grease and flour the tin if you prefer. If you’re going the greasing route, make sure to get into all the nooks and crannies.
Step 2: Mix Dry Ingredients
In a large bowl, whisk together the all-purpose flour, granulated sugar, baking powder, salt, and ground cinnamon. Whisking thoroughly is important here; it helps distribute the leavening agent evenly, which means you’ll get evenly risen muffins. You want to see no streaks of flour or baking powder. Aim for a light and airy mixture.
Step 3: Mix Wet Ingredients
In a separate medium bowl, whisk together the eggs until they’re lightly beaten. Then, add the milk, vegetable oil, and vanilla extract. Whisk until everything is well combined and emulsified. The mixture should look smooth and uniform. Remember, room temperature eggs incorporate best!
Step 4: Combine
Now for the magic moment! Pour the wet ingredients into the bowl with the dry ingredients. Using a spatula or wooden spoon, gently fold the ingredients together until they are *just* combined. It’s really important not to overmix here. A few streaks of flour are perfectly okay! Overmixing develops the gluten in the flour, which can lead to tough, rubbery muffins. We want tender, delicate homemade muffins, remember?
Step 5: Prepare Filling
In a small bowl, beat the softened Cream Cheese with the powdered sugar until it’s smooth and creamy. If you’re using it, stir in the lemon zest. This filling is what takes these muffins from good to absolutely glorious. It adds this wonderfully creamy, tangy counterpoint to the sweet muffin batter.
Step 6: Layer & Swirl
Spoon about half of the muffin batter evenly into your prepared muffin cups, filling each about one-third full. Then, place a dollop of the cream cheese filling into the center of each muffin cup. Top with the remaining batter, filling each cup about two-thirds to three-quarters full. Now, here’s the fun part: take a toothpick or a small knife and gently swirl the cream cheese filling into the batter. Don’t over-swirl; you want those beautiful little pockets of cream cheese to remain. A few gentle twists will do the trick!
Step 7: Bake
Place the muffin tin in your preheated oven and bake for 20-25 minutes, or until a wooden skewer or toothpick inserted into the center of a muffin comes out clean. The tops should be golden brown and look beautifully puffed. Ovens can vary, so keep an eye on them. If they’re browning too quickly, you can loosely tent them with foil.
Step 8: Cool & Glaze
Once baked, let the muffins cool in the muffin tin for about 5-10 minutes. This allows them to firm up a bit before you try to remove them. Then, carefully transfer them to a wire rack to cool completely. While they’re cooling, whisk together the sifted powdered sugar, milk (start with 2 tablespoons and add more as needed), and vanilla extract for the glaze. You want a drizzly consistency that’s thick enough to coat but thin enough to pour. Once the muffins are completely cool, drizzle the glaze generously over the tops. Let the glaze set for a few minutes before serving.
Step 9: Slice & Serve
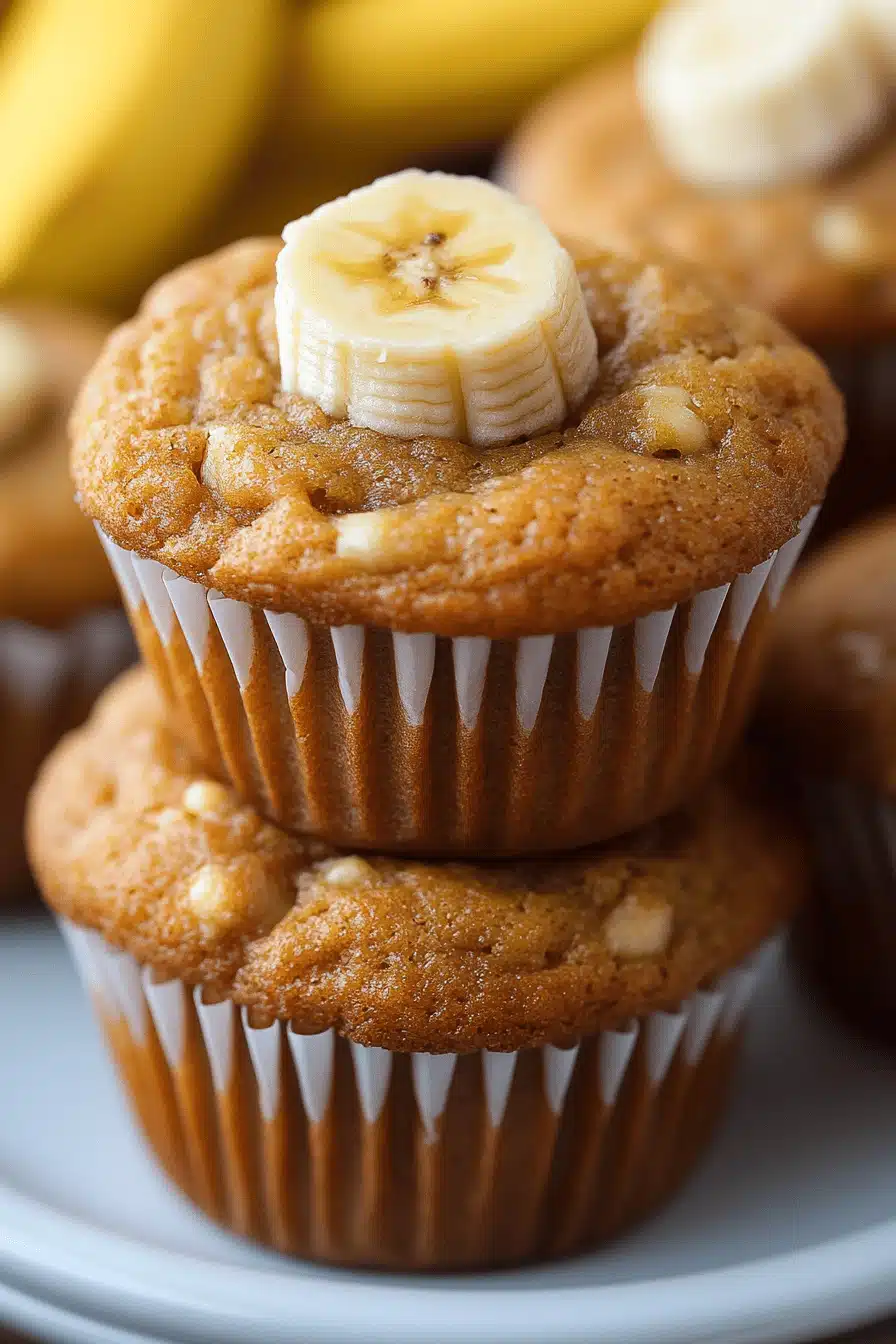
And there you have it! Your absolutely perfect homemade muffins, ready to be devoured. They’re best served at room temperature, so the glaze has set and the flavors have melded. Slice one in half to reveal that beautiful swirl and enjoy the incredible aroma.
What to Serve It With
These homemade muffins are so versatile, they fit into almost any meal or occasion. They’re truly a crowd-pleaser!
For Breakfast: They are, of course, phenomenal on their own with a hot cup of coffee or a glass of cold milk. I love them on busy mornings when I need something quick and satisfying. For a slightly more elaborate breakfast, I’ll pair them with some fresh fruit salad or a dollop of Greek yogurt. The contrast between the sweet muffin and the tartness of berries is just divine.
For Brunch: These muffins add a touch of homemade charm to any brunch spread. They look beautiful nestled alongside quiches, savory egg dishes, or even a charcuterie board. I often serve them with a side of crispy bacon and a mimosa. For a lighter touch, a simple side of fresh berries and whipped cream is always a winner.
As Dessert: Don’t underestimate these beauties as a dessert option! They’re perfect for when you want something sweet but don’t want to bake a whole cake. A warm muffin with a scoop of vanilla bean ice cream is pure bliss. You can also serve them with a light fruit compote or a drizzle of chocolate sauce for an extra indulgence.
For Cozy Snacks: These are my go-to for afternoon tea or a comforting snack anytime. They’re perfect with a steaming mug of hot chocolate on a chilly day. My kids also love them as an after-school treat, and honestly, they usually disappear in minutes. Sometimes, I’ll even just have one with a glass of milk for a light lunch. They’re just so satisfying and always hit the spot!
Top Tips for Perfecting Your Homemade Muffins
Over the years, I’ve learned a few tricks that make my homemade muffins consistently amazing. I’m happy to share them with you so you can achieve muffin perfection too!
Zucchini Prep (If applicable): If you’re adding zucchini to your muffin batter (which is a fantastic way to boost moisture and nutrients!), make sure to squeeze out as much liquid as possible after shredding. Use a clean kitchen towel or cheesecloth. Excess moisture will make your muffins soggy. Grate the zucchini finely for the best texture integration.
Mixing Advice: I can’t stress this enough: do NOT overmix the batter. It’s the single most common mistake people make with muffins. Mix until *just* combined, and don’t worry about a few lumps or streaks of flour. Overmixing develops the gluten, resulting in tough, dense muffins. A gentle hand is key to a tender crumb.
Swirl Customization: For that beautiful marbled effect, don’t overdo the swirling. A few passes with a toothpick or knife are all you need. You want distinct pockets of filling, not a uniform blend. You can also try different patterns – zig-zags, figure-eights, or just gentle stirs. Experiment to see what you like best visually!
Ingredient Swaps:
- Milk: You can swap whole milk for 2% or even non-dairy options like almond, soy, or oat milk. I’ve found almond milk makes it particularly creamy.
- Oil: Canola oil, melted coconut oil, or even a light olive oil work well. If using butter, make sure it’s melted and slightly cooled.
- Sugar: For a less sweet muffin, you can reduce the granulated sugar by 1-2 tablespoons. You can also experiment with brown sugar for a deeper, caramel-like flavor.
- Flour: For a gluten-free version, a good quality 1-to-1 gluten-free baking blend usually works well. Be aware that the texture might be slightly different.
Baking Tips: Always preheat your oven properly. Make sure your baking powder is fresh – test it by dropping a teaspoon into hot water; it should fizz vigorously. Don’t overcrowd the oven; bake in batches if necessary to allow hot air to circulate evenly. If your muffins are browning too quickly on top, you can loosely tent the tin with aluminum foil for the last 5-10 minutes of baking.
Glaze Variations: If you’re not a fan of glaze, you can dust the cooled muffins with powdered sugar using a fine-mesh sieve, or even a sprinkle of cinnamon sugar. For a chocolate glaze, whisk cocoa powder into the powdered sugar and milk mixture. You can also add a tiny pinch of salt to the glaze to balance the sweetness.
Storing and Reheating Tips
Proper storage is key to keeping your delicious homemade muffins fresh and tasty for as long as possible. I’ve found these methods work best:
Room Temperature: Once completely cooled (this is important to prevent condensation, which can make them soggy), store the muffins in an airtight container at room temperature for up to 3 days. If you don’t have an airtight container, you can wrap them tightly in plastic wrap. They’re generally best eaten within the first two days, as they can start to dry out a bit after that.
Refrigerator Storage: For longer storage, up to a week, you can refrigerate your muffins. Place them in an airtight container or a zip-top bag. They can become a bit firmer when chilled, so you’ll likely want to reheat them before enjoying. This is also a good option if you live in a very warm or humid climate where muffins might spoil faster at room temperature.
Freezer Instructions: These homemade muffins freeze exceptionally well, making them perfect for baking ahead. Wrap each completely cooled muffin individually and tightly in plastic wrap, then place them in a freezer-safe zip-top bag or airtight container. They’ll keep their best quality for up to 2-3 months. To thaw, simply remove them from the freezer and let them come to room temperature. You can also reheat them gently.
Glaze Timing Advice: If you plan to store your muffins for more than a day, I often recommend glazing them *after* they’ve been stored and just before serving. This keeps the glaze looking its best, especially if you’re freezing them. If you glaze them before freezing, the glaze might become a bit sticky or textured upon thawing. For room temperature storage for a day or two, glazing them beforehand is usually fine.
Frequently Asked Questions
Final Thoughts
So there you have it – my absolute favorite homemade muffins recipe! It’s more than just a recipe; it’s a little slice of comfort and joy that I love sharing. It’s the perfect example of how simple ingredients can create something truly magical. The aroma alone is enough to brighten any day, and the taste is simply divine. I really hope you give this a try. It’s a recipe that’s been a lifesaver for me, perfect for those moments when you need a little something sweet and homemade without a ton of fuss. If you love this, you might also enjoy my Simple Blueberry Scones for another delightful baked treat. I can’t wait to hear how yours turn out! Please leave a comment below with your thoughts, your favorite add-ins, or any questions you might have. And if you share your creations on social media, be sure to tag me – I love seeing your baking adventures!
Homemade Muffins Recipe
Ingredients
Dry Ingredients
- 2.5 cups all-purpose flour
- 0.5 cup granulated sugar
- 2 teaspoons baking powder
- 0.5 teaspoon salt
Wet Ingredients
- 1 large egg
- 1 cup milk
- 0.33 cup vegetable oil
Instructions
Preparation Steps
- Preheat oven to 400°F (200°C). Line a 12-cup muffin tin with paper liners or grease it well.
- In a large bowl, whisk together the flour, sugar, baking powder, and salt.
- In a separate medium bowl, whisk together the egg, milk, and vegetable oil.
- Pour the wet ingredients into the dry ingredients and stir until just combined. Do not overmix; a few lumps are okay.
- Divide the batter evenly among the prepared muffin cups, filling each about two-thirds full.
- Bake for 18-20 minutes, or until a toothpick inserted into the center of a muffin comes out clean.
- Let the muffins cool in the tin for a few minutes before transferring them to a wire rack to cool completely.