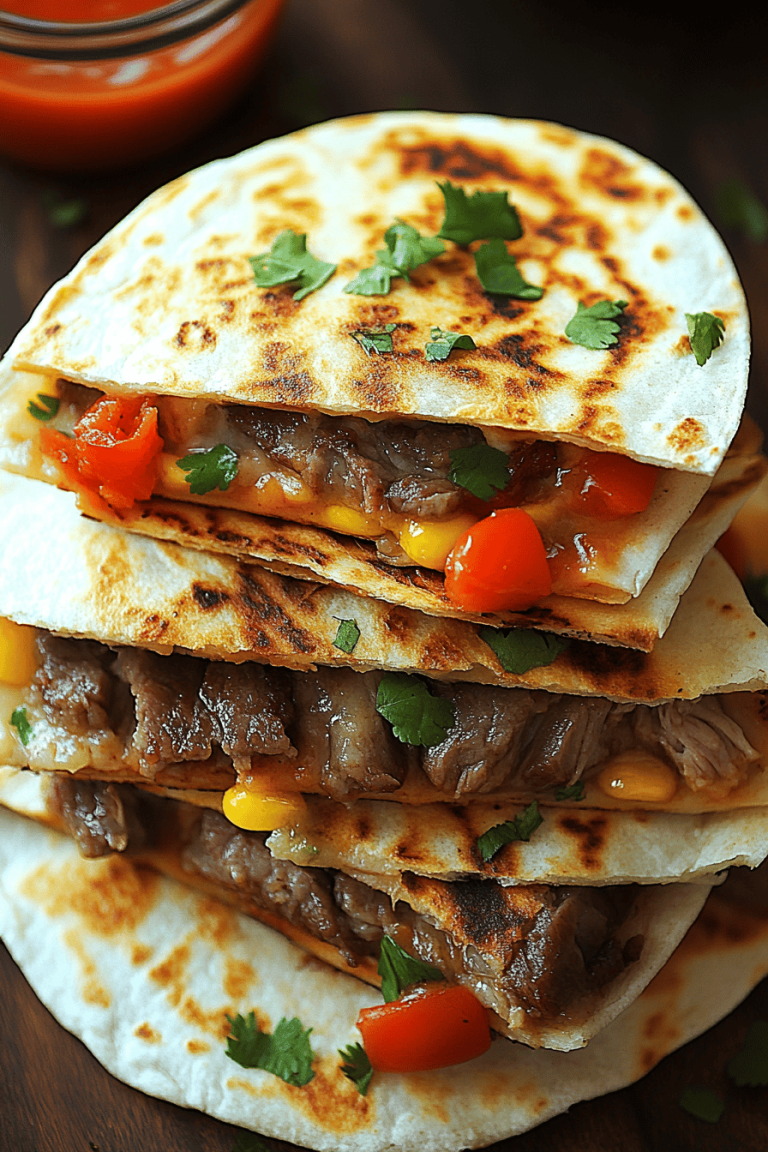
homemade cashew chicken
Steam fogs the kitchen window as the skillet heats and the scent of garlic—that warm, comforting kind that instantly says “home”—fills the room. I’ve been perfecting this homemade cashew chicken for years, chasing the exact balance of crispy coating, glossy-sweet-tresh sauce, and that inevitable crunch from toasted cashews. It’s the kind of dish that tastes like a special treat but is shockingly simple to pull off on a weeknight. It reminds me of a favorite takeout but far more forgiving—and you can tweak the heat and sweetness to match your own crew’s tastes. I still remember the first time I tried to recreate it: the kitchen smelled amazing, the kids hovered, and we all ended up with sauce smeared on our smiles. This is the kind of recipe that earns a permanent spot in the family rotation—the one you reach for when you want something cozy, reliable, and deeply satisfying. This homemade cashew chicken is your new weeknight lifeline, I promise.
What is a cashew chicken?
Think of homemade cashew chicken as a Chinese-American-inspired skillet favorite that delivers big flavor with everyday ingredients. It’s essentially Crispy Chicken tossed with a shower of crunchy cashews, colorful vegetables, and a velvety glaze that’s both sweet and savory. The beauty is that you don’t need fancy equipment or long marinating times—it’s all about building texture: a crisp coating, a tender center, and a sauce that clings to every bite. The name itself hints at comfort and home-cooked warmth; you’ll often hear it described as a home-style version of a restaurant staple, adjusted to fit a busy kitchen and a smart grocery list. It’s one of those dishes that feels exotic enough to feel special, yet friendly enough to master on a Tuesday after school.
Why you’ll love this recipe?
What I love most about this homemade cashew chicken is how makeup-and-makeup-sauce simple it is. The flavor profile hits that sweet-savory harmony you crave, with a ginger-garlic kick that wakes up the palate. The coating stays crisp in the pan and the glaze clings without becoming syrupy or overly sticky. It’s incredibly forgiving—you can use Chicken Thighs for tenderness or breasts for a lighter option, and the veggies are flexible depending on what’s in your crisper. It’s a sauce-slinger’s dream: a glossy finish that’s quick to whisk together and scalable for a crowd. This dish also checks budget boxes—cashews add texture and richness, but you can dial back the nuts or substitute with roasted peanuts if you need to trim costs. My kids actually ask for seconds, which is the best compliment a weekday dinner can get. And because you control the heat, it’s easy to accommodate the spice-phobic and the heat-hungry in the same kitchen—a rare win in a family dinner rotation.
How do I make homemade cashew chicken?
Quick Overview
This is a one-pan bake-and-glaze affair that starts with a crisp, lightly battered chicken, then moves to a colorful veggie bed. The pieces are nestled on a Sheet Pan, baked until golden, doused with a glossy glaze that tastes like it was stirred on the stove, and finished with a crunchy handful of toasted cashews. The magic is in the timing: you want the coating to set, the veggies to stay bright, and the glaze to heat through just enough to cling. Don’t worry if you’ve never baked crispy chicken this way—this method keeps everything juicy and flavorful while still delivering that satisfying bite we crave from cashew chicken. It’s a cozy, hands-off approach that still feels exciting and vibrant on the plate.
Ingredients
For the Main Batter:
- 1 1/2 pounds boneless chicken thighs, trimmed and cut into 1-inch pieces (thighs stay extra juicy, breast works too)
- 1/2 cup cornstarch (for that perfect crisp)
- 1/2 cup all-purpose flour (optional, for extra crunch)
- 1 teaspoon kosher salt
- 1/2 teaspoon garlic powder
- 1 large egg
- 2 tablespoons cold water
For the Filling:
- 1 red bell pepper, sliced into thin strips
- 1 cup snap peas or green beans, trimmed
- 1 small onion, thinly sliced
- 2 cloves garlic, minced
- 1 tablespoon Fresh Ginger, grated
For the Glaze:
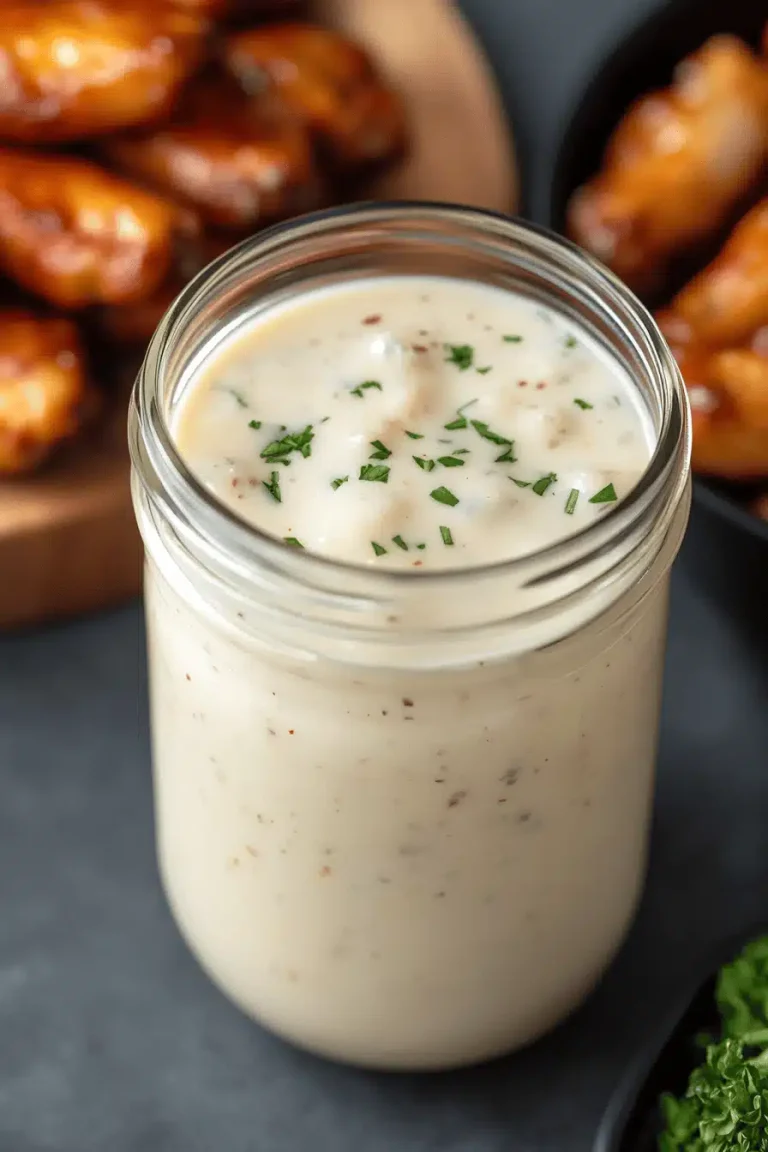
- 3 tablespoons soy sauce (use tamari for gluten-free)
- 2 tablespoons rice vinegar
- 2 tablespoons honey or maple syrup
- 1 tablespoon hoisin sauce (optional, for depth)
- 1 teaspoon sesame oil
- 1-2 teaspoons cornstarch mixed with 1 tablespoon water (slurry)
For finishing:
- 1/2 cup roasted cashews, roughly chopped
- A drizzle of sesame seeds (optional)
Step-by-Step Instructions
Step 1: Preheat & Prep Pan
Heat your oven to 425°F (220°C) and line a large rimmed baking sheet with parchment. If you have a wire rack, set it on the sheet so the chicken can crisp from all sides. I always do this when I want that oven-crisp without deep-frying, because it keeps the coating from sogging while the glaze does its magic later.
Step 2: Mix Dry Ingredients
In a shallow dish, whisk together the cornstarch, flour (if using), salt, and garlic powder. The goal is a light, even coat that sticks without clumping. A quick whisk helps break up any lumps so every piece gets a uniform crust.
Step 3: Mix Wet Ingredients
In another bowl, beat the egg with the cold water. This is your dipping bath that helps the dry coat cling. If you want to skip the egg, you can use a splash of buttermilk or a tablespoon of water with a pinch of baking soda for a similar crisp, but the egg gives a nice chew and color.
Step 4: Combine
Dredge the chicken pieces in the dry mixture until evenly coated, then dip them into the wet mixture. Return to the dry mixture for a second coat if you like extra crunch. Place the coated pieces on the prepared sheet pan in a single layer, giving them space so they bake evenly.
Step 5: Prepare Filling
In a large skillet, heat a tablespoon of oil over medium heat. Add the onion, garlic, and ginger, sautéing until the onions start to turn translucent. Add the bell pepper and snap peas, cooking just until they’re crisp-tender. You’re aiming for color and brightness, not saggy vegetables. This step is your “lift”—the vegetables bring freshness to balance the rich coating.
Step 6: Layer & Swirl
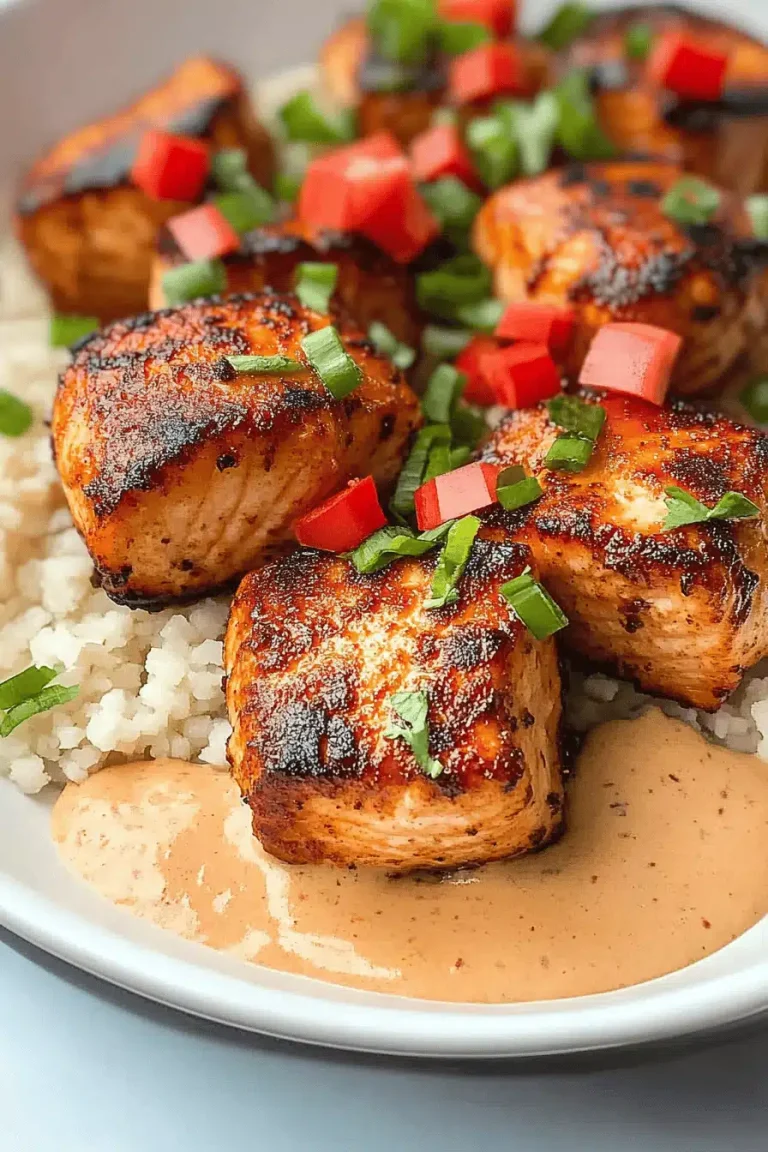
Pop the coated chicken into the oven and bake for about 12-14 minutes, then flip and bake another 6-8 minutes until the pieces are golden and crisp. Remove from the oven and arrange the chicken over the veggie bed on the pan. Brush a light layer of glaze over the top and use a gentle swirl to create a pretty pattern. Scatter the toasted cashews across the top, pressing a few into the edges so they snag a little glaze and sing with flavor.
Step 7: Bake
Return to the oven for 3-5 minutes more to let the glaze set and the crust finish crisping. If you want the glaze really glossy, you can brush on another light coat after it comes out, then let it sit for a minute to thicken to a perfect lacquer-like shine.
Step 8: Cool & Glaze
Drizzle a final touch of glaze across the top once the pan has cooled just a touch. If the pan looks a little dry, spoon a bit more glaze over the chicken and toss gently so every bite glistens. The roasted cashews should be toasty and fragrant at this point, adding a rich crunch that makes the dish memorable.
Step 9: Slice & Serve
While the pan is hot, you can slice the chicken into bite-sized pieces for easy serving, or simply plate the whole sheet pan and let everyone help themselves. Serve over warm steamed rice or with a side of sautéed greens. I love a squeeze of lime over the top for brightness. The aroma alone is enough to make the table feel special, and the first bite is always a little crunchy, a little glossy, and completely comforting—the essence of this homemade cashew chicken.
What to Serve It With
This dish shines with a simple pairing that keeps the flavors front and center. Here are a few ideas that have worked well in my kitchen, organized by occasion.
For Breakfast: Transform yesterday’s leftovers into a savory breakfast bowl. Spoon the warm cashew chicken over a bed of soft scrambled eggs, add a handful of chopped scallions, and top with a fried egg if you’re feeling indulgent. This makes a breakfast that feels like a treat but keeps you fueled for a busy morning.
For Brunch: Create a casual brunch spread with small bowls of jasmine rice, a few bright cucumber ribbons, and sesame seeds. Serve the cashew chicken alongside soft-boiled eggs and a crisp green salad. The balance of textures—crispy chicken, crisp veg, and creamy yolk—is addictive and elegant without any fuss.
As Dessert: Okay, maybe not dessert in the traditional sense, but you can style a playful, sweet-savory finale. Warm a spoonful of the glaze to drizzle over vanilla yogurt or coconut cream, then top with chopped cashews and a drizzle of honey. It’s a surprising, delicious finish that echoes the night’s flavors in a lighter, dairy-friendly way.
For Cozy Snacks: Make a casual platter with mini lettuce wraps, extra cashews, and a small bowl of more glaze for dipping. It’s the kind of snack that feels both comforting and a little fancy—perfect for movie nights or casual gatherings with friends.
Personally, this is the kind of dish that travels well to potlucks and makes a busy week feel celebratory. The balance between sweet and savory, the way the glaze glistens, and the way the cashews stay crisp even when ladled over a warm pile of rice—all of it feels like a little victory every time.
Top Tips for Perfecting Your Homemade Cashew Chicken
Here are some practical tweaks I’ve picked up along the way, organized by technique to help you nail this every single time.
Chicken Prep: Use chicken thighs for juiciness; they stay tender even after baking. If you must use chicken breasts, consider extra-dusting with cornstarch and keeping bake time shorter to avoid drying out. Let the coated pieces rest on the rack for 5–10 minutes before baking so the crust sets nicely.
Main Batter & Coating: Don’t overmix the dry ingredients; a few small lumps are fine. The goal is a light, evenly distributed crust. If you’re short on time, you can skip the flour and simply use a thick cornstarch-and-egg coating for a crisper bite. If you prefer a thicker crust, add a tablespoon more cornstarch.
Mixing Advice: When you dip the pieces in the wet mix, shake off excess so you don’t end up with a soggy bottom. The less wet batter on the pan, the crispier the crust will be. If your glaze looks thick, loosen with a teaspoon of water or stock until it flows smoothly and coats well.
Swirl Customization: The “Layer & Swirl” step is about presentation as well as flavor. You can drizzle a little glaze in a decorative pattern before returning to the oven, or fan the chicken out for a candy-striping look. Either way, aim for a glossy sheen that invites a bite.
Ingredient Swaps: Swap tamari or coconut aminos for soy to reduce sodium or fit dietary needs. If you don’t have honey, maple syrup works beautifully and gives a slightly different depth. Cashews can be substituted with roasted peanuts if you’re stocking up on nuts or if you want a stronger crunch. For a gluten-free version, ensure the glaze uses gluten-free soy sauce and check the flour option used in the batter.
Baking Tips: For extra crisp, use a wire rack on the pan and give the pieces a quick flip at the halfway point. If your oven runs hot, rotate sooner to prevent browning too quickly. A convection setting (if you have it) can help the crust achieve a lighter, airier crunch.
Glaze Variations: Add a pinch of chili flakes for heat, or a teaspoon of rice wine to brighten the sauce. A little lime zest at the end adds a fresh citrus note that lifts the whole dish. If you want more depth, whisk in a teaspoon of hoisin or a splash of sesame oil to finish.
Lessons learned: I’ve burned the glaze by rushing it, and I’ve over-breaded the chicken by piling on too thick a crust. Both times, a quick reset—slower heat, thinner coating, and a little patience—brought it back to perfection. Trust the process and taste as you go. It’s a flexible recipe that loves your personal touch.
Storing and Reheating Tips
Leftovers? They happen in my house, too. Here’s how I keep the texture and flavor from fading when you store and reheat homemade cashew chicken.
Room Temperature: After cooking, let the dish cool to room temperature for up to two hours. If you’re not refrigerating soon, keep the pan covered with foil to prevent skin from drying out a bit, but it’s best eaten fresh for the crisp crust.
Refrigerator Storage: Store leftovers in an airtight container for 3–4 days. Keep the chicken and the glaze separate for the best texture, especially if you plan to reheat. Cashews can lose some crunch when stored with the sauce, so I sometimes add a few extra roasted cashews just before serving.
Freezer Instructions: For longer storage, freeze the cooked chicken and vegetables separately in freezer-safe bags for up to 2 months. Thaw in the fridge overnight and reheat in the oven or on the stove, adding a splash of glaze to rekindle gloss and flavor. The coating may soften a bit, but a quick re-crisp in a hot oven helps regain much of that original bite.
Glaze Timing Advice: If you’re freezing, don’t glaze before freezing. Glaze after reheating so it stays glossy and doesn’t become gluey. If you’re reheating in the microwave, do so in short intervals to prevent sogginess, then finish with a quick splash of glaze and a final toss in a hot oven for 3–5 minutes to restore crispness.
In my kitchen, this approach means I can pull together a comforting dinner in minutes after a long day, with the same bright flavors and satisfying texture every time. The dish holds up well, and it’s perfect for meal-prep days when you want a few containers that taste like they were just made.
Frequently Asked Questions
Final Thoughts
This recipe has become a quiet staple in my kitchen—easy enough for busy weeknights, comforting enough to feel like a hug on a cold evening, and flexible enough to adapt to whatever you’ve got in the pantry. The homemade cashew chicken balances crisp coating with a glossy glaze and a crunchy hit from those nuts, all crowned by colorful vegetables that keep things fresh. It’s the kind of dish that makes you smile as you plate it, and the leftovers—if there are any—make your next day feel just a little more special. If you try this version, I’d love to hear how you tweaked it to fit your family’s tastes. And if you’ve got even better glaze ideas, share them in the comments—we’re all learning together. Happy cooking!
Ready to jump in? I’d love to hear how yours turns out. Leave a comment with your favorite tweaks, rate the recipe, and share your own variations. And if you end up snapping a photo, tag me in your post—there’s nothing I love more than seeing your cozy kitchen moments with this dish. Enjoy every bite, friend, and may your skillet always be full of warmth and laughter. Happy baking!