hidden gem cookies
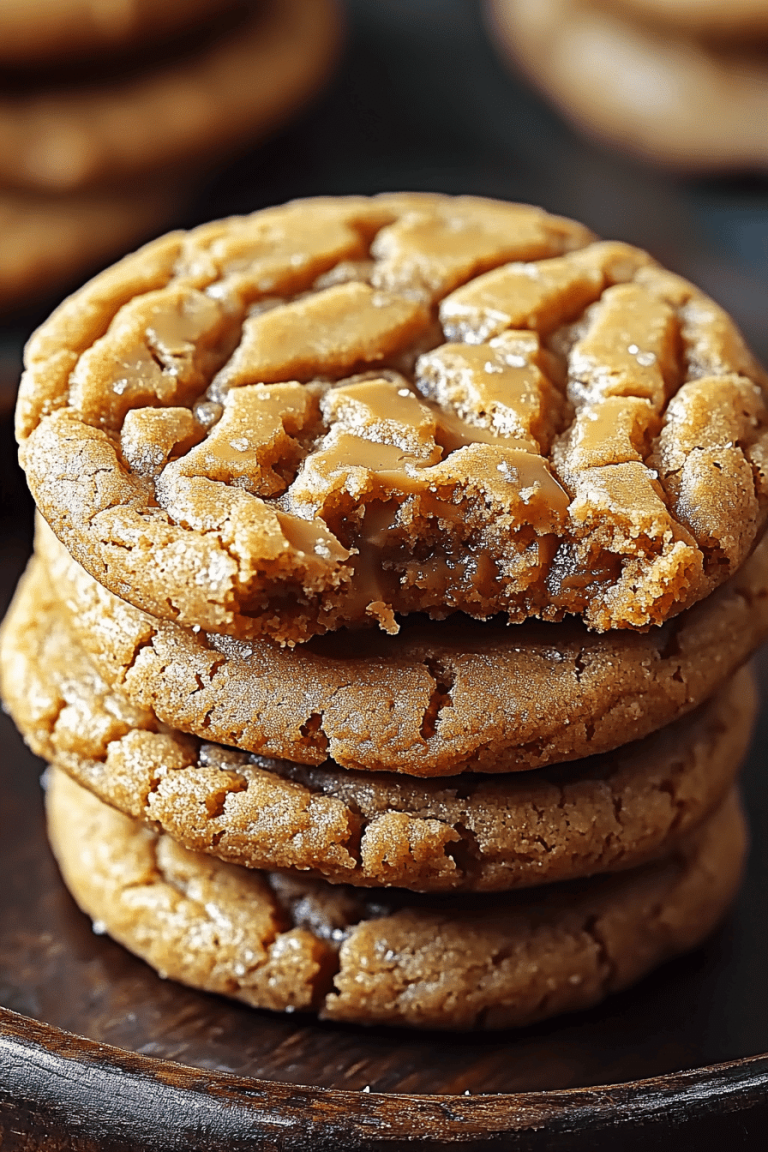
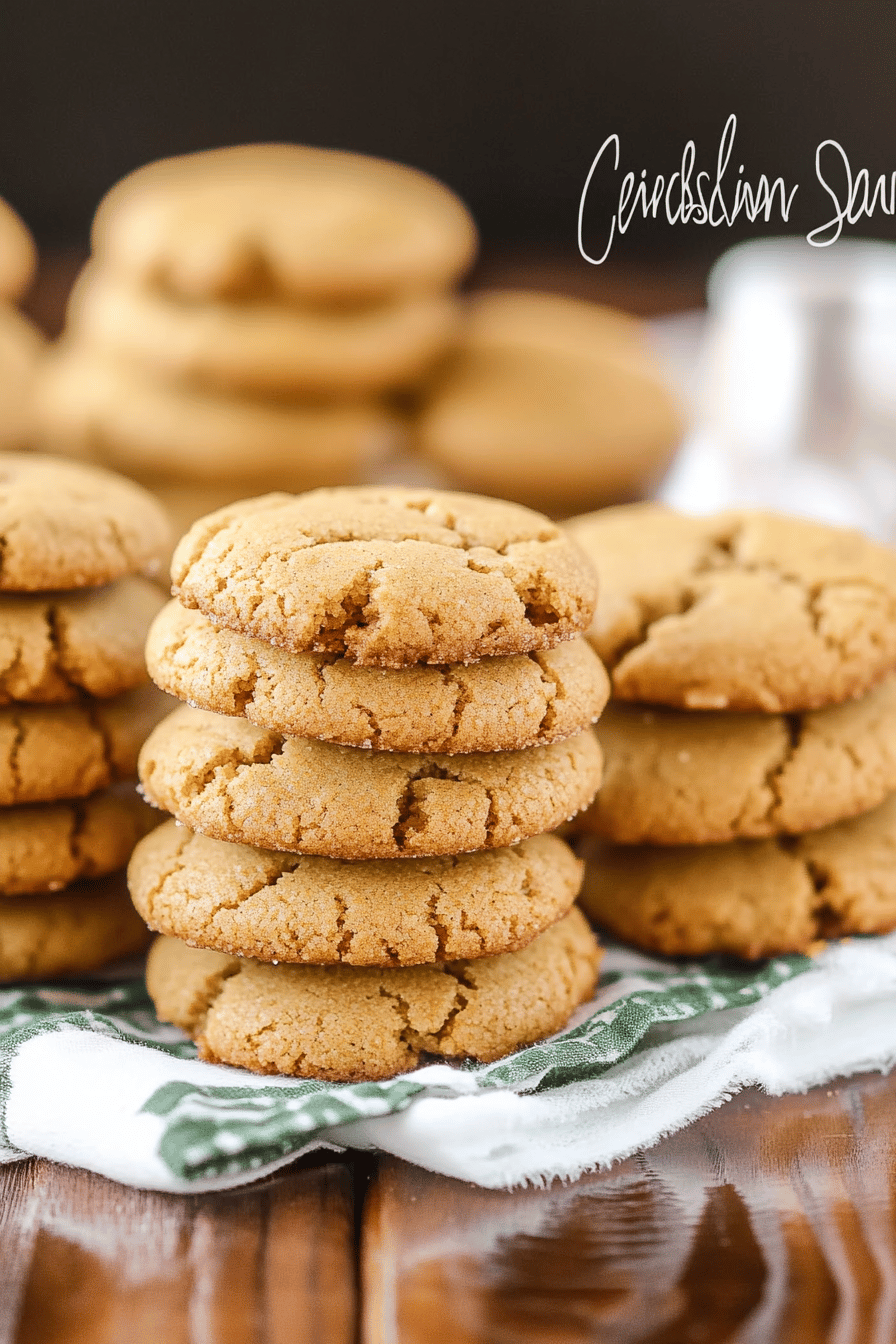
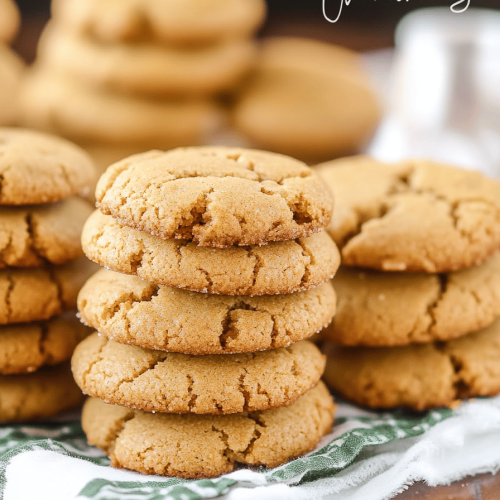
If there’s one recipe that turns a simple afternoon into a memory, it’s these hidden gem cookies. I can still smell the butter melting in the pan and hear my grandmother’s voice saying, “Just a little patience, love.” This cookie doesn’t shout for attention; it invites you in with a warm, familiar aroma and a surprising little center that feels like a secret you only share with good friends. They’re a breeze to whip up on a weeknight, yet elegant enough to serve with tea for guests. Think of them as the grown-up version of your favorite jam-filled treat, with a cocoa-dusted crust and a ribbon of jam or creamy filling tucked inside. I compared them once to a classic thumbprint cookie, but these hide a more delicate swirl and a glossy glaze that catches the light like a treasure. The moment you bite into one, you’ll understand why this cookie has earned its name in my kitchen: a true hidden gem cookies moment, right there in the cookie jar.
What are hidden gem cookies?
Hidden Gem Cookies are a two-in-one delight: a tender, fudgy-edged batter that bakes into little disks, and a playful, flavorful filling that peeks through as you bite. Think of it as a sandwich cookie without the fuss—except there’s no sandwiching required if you prefer a marbled swirl that reveals the surprise inside. The name comes from the way each cookie holds a small, hidden center—whether jam, a Cream Cheese Swirl, or a fruity jam ripple—that appears only when you take a bite. It’s essentially a chewy, melt-in-your-mouth cookie with a luxe twist: a soft core that you can customize to your mood or pantry. The concept is simple, but the result feels special enough for holidays and easy enough for a weeknight treat. It’s a little nostalgic, a little modern, and a lot delicious—a true hidden gem cookies moment in a single bite.
Why you’ll love this recipe?
What I love most about this recipe is how flexible it is while still feeling indulgent. The flavor is a warm chocolate-vanilla partnership with a fruity or creamy surprise that makes every bite feel like a little adventure. The texture is where it shines: the edges stay fudgy and slightly crisp, while the center stays soft and almost custardy. This recipe is a lifesaver on busy nights because you can make the dough ahead, chill it, and bake a few cookies for an instant treat after dinner. Budget-wise, it’s friendlier than you’d expect—simple pantry staples, a handful of mix-ins, and a glaze that takes minutes to whip up. Versatility is the name of the game: swap in apricot jam for a brighter note, or use a cream-cheese filling for extra richness. And yes, you can absolutely bake these as small, bite-size cookies for a party tray or pack them for lunchboxes. I’ve made these countless times and they never fail to put smiles on faces—especially when a friend discovers the hidden gem inside.
How do I make hidden gem cookies?
Quick Overview
Here’s the quick version: whisk dry ingredients together, cream butter with sugar until fluffy, beat in eggs and vanilla, then fold the dry into the wet to form a soft dough. Roll a portion into a disk, spoon a little filling in the center, and top with another disk to enclose the swirl. Bake until the edges set and the centers are just barely soft. The glaze comes together in a snap, drizzled over the warm cookies so it hardens to a glossy finish. The beauty of this method is the balance between a sturdy outer shell and a luscious, surprise-filled interior—perfect for those times you want a cookie with a gentle, grown-up personality.
Ingredients
For the Main Batter:
- 2 cups (240 g) all-purpose flour, spooned and leveled for accuracy
- 1/2 cup (100 g) granulated sugar
- 1/2 cup (110 g) packed light Brown Sugar
- 1 cup (225 g) unsalted butter, softened
- 1 large egg
- 2 teaspoons vanilla extract
- 1/4 teaspoon salt
- 2 tablespoons unsweetened cocoa powder for a chocolate-hued dough (optional but delightful)
For the Filling:
- 1/3 cup (112 g) fruit jam or preserves, your choice of berry works beautifully
- or 2–3 tablespoons Cream Cheese, softened, for a creamy center
- pinch of lemon zest (optional, it brightens the jam)
For the Glaze:
- 1 cup (120 g) powdered sugar
- 2–3 tablespoons milk or cream, as needed
- 1/2 teaspoon vanilla extract
- Optional: a pinch of cinnamon or citrus zest for extra flavor
Step-by-Step Instructions
Step 1: Preheat & Prep Pan
Preheat your oven to 350°F (175°C). Line two baking sheets with parchment paper or silicone mats. The parchment helps those centers slide right out when you’re ready to assemble, and it keeps the edges from getting too dark while you’re perfecting the swirl. I always double-check my oven with a thermometer—these cookies love a steady, gentle heat rather than a blasting hot bake. If you’re baking on a full sheet, rotate halfway through for even browning.
Step 2: Mix Dry Ingredients
In a medium bowl, whisk together the flour, cocoa powder (if using), and salt. Sifting isn’t mandatory, but it helps keep the batter smooth and prevents any cocoa lumps from sneaking into your final cookie. I’ve learned the hard way that a few clumps here will show up as chewy specks in the finished cookie, so a light whisk is your friend. Set this aside while you cream the butter and sugars.
Step 3: Mix Wet Ingredients
In a large bowl, beat the softened butter with the granulated sugar and Brown Sugar until it’s pale, fluffy, and a little billowy—about 3–4 minutes on medium speed. Scrape down the sides, then beat in the egg and the vanilla until everything looks glossy and fully incorporated. If the mixture looks separated, you’ve probably overmixed; a quick scrape and a gentle fold will bring it back together.
Step 4: Combine
Fold the dry ingredients into the wet in two additions. The dough should come together but still feel soft and a touch sticky. If you find it too sticky, add a tablespoon of flour at a time, a teaspoon max, until it’s manageable. This is where a lot of people overwork the dough—trust me, you don’t want to develop too much gluten here, or the cookies will lose that tender bite. If you’re using cocoa, the dough will look a touch darker and smell amazing as the chocolate notes wake up.
Step 5: Prepare Filling
If you’re going with jam, keep it in a small bowl and give it a stir to loosen it up so you can spoon a neat dollop without it turning into a river. If you’re using cream cheese filling, whip it briefly with a pinch of sugar and a splash of vanilla until it’s soft and pipeable. This is where you can really customize: lemon curd, raspberry preserves, or even Dulce de Leche all work beautifully. The trick is to keep the filling thick enough to hold its shape when you envelope it with dough.
Step 6: Layer & Swirl
Roll a small portion of dough into a ball, then flatten it into a disk about 2.5 inches in diameter on your work surface. Place a teaspoon of filling in the center, then top with another flattened disk to create a sandwich. If you prefer a swirl, you can layer the dough with a small amount of filling in a marbling fashion before sealing. For a cleaner final look, gently press the edges to seal completely and avoid any filling escaping during baking. If you’re craving a dramatic marble, you can roll two colors of dough together and twist into a log, then slice rounds for a naturally swirled effect.
Step 7: Bake
Bake 12–14 minutes, rotating the pans halfway through for even color. The cookies should be set around the edges but still a touch soft in the center; they’ll firm up as they cool. If you see the centers puffing too high, a quick poke with a toothpick will tell you if they’re underdone. They should look just matte, with a gentle crackle on top—that crackle is the sign of a good, fudgy interior and a crisp edge. Let the cookies rest on the sheet for 5 minutes before transferring to a wire rack to cool completely.
Step 8: Cool & Glaze
While the cookies cool, whisk together the glaze until smooth. Drizzle or pipe it over the cooled cookies for a glossy finish. If you want a thinner glaze, add a touch more milk; for a thicker spread, use less liquid. A light dusting of citrus zest or a pinch of cinnamon on top of the glaze adds a bright note that cuts through the chocolate and complements the jam or cream filling nicely. The glaze isn’t essential, but it does make these look extra special and feels like a little holiday in a tidy cookie.
Step 9: Slice & Serve
For the classic version, you’ll want to bite into a neatly sealed cookie to reveal the hidden gem inside. If you’ve made rounds that were a little too generous with filling, you can slice them into halves or quarters to showcase the swirl and the center. Serve with a mug of coffee or a glass of milk. These cookies are best the day they’re glazed, but they’ll still feel soft and comforting for a couple of days when stored in an airtight container at room temperature. My kids actually ask for seconds, especially when I’ve added a lemony glaze that smells like sunshine in winter.
What to Serve It With
Hidden gem cookies shine when paired with the right accompaniments, making them perfect for different occasions.
For Breakfast: A hot cup of coffee or a latte beside a plate of two or three cookies. The cocoa in the dough echoes chocolate notes in your coffee, and a dollop of jam can wake up a sleepy morning tastebud. Serve with a warm pastry boat of yogurt and fruit for a balanced start.
For Brunch: Place a few cookies on a dessert plate with a sprig of mint and a berry compote. They look elegant on a tiered tray and pair wonderfully with a light sparkling drink or a citrusy shrub.
As Dessert: These cookies double as a quick-but-impressive finale. Plate with a scoop of vanilla bean ice cream or a dollop of whipped cream, and drizzle with a touch more glaze for a cohesive, glossy finish. The hidden center makes them feel fancy without being fussy.
For Cozy Snacks: They’re perfect with a mug of hot cocoa, a cinnamon stick, and a favorite podcast. When the house smells like cocoa and butter, you know someone in the family will wander into the kitchen to see what’s happening. This is the kind of snack that makes family movie night feel special, even on a Tuesday.
Top Tips for Perfecting Your Hidden Gem Cookies
Here are a few practical tips I’ve learned after countless batches. The goal is to keep that tender, melt-in-your-mouth center while giving the outside a gentle crisp that contrasts with the filling inside.
Zucchini Prep: I know the heading says zucchini, but stay with me—this tip isn’t about vegetables. It’s about moisture management. If you’re using jam that’s a bit syrupy, stir in a tiny pinch of cornstarch to help thicken without diluting flavor. If your batter seems too wet, chill it for 20–30 minutes. A cooler dough is easier to shape and less prone to spreading, which helps keep the filling neatly tucked inside.
Mixing Advice: Stop as soon as the flour disappears into the batter. Overmixing leads to a tougher texture with less tenderness. If you’re adding cocoa for color, sift it with the flour to prevent clumps. For a more pronounced center, you can increase the filling by a teaspoon per cookie, but not so much that it bursts the dough when sealed.
Swirl Customization: The swirl is your chance to play. Alternate dollops of vanilla dough and cocoa dough, then give a gentle swirl with a toothpick or skewer to create a marbled pattern. If you like a bold look, you can layer the center with a thicker line of jam or cream cheese before sealing the disks.
Ingredient Swaps: I’ve swapped part of the butter for browned butter for a toasty, nutty note, which pairs beautifully with darker chocolate dough. A 1:1 swap with applesauce can reduce fat a bit and yield a softer texture. Almond flour works nicely in place of up to 1/4 of the all-purpose flour for a nuttier bite; just know it dries a touch quicker, so you may need a teaspoon more liquid.
Baking Tips: An oven thermometer is your best friend here. Cookies can brown unevenly if the oven runs hot. Use a light hand when reshaping dough on the tray—pressing too hard can seal in a way that makes the center feel dense. For extra crisp edges, bake a minute longer, but watch carefully to avoid over-browning. Mid-bake, you can lightly tap the sheet to help the centers settle out and prevent doming.
Glaze Variations: A simple glaze goes a long way: 1 cup powdered sugar with 2–3 tablespoons milk and a splash of vanilla. For a citrusy twist, add a teaspoon of lemon or orange zest to the glaze. If you want something richer, swap a tablespoon of milk for a tablespoon of cream. Drizzle lightly so the glaze doesn’t pool and hide your hidden center.
Lessons learned: consistency matters more than intensity. A smooth dough and a neatly sealed center will always yield cookies that look and taste like they came from a bakery, but with your own cozy touch. Trust the timing, trust the seal, trust the glaze, and you’ll end up with a batch of hidden gem cookies that disappear in minutes at my house, every single time.
Storing and Reheating Tips
Storage really matters for these cookies because you want that center to stay soft and flavorful without turning hard or stale. Here’s how I keep them tasting fresh and tempting.
Room Temperature: Store in an airtight container for up to 3 days. If your home is warm, use a glass container with a tight seal to keep out humidity, which can soften the glaze too quickly. I like layering a piece of parchment between layers to prevent sticking and preserve the center’s delicate texture.
Refrigerator Storage: They’ll stay good for up to a week in the fridge if sealed properly. The glaze may firm up a bit; simply let them sit at room temperature for 10 minutes to soften before serving. The filling remains bright and tasty as long as the cookies stay dry.
Freezer Instructions: Freeze baked cookies on a tray first, then transfer to a freezer bag for up to 2 months. Thaw at room temperature and glaze just before serving for best texture. If you freeze unbaked assembled cookies, you can bake straight from frozen—just add a couple more minutes to the baking time.
Glaze Timing Advice: If freezing, hold off on the glaze and apply it after thawing for the best sheen and texture. If you’re storing cookies without glaze, the centers stay soft and the interiors stay juicy longer, which is a nice trade-off for make-ahead plans.
Frequently Asked Questions
Final Thoughts
These hidden gem cookies are the kind of recipe that earns a permanent spot in the recipe box: familiar comfort with a little twist, easy to pull off on a busy evening, and just fancy enough to feel special. They remind me of afternoons when the house was quiet, the kettle was boiling, and the simple act of baking could turn ordinary moments into a memory. If you’re after something that travels well, looks polished on a plate, and still tastes like a hug, this is it. I hope you’ll bake a batch and share them with someone you love. And please tell me in the comments which filling you chose—the jam, lemon cream, or a creamy center—and how your family reacts when the hidden gem reveals itself. Happy baking, friend, and may your kitchen be forever fragrant with butter and joy!
Hidden Gem Cookie Recipe How To
Ingredients
Main Ingredients
- 0.5 cup butter, melted and browned
- 1.5 cups graham cracker crumbs
- 0.5 cup all-purpose flour
- 1 teaspoon baking powder
- 0.5 teaspoon kosher salt
- 1 can (14 ounce) sweetened condensed milk
- 1.25 cups sweetened flaked coconut
- 2 cups chocolate chips
Instructions
Preparation Steps
- Preheat oven to 375 degrees F (190 degrees C).
- Line a baking sheet with parchment paper and set aside.
- In a small saucepan, melt 1/2 cup butter over medium-low heat. Continue cooking once melted until butter begins to brown, swirling the pan constantly to prevent burning. Once butter becomes golden brown, remove from heat and let cool slightly (about 10 minutes).
- In a medium bowl, whisk together graham cracker crumbs, flour, baking powder, and salt. Set aside.
- In the bowl of a stand mixer, beat together the sweetened condensed milk and slightly cooled browned butter until combined. Add the graham cracker mixture and mix until just combined.
- Add the coconut and mix until combined. Finally, stir in the chocolate chips.
- Using a 2-tablespoon sized cookie scoop, scoop dough onto the prepared baking sheet, placing them about 2 inches apart. Bake for 8-9 minutes, or until the edges are slightly golden.
- Remove from the oven and let the cookies cool on the baking sheet for 3-4 minutes before transferring them to a wire rack to cool completely.