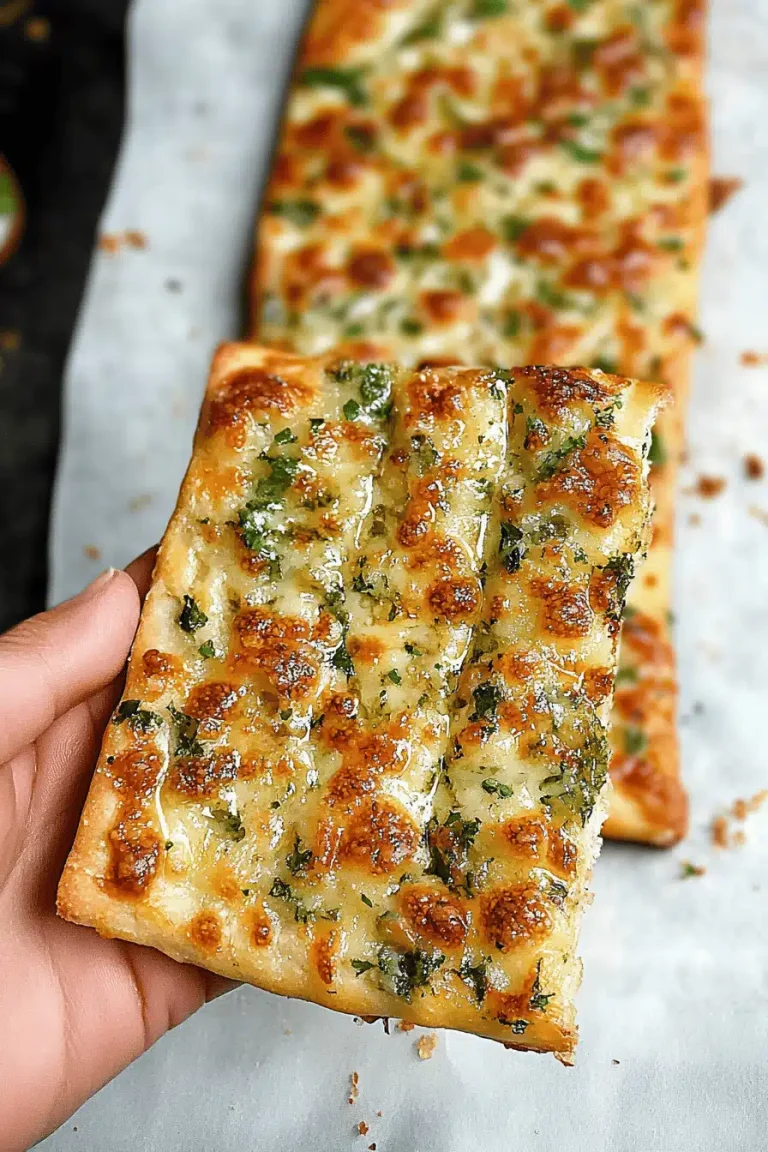
fried pizza sandwiches
Oh, where do I even begin with these fried pizza sandwiches? For me, they’re more than just a meal; they’re a warm hug, a trip back to my childhood kitchen, and frankly, a lifesaver on those nights when dinner needs to be both ridiculously delicious and lightning-fast. You know those nights, right? The ones where the kids are buzzing with energy and your own energy is… well, a little less so. This recipe is my secret weapon. It’s like a playful, saucy cousin to a classic Grilled Cheese, but with all the irresistible pizza flavors we adore packed into a perfectly crisp, golden pocket. I’ve tried so many variations over the years, but this specific method, the one I’m about to share with you, is the one that always gets rave reviews. It’s the kind of food that makes you close your eyes and just savor the moment. If you’re a fan of pizza, and let’s be honest, who isn’t, then you absolutely *need* to try these fried pizza sandwiches. They’re going to change your weeknight dinner game, I promise!
What is a fried pizza sandwich?
So, what exactly are these magical things called fried pizza sandwiches? Think of them as your favorite pizza toppings, nestled snugly between two slices of bread, all sealed up and then pan-fried to golden perfection. It’s essentially a pizza Grilled Cheese, but better! The name itself is a little playful, isn’t it? “Fried pizza sandwiches” just sounds like pure comfort food. We’re taking all the components of a classic pizza – the gooey cheese, the tangy sauce, maybe some pepperoni or your favorite veggies – and transforming them into something new and exciting. Instead of a crispy crust, you get a beautifully browned, slightly chewy bread that’s been kissed by the hot skillet. It’s the easiest way to get that pizza fix without the fuss of making dough or waiting for a whole pie to bake. It’s a genius concept, really, for anyone who loves the flavors of pizza but wants a handheld, incredibly satisfying meal.
Why you’ll love this recipe?
Honestly, the reasons I adore this recipe are endless, but let me try to narrow it down for you! First and foremost, the flavor explosion is out of this world. You get that familiar, comforting taste of pizza – the savory tomato sauce, the melty mozzarella, and whatever other delicious bits you tuck inside – all amplified by the crispy, buttery exterior of the fried bread. It’s a textural wonderland, too! That contrast between the soft, gooey inside and the perfectly fried, slightly crunchy outside is just divine.
Then there’s the sheer simplicity of it all. We’re talking about using ingredients you probably already have in your pantry and fridge. No fancy equipment needed, just a skillet and a little patience. It’s a fantastic way to use up leftover bread, too, which I’m always looking for. And let’s talk about budget-friendliness! This recipe is incredibly cost-effective, especially compared to ordering pizza. You get so much deliciousness for a fraction of the price.
What I also love is how versatile these fried pizza sandwiches are. They’re not just for dinner; they’re perfect for a quick lunch, a fun appetizer, or even a late-night snack. You can customize the fillings endlessly! One day it might be classic pepperoni and mozzarella, the next it’s a veggie-loaded delight or even a white pizza version with ricotta. It truly stands out because it delivers all the pizza satisfaction in a portable, incredibly satisfying package. It’s comfort food at its absolute finest, and it’s so darn easy to whip up.
How do I make a fried pizza sandwich?
Quick Overview
Making these fried pizza sandwiches is surprisingly straightforward. We’re essentially building a sandwich with pizza fillings and then pan-frying it until golden and the cheese is wonderfully melted. The key is in the layering and getting that perfect golden-brown crust. You’ll be amazed at how quickly this comes together, making it ideal for busy weeknights or when you’re just craving something incredibly satisfying without a lot of fuss. It’s about simplicity and delicious results, every single time.
Ingredients
For the base (the bread part):
You’ll need some good quality, sturdy bread. I usually reach for a hearty white bread, challah, or even a brioche if I’m feeling a bit fancy. The key is a bread that holds up well to frying and doesn’t get too soggy. About 8 slices will give you 4 sandwiches.
Butter or mayonnaise for frying: About 2-3 tablespoons. I’ve found that using butter gives a lovely golden color and rich flavor, but mayonnaise works wonders too for an extra crispy crust and a subtle tang. You can also use a mix of both!
For the Filling (The Pizza Magic!):
* 1 cup shredded mozzarella cheese (plus a little extra for good measure – cheese is never a bad idea!)
* 1/2 cup your favorite pizza sauce or marinara sauce. Make sure it’s not too watery, or it might make the bread soggy. A thicker sauce is best.
* Optional additions: Pepperoni slices, cooked sausage crumbles, sautéed mushrooms, Bell Peppers, onions, olives – whatever your pizza-loving heart desires!
Step-by-Step Instructions
Step 1: Prep Your Workstation
First things first, let’s get organized! Lay out your bread slices on a clean surface. Have your cheese, sauce, and any other fillings ready to go. This makes the assembly process super smooth, especially when you’re trying to work quickly.
Step 2: Spread the Sauce
Take 4 of your bread slices and spread a generous layer of pizza sauce on one side of each. Don’t go too close to the edges, or the sauce might ooze out too much when you press the sandwich. A nice, even layer is what we’re aiming for.
Step 3: Add the Cheese and Toppings
Sprinkle a good amount of shredded mozzarella over the sauce on those 4 slices. Now’s the time to add any of your other chosen toppings – pepperoni, veggies, cooked meats. Try not to overstuff them, or they’ll be tricky to close and fry evenly.
Step 4: Cap It Off
Take the remaining 4 bread slices and place them sauce-side down (if you spread sauce on all sides, just place them plain-side down) on top of the filling. Gently press down to create your sandwiches. You should have 4 lovely, plump sandwiches ready for their golden transformation.
Step 5: Butter (or Mayo) Up the Pan
Heat a large skillet or griddle over medium heat. Add your butter or mayonnaise to the pan. You want enough to coat the bottom generously. Let it melt or heat up until it’s shimmering. This is what gives us that beautiful, crispy exterior.
Step 6: Fry ‘Em Up!
Carefully place your sandwiches in the hot skillet. You might need to do this in batches depending on the size of your pan, so you don’t overcrowd it. Cook for about 3-5 minutes per side, or until the bread is a deep golden brown and beautifully toasted, and the cheese inside is gloriously melted and gooey. Keep an eye on them; they can go from perfect to burnt pretty quickly!
Step 7: Check for Meltiness
Gently lift a corner of a sandwich with a spatula to check the underside. If it’s golden and crisp, carefully flip it over. You can also press down gently on the top of the sandwich with your spatula to ensure even browning and help the cheese melt.
Step 8: Golden Perfection
Continue frying the other side for another 3-5 minutes until it matches the first side. You’re looking for that irresistible golden-brown crust and the delightful sight of cheese starting to peek out from the edges. That’s how you know they’re ready!
Step 9: Slice and Serve
Once both sides are perfectly golden and the cheese is melted, remove the sandwiches from the skillet. Let them rest for just a minute or two – that hot cheese is molten! Then, carefully slice them in half, either diagonally or straight across. The best part is seeing that gooey cheese pull as you cut them. Serve immediately while they’re hot and at their Absolute Best!
What to Serve It With
These fried pizza sandwiches are so satisfying on their own, but they also pair wonderfully with a few simple sides that really round out the meal. For a quick and easy dinner, I love serving them with a simple side salad. Just some mixed greens with a light vinaigrette – it cuts through the richness of the sandwich beautifully. A bowl of crispy oven-baked fries or Sweet Potato fries is always a hit with the kids, and who can say no to that combo?
If you’re feeling a little more ambitious, a cup of creamy tomato soup is an absolute classic pairing. It’s like the ultimate comfort food duo, reminiscent of childhood lunches. For a more substantial meal, you could add some roasted vegetables like broccoli or asparagus on the side. They add a nice freshness and a touch of green. And don’t forget the drinks! A cold glass of milk is perfect for the kids (and me!), or a crisp, cold beer or a glass of Italian red wine would be lovely for the adults. It’s all about creating a meal that feels both special and effortless.
Top Tips for Perfecting Your Fried Pizza Sandwiches
Over the years, I’ve picked up a few tricks that really elevate these fried pizza sandwiches from good to absolutely phenomenal. Let’s dive into some of my favorite wisdom:
Bread Choice Matters: Seriously, don’t skimp on the bread. A soft, flimsy white bread can turn into a mushy mess. I find that a good quality sourdough, a thick-cut brioche, or even a sturdy Italian loaf works wonders. It needs to have some integrity to hold up to the fillings and the frying.
Sauce Consistency is Key: Use a thicker pizza sauce or a reduced marinara. If your sauce is too watery, it’ll seep into the bread and make it soggy, which is the arch-nemesis of a crispy sandwich. You can even cook down your sauce a bit to thicken it up if needed.
Don’t Overstuff: It’s tempting to pile on all your favorite toppings, but resist the urge! Overstuffing makes the sandwich difficult to close, fry evenly, and can lead to the fillings escaping and burning in the pan. A moderate amount of cheese and toppings is usually best.
The Butter vs. Mayo Debate: I’ve tried both, and honestly, they both work! Butter gives that classic rich flavor and beautiful golden-brown color. Mayonnaise, on the other hand, creates an incredibly crisp, almost crackly crust and adds a subtle tang that I really love. My personal favorite is often a mix of both – you get the best of both worlds!
Medium Heat is Your Friend: Don’t be tempted to crank up the heat to speed things along. Medium heat is crucial. It allows the bread to toast up to a perfect golden-brown while giving the cheese inside enough time to melt completely without burning the outside. Patience here pays off tenfold.
The Lid Trick: If you’re finding your cheese isn’t melting before the bread gets too dark, try covering the pan for a minute or two after you flip the sandwich. The trapped heat will help melt that cheese beautifully. Just keep an eye on it so it doesn’t steam the bread.
Press Gently: When you flip the sandwich, give it a gentle press with your spatula. This helps ensure even contact with the pan for uniform browning and encourages the cheese to spread and melt into all the nooks and crannies.
Rest Before Slicing: I know, I know, you want to dive right in! But letting the sandwich rest for just a minute or two after it comes out of the pan allows the molten cheese to set just a tiny bit. This prevents a messy cheese explosion when you slice it and makes for a cleaner, more satisfying pull.
Experiment with Cheeses: While mozzarella is the classic, feel free to mix it up! A little bit of provolone adds a sharper flavor, or some Monterey Jack can give you an extra gooey stretch. Just make sure they’re good melting cheeses.
Storing and Reheating Tips
Now, if by some small miracle you have leftovers of these amazing fried pizza sandwiches, here’s how to keep them tasting their best. Honestly, they’re truly at their peak when served immediately, but life happens!
Room Temperature: If you’re planning to eat them within a couple of hours, you can technically leave them at room temperature. However, the bread might start to lose a bit of its crispiness, and the cheese won’t be as melty. I usually try to avoid this if possible.
Refrigerator Storage: For longer storage, cool the sandwiches completely. Then, wrap each one tightly in plastic wrap or aluminum foil, or place them in an airtight container. They should stay good in the refrigerator for about 2-3 days. The bread will likely be a bit softer after refrigeration, but they’re still salvageable!
Freezer Instructions: You can freeze these too! Once they’re completely cool, wrap each sandwich individually in plastic wrap, then place them inside a freezer-safe bag or container. They’ll keep well in the freezer for about 1-2 months. Make sure they are well-sealed to prevent freezer burn.
Reheating Savvy: This is where the magic happens to bring back that crispness! The best way to reheat is in a skillet over medium-low heat. Add a tiny bit of butter or oil to the pan, place the sandwich in, and cook for a few minutes per side until heated through and the bread is crisp again. You can also use a toaster oven or a conventional oven preheated to around 350°F (175°C). Place the sandwiches on a baking sheet and warm them for about 5-10 minutes, or until heated through and the bread has crisped up. Microwaving is usually a last resort, as it tends to make the bread soft and chewy, but it will at least melt the cheese again. For frozen sandwiches, reheat directly from frozen in the oven or toaster oven, adding a few extra minutes to the cooking time.
Glaze Timing Advice: If you’re making these with a glaze (which I highly recommend sometimes!), it’s best to add the glaze right before serving for the freshest taste and appearance. If you’re storing them, you can store the sandwiches plain and add a glaze to individual servings when you reheat them.
Frequently Asked Questions
Final Thoughts
I really hope you give these fried pizza sandwiches a try. They’ve brought so much joy (and deliciousness!) to my table, and I truly believe they’ll do the same for yours. It’s more than just a recipe; it’s about creating those easy, happy moments around food that we all cherish. The combination of familiar pizza flavors with that irresistible fried crunch is just pure magic. They’re perfect for fueling a busy weeknight, pleasing picky eaters, or even just treating yourself to something wonderfully comforting. I’ve found that the best meals are often the simplest, and these definitely fall into that category.
If you love this recipe, you might also enjoy my other easy weeknight dinners or my collection of kid-approved recipes. Don’t forget to experiment with your favorite pizza toppings to make these your own! I can’t wait to hear how yours turn out, so please, leave a comment below and let me know your thoughts, your favorite fillings, or any creative twists you’ve added. Happy cooking, and more importantly, happy eating!

Fried Pizza Sandwiches An Easy Italian Treat
Ingredients
Main Ingredients
- 4 large Eggs beaten
- 0.5 cup Milk
- tsp Salt to taste
- tsp Black Pepper freshly ground, to taste
- cup Oil for deep frying, I use Peanut Oil
- 8 slices Sandwich Bread cut diagonally into triangles
- 8 slices Tomato fresh
- 8 slices Mozzarella Cheese or any other melty sliced cheese
- 16 slices Pepperoni
Instructions
Preparation Steps
- Combine the beaten eggs and milk in a dish. Whisk in salt and pepper and set aside.
- Heat the oil in a frying pan over medium-high heat.
- Top 8 of the bread triangles with a slice of tomato, mozzarella, and 2 pepperoni slices.
- Cover the sandwiches with the remaining 8 slices of bread, press down on top of the sandwich and seal together the edges.
- Place the sandwiches in the egg mixture for about 20 seconds on each side.
- Seal the sandwiches again before adding them to the hot oil, one at a time.
- Fry for about 2 minutes on one side and flip it over carefully with a pair of tongs. Continue to cook for another 30 seconds to 1 minute.
- Remove the sandwiches with a slotted spoon and drain well on paper towels.
- Serve.