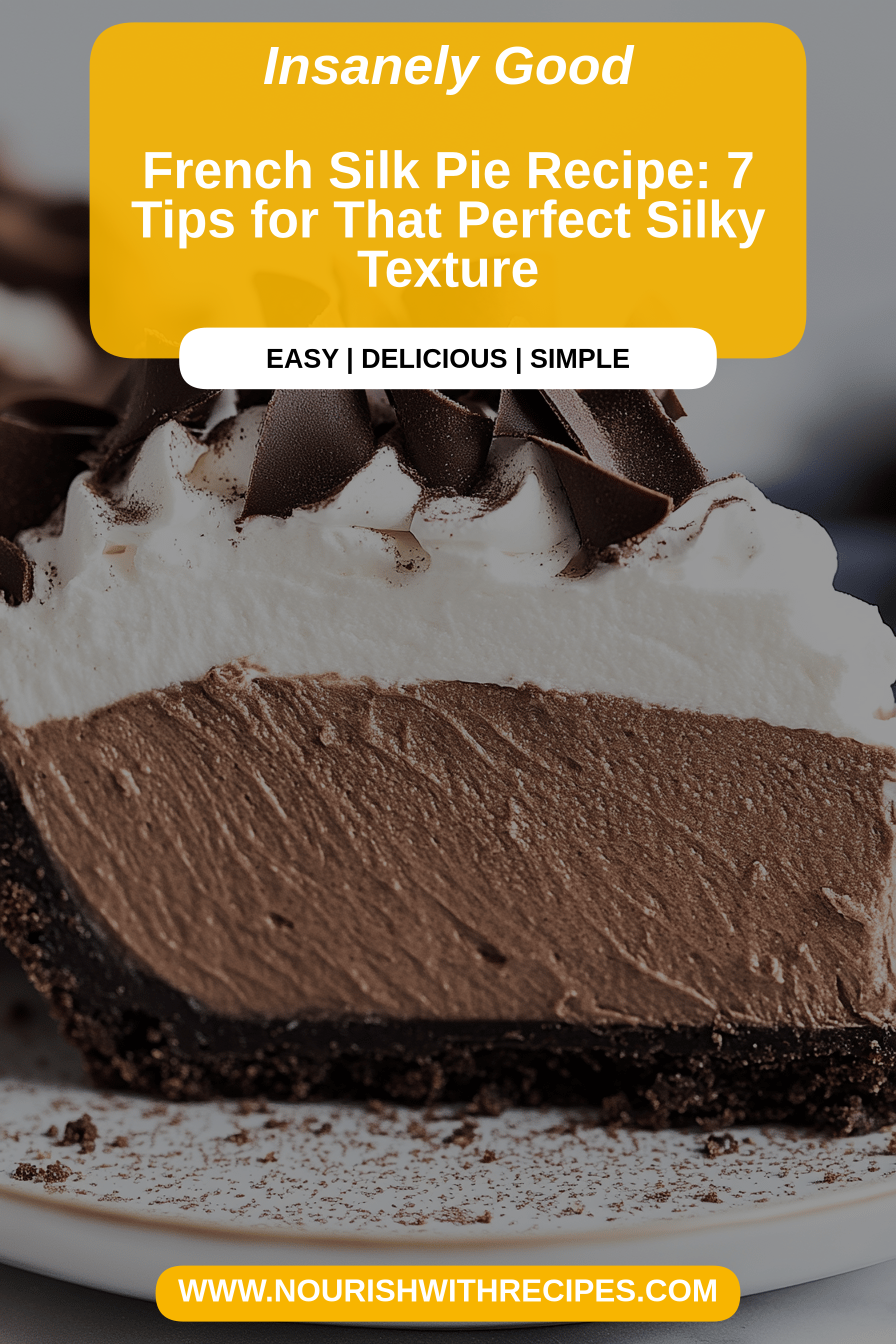
French Silk Pie Recipe
Oh, where do I even begin with this French Silk Pie Recipe? It’s the kind of dessert that makes people close their eyes and sigh with pure bliss. I remember the first time I ever tasted a truly magnificent French Silk Pie – it was at my aunt Carol’s house, a woman who could coax miracles out of any recipe. The filling was so impossibly smooth, so decadently rich, and that hint of chocolate… it was pure magic. For years, I’d only ever had store-bought versions, which, let’s be honest, can be a bit hit or miss. But this? This is the real deal. It’s the kind of pie that makes a special occasion even more memorable, or, if I’m being perfectly honest, the perfect antidote to a really long Tuesday. It’s like a luxurious hug in pie form, and the best part is, it’s not nearly as intimidating to make as you might think. Forget those complicated pastry crusts; this French Silk Pie recipe is surprisingly straightforward, and I’m going to walk you through every single step.
What is French Silk Pie?
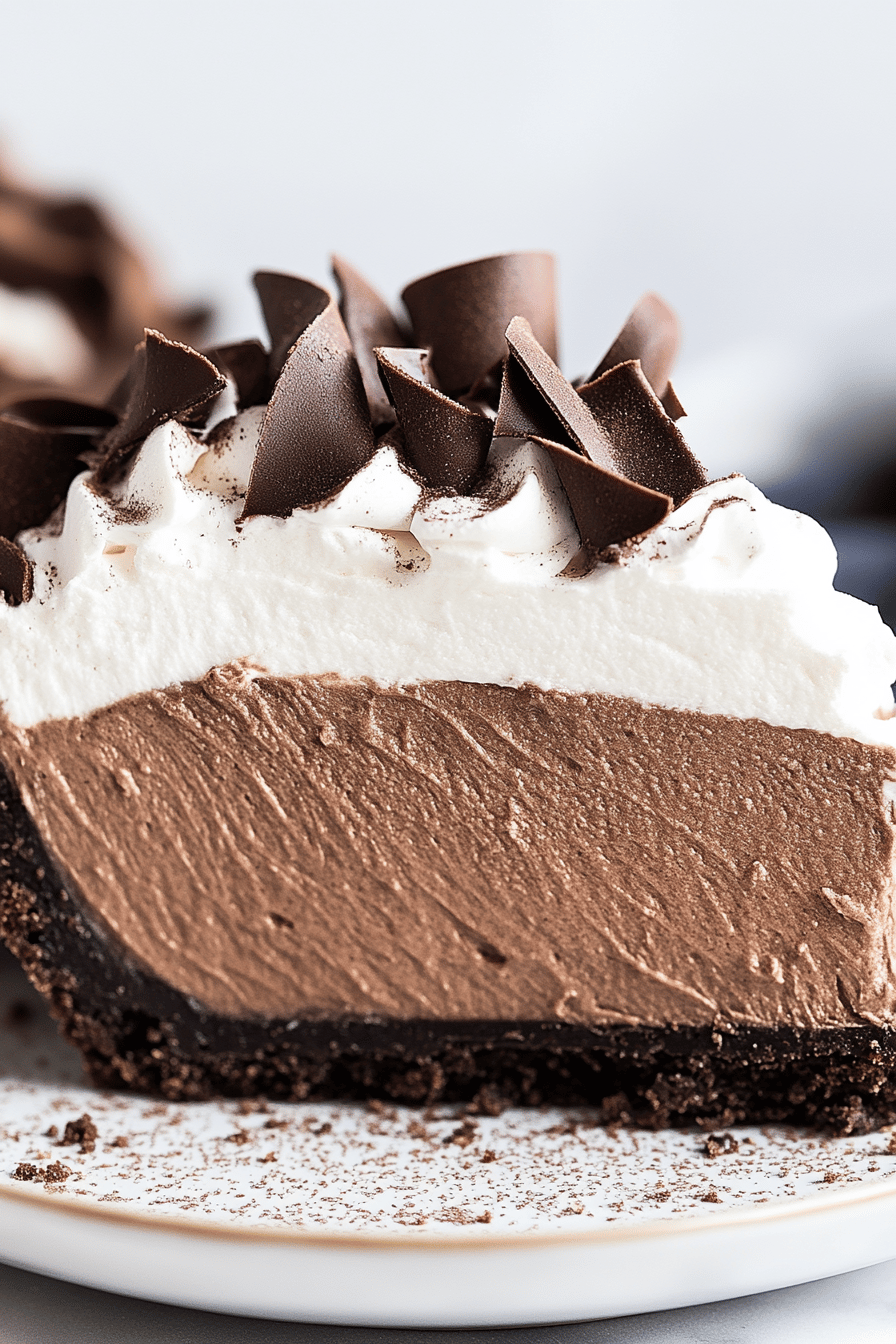
So, what exactly *is* a French Silk Pie? At its heart, it’s a luscious, no-bake chocolate pie that boasts an incredibly smooth, airy, and intensely chocolatey filling. Think of it as a sophisticated chocolate mousse that’s been cleverly set in a crisp pie crust. The “silk” in its name isn’t just for show; it perfectly describes that melt-in-your-mouth texture. It’s not quite a pudding, not quite a ganache, but something wonderfully in between. The magic really happens with a few key ingredients, usually involving butter, sugar, eggs (handled carefully, of course!), and plenty of good quality chocolate. It’s a classic for a reason, and while many variations exist, this particular French Silk Pie Recipe has become my absolute go-to because it consistently delivers that wow factor without too much fuss. It’s a dessert that feels incredibly elegant but is surprisingly down-to-earth to prepare.
Why you’ll love this recipe?
Honestly, I could wax poetic about this French Silk Pie Recipe all day, but let’s get down to the nitty-gritty of why you absolutely *need* to try it. First and foremost, the flavor. It’s a deep, dark chocolate experience that’s rich without being overly sweet. There’s a subtle complexity that comes from using good chocolate, and it’s perfectly balanced by that creamy, almost cloud-like texture. It’s not just chocolatey; it’s *velvety* chocolatey.
Then there’s the simplicity. I know, I know, “chocolate silk pie” sounds fancy, but this recipe is genuinely approachable. If you can whip butter and melt chocolate, you’re practically there. It skips the tricky baking steps of many pies, making it a lifesaver when you need a showstopper dessert in a pinch. I’ve even made it on a weeknight when the craving for something truly special hit hard – it’s that manageable!
Cost-efficiency is another big win here. While it tastes incredibly decadent, the ingredients are pretty standard pantry staples. You likely have most of them already, and the ones you might need to pick up are reasonably priced, especially when you consider how much you’d spend buying a pie of this caliber at a good bakery. It’s a fantastic way to treat yourself or your loved ones without breaking the bank.
And versatility? Oh, it’s wonderfully versatile. While the classic is perfection, I’ve experimented with different chocolates (hello, dark chocolate with a hint of raspberry!) and crusts (pecan crust, anyone?). It’s also a dream to serve – a simple dusting of cocoa or some Fresh Berries and a dollop of whipped cream is all it needs. It’s a perfect alternative to a heavy cake for dessert, and frankly, my family asks for this French Silk Pie recipe more often than they ask for anything else. It just hits the spot every single time.
How do I make French Silk Pie?
Quick Overview
This French Silk Pie Recipe is a delightful journey of creating a decadent, smooth chocolate filling that sets up beautifully in a pre-baked pie crust. We’ll start by getting our crust ready, then whip up a rich chocolate custard base that’s both airy and intense. The key is in the chilling time, allowing the flavors to meld and the texture to become impossibly smooth. It’s a simple process that yields truly spectacular results, proving that you don’t need hours in the kitchen for a dessert that tastes like it came from a five-star restaurant.
Ingredients
For the Crust:
- 1 12 cups all-purpose flour (spooned and leveled)
- ½ teaspoon granulated sugar
- ½ teaspoon salt
- ½ cup (1 stick) unsalted butter, very cold and cut into cubes
- 4-6 tablespoons ice water
A good crust is the foundation of any great pie, and for this French Silk Pie, I like a simple, buttery, flaky one. Make sure your butter and water are super cold; it’s the secret to flakiness! If you’re in a hurry, a store-bought graham cracker crust or even a chocolate cookie crust works beautifully too, though nothing beats that homemade buttery crunch.
For the Filling:
- 8 ounces good quality bittersweet or semi-sweet chocolate, finely chopped
- ½ cup (1 stick) unsalted butter, softened
- ¾ cup granulated sugar
- 3 large eggs, separated
- 1 teaspoon vanilla extract
- ½ teaspoon instant espresso powder (optional, but it really deepens the chocolate flavor!)
- Pinch of salt
The chocolate is the star here, so use the best you can find. I usually go for a 60-70% cacao content. Melting it gently is crucial – don’t let it seize up! And make sure your butter is truly softened, not melted. For the eggs, using fresh, good-quality eggs is a must since they’re not fully cooked.
For the Topping:
- 1 cup heavy whipping cream, very cold
- 2 tablespoons powdered sugar
- ½ teaspoon vanilla extract
- Chocolate shavings or curls for garnish
This is optional but highly recommended! A crown of lightly sweetened whipped cream is the perfect contrast to the rich chocolate filling. Make sure your cream is ice cold for the best volume.
Step-by-Step Instructions
Step 1: Preheat & Prep Pan
First things first, let’s get that pie crust ready. Preheat your oven to 375°F (190°C). While the oven heats up, I like to roll out my pie dough. I usually aim for about a 12-inch circle, which gives me a little extra to crimp the edges nicely. Gently press the dough into a 9-inch pie plate. You can either crimp the edges decoratively or just press them against the rim. Then, I like to prick the bottom and sides all over with a fork – this helps prevent it from puffing up too much. For an extra security measure, I sometimes line the crust with parchment paper and fill it with pie weights or dried beans. This is called blind baking, and it ensures you get a perfectly crisp crust that won’t get soggy from that luscious filling. Bake for about 15-20 minutes, or until the crust is lightly golden brown. If you used parchment and weights, remove them for the last 5 minutes of baking. Once done, let it cool completely on a wire rack while you prepare the filling. Patience here is key!
Step 2: Mix Dry Ingredients
This step is less about “mixing” and more about getting your chocolate ready for its transformation. Take your finely chopped bittersweet or semi-sweet chocolate and place it in a heatproof bowl. I love using a double boiler method for this – setting the bowl over a saucepan of simmering water (making sure the bottom of the bowl doesn’t touch the water). Stir gently until the chocolate is completely melted and smooth. Once melted, remove the bowl from the heat and let it cool slightly. This gentle melting ensures you don’t scorch the chocolate, which would ruin the texture and flavor. If you’re adding that optional espresso powder, stir it into the melted chocolate now; it dissolves beautifully and really enhances that deep chocolate goodness.
Step 3: Mix Wet Ingredients
In a large bowl, cream together the softened butter and granulated sugar. I use an electric mixer for this, starting on low speed and gradually increasing until it’s light and fluffy, almost like a pale yellow cloud. This usually takes a good 3-5 minutes. Then, it’s time for the egg yolks. Add them one at a time, beating well after each addition until fully incorporated. Now, pour in the slightly cooled melted chocolate mixture and the vanilla extract. Beat again until everything is wonderfully smooth and combined. This mixture will be thick and glossy.
Step 4: Combine
Here’s where we bring it all together! In a separate, clean bowl, whip the egg whites with a pinch of salt until stiff, glossy peaks form. This is really important for achieving that light, airy texture in our French Silk Pie. Don’t overmix, or they’ll become dry. Now, gently fold about a third of the whipped egg whites into the chocolate mixture. This is to lighten it up a bit. Then, carefully fold in the remaining egg whites. The goal here is to keep as much air in the mixture as possible, so be gentle and don’t stir vigorously. You want streaks of white to disappear, but it’s okay if it’s not perfectly uniform. The texture should be light, airy, and deeply chocolatey.
Step 5: Prepare Filling
The filling is already prepared in the previous step! What we’ve done is essentially created a lightened chocolate custard that will set into our silken filling. The process of melting the chocolate gently, creaming the butter and sugar, incorporating the egg yolks, and then folding in the whipped egg whites is what creates that signature texture. The chilling process will do the rest of the work to set it all up perfectly.
Step 6: Layer & Swirl
Once your pie crust is completely cooled, it’s time to pour in that glorious chocolate filling. Spoon it gently into the prepared crust, spreading it evenly with an offset spatula or the back of a spoon. You want to fill it right to the brim. For that extra touch of elegance, you can create a swirl pattern on top using a toothpick or a small skewer, but honestly, a smooth top is just as divine. The goal is to get it into the crust and ready for its chill time.
Step 7: Bake
Wait, bake? Nope, this French Silk Pie recipe is a no-bake wonder once the crust is done! The filling itself doesn’t require baking. All the “cooking” of the eggs happens during the gentle melting of the chocolate and the beating of the whites, and the final setting happens in the refrigerator. So, after filling your cooled crust, it’s straight to the fridge!
Step 8: Cool & Glaze
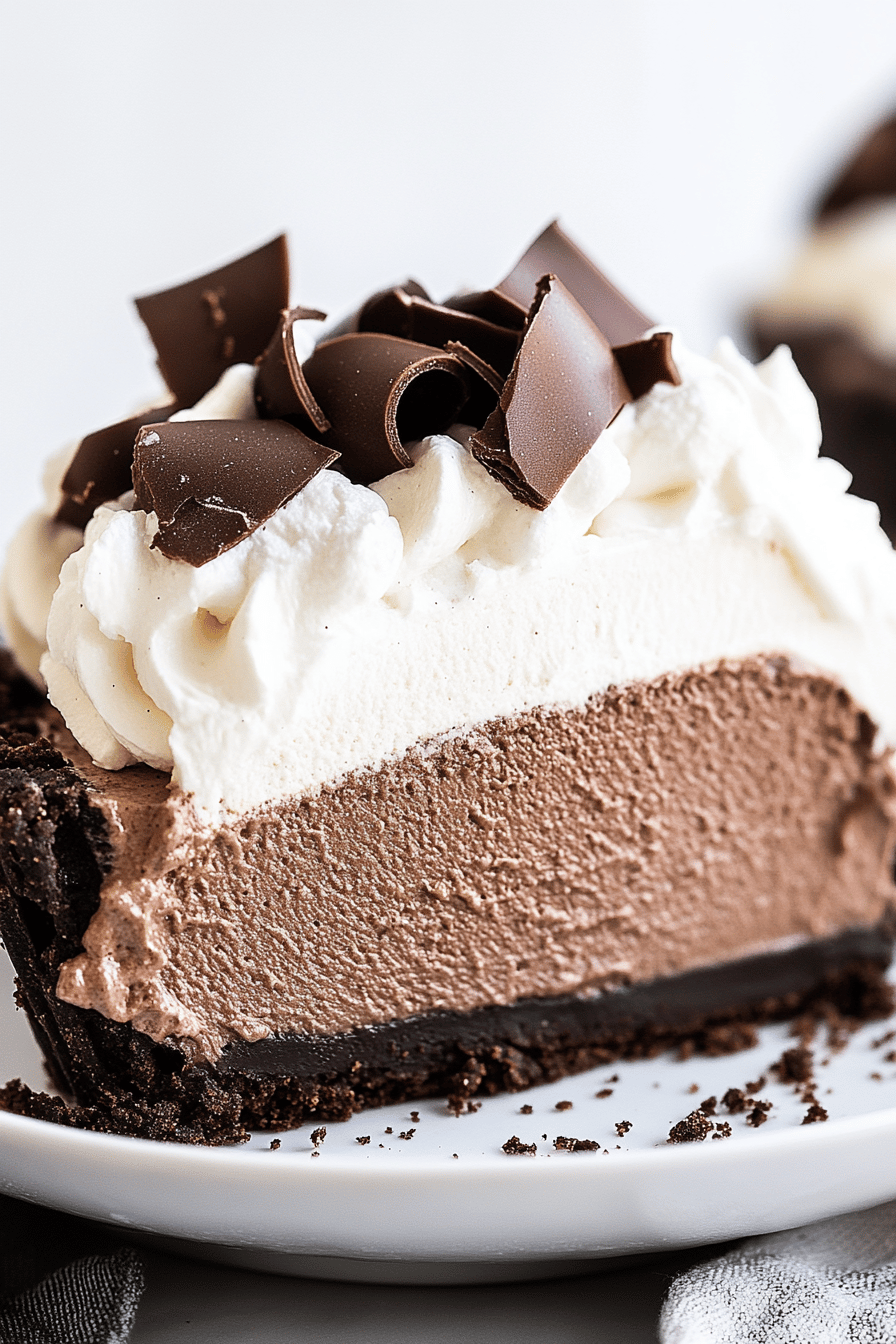
This is perhaps the most crucial step for achieving that perfect silken texture. Cover the pie loosely with plastic wrap (try not to let it touch the surface of the filling if possible, or just wrap the edges of the crust). Place it in the refrigerator for at least 4-6 hours, or preferably overnight. The longer it chills, the firmer and silkier it will become. While it’s chilling, you can prepare the topping. In a cold bowl, whip the cold heavy cream with the powdered sugar and vanilla extract until soft to medium peaks form. Don’t overwhipped it, or you’ll end up with butter! Once the pie is fully chilled and set, gently spread the whipped cream over the top. Finish with a generous dusting of chocolate shavings or curls for that classic, elegant look. The glaze adds a lovely textural contrast and a burst of freshness.
Step 9: Slice & Serve
The moment of truth! To get clean slices, I highly recommend using a sharp knife dipped in hot water and wiped dry between each cut. This helps slice through the rich filling smoothly. Serve immediately, chilled. You can also serve it with an extra dollop of whipped cream on the side if you’re feeling particularly indulgent. This French Silk Pie is best enjoyed cold, allowing the flavors and textures to really shine. Enjoy every decadent bite!
What to Serve It With
This French Silk Pie is truly a star on its own, but pairing it with the right accompaniments can elevate the experience even further. For a truly decadent dessert experience, it’s sublime on its own, perhaps with a drizzle of extra chocolate sauce or a sprinkle of sea salt for a sophisticated touch. But let’s get creative!
For Breakfast: While it might sound unconventional, a tiny sliver of this pie alongside a strong, black coffee can be an absolute treat. It’s the ultimate indulgence to kickstart your day if you’re feeling a bit fancy. Think of it as a rich chocolate pastry that doesn’t require any baking in the morning.
For Brunch: Alongside a spread of fresh fruit, perhaps some berries or sliced peaches, this pie adds a touch of elegance. A mimosa or a sparkling rosé pairs beautifully, cutting through the richness of the chocolate. It’s a wonderful centerpiece that feels celebratory and special.
As Dessert: This is its natural habitat, of course! For a more formal dinner party, serve a neat slice with a quenelle of raspberry sorbet or a small glass of port wine. The tartness of the sorbet or the deep notes of the port create a lovely counterpoint to the sweet, rich pie. My family loves it after a hearty roast chicken dinner, it’s the perfect sweet ending.
For Cozy Snacks: On a chilly evening, there’s nothing quite like a warm mug of hot chocolate or a nice cup of Earl Grey tea alongside a slice of this pie. It’s pure comfort food. I also love to serve it with a little dish of salted caramel sauce for dipping – talk about pure bliss!
Top Tips for Perfecting Your French Silk Pie
I’ve made this French Silk Pie recipe more times than I can count, and over the years, I’ve picked up a few tricks that I think really make a difference. These aren’t strict rules, but more like friendly nudges to ensure your pie turns out absolutely spectacular every single time.
Chocolate Quality: Seriously, this is non-negotiable. Using a good quality bittersweet or semi-sweet chocolate makes a world of difference. The cheap stuff just doesn’t have the same depth of flavor or meltability. I usually opt for brands like Ghirardelli, Lindt, or Valrhona if I’m feeling extra fancy. You can really taste the difference, trust me!
Gentle Melting: When melting your chocolate, whether in a double boiler or carefully in the microwave, go low and slow. Overheated chocolate can seize up and become grainy, which is the enemy of silkiness. Stir frequently and remove it from the heat just before it’s completely melted, letting the residual heat do the rest. This ensures a super smooth, glossy base.
Butter Softness: For the filling, your butter needs to be truly softened but not melted. If it’s too cold, it won’t cream properly with the sugar, and if it’s melted, your filling might be too greasy. Let it sit on the counter for about an hour before you plan to start mixing. It should yield slightly to the touch but still hold its shape.
Egg Safety: Since this pie doesn’t bake the eggs thoroughly, it’s important to use the freshest, highest-quality eggs you can find. Some people prefer to temper the egg yolks or use pasteurized eggs for extra peace of mind, but for my family, using fresh eggs and ensuring proper chilling has always been sufficient. The heat from the melted chocolate does cook them slightly. Also, make sure your egg whites are free from any yolk – even a tiny bit can prevent them from whipping up to stiff peaks.
Folding Technique: This is where you get that ethereal, airy texture. When you’re folding in the whipped egg whites into the chocolate mixture, be gentle. Use a rubber spatula and make sweeping motions from the bottom up, turning the bowl as you go. You want to incorporate the whites without deflating them. It’s okay if there are a few tiny streaks of white left; it’s better than overmixing and losing all that lovely air.
Chilling Time is Crucial: I know it’s tempting to dive in after a couple of hours, but the French Silk Pie really needs that time in the fridge to set properly. The minimum is 4-6 hours, but overnight is truly best. This allows the flavors to meld and the filling to become that signature firm yet incredibly smooth texture. Patience will be rewarded!
Crust Variations: While I adore a classic flaky pastry crust, don’t be afraid to experiment! A chocolate cookie crust (like Oreos, crushed with some melted butter) is absolutely divine with the chocolate filling. A graham cracker crust is a classic for a reason, and for a nuttier flavor, a pecan or almond crust works wonderfully too. Just pre-bake it according to your chosen crust recipe.
Storing and Reheating Tips
Proper storage is key to keeping your beautiful French Silk Pie tasting its best. Because it contains eggs and dairy, it definitely needs to be refrigerated once assembled, especially after the whipped cream topping is added.
Refrigerator Storage: The best place for your French Silk Pie is in the refrigerator. Once the whipped cream is on, I cover it loosely with plastic wrap or use a pie carrier to protect it. It will stay delicious for about 3-4 days. After about day two, the whipped cream might start to deflate a bit, but the filling will remain wonderfully smooth and rich. I’ve found that the flavors actually meld even more beautifully on the second day, making it even more delicious!
Room Temperature: I really don’t recommend leaving this pie out at room temperature for more than an hour or two, especially if it’s warm. The delicate filling and whipped cream topping are best kept chilled to maintain their texture and prevent any spoilage.
Freezer Instructions: You can freeze this pie, but I prefer not to freeze it *with* the whipped cream topping. If you plan to freeze it, let the chocolate filling set completely in the crust, then cover it tightly with plastic wrap and then foil. It should keep well in the freezer for up to 2 months. To thaw, transfer it to the refrigerator overnight. Once thawed, you can add fresh whipped cream just before serving. The crust might soften a bit upon thawing, but it’s still a great way to have this amazing dessert on hand.
Glaze Timing Advice: If you’re serving the pie immediately after chilling and haven’t added the whipped cream, you can always add fresh whipped cream or chocolate shavings just before serving. If you’re making it ahead and know you’ll be serving it within a day or two, go ahead and top it with whipped cream. It just makes it look so much more inviting when it’s ready to go!
Frequently Asked Questions
Final Thoughts
There you have it – my absolute favorite French Silk Pie recipe! I truly hope you give this a try. It’s the kind of dessert that makes a lasting impression, the one people talk about long after the last crumb is gone. It’s rich, it’s velvety, and it’s surprisingly achievable for even a novice baker. It’s more than just a dessert; it’s a little piece of edible luxury that brings so much joy. If you love this recipe, you might also enjoy my Classic Chocolate Mousse or my Decadent Brownies – they’re in a similar vein of pure chocolate bliss! Don’t hesitate to leave a comment below to let me know how yours turned out, or if you have any special tips or variations you discovered. I absolutely love hearing from you all! Happy baking, and even happier eating!
French Silk Pie Recipe
Ingredients
For the Pie Crust
- 1.5 cups all-purpose flour
- 0.5 teaspoon salt
- 0.75 cup unsalted butter, cold and cubed
- 0.25 cup ice water
For the Chocolate Filling
- 7 ounce bittersweet chocolate, chopped
- 0.5 cup unsalted butter, softened
- 1.5 cup granulated sugar
- 4 large eggs, separated
- 1 teaspoon vanilla extract
- 0.5 cup heavy cream
For Topping
- 1 cup heavy cream, cold
- 2 tablespoon powdered sugar
- 0.5 teaspoon vanilla extract
- chocolate shavings optional
Instructions
Prepare the Pie Crust
- In a large bowl, whisk together flour and salt. Cut in the cold butter with a pastry blender or your fingertips until the mixture resembles coarse crumbs with some pea-sized pieces of butter remaining.
- Gradually add ice water, 1 tablespoon at a time, mixing until the dough just comes together. Do not overmix.
- Gather the dough into a ball, flatten into a disk, wrap in plastic wrap, and refrigerate for at least 30 minutes.
- Preheat oven to 400°F (200°C). On a lightly floured surface, roll out the chilled dough into a 12-inch circle. Carefully transfer the dough to a 9-inch pie plate. Trim and crimp the edges as desired.
- Line the pie crust with parchment paper and fill with pie weights or dried beans. Blind bake for 15 minutes. Remove weights and parchment paper and bake for another 5-7 minutes, or until golden brown. Let cool completely.
Make the Chocolate Filling
- Melt the chopped bittersweet chocolate in a heatproof bowl set over a saucepan of simmering water (double boiler), stirring until smooth. Remove from heat and let cool slightly.
- In a large bowl, beat the softened butter and granulated sugar until light and fluffy.
- Beat in the egg yolks one at a time until well combined. Stir in the melted chocolate and vanilla extract.
- In a separate bowl, whip the heavy cream until stiff peaks form. Gently fold the whipped cream into the chocolate mixture until just combined.
- In a very clean bowl, beat the egg whites until stiff peaks form. Gently fold the beaten egg whites into the chocolate mixture until just combined. This step is crucial for the airy texture.
- Pour the chocolate filling into the cooled pie crust and spread evenly. Cover the pie loosely with plastic wrap (do not let it touch the surface of the filling).
- Refrigerate for at least 4 hours, or preferably overnight, until the filling is firm.
Prepare the Topping and Serve
- In a chilled bowl, whip the cold heavy cream with powdered sugar and vanilla extract until stiff peaks form.
- Spoon or pipe the whipped cream over the chilled French Silk Pie. Garnish with chocolate shavings if desired.
- Slice and serve immediately.