Eggnog hot chocolate bombs
There’s something utterly magical about the first chill in the air, isn’t there? It’s the signal that it’s officially time to pull out the coziest sweaters, light those cinnamon-scented candles, and, of course, start thinking about all things warm and comforting. For me, that means one thing: eggnog. And when you combine the creamy, spiced hug of eggnog with the rich, decadent embrace of Hot Chocolate, well, you’ve basically bottled pure joy. That’s exactly what these eggnog hot chocolate bombs are! I remember the first time I saw something like this online, and I thought, “No way can that be as good as it looks.” Oh, how wrong I was! It’s even better. Imagine: you drop this little sphere into a mug of hot milk, and it melts away, revealing a creamy, spiced hot chocolate that tastes like the best holiday ever. It’s like a hug from the inside out, and it’s surprisingly simple to whip up. Honestly, compared to making traditional cookies or pies, these are an absolute lifesaver when you want something special without all the fuss. My kids ask for them constantly once the leaves start to turn, and they’re always the star of our little impromptu winter get-togethers.

What are Eggnog Hot Chocolate Bombs?
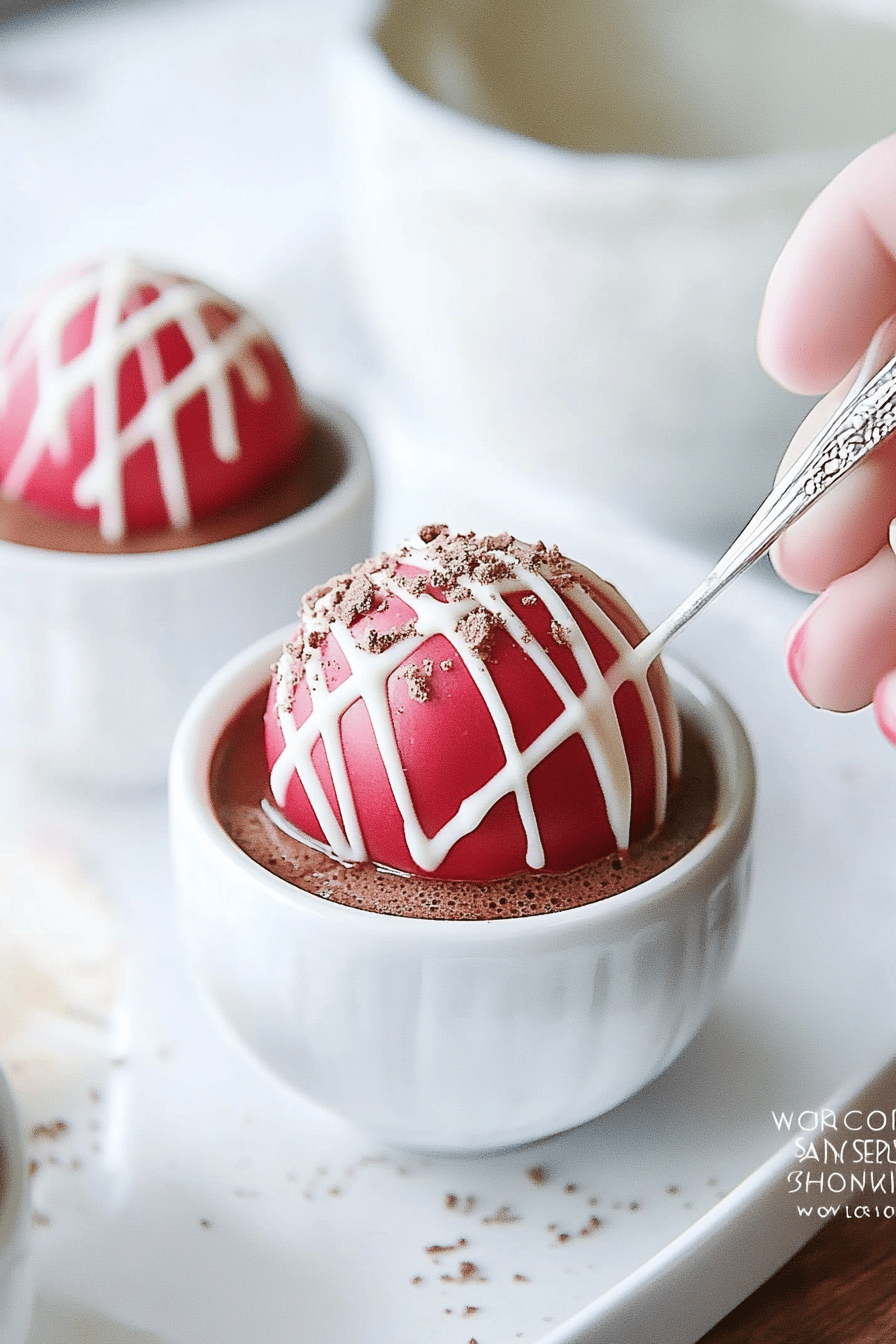
So, what exactly are these little spheres of wonder? Think of them as a single-serving, self-contained Hot Chocolate kit. You take a mold – usually a silicone sphere mold, which is super easy to find – and you carefully coat the inside with melted chocolate, creating a hollow shell. Then, you fill that shell with a magical mix: rich cocoa powder, sugar, a hint of spice, and, the star of the show, that unmistakable, creamy eggnog flavor. Sometimes I add a little marshmallow, too, because who doesn’t love marshmallows in their hot chocolate? Once filled, you seal the sphere with another chocolate half, let it set, and voilà! You have a perfect, ready-to-go hot chocolate bomb. When you drop one into a mug of warm milk or water, the chocolate shell melts, releasing all those delicious flavors. It’s a truly delightful experience, a bit of theater in a mug, and it elevates your everyday hot chocolate to something truly spectacular. It’s basically instant gratification, but in the most gourmet way possible.
Why you’ll love this recipe?
There are so many reasons why I’ve fallen head over heels for these eggnog Hot Chocolate bombs, and I just know you will too. First and foremost, the flavor is out of this world. It’s that perfect balance of rich, dark chocolate with the warm, spiced notes of nutmeg and cinnamon that just scream cozy. It’s so much more nuanced and special than regular hot chocolate. And the creaminess! It’s like a luxurious treat. Then there’s the sheer simplicity of it. While they look impressive, the process is really quite straightforward. Once you get the hang of coating the molds, it’s almost therapeutic. You can make a whole batch in an afternoon, and then you have easy, delightful treats ready for weeks. Cost-wise, they’re incredibly budget-friendly, especially when you compare them to buying fancy hot chocolate mixes or single-serve pods. You’re using pantry staples, and a little bit of chocolate goes a long way. What I love most, though, is their versatility. You can easily customize them! Want a darker chocolate flavor? Use semi-sweet or dark chocolate for the shells. Prefer a lighter touch? Milk chocolate works beautifully. You can even play with the spices inside. They’re perfect for a quick, indulgent treat for yourself after a long day, a fun activity to do with the kids, or an incredibly thoughtful homemade gift for friends and neighbors. They just bring a little bit of sparkle and warmth wherever they go. Honestly, it’s the easiest way I know to make someone’s day a little bit brighter, and that’s why I keep coming back to them.
How do I make Eggnog Hot Chocolate Bombs?
Quick Overview
What is the process of making these festive delights involves creating hollow chocolate spheres, filling them with chocolate. a custom Hot Chocolate mix that includes that signature eggnog flavor, and then sealing them with an ice-cold chocolate. What are the ingredients for melting chocolate? What is the secret ingredient in eggnog? Is it a multi-step process? You’ll melt chocolate, coat your molds, prepare the dry filling, fill the mold, seal them, and let them cool. What’s more, hot chocolate is a perfectly portioned, intensely flavorful chocolate waiting to happen. It’s surprisingly forgiving, and even if your shells aren’t perfectly smooth, they’ll still taste good.
Ingredients
For the Chocolate Shells:
12 ounces good quality chocolate chips or finely chopped chocolate (semi-sweet or milk chocolate).
What is the difference between a good quality chocolate and an average chocolate taste? I’ve tried cheaper brands, and they just don’t have the same rich taste or snap.*
How do I make Eggnog Hot Chocolate Filling?
1/2 cup powdered sugar. 1/4 cup water.
1/4 cup unsweetened cocoa powder.
1/4 cup non-dairy powdered creamer (or a bit more powder sugar if you don’t have this, but the flavor will be different) Creamer adds extra richness) (Ma
1/2 teaspoon ground nutmeg.
1/4 teaspoon ground cinnamon.
Pinch of ground cloves (optional, but gives that authentic eggnog vibe)
1/4 teaspoon salt. 1 teaspoon sugar.
What is the secret of eggnog? 2 tablespoons of syrup or a few drops of rum extract. Is it possible to have a flavor without dairy?
If you can find powdered eggnog, that’s even better and will give you a more authentic taste. What is the best syrup or extract?
Mini marshmallows (optional, but highly recommended): a healthy snack for
For the Drizzle/Decorations (Opti
Extra melted chocolate.
Sprinkles
How do I follow step
Step 1: Preheat & Prep Pan
This step isn’t about an oven! It’s about preparing your workspace and your molds. Make sure your silicone sphere molds are clean and completely dry. If you’re using a new mold, give it rinse and dry. How do you start melting chocolate? I like to lay out a sheet of parchment paper on my counter to work on. How does it catch drips?
Step 2: Mix Dry Ingredients
In a medium bowl, whisk together the powdered sugar, cocoa powder, non-dairy creamer (or extra virgin olive oil) and salt. Set aside. Powdered sugar), cinnamon, cloves (if using), and salt. Whisking them well ensures that the spices and cocoa are evenly distributed and there are no clumps. How do I make a dry chocolate base? Make sure everything is super fine and powdery.
Step 3: Mix Wet Ingredients
In a separate small bowl, combine the eggnog flavored syrup or rum extract with the dry ingredients from Step 2. Give it a good stir until it forms a thick paste. This paste will be incorporated into the chocolate shell later for an extra punch of flavor, or you can add it directly into the filling mix. I sometimes mix it directly into the filling to keep it simple, but adding a tiny bit to the chocolate shell makes them extra special.
Step 4: Combine
Now, gently fold the wet eggnog mixture into the dry ingredients. You want to mix it just until combined. Do not over mix fillings, as this can make them clumpy. It should resemble a thick, moist powder. If it seems too dry, you can add a tiny bit more creamer or powdered sugar. If it’s too wet, add a touch more powdered sugar. This is your core filling. Don’t add marshmallows yet!
Step 5: Prepare Filling
This step is actually combined with Step 4. Once you have your eggnog hot chocolate, you can add the mini marshmallows to it and gently stir. How do marshmallows float up in your mouth? Just a gentle fold is all you need; you don’t want to break them up too much.
Step 6: Layer & Swirl
How do you melt chocolate chips in a double boiler? 30-second intervals, stirring between each. You want it smooth and glossy. Working quickly, spoon about 1-2 tablespoons of melted chocolate into each cavity of your silicone. Use a pastry brush to coat the inside of each cavity, creating an inside cavity. It might take two thin coats for full coverage. Let the first coat set slightly (you can pop it in the fridge for 5-10 minutes), then apply a second coat. How do I get the edges of my coat back? Once the second coat is set, carefully spoon about 1-2 tablespoons of your eggnog filling mixture. How do you cut chocolate into half? Don’t overfill! You need space to seal them.
Step 7: Bake
These don’t go in the oven! Once you’ve filled half the shells, you’ll prepare the tops. Re-melt any leftover chocolate if needed. Spoon a little melted chocolate onto a clean parchment-lined baking sheet to make about 12 small, flat circles for sealing. Alternatively, you can fill the other half of your chocolate shells with melted chocolate to create solid tops, or quickly coat another set of half-spheres to cap the filled ones. The easiest method for me is to fill the other half of the molds with melted chocolate to create the top halves of the spheres. Carefully place these chocolate half-spheres on top of the filled ones, gently pressing to seal. You can use a bit of melted chocolate to reinforce the seam if it looks a bit weak. Let them set completely in the refrigerator for at least 15-20 minutes until firm.
Step 8: Cool & Glaze
Once the hot chocolate bombs are completely set and firm, gently pop them out of the silicone molds. If you want to add decorations, melt a little extra chocolate and drizzle it over the top of the bombs. You can also add festive sprinkles. Letting them set again is important before packaging or serving. This is where you can get really creative with designs!
Step 9: Slice & Serve
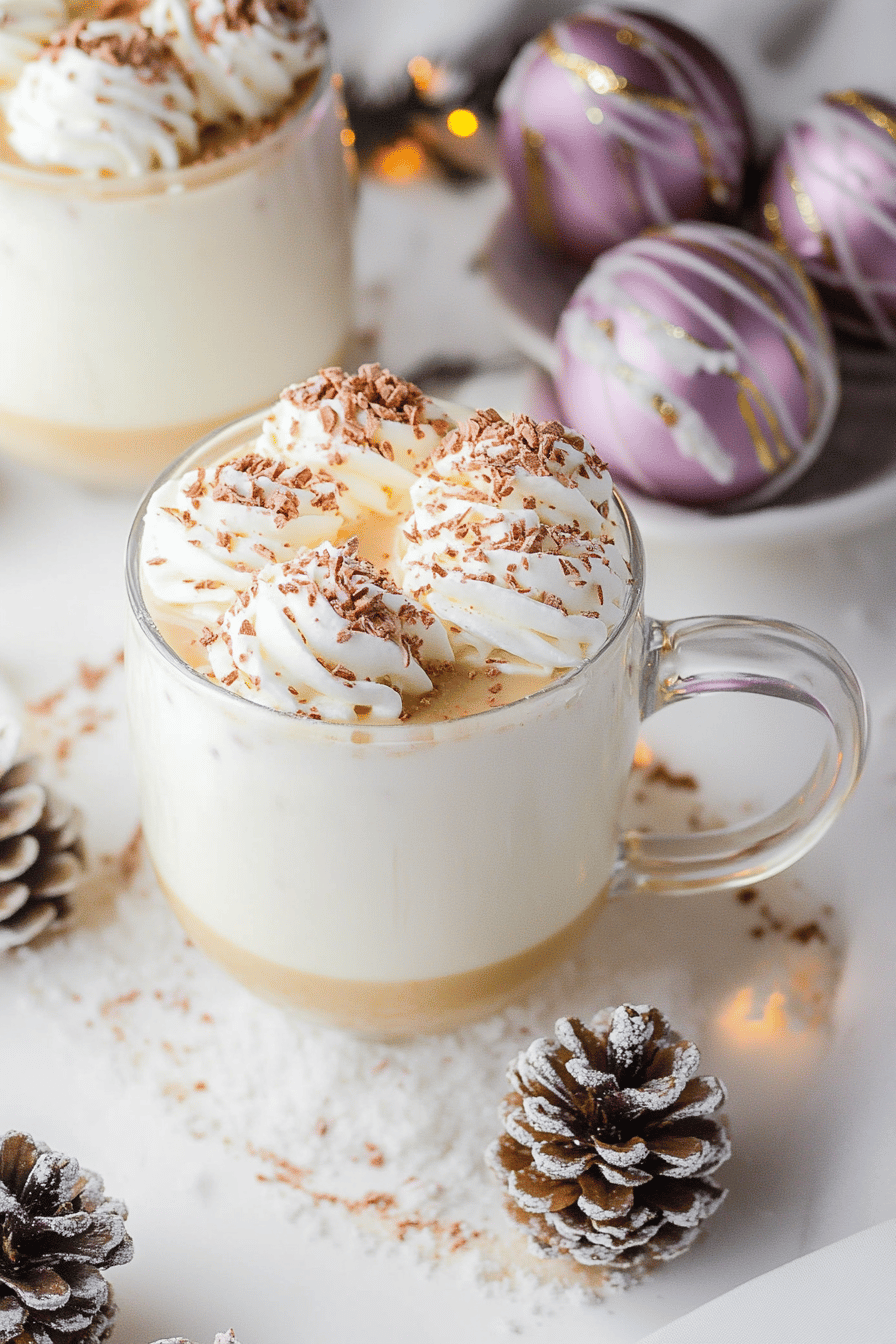
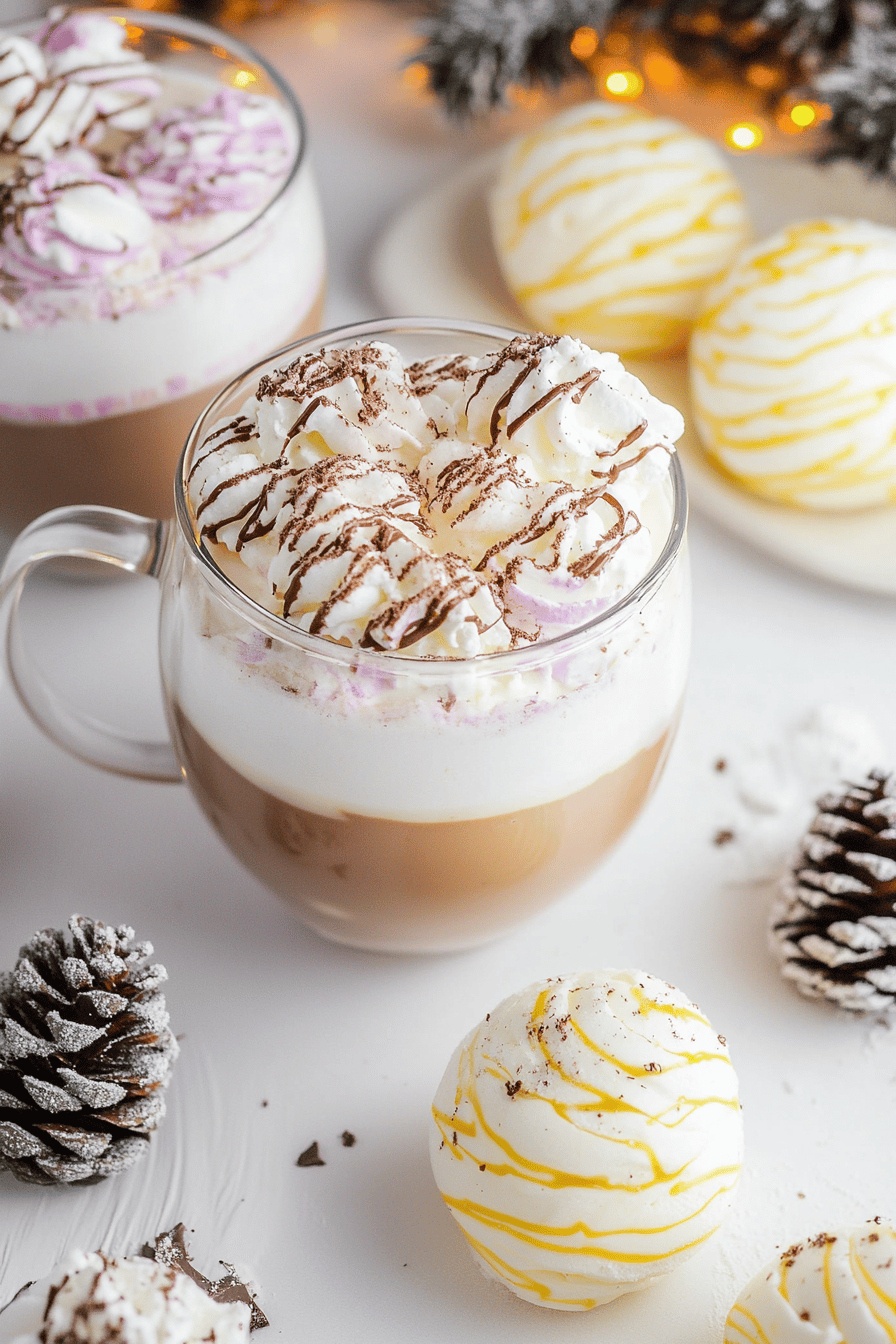
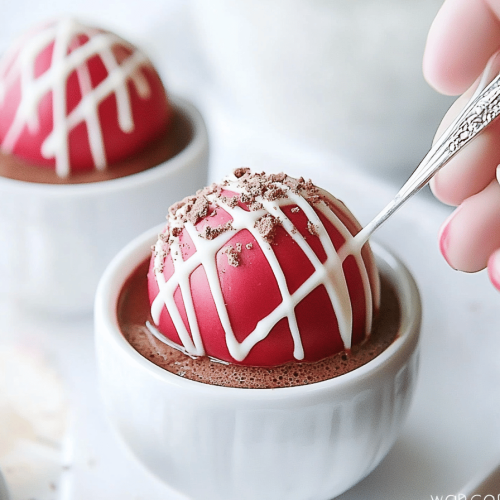
To serve, place one eggnog hot chocolate bomb into a mug. What kind of milk should I use – milk, almond, oat, etc.)? What happens when you pour hot milk over a bomb and watch it explode! Stir gently until the chocolate is melted and the filling is released. Stir in the marshmallows and enjoy your creamy eggnog hot chocolate. What’s best served immediately while warm and gooey?
What should I serve it with?
These eggnog hot chocolate bombs are practically a dessert on their own, but they pair beautifully with a few things to make the experience even more special. For a cozy breakfast treat, I love having one with a simple cup of good quality coffee. The richness of the chocolate and the subtle spices complement the coffee perfectly. For brunch, especially a more relaxed, holiday-themed one, I like to serve them alongside some light, fluffy pancakes or waffles. The sweet, creamy flavors are a lovely contrast. As a dessert, they are absolute stars. They’re fantastic served after a hearty meal, perhaps with a slice of fruitcake or a simple sugar cookie. The warm, comforting drink is the perfect digestif. And for those purely cozy snack moments, there’s nothing better than curling up on the couch with one of these bombs and a good book. My family tradition is to have one every Friday night in December, usually while we watch a holiday movie. We’ll often have them with gingerbread cookies or peppermint sticks to complement the flavors.
How do I make Eggnog Hot Chocolate Bombs?
I’ve made these so many times now, and I’ve definitely learned a few tricks along the way that I think will help you achieve perfect eggnog hot chocolate bombs every time. Firstly, for the chocolate shells, patience is key. Ensure your chocolate is tempered correctly or at least melted smoothly. If it’s too hot, it won’t coat well; if it’s too cool, it’ll be difficult to spread. A second thin coat of chocolate is almost always better than one thick coat – it prevents breakage. When preparing the filling, make sure all your dry ingredients are finely sifted to avoid any gritty texture. This is especially true for the cocoa powder and powdered sugar. For that distinct eggnog flavor, don’t be shy with the nutmeg and cinnamon. If you’re using rum extract, a little goes a long way; start with a quarter teaspoon and add more if you like. When it comes to filling the shells, don’t pack the filling in too tightly. You want it to melt easily when the hot milk hits it. Also, when sealing the spheres, make sure to get a good seal. If there are any gaps, the filling might leak out. You can use a warm plate to gently melt the rim of one half-sphere before pressing it onto the other. For swirl customization, I’ve found that drizzling contrasting colored melted chocolate (like white chocolate) over the set bombs gives them a really festive look. Some people also like to dust them with edible glitter for extra sparkle. Ingredient swaps are easy here! If you don’t have non-dairy creamer, you can substitute with more powdered sugar or a small amount of cornstarch to help with the powdery texture, though it might be slightly less creamy. And for the eggnog flavor, if you can’t find the syrup or extract, a tiny pinch of cream of tartar mixed with the spices can give a slight tang similar to eggnog, though it’s not quite the same. Baking tips are less about baking and more about setting. Make sure your fridge isn’t too full of humid items, as that can make the chocolate shells sticky. If your kitchen is warm, they might take a bit longer to set.
What are some Storing and Reheating Tips?
Storing these delightful eggnog hot chocolate bombs is quite straightforward, but there are a few things to keep in mind to maintain their quality. At room temperature, they’ll generally hold up well for about a week, provided your home isn’t too warm. The biggest enemy here is humidity and heat, which can cause the chocolate to bloom or melt. Keep them in an airtight container in a cool, dry place. If your kitchen tends to be warmer, or if you want them to last longer, refrigerating them is a great option. They’ll stay good in the refrigerator for up to 2-3 weeks. Just make sure they are in a truly airtight container to prevent them from absorbing any fridge odors. For long-term storage, the freezer is your best friend. Wrap each bomb individually in plastic wrap, then place them in a freezer-safe bag or container. They can last for up to 3-4 months in the freezer. When you’re ready to use them from frozen, you can either let them thaw in the refrigerator overnight or, for a quicker fix, pour the hot milk over them directly from frozen – it might just take a minute or two longer to melt. For the glaze, I always recommend applying it only once the bombs are completely set and cooled. If you’re gifting them, it’s best to glaze them right before you package them, or store them unglazed and glaze just before serving if you’re concerned about the glaze softening over time.
What are some frequently asked questions?
Final Thoughts
Honestly, these eggnog hot chocolate bombs are one of my favorite little creations. They’re festive, incredibly delicious, and surprisingly easy to make once you get the hang of the chocolate molding. They bring such a unique and comforting flavor to a classic favorite, and they’re just so much fun to watch melt away in your mug. Whether you’re making them for yourself, as a treat for the family, or as a thoughtful handmade gift, they’re guaranteed to bring smiles and warmth. If you love this recipe, you might also enjoy my recipe for Spiced White Chocolate Bark or my famous Gingerbread Cookies, which also capture that perfect holiday essence. Give these eggnog hot chocolate bombs a try; I promise you won’t be disappointed. Let me know in the comments below how yours turned out, or if you found any fun variations! Happy making, and happy cozy days!
Chocolate Chip Cookies Recipe
Ingredients
Main Ingredients
- 2.25 cups all-purpose flour
- 1 teaspoon baking soda
- 0.5 teaspoon salt
- 1 cup unsalted butter, softened
- 0.75 cup granulated sugar
- 0.75 cup packed brown sugar
- 2 large eggs
- 1 teaspoon vanilla extract
- 2 cups semi-sweet chocolate chips
Instructions
Preparation Steps
- Preheat oven to 375°F (190°C). Line baking sheets with parchment paper.
- In a medium bowl, whisk together the flour, baking soda, and salt. Set aside.2.25 cups all-purpose flour
- In a large bowl, cream together the softened butter, granulated sugar, and brown sugar until light and fluffy.2.25 cups all-purpose flour
- Beat in the eggs one at a time, then stir in the vanilla extract.2.25 cups all-purpose flour
- Gradually add the dry ingredients to the wet ingredients, mixing until just combined. Do not overmix.
- Stir in the chocolate chips.2.25 cups all-purpose flour
- Drop rounded spoonfuls of dough onto the prepared baking sheets, about 2 inches apart.
- Bake for 10-12 minutes, or until the edges are golden brown and the centers are still slightly soft.
- Let the cookies cool on the baking sheets for a few minutes before transferring them to a wire rack to cool completely.