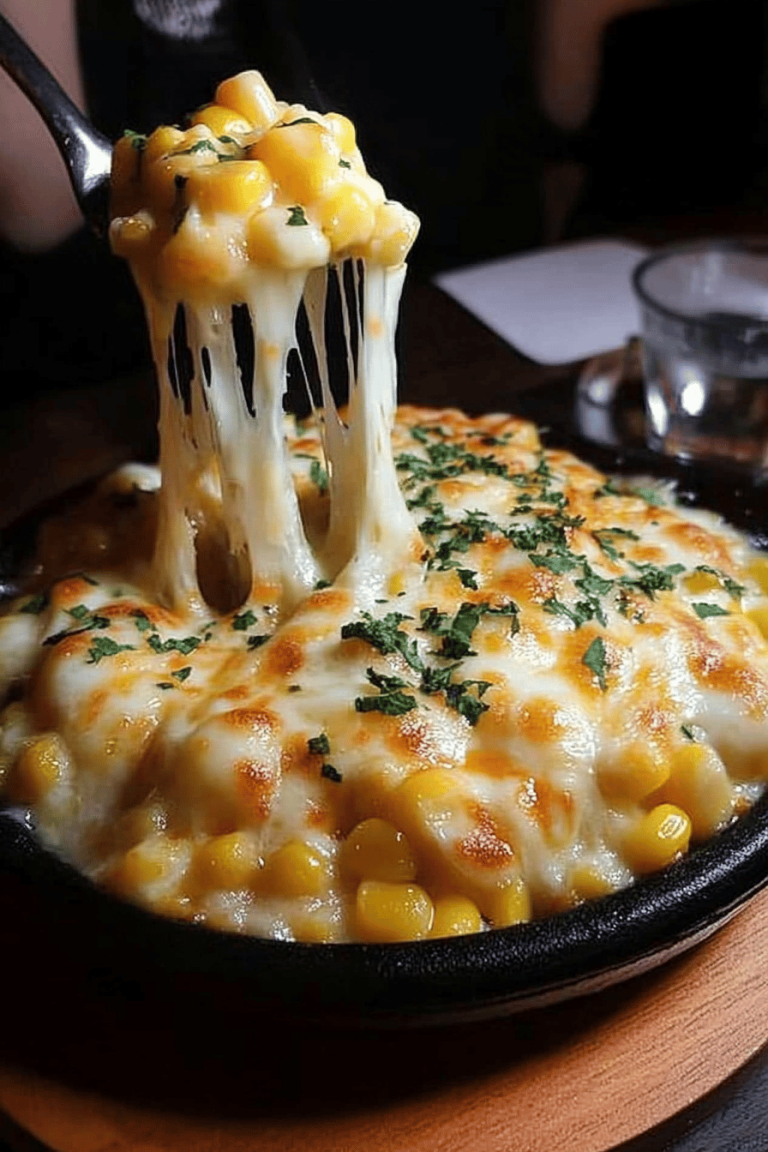
Easy Texas Cheese Fries Recipe
There’s something incredibly soul-soothing about a plate piled high with golden, crispy fries smothered in melted cheese that just hits the spot every single time. I vividly remember the first time I made these cheese fries at home—it was a chilly evening, the kind where you just want to curl up on the couch with something warm, indulgent, and totally freed from any guilt. They smelled amazing while baking, that rich cheese aroma wafting through the kitchen, driving everyone a little wild in anticipation. Honestly, cheese fries are the ultimate snack-meets-meal combo, kind of like a cozy cousin to loaded nachos or that classic mac and cheese. But what makes these cheese fries stand out? It’s all about the crispy contrast and that ooey-gooey cheese topping that melts into every nook of the potatoes. Every time I serve this up, it disappears in minutes—my kids actually ask for seconds, and I don’t blame them. If you’ve ever dreamed of making your own crispy, cheesy fries at home, stick with me—I’m sharing everything I’ve learned to make your kitchen smell like the best diner in town.
What is cheese fries?
Think of cheese fries as the classic potato fry’s best friend—they’re essentially crispy fries that get a generous blanket of melted cheese poured over the top, sometimes with extras like bacon bits, green onions, or even a drizzle of ranch or spicy sauce. They’re loved in diners, sports bars, and greasy spoons across the country, but guess what? Making them at home is shockingly simple and so much more satisfying. The name says it all, really—fries plus cheese equals a magical combo everyone adores. Behind the casual name is a dish that brings together crunch, creaminess, and savory goodness in one perfect bite, almost like a mini celebration on your plate.
Why you’ll love this recipe?
What I love most about cheese fries is that they nail the flavor trifecta: crispy, cheesy, and a tiny bit salty—kind of like the culinary version of a warm hug. The flavor is so rich and satisfying, but what surprises a lot of people is how easy it is to pull together with just a handful of pantry staples. You really don’t need to be a kitchen pro to wow your friends or calm a hangry crowd with these. Plus, it’s budget-friendly: potatoes and cheese are staples that don’t break the bank, and you can tweak the toppings to use whatever you’ve got around, like leftover shredded chicken or a dollop of sour cream. The versatility is where the magic happens—whether you want to keep it classic or get creative with jalapeños, garlic aioli, or even a sprinkle of smoked paprika, cheese fries are like a blank canvas ready for your favorite flavors. Honestly, this recipe has been my go-to when I don’t wanna cook something fancy but still want everyone asking for more. It’s like the best comfort food that’s both nostalgic and fresh.
How do I make cheese fries?
Quick Overview
Making these cheese fries is about nailing two key things: perfect crispy fries and that melty, gooey cheese topping. You get to work with simple ingredients—cutting fresh potatoes or using your favorite frozen fries—and then you bake (or air fry!) until crispy. Then comes the satisfying step of layering on your cheese and popping it back in the oven until it turns all bubbly and delicious. This method keeps things straightforward while giving you that crave-worthy texture contrast that only homemade cheese fries can deliver. No deep fryer needed here, making this a perfect weeknight treat.
Ingredients
For the Fries:
- 4 large russet potatoes (or 1 bag of frozen steak fries for a shortcut) or 1 bag of frozen ham.
- 2 tablespoons olive oil or avocado oil (for that perfect crisp)
- 1 teaspoon garlic powder (because it’s magic)
- Salt and pepper to taste
For the Cheese Topping:
- 2 cups shredded sharp cheddar cheese (mix in Monterey Jack for extra gooeyness if you like)
- ½ cup crumbled cooked bacon (optional, but trust me, it’s a game-changer)
- 2 green onions, thinly sliced (fresh bite)
For Serving (Optional but Worth It):
- Sour cream or ranch dressing for dipping
- Jalapeños for a spicy kick
- Smoky paprika or chili powder (sprinkle before cheese for an extra flavor pop)
Step-by-Step Instructions
Step 1: Preheat & Prep the Pan
Start by preheating your oven to 425°F (220°C). If you’re using a baking sheet, line it generously with parchment paper or a silicone mat—this will help your fries crisp up without sticking, and cleanup is a breeze. If you’re air frying, get that machine warmed up, too.
Step 2: Cut & Season the Fries
If you’re working with fresh potatoes, wash and scrub them well, then cut into fries about ¼ to ½ inch thick—nothing too thin or they’ll burn, and nothing too chunky or they won’t crisp properly. Toss them in olive oil, garlic powder, salt, and pepper, making sure each fry is evenly coated. This step is crucial; I learned the hard way that uneven seasoning can make some fries bland while others are too salty.
Step 3: Bake or Air Fry the Fries
Spread the fries out evenly on your baking tray so they’re not crowded—that’s key for crispiness. Bake for about 25-30 minutes, flipping halfway through. If you’re air frying, 20-25 minutes at 400°F (200°C) usually does the trick; just shake the basket every 7-10 minutes. You’ll know they’re done when they’re golden brown and have that irresistible crunch that makes you wanna snack before topping them!
Step 4: Add the Cheese and Toppings
Once your fries are beautifully crispy, pull them out and sprinkle the shredded cheese evenly on top. You can throw on bacon bits now if you’re using them. Slide the whole pan back into the oven for another 5-7 minutes (or until the cheese is melted and bubbly). The kitchen will smell like pure happiness. Last, scatter the green onions over everything for a fresh burst of color and a slight onion bite.
Step 5: Serve It Up
These are best enjoyed piping hot, right out of the oven! Serve with sour cream, ranch, or your favorite dipping sauce on the side. I usually plop a generous dollop on top for extra indulgence. Whether you’re eating straight from the pan or plating it up for a crowd, these cheese fries always bring the smiles.
What to Serve It With
For Breakfast: Cheese fries might sound wild for breakfast, but trust me, topped with a fried egg and a sprinkle of hot sauce, they’re a morning joy with your coffee. I love this twist on weekend brunch—super filling and a nice change from the usual bacon and eggs.
For Brunch: Pair your cheese fries alongside a crisp Caesar salad and a mimosa or Bloody Mary for a casual brunch vibe that feels a bit indulgent but totally fun. This combo always impresses guests without adding too much work.
As Dessert: Okay, so cheese fries aren’t dessert, but when you’re craving savory comfort after dinner, they fill that gap perfectly. My family likes to finish a meal with these paired with a sparkling soda or a creamy milkshake—pure nostalgia.
For Cozy Snacks: There’s nothing like them on movie night or after a long day when you’re craving something warm and cheesy. Sometimes I serve them with guacamole or salsa dips for a little Tex-Mex flair. They’re the ultimate comfort food that feels like a treat but comes together fast.
Top Tips for Perfecting Your Cheese Fries
Choosing Your Potatoes: Russets are your best bet for fries that crisp up nicely thanks to their starchy nature. Waxy potatoes tend to stay soft, which is fine if you like them that way, but I personally lean toward that crispy crunch.
Cut Uniformly: To avoid having some fries overcooked and others underdone, slice them evenly. My secret? A ruler or sharp knife makes all the difference.
Don’t Skip the Oil Toss: It might seem minor, but tossing fries in oil and seasoning before baking is the step that gives you that golden surface. Make sure every fry is coated but not swimming in oil.
Broil for Extra Crisp: If you want an ultra-crispy top after the cheese melts, switch your oven to broil for the last 1-2 minutes—just watch closely so it doesn’t burn!
Cheese Choices: Sharp cheddar is classic, but mixing in mozzarella or Monterey Jack can up the melt factor. I’ve even tried smoked gouda for something funky and it blew my mind.
Add Texture: Bacon bits or crispy fried onions make a huge difference. Sometimes I sprinkle a little smoked paprika on top along with green onions for color and flavor contrast—a simple sprinkle goes a long way!
Leftovers? They don’t keep well in the fridge soggy, so reheat in the oven or air fryer rather than microwave to regain that golden crisp. Trust me, I learned this the hard way.
Storing and Reheating Tips
Room Temperature: If you plan on eating these within a couple of hours, just cover the plate loosely with foil or a tented paper towel to maintain crispness without trapping steam. Any longer and you risk sogginess.
In the Fridge: Store leftovers in an airtight container for 2-3 days max. Separate the cheese fries from any wet toppings like sour cream to avoid sogginess. Reheat in a preheated oven at 375°F (190°C) for about 10 minutes, turning halfway through, or use an air fryer for best results.
Freezing: Cheese fries don’t freeze well once assembled with cheese because the texture gets weird, but you can freeze pre-cooked fries without toppings. Bake or air fry from frozen and then add cheese fresh for serving.
Glaze Timing: Adding your cheese topping right before serving keeps everything melty and fresh—always better than letting it sit.
Frequently Asked Questions
Final Thoughts
Cheese fries have a simple charm that’s hard to resist—they’re that familiar, comforting dish that feels like a small celebration in every bite. I’m telling you, once you try making these at home, you’ll find yourself reaching for this recipe again and again, especially on days when you just want a little extra love on your plate. This dish is flexible, forgiving, and seriously satisfying—the kind of recipe that creates little moments of joy around the dinner table. If you loved these, give some loaded nachos or cheesy potato casserole a try next; they’re cousins in the comfort food family with their own delicious twists. I can’t wait to hear how yours turns out—don’t forget to share your tweaks and favorite toppings below. Happy indulging!