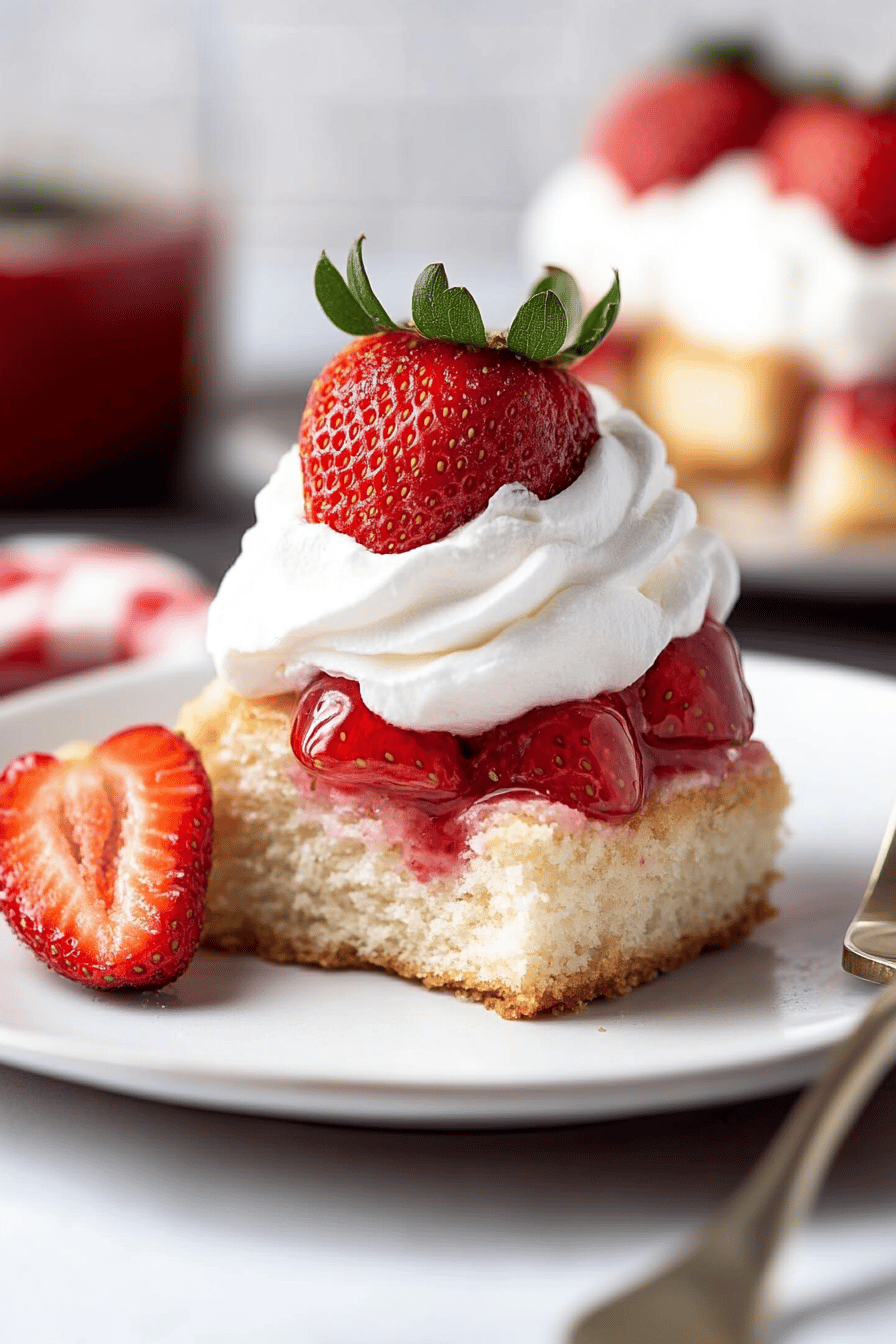
easy strawberry dessert
The moment the kitchen fills with the bright perfume of fresh strawberries, I know I’m in for something comforting and pretty simple. This easy strawberry dessert is one of those recipes I reach for when I want something impressive without spending hours fussing in the kitchen. It’s the kind of dessert that makes the whole house feel warmer, like the scent of Sunday mornings drifting in even on a Tuesday night. I remember my grandma making something similar with ripe berries, a whisper of vanilla, and a glaze that glittered like morning dew on a pan of sugar. I’ve tweaked her method just enough to keep it mine—and yes, it’s every bit as kid-approved as it is grown-up-friendly. This easy strawberry dessert is the kind you can pull together after a Busy Day and still have time to enjoy while it’s fresh and glossy. Think of it as a perfect balance between a shortcake kiss and a creamy, swirled cake—light, fruity, and wonderfully adaptable. I’m sharing it here because it’s a lifesaver on busy nights, and my family asks for it all the time. The first bite always tells you you’ve chosen well: strawberry brightness, a hint of vanilla, and a whisper of sweetness that never feels cloying. This is the dessert that disappears in minutes at my house, and I’m betting it will do the same at yours.
What is an easy strawberry dessert?
Easy strawberry dessert is essentially a softly spongy vanilla cake swirled with strawberry puree, baked until tender, then finished with a glossy, tart-sweet glaze. Think of it as a cake-meets-shortcake hybrid that’s both cozy and celebratory. The name is simple on purpose because there’s nothing fussy here—just good ingredients treated with a light hand. The concept comes from a traditional strawberry Layer Cake, but we dialed it back to a single pan, a gentle bake, and a swirl that leaves pretty ribbons of pink through the pale batter. It’s essentially a crowd-pleaser that you can tailor in minutes: use extra strawberries for a brighter color, swap in almond milk for a dairy-free version, or add lemon zest to wake up the flavor. It’s a dish I always reach for when friends drop by or when I’m craving something fruity after dinner. And yes, the glaze is that little extra sparkle that makes it feel like a special treat without adding drama in the kitchen. If you’ve cooked with fresh strawberries before, you’ll recognize that familiar, sun-warmed scent as you mix and swirl—a tiny reminder that summer isn’t far away, no matter what the calendar says.
Why you’ll love this recipe?
I’ve made this countless times and it never fails to charm a room. What I love most about this easy strawberry dessert is how forgiving it is without sacrificing that “wow” factor. Here’s why it’s a favorite in my rotation:
- Flavor: Bright strawberry aroma, vanilla-soft cake, and a glaze that’s tart enough to balance the sweetness. It tastes like sunshine and cream all at once, which is precisely the mood I want after a long day.
- SimplicityThere isn’t a thousand-step process here. You mix dry, mix wet, combine, swirl, bake, glaze, and serve
- Cost-efficiency: What is the best way to measure cost-efficiency?: You likely have most of the ingredients on hand. Fresh berries are the only variable, but even that can be substituted with frozen berries if you’re in a pinch.
- Versatility: It’s adaptable for dairy-free, gluten-free, or lower-sugar diets with a few simple swaps. It also plays nicely with add-ins like lemon zest, a hint of almond extract, or a dollop of whipped cream for the final touch.
- Make-ahead friendly: You can bake and glaze ahead, then refrigerate for a few hours before serving—perfect for company without last-minute hustle.
What I love most about it is how it stays fresh in the fridge for a day or two without drying out, which is a real gift when you’re feeding a hungry household or a crowd. And the best part? It tastes better the next day when the flavors have had a little time to mingle. This is the kind of dessert that invites you to slow down, plate nicely, and savor a spoonful with someone you care about.
How to Make Easy Strawberry Dessert
Quick Overview
We start with a simple vanilla cake batter, lower in fat than a full Butter Cake to keep it tender and light. Then we swirl in a bright strawberry puree to create ribbons of pink that promise fruity goodness in every bite. Bake it in a shallow pan so it bakes evenly and stays moist, then drizzle with a glossy strawberry glaze that hardens just enough to hold a pretty sheen. The beauty of this method is that the batter itself is forgiving—no overmixing, no drama—so even confident beginners can nail it on the first try. It’s all about layering flavor and texture in a single, accessible dessert you can whip up with minimal equipment and a lot of love.
Ingredients
For the Main Batter:
– 1 3/4 cups all-purpose flour
– 3/4 cup granulated sugar
– 2 teaspoons baking powder
– 1/2 teaspoon salt
– 1/2 cup unsalted butter, melted and cooled slightly
– 2/3 cup milk (dairy or your favorite plant-based milk)
– 2 large eggs
– 1 teaspoon vanilla extract
For the Filling (Strawberry Swirl):
– 1 cup fresh strawberries, hulled and pureed
– 2 tablespoons granulated sugar (adjust to sweetness of berries)
– 1 teaspoon lemon juice
– 1 teaspoon cornstarch (optional, for thicker swirl)
For the Glaze:
– 1 cup powdered sugar
– 2-3 tablespoons strawberry puree (adjust for desired consistency)
– 1 teaspoon lemon juice (optional, brightens flavor)
Step-by-Step Instructions
Step 1: Preheat & Prep Pan
Heat your oven to 350°F (175°C). Lightly grease a 9×13-inch pan or line it with parchment for easy removal. If you’re using a lighter metal pan, a quick spray with nonstick will help the cake release cleanly. I always set the pan on a Sheet Pan too—keeps the bottom from browning too fast and makes clean-up simpler. While the oven warms, whisk together the dry ingredients so the baking powder stays evenly distributed. It’s the small stuff that pays off later—trust me on this one.
Step 2: Mix Dry Ingredients
In a medium bowl, sift or whisk together flour, sugar, baking powder, and salt. This ensures a tender crumb without pockets of dry flour. I find that a gentle whisk does the trick—no need to overdo it. The goal is even moisture and a soft lift, not a jet-mixed batter that feels glossy and dense. My grandma always reminded me that a steady hand beats a heavy arm when it comes to dry ingredients.
Step 3: Mix Wet Ingredients
In a separate bowl, whisk the melted butter with milk, eggs, and vanilla until smooth. The mixture should look softly emulsified, not curdled. If your butter is a touch warm, that’s okay—it helps the batter stay pourable and light once baked. I’ve even whisked in a splash of almond extract on some days when I wanted a tiny almond aroma to mingle with the strawberry glaze. You’ll know the wet ingredients are ready when there’s no streaks of flour clinging to the whisk and everything looks glossy and inviting.
Step 4: Combine
Pour the wet ingredients into the dry and whisk just until the batter comes together. It’ll be slightly thick but still pourable. Overmixing here will make the cake tougher, so mix until you see combined lumps disappear but stop as soon as you can. If you want to make the swirl more dramatic, reserve a couple of tablespoons of the batter in a separate bowl and drop stabilized dollops around the pan as you layer—this creates a pretty marble effect without complicating the bake.
Step 5: Prepare Filling
While the batter is resting for a moment, prepare your strawberry swirl. Stir the strawberry puree with sugar and lemon juice. If you’re worried about runny swirl, whisk in a teaspoon of cornstarch dissolved in a teaspoon of water to thicken slightly. I’ve found that a thickened swirl clings to the batter better and creates those characteristic pink ribbons in every slice. Taste the swirl—bright, not cloying, with a tart edge that balances the sweetness of the cake. If your berries are particularly sweet, you might want to dial back the sugar a touch.
Step 6: Layer & Swirl
Spread about half of the batter into the pan, smoothing the surface with a spatula. Spoon generous dollops of the strawberry swirl over the batter, then drizzle the remaining batter on top. Use a skewer or the tip of a knife to swirl the strawberry into the batter in gentle figure-eights. The key is a light touch—you want pretty marbling, not a fully dyed pink batter. If you want more dramatic swirls, add more swirl layers and fewer dollops of batter in between. The swirl should look inviting and artistic, not muddy. When you’re happy with the pattern, it’s ready for the oven.
Step 7: Bake
Bake for about 25-30 minutes, or until the toothpick inserted into the center comes out with a few moist crumbs. The cake should spring back lightly when you press the center. If your oven runs hot, start checking a little earlier, as round or dark pans can brown quicker. A shallow bake helps keep the texture tender and gentle—no dry edges. If you see the surface browning too quickly, tent the top loosely with foil for the last 5-10 minutes to protect the crumb while the center catches up.
Step 8: Cool & Glaze
Let the cake cool in the pan on a rack for at least 20 minutes before glazing. This prevents the glaze from sliding off and ensures a neat finish. Whisk the powdered sugar with strawberry puree and lemon juice until it’s smooth and thick enough to pour slowly but still hold its shape a little. If you want a thinner glaze, add a touch more liquid; for a glossy, thicker coat, use a touch less liquid. Drizzle the glaze in slow, rhythmic lines across the top. I love watching the glaze settle into the marbled patterns—it’s like a little edible art moment. If you’re serving the cake later, you can chill it to set the glaze more firmly; I personally enjoy it a bit soft and glossy, right after it’s glazed.
Step 9: Slice & Serve
Let the glaze set for a few minutes, then slice into generous squares or long triangles, depending on your pan shape. A sharp serrated knife makes clean cuts through the tender crumb without squashing the marbling. Wipe the knife between slices for neat edges. This dessert shines with a dollop of lightly whipped cream or a scoop of vanilla Ice Cream, if you like. A few fresh strawberry slices on top finish the presentation and amplify the color. My kids love watching the pink ribbons appear as I cut—it’s almost as fun as tasting it.
What to Serve It With
This easy strawberry dessert is pretty enough to stand on its own, but a few well-chosen accompaniments can elevate it for different occasions:
For Breakfast: A gentle dusting of powdered sugar and a side of black coffee or a lightly brewed cuppa tea makes for a charming weekend treat. The cake’s soft crumb pairs wonderfully with a splash of cold milk or a dollop of yogurt in the morning light.
For Brunch: Layer small slices atop a platter with extra berries, lemon zest, and a few edible flowers for a brunch-worthy presentation. Serve with sparkling water or a light sparkling rosé for a celebratory touch.
As Dessert: Pair with a scoop of vanilla ice cream or a cloud of whipped cream; a mint leaf or two and a few extra strawberry slices make it look like a shop-bought dream without the fuss.
For Cozy Snacks: Cut the cake into bite-sized squares and serve with hot tea or coffee. A warm kitchen and this dessert are basically a hug in edible form. My kids grab them straight from the fridge after school, and I’ll admit I do, too—they’re “snackable” in the best way possible.
Top Tips for Perfecting Your Easy Strawberry Dessert
These little refinements have saved me more times than I can count, especially on nights when I’m racing the clock and the kids are circling like hungry satellites.
Strawberry Prep: If you’re using fresh berries, wash, hull, and gently pat dry. A quick puree with a splash of lemon juice heightens brightness. If your berries are on the small side, you can puree with a tiny bit of water to help the blender along; you want a vibrant, pourable sauce, not a soup.
Mixing Advice: Overmixing the batter leads to a tougher crumb. Stir until just combined, then stop. If you plan to swirl, reserve a small portion of batter in a separate bowl so you can create pretty ribbons without losing lightness.
Swirl Customization: For a bolder pink marbling, add a touch more strawberry puree to a portion of the batter and swirl gently. You can also layer dollops of batter with spoonfuls of berry puree in alternate fashion for a more dramatic effect.
Ingredient Swaps: To make this gluten-free, use a 1:1 gluten-free all-purpose flour blend. For dairy-free, substitute plant-based milk and melted coconut oil or dairy-free butter. If you want to reduce sugar, cut the glaze by a tablespoon and rely on the natural sweetness of the berries, compensating with a touch of lemon to balance flavor.
Baking Tips: Pan choice matters. A light-colored metal pan bakes more evenly and helps avoid over-browning on the bottom. If you’re using dark-coated pans, lower the oven by 25°F (about 15°C) and keep a careful eye on the bake time.
Glaze Variations: Add a teaspoon of vanilla or a pinch of finely grated lemon zest to the glaze for extra depth. If you want a glossy, almost jelly-like finish, whisk in a tiny amount of corn syrup or honey. Drizzle right before serving to preserve the sheen for presentation.
As with most family recipes, I learned these tricks after a few missteps—like the time I overmixed and ended up with a cake that was a touch denser than intended, or the night I forgot the lemon and the glaze felt flat. Trust me on the little details: they’re what make this dessert feel like your own signature treat. My friends say the glaze tastes like a berry kiss; the kids say it looks like a tiny, edible sunset. It’s these moments that make baking feel less like science and more like weather—unpredictable, but always beautiful in the end.
Storing and Reheating Tips
Store this dessert thoughtfully so it stays moist, fresh, and sliceable. Here’s how I keep it at its best:
Room Temperature: If you’re serving within a few hours, you can leave it uncovered or loosely covered for a couple of hours. It’ll stay tender for a while in a cool kitchen, but I don’t recommend leaving it out overnight in a warm room—the glaze can soften more than you want.
Refrigerator Storage: Refrigerate leftovers in an airtight container for up to 3 days. The flavors will intensify a bit, especially the strawberry glaze. Bring slices to room temperature for 15-20 minutes before serving to revive the crumb and glaze sheen.
Freezer Instructions: You can freeze the baked cake, tightly wrapped, for up to 1 month. Thaw overnight in the fridge and bring to room temperature before glazing if you’ve frozen the cake already glazed; if not, glaze after thawing for a fresh, glossy finish. Note that freezing may slightly soften the texture of the glaze but won’t ruin the overall dessert.
Glaze Timing Advice: If you’re freezing, you can glaze after thawing to preserve the glaze’s shine. If you’re eating soon after baking, glaze while the cake is still slightly warm for a more integrated look and texture. Either way, avoid refrigerating the glaze separately—it’s best when freshly applied for a vibrant finish.
Frequently Asked Questions
Final Thoughts
This easy strawberry dessert is a little celebration you can carry from the kitchen to the table in a hurry, and it always feels special. The batter stays tender, the strawberry swirl looks like pretty art, and the glaze adds just the right kiss of brightness. It’s reliable enough for family dinners, charming enough for a weekend brunch, and flexible enough to accommodate changes you might need for dietary preferences or ingredient availability. If you’re new to baking, this is a wonderful place to start because the steps are straightforward, and the results are consistently stunning. If you’re a seasoned baker, you’ll appreciate how the berry swirl elevates a simple vanilla cake without turning it into a complicated project. I’d love to hear how you customize it—do you add lemon zest, a splash of liqueur, or a pinch of cardamom? Share your variations in the comments, rate the recipe, and tag me in your photos. Happy baking!