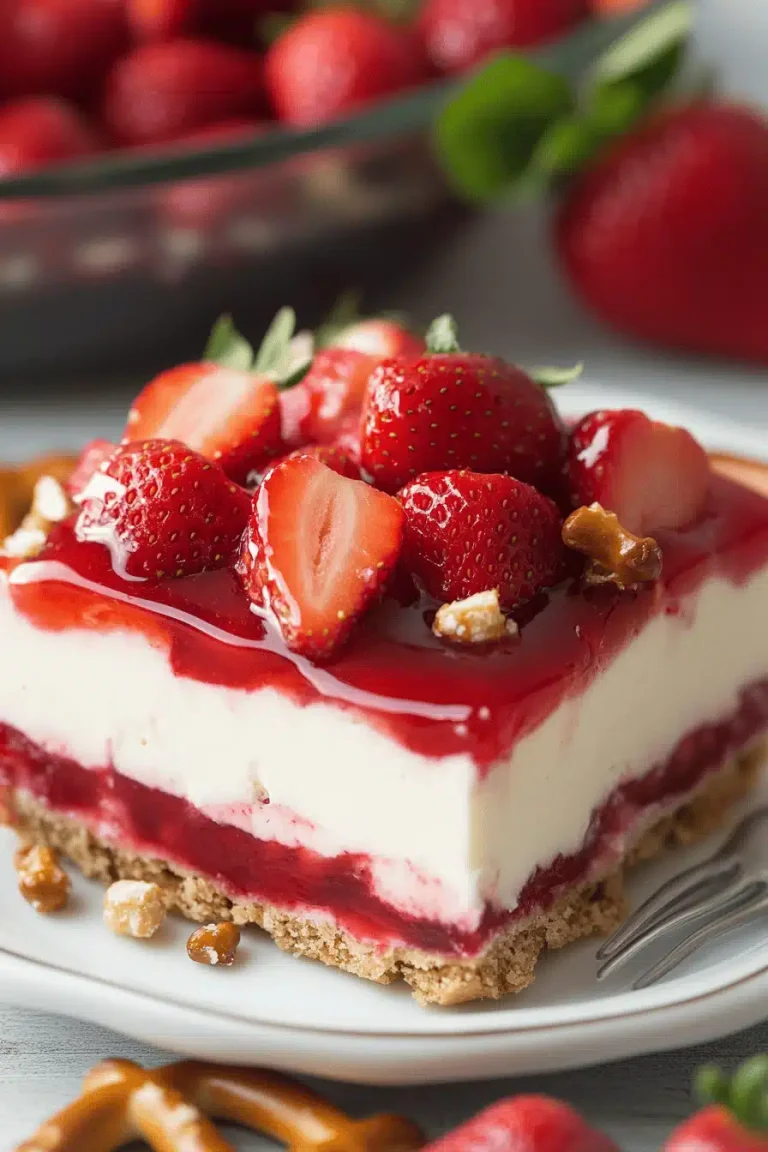
Easy No Bake Cheesecake So Creamy
Okay, so confession time: I am *not* a natural baker. Like, at all. Measuring cups and I have a complicated relationship, and anything involving yeast feels like a high-stakes science experiment. Which is why, for years, cheesecake felt like this mythical, unattainable dessert. You know, the kind that requires water baths and delicate crusts and the fear of cracking that haunts your dreams. Then, a few years ago, a friend shared this no bake Cheesecake Recipe with me, and let me tell you, it changed everything. It’s the kind of dessert that makes you look like a culinary genius without breaking a sweat, and honestly, it’s become my absolute go-to for everything from last-minute potlucks to quiet nights when I just need something ridiculously delicious. It’s so easy, my kids can practically make it themselves (and sometimes they do!). If you’ve ever felt intimidated by traditional cheesecakes, or you just need a seriously impressive dessert that’s shockingly simple, then you’re in the right place.
What is no bake cheesecake?
So, what exactly *is* a no bake cheesecake? Think of it as all the creamy, dreamy goodness of a classic cheesecake, but without the oven. That’s right, no oven required! Instead of relying on eggs and heat to set, this magical creation uses the power of chilled Cream Cheese, whipped cream, and a touch of condensed milk to achieve that perfect, luscious texture. It’s essentially a super-rich, decadent dessert filling poured into a simple crumb crust and then chilled until it’s perfectly firm and utterly irresistible. The name itself says it all – it’s a cheesecake you don’t have to bake. It’s the ultimate shortcut to a show-stopping dessert that tastes like you spent hours slaving away, when in reality, you probably spent less than 20 minutes of active prep time. It’s pure dessert alchemy, and I’m here for it!
Why you’ll love this recipe?
Honestly, where do I even begin? This no bake Cheesecake Recipe is the definition of a kitchen win. First off, let’s talk flavor. It’s rich, tangy, and perfectly sweet, with that signature cheesecake taste that just melts in your mouth. The texture is unbelievably creamy and smooth, and it’s not overly sweet, which I personally love. It’s got that perfect balance that makes you reach for just one more slice (or, you know, admit defeat and go for a second). Then there’s the simplicity. I’ve mentioned it before, but it bears repeating: this is SO easy. You don’t need any fancy equipment or skills. Just a few bowls, a whisk, and a fridge. It’s the ultimate lifesaver for busy weeknights or when unexpected guests pop over. I’ve had friends ask me for the recipe after taking just one bite, completely shocked that it didn’t involve an oven. Plus, it’s incredibly budget-friendly. The ingredients are all pantry staples or easily found at any grocery store, making it an affordable way to impress everyone. And talk about versatility! This recipe is a fantastic base for all sorts of toppings and flavorings. You can go classic with a berry compote, or get creative with chocolate ganache, caramel sauce, or even some fresh fruit. It’s adaptable to whatever you’re craving or whatever you have on hand. What I love most about this is the sheer relief it brings. It’s the dessert that always delivers, no matter what. It’s a guaranteed crowd-pleaser and a total sanity saver for anyone who loves dessert but dreads the baking process.
How do I make no bake cheesecake?
Quick Overview
The process for this no bake cheesecake is delightfully straightforward. You’ll start by crushing your favorite cookies into crumbs for the crust, mixing them with a bit of melted butter, and pressing it all into your pan. While that chills briefly, you’ll whip up the creamy filling by blending Cream Cheese, condensed milk, and vanilla until smooth, then gently folding in whipped cream for that airy lightness. Pour that luscious mixture into the prepared crust, smooth the top, and then it’s off to the fridge to work its magic. It’s truly that simple – a few steps, minimal fuss, and maximum reward. This method ensures a perfectly set, incredibly smooth cheesecake every single time, and it’s perfect for those hot summer days when you don’t want to turn on the oven.
Ingredients
For the Crust:
2 cups graham cracker crumbs (about 14 full crackers)
1/4 cup granulated sugar
1/2 cup unsalted butter, melted
For the Filling:
2 (8 ounce) packages Cream Cheese, softened to room temperature
1 (14 ounce) can sweetened condensed milk
1/4 cup fresh lemon juice (this is key for that tang!)
1 teaspoon vanilla extract
1 1/2 cups heavy whipping cream, cold
For the Optional Topping (Highly Recommended!):
Fresh berries, fruit compote, chocolate sauce, or caramel drizzle
Step-by-Step Instructions
Step 1: Preheat & Prep Pan
Even though we’re not baking, we still want to get our pan ready! Grab a 9-inch springform pan. This is crucial because it makes getting the cheesecake out so much easier. You don’t want to struggle with unmolding it! If you don’t have a springform, a regular 9-inch pie plate will work, but you might have a little more difficulty serving it neatly. Press the crust mixture firmly into the bottom and slightly up the sides of the pan. I like to use the bottom of a glass or a flat measuring cup to get it really compact and even. Pop this into the refrigerator for at least 10 minutes while you prepare the filling. This helps it firm up so it doesn’t crumble when you slice.
Step 2: Mix Dry Ingredients
For the crust, you’ll want to make sure your graham cracker crumbs are nice and fine. You can do this by pulsing them in a food processor or putting them in a zip-top bag and crushing them with a rolling pin. In a medium bowl, combine the graham cracker crumbs and the granulated sugar. Give them a good stir to make sure the sugar is evenly distributed. This dry mixture is the base of our delicious crust, and the sugar adds just a touch of sweetness to complement the creamy filling.
Step 3: Mix Wet Ingredients
In a large bowl, beat the softened cream cheese until it’s completely smooth and creamy. Seriously, no lumps allowed! This is where the magic starts. Then, gradually pour in the sweetened condensed milk while beating. Keep going until everything is well combined and super smooth. Next, add the fresh lemon juice and vanilla extract. The lemon juice is what gives cheesecake that signature tanginess and helps it set up a bit more, so don’t skip it! Beat again until just combined. You’ll notice the mixture will start to thicken up nicely.
Step 4: Combine
In a separate, clean bowl (or the bowl of your stand mixer if you have one), whip the cold heavy cream until stiff peaks form. You want it to hold its shape when you lift the whisk. This is what gives the no bake cheesecake its light and airy texture. Be careful not to over-whip, or you’ll end up with butter! Once your cream is whipped, gently fold about half of it into the cream cheese mixture. Then, gently fold in the remaining whipped cream. The key here is to fold gently, trying to keep as much air in the mixture as possible. We want it light and fluffy, not dense!
Step 5: Prepare Filling
At this point, your cream cheese mixture should be thick, smooth, and wonderfully aromatic from the vanilla and lemon. Once you’ve folded in the whipped cream, it will become even more voluminous and cloud-like. This is exactly the consistency you’re looking for – a rich, creamy filling that’s ready to be poured. I always give it one last gentle stir to ensure everything is perfectly incorporated, but I’m careful not to overmix, as we want to preserve that lovely airiness. This step is crucial for achieving that signature melt-in-your-mouth texture that everyone raves about.
Step 6: Layer & Swirl
Gently pour the creamy filling over the chilled crust in your springform pan. Use a spatula to spread it evenly, making sure to get it right to the edges. You want a nice, smooth surface. If you’re adding any swirls now – perhaps some melted chocolate or fruit puree – you can dollop them on top and use a toothpick or skewer to gently swirl them in. I often do a simple swirl of raspberry coulis for a pop of color and flavor. Just remember not to over-swirl, or you’ll muddy the colors. Keep it subtle and elegant!
Step 7: Bake
Wait, bake? Nope! This is the “no bake” part! Once your filling is smoothed and any swirls are done, cover the pan loosely with plastic wrap or foil. Place the entire pan in the refrigerator. You need to let it chill for at least 6-8 hours, but overnight is truly best. This allows the cheesecake to set up properly and all those flavors to meld together beautifully. The longer it chills, the firmer and more delicious it will be. Resist the urge to poke it too early – patience is key for this recipe!
Step 8: Cool & Glaze
After the chilling period, your no bake cheesecake should be beautifully set. The filling will be firm to the touch but still wonderfully creamy. Carefully remove the sides of the springform pan. If it seems a little stuck, you can run a thin knife around the edge before releasing the spring. Now it’s time for toppings! If you’re using a simple topping like fresh berries, arrange them beautifully on top. For a sauce or glaze, you can gently spoon or drizzle it over the cheesecake. For a fruit compote, let it cool slightly before spreading evenly. The goal is a visually appealing finish that hints at the deliciousness inside.
Step 9: Slice & Serve
This is the moment you’ve been waiting for! To get clean slices, I recommend using a sharp knife that has been dipped in hot water and then wiped dry. Slice the cheesecake into wedges and serve immediately. The best temperature for serving is chilled, but not ice cold. You want that creamy texture to really shine. If you’re feeling fancy, a dollop of whipped cream or a sprig of mint can elevate it even further. Enjoy every single delightful bite of your homemade no bake cheesecake!
What to Serve It With
This no bake cheesecake is so versatile, it truly fits into any meal or occasion! For a delightful breakfast treat (yes, I’m a firm believer that dessert can be breakfast!), I love pairing a small slice with a strong cup of black coffee or a creamy latte. A few fresh raspberries or blueberries on top add a burst of freshness to start the day. If you’re hosting a lovely brunch, this cheesecake is an absolute showstopper. Serve it with a vibrant fruit salad and maybe some mimosas or sparkling cider. The elegant presentation of the cheesecake makes it feel extra special. As a dessert, well, it’s in its natural habitat! It’s fantastic after a hearty meal, especially when paired with a dessert wine like a Moscato d’Asti or even a rich espresso. For those cozy snack moments, when you just need a comforting sweet bite, this cheesecake is perfect. I’ll often serve it with a mug of hot chocolate on a chilly evening, or with a glass of cold milk when the craving strikes. My family loves it with a drizzle of homemade caramel sauce, which adds an extra layer of indulgence. Another favorite combination is a simple, tart cherry compote that cuts through the richness of the cheesecake beautifully. Honestly, the possibilities are endless, and it always feels special, no matter how you serve it.
Top Tips for Perfecting Your No Bake Cheesecake
Over the years, I’ve learned a few tricks that make this no bake cheesecake absolutely foolproof. When it comes to the crust, make sure your graham cracker crumbs are fine. If they’re too coarse, the crust can be crumbly. Also, don’t be shy with the melted butter; it’s the binder! Press it firmly and evenly into the pan; a compact crust prevents any gaps. For the filling, the key is really soft cream cheese. If it’s cold, you’ll end up with lumps, no matter how hard you beat it. Let it sit out on the counter for at least an hour, or even microwave it in 10-second bursts, stirring in between, until it’s pliable. When whipping the heavy cream, make sure it’s very cold. This helps it whip up quickly and achieve those stiff peaks. I learned the hard way that trying to whip warm cream is a recipe for disaster (and a greasy mess!). Don’t over-whip, either; stop as soon as you see stiff peaks. When folding the whipped cream into the cream cheese mixture, be gentle. Use a spatula and fold from the bottom up, just until combined. Overmixing will deflate the air, resulting in a denser cheesecake. For the lemon juice, fresh is always best. Bottled lemon juice just doesn’t have the same bright flavor and can make the cheesecake taste a bit artificial. I’ve tried it, and trust me, it’s worth squeezing fresh lemons. When it comes to chilling, give it the full recommended time, or even better, overnight. This is non-negotiable for a properly set cheesecake. Rushing the chilling process is the number one reason for a cheesecake that doesn’t hold its shape. If you want to add swirls or flavorings, do it just before it goes into the fridge. And if you’re cutting it and find it’s not quite firm enough, just pop it back in the fridge for another hour or two. It’s a forgiving recipe!
Storing and Reheating Tips
Because this no bake cheesecake doesn’t have eggs or bake, it has a pretty decent shelf life, which is another reason I love it! If you have any leftovers (which is rare in my house!), storing it is a breeze. At room temperature, I would only leave it out for a maximum of 2 hours, mainly because of the dairy. It’s always best to refrigerate it as soon as possible. For refrigerator storage, a tightly covered springform pan or transferring the cheesecake to an airtight container is ideal. It will stay wonderfully fresh and delicious for about 3 to 4 days. The flavor actually often improves on the second day as all the ingredients really meld together. If you need to store it for longer, freezing is an excellent option. You can freeze the entire cheesecake (before adding any delicate fruit toppings, of course!). Wrap it very well in plastic wrap, then in foil, to prevent freezer burn. It can stay frozen for up to 2 months. When you’re ready to serve a frozen cheesecake, thaw it slowly in the refrigerator overnight. This ensures it thaws evenly and maintains its creamy texture. I generally don’t recommend “reheating” a no bake cheesecake; it’s meant to be served chilled. If it’s slightly too firm from the fridge, just let it sit at room temperature for about 15-20 minutes before slicing. For toppings, it’s best to add delicate glazes or fresh fruit just before serving, especially if you plan to store leftovers, as they can become soggy. Sauces and compotes hold up a bit better.
Frequently Asked Questions
Final Thoughts
So there you have it, my absolute favorite no bake cheesecake recipe! I truly hope you give this one a try. It’s the kind of dessert that brings smiles to faces and makes everyone feel like they’re indulging in something truly special, all without the stress of traditional baking. It’s proof that you don’t need a fancy degree or a professional kitchen to create something incredibly delicious. Whether you’re a seasoned baker looking for a quick fix or someone like me who finds baking a bit daunting, this recipe is a winner. It’s the perfect balance of creamy, tangy, and sweet, and the fact that it’s so adaptable means you can make it your own. If you love this recipe, you might also enjoy my other easy dessert recipes, like my no-churn ice cream or my simple fruit crumble. I can’t wait to hear how your no bake cheesecake turns out! Please leave a comment below and let me know what toppings you used or any little twists you added. Happy “baking” (or rather, chilling!)!