Easy Hazelnut Brownies A Simple Treat
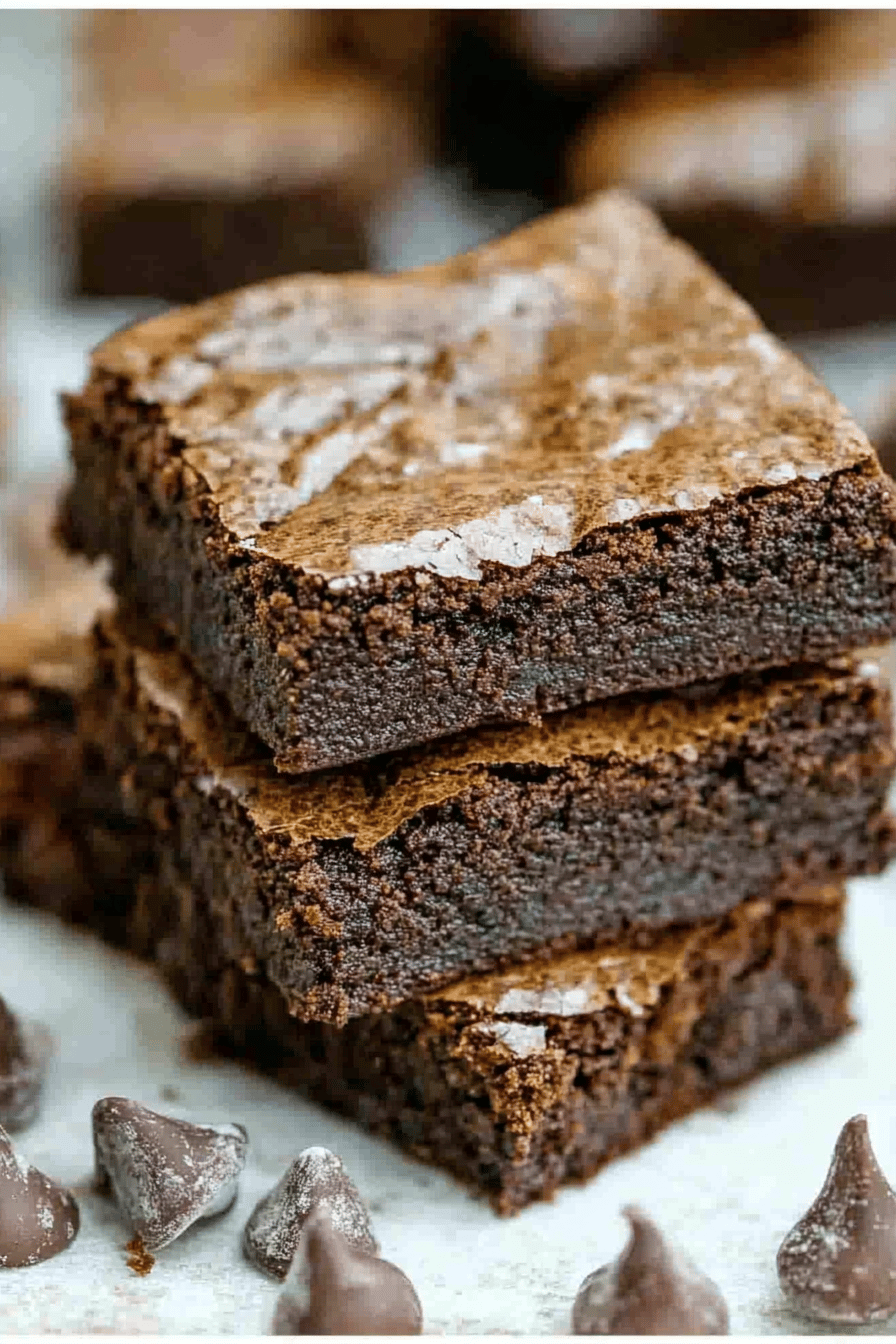
There’s something about the scent of warm chocolate that hugs you like a cozy blanket on a rainy afternoon. These Nutella brownies bring me right back to those moments when the kids would come running into the kitchen, eager for a treat I whipped up from whatever pantry staples I had around. Nutella and brownies are both childhood favorites in their own right, but put them together? Magic happens. This is that easy, comforting dessert that’s almost like a hug in dessert form — fudgy chocolate with that unmistakable smooth hazelnut swirl. Honestly, it’s just easier than making traditional brownies from scratch, but you won’t miss a thing in the flavor department. If you’ve ever fussed with complicated recipes that require half a dozen bowls or precise temperatures, this one’s a lifesaver. I promise, these brownies will disappear faster than you can say “Nutella.”
What is Nutella Brownies?
Think of Nutella brownies as the unofficial lovechild of classic brownies and everyone’s favorite hazelnut-chocolate spread. It’s essentially a brownie base that’s enriched with pockets of Nutella swirled in just before baking to create those gooey, dreamy ribbons of flavor throughout. The name says it all, but the experience is so much more — imagine biting into a chewy, chocolatey brownie with creamy, nutty surprise bites all through. It’s a simple, approachable twist on a timeless dessert, perfect for when you want something special without a fuss. There’s no special equipment needed, and the Nutella adds a little something that makes you wonder why you haven’t done it before. I’ve shared this recipe at countless family get-togethers, and it’s always the first to go.
Why you’ll love this recipe?
What I love most about these Nutella brownies is just how effortlessly luscious they are. The rich chocolate base hits that classic brownie note—fudgy yet tender without being cakey—while the swirls of Nutella add pockets of smooth sweetness and that iconic nutty kick. It’s like a brownie that’s been hugged by your favorite chocolate spread. The simplicity can’t be overstated here; it’s basically a “dump it all together” scenario, which is perfect for lazy weekends or those 8pm cravings when you just want something comforting without complicated prep.
Then there’s the budget-friendliness. With ingredients you likely already have — eggs, flour, sugar, cocoa, and of course, Nutella — it won’t break the bank or require a trip to some specialty store. Plus, these brownies adapt well depending on what you have around. Want to throw in some walnuts or dark chocolate chips? Go for it. Like your brownies a little less sweet? I’ve learned a few tricks over time that let you play with sugar levels without losing that signature fudgy texture.
This recipe also has a versatility that surprises people. Serve these warm with a scoop of vanilla ice cream for an easy dessert, slice them up for lunchbox treats, or just snack away while binge-watching your favorite shows. They’re a crowd-pleaser and that’s coming from someone who has seen picky eaters dig in without hesitation. To me, nothing beats the nostalgia of a dessert that’s quick, delicious, and reliably satisfying every time. It’s my go-to for when I want to impress without the stress.
How do I make Nutella Brownies?
Quick Overview
If you know your way around a mixing bowl and an oven, you’re already halfway there. This recipe is a breeze — mixing the wet and dry ingredients separately, folding them together just so, and then layering thick ribbons of Nutella before popping the whole pan into the oven. The magic really happens during baking as the Nutella swirls melt into the brownie batter, creating those dreamy pockets of gooey goodness. It’s straightforward but feels special, which is why I keep coming back to it whenever I need a reliable sweet fix without the fuss.
Ingredients
For the Main Batter:
- 1/2 cup (115g) unsalted butter, melted – I always use good quality butter to get the best rich flavor.
- 1 cup (200g) granulated sugar – you can reduce it slightly if you prefer less sweet.
- 2 large eggs, room temperature – they help bind everything together and give that fudgy texture.
- 1 teaspoon pure vanilla extract – this is where even a little quality shines through.
- 1/3 cup (40g) unsweetened cocoa powder – sifted to avoid clumps and give a smooth final texture.
- 1/2 cup (65g) all-purpose flour – avoid over-measuring; spoon and level for best results.
- 1/4 teaspoon salt – balances sweetness and enhances chocolate flavor.
For the Filling:
- 1/2 cup Nutella – the star ingredient, smooth, creamy, and nutty.
- Optional: 2 tablespoons heavy cream or milk – I sometimes thin out the Nutella a bit when I want a lighter swirl effect.
For the Glaze:
- 1/4 cup Nutella – warmed slightly to drizzle over once baked (skip if you prefer your brownies plain).
- Optional: pinch of sea salt – enhances depth and balances sweetness beautifully.
Step-by-Step Instructions
Step 1: Preheat & Prep Pan
Start by heating your oven to 350°F (175°C). Grab an 8×8-inch square baking pan and line it with parchment paper or grease it generously with butter. I like the parchment because it helps me lift the whole batch out easily, making slicing a breeze. While the oven gets cozy, this little prep gets you ahead of the game.
Step 2: Mix Dry Ingredients
In a medium bowl, sift together your cocoa powder, flour, and salt. I always double-check for any hidden lumps because you want that batter silky smooth. This step is key to the brownie’s final texture — it ensures even cocoa distribution and prevents any dry flour pockets in the finished brownie.
Step 3: Mix Wet Ingredients
In another larger bowl, whisk the melted butter and sugar until it’s shiny and just starting to thicken a bit. Then add the eggs one at a time, whisking gently after each addition until the mixture is smooth and glossy. Stir in the vanilla extract last. Watch how the batter slightly lightens and gains that almost fudge-like shimmer. If your eggs are too cold, the butter might seize — so I always let them warm up a bit beforehand.
Step 4: Combine
Now it’s time to add the dry ingredients to the wet. I do this slowly, folding gently with a spatula. The goal is to bring everything together without overmixing because that can make the brownies tough. You’re looking for a thick, smooth batter that falls like liquid fudge off your spatula. If it feels too dry, double-check your flour measurement — sometimes we pack it too tightly!
Step 5: Prepare Filling
In a small bowl, stir your Nutella with a touch of cream or milk if you want a looser swirl. This step is optional, but when I want those gorgeous ribbons that melt into the batter, it makes a big difference. If you’re like me and sometimes impatient, this little tweak lets you swirl effortlessly without Nutella sticking stubbornly to your spoon or spatula.
Step 6: Layer & Swirl
Pour half of the brownie batter into the prepared pan. Dollop spoonfuls of Nutella over the batter, then pour the remaining batter on top. Now comes my favorite part: grab a butter knife or skewer and swirl the Nutella into the batter with gentle, wavy motions. Don’t overdo it—those lovely streaks are what you want to see baked into each bite. I learned from a messy first try that patience is key here; resist the urge to mix too vigorously!
Step 7: Bake
Bake in the preheated oven for 25-30 minutes, checking at around 25. The edges will look set, but the middle should still be slightly gooey—this is where the fudgy magic lives. I usually do the toothpick test around 28 minutes, expecting it to come out with a few moist crumbs but no wet batter. Every oven is different, so keep an eye but don’t open the door too often; that lets the heat escape.
Step 8: Cool & Glaze
Let the brownies cool completely in the pan on a wire rack, at least 30 minutes. Once cool, warm your remaining Nutella slightly and drizzle it over the top—this adds a shiny, luscious finish and an extra punch of that signature hazelnut flavor. I like to sprinkle a pinch of flaky sea salt here; it turns these from great to unforgettable.
Step 9: Slice & Serve
Use a sharp knife or even dental floss to cut neat squares. The brownies hold together beautifully but slicing too early can cause breakage, so patience pays off. Serve them at room temperature or lightly warmed to get those Nutella swirls gooey again. Trust me, these disappear fast, so you might want to hide a piece for yourself!
What to Serve It With
For Breakfast: Pair a warm brownie square with your morning coffee or a creamy latte. The hazelnut notes from the Nutella echo beautifully with a nutty coffee roast. Sometimes I add a dollop of Greek yogurt on the side to keep things a bit balanced.
For Brunch: Plate these brownies alongside fresh berries, maybe some whipped cream or mascarpone, and a glass of chilled sparkling water with lemon. I’ve brought this to weekend brunches, and it adds a lovely chocolate-forward twist that’s unexpectedly elegant.
As Dessert: Nothing beats serving these with a scoop of vanilla bean ice cream and a drizzle of warm chocolate sauce. Add toasted hazelnuts if you’re feeling fancy. At family dinners, this has become our “special occasion” treat and it never fails to elicit smiles.
For Cozy Snacks: When the urge for comfort hits mid-afternoon, I’ll pair these with a warm cup of chai tea or even just a glass of cold milk. They’re the kind of treat that instantly quiets the day’s chaos and makes you feel just a little bit spoiled.
Top Tips for Perfecting Your Nutella Brownies
Butter Consistency: Use melted but not hot butter—it should be warm enough to blend easily but not so hot that it cooks the eggs when you add them. This keeps your batter silky smooth.
Mixing Technique: Fold gently but thoroughly to avoid overworking the gluten in the flour. Overmixing makes brownies cakey instead of fudgy. I always stop mixing right after the dry ingredients disappear.
Swirl Customization: For a bolder Nutella flavor, you can add larger dollops or swirl multiple times. If you want an even prettier marbled look, gently drag your knife in an “S” motion rather than just circular swirls. Little differences make a big impact visually.
Ingredient Swaps: Subbing half of the flour with almond flour can add a nice nutty crunch, but keep in mind it will change the texture slightly. I’ve also tried coconut sugar for part of the granulated sugar, which adds a subtle caramel note and deeper color.
Baking Tips: Position your rack in the middle of the oven for even cooking. Ovens vary, so start checking at 25 minutes, but don’t be afraid to go a bit longer if your brownies seem too loose. The fudgy center firming up slightly as they cool is normal and will keep them perfectly soft.
Glaze Variations: If Nutella’s too heavy as a glaze, try a simple powdered sugar and cocoa dusting for a lighter finish. Or add a splash of coffee to the glaze for a mocha twist. I’ve also drizzled melted white chocolate on top when I wanted a pretty contrast.
Storing and Reheating Tips
Room Temperature: Store your brownies in an airtight container at room temp for up to 3 days. This keeps them soft and moist—if they call your name by the next day, I totally get it.
Refrigerator Storage: If you want to keep them longer (up to 5 days), pop them in the fridge wrapped tightly in plastic wrap or in an airtight container. They’ll firm up, so I recommend warming them briefly before serving to melt those Nutella swirls back to life.
Freezer Instructions: These brownies freeze beautifully! Wrap individual squares tightly in plastic wrap, then tuck them into a freezer bag or container. They’ll keep for up to 3 months. To thaw, just leave them overnight in the fridge or heat gently in the microwave for a few seconds for that fresh-baked feel.
Glaze Timing Advice: Add the glaze after you take the brownies out of the oven and they’ve cooled a bit, rather than before baking. If you’re freezing brownies, I suggest glazing only after thawing and warming for the best result.
Frequently Asked Questions
Final Thoughts
If you’re anything like me, you’ll find yourself coming back to these Nutella brownies again and again—not just because they’re delicious, but because they feel like a little treat of something familiar and comforting every single time. They’re quick, forgiving, and ridiculously satisfying, plus they sneak in just the right touch of nostalgia mixed with that irresistible Nutella charm. Seriously, every bite brings a huge smile (and occasionally a bit of that “oh no I shouldn’t eat the whole pan” panic). I’d say give this recipe a try on an easy weekend or when you need a sweet pick-me-up — once you do, I’d bet you’ll bake them often too. Drop a comment below to share how yours turn out, any kooky twists you’ve tried, or just your favorite way to enjoy them warm. Happy baking, friends!