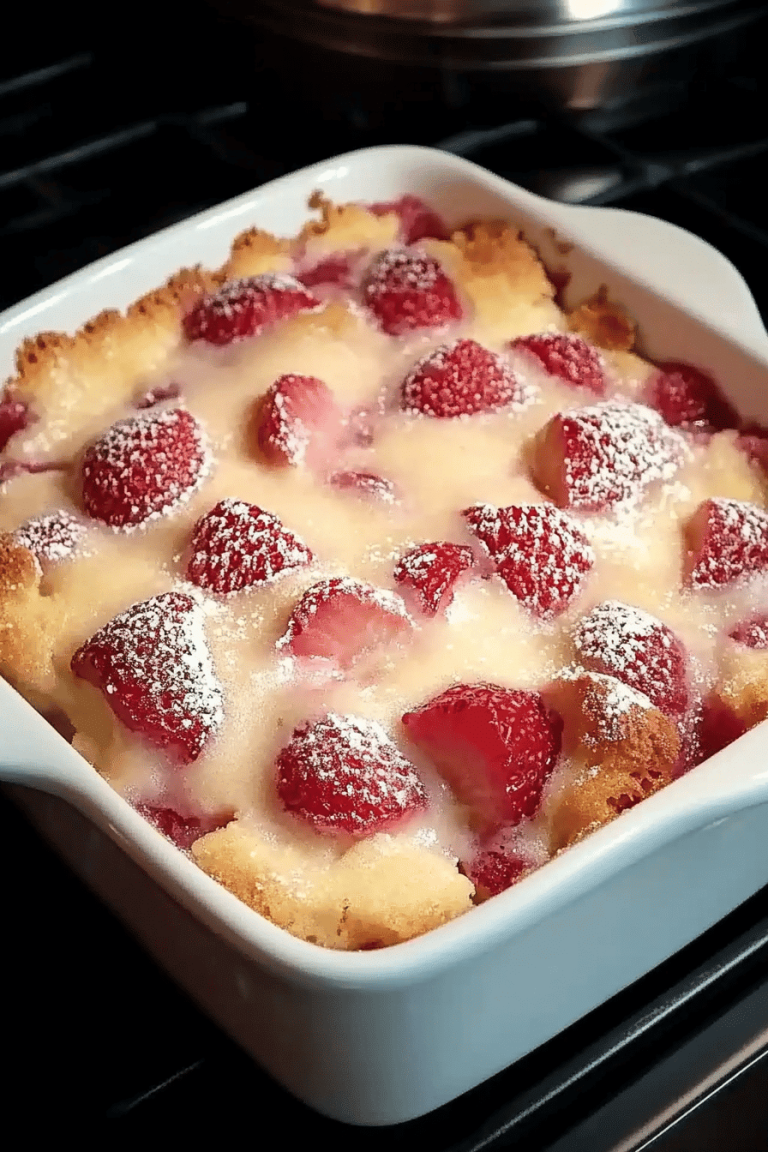
Easy Cherry Cobbler for a Cozy Winter
There’s something truly magical about the way the cold weather makes us crave comfort food, isn’t there? For me, it’s that deep, satisfying warmth that fills the kitchen and then your belly. And when those cravings hit, especially on a chilly afternoon when the wind is howling outside, there’s one dessert that always, *always* comes to mind: my winter Cherry Cobbler Recipe. It’s not just any cobbler, though. This one is special. It’s the kind of treat that feels like a hug in a bowl, bursting with sweet-tart cherries and topped with a golden, tender biscuit. I’ve made countless versions of fruit cobblers over the years, from peach to blueberry, but there’s a unique magic that happens when you combine warm spices with those vibrant, jewel-toned cherries. It’s like a little piece of summer sunshine captured in the heart of winter. If you’re looking for a dessert that’s both incredibly delicious and surprisingly simple to whip up, you’ve landed in the right spot. This winter cherry cobbler recipe is a lifesaver on busy nights and a guaranteed crowd-pleaser. My kids ask for this all the time, and honestly, so do I!
What is a Winter Cherry Cobbler?
So, what exactly is this delightful creation I keep raving about? Think of a winter cherry cobbler as the cozy, sophisticated cousin of a traditional fruit cobbler. Instead of relying on fresh, in-season fruits, we’re going to lean on the magic of frozen or canned cherries. This is key because it means you can enjoy this comforting dessert year-round, no matter what the grocery store shelves look like. The “cobbler” part refers to the topping, which is typically a biscuit-like dough that bakes up golden and slightly crumbly over the bubbling fruit filling. It’s not quite a pie, and it’s definitely not a cake, but it’s something wonderfully in between. It’s rustic, charming, and unapologetically delicious. It’s essentially a warm, fruity hug with a fluffy, slightly sweet blanket on top. The beauty of it is its simplicity; there are no fancy techniques or obscure ingredients, just pure, honest-to-goodness comfort in every spoonful.
Why you’ll love this recipe?
What are some of the reasons why I love this winter cherryflavor is just out of this world. You get that lovely tartness from the cherries, which is perfectly balanced by the sweet, spiced biscuit topping. I always add a touch of cinnamon and a hint of almond extract to the filling, which just elevates the whole experience. It’s like a little party in your mouth! Then there’s the simplicity. Seriously, this is so easy to make, even if you’re not usually a baker. The filling just sort of comes together on its own, and the topping is a simple mix-and-drop affair. It’s one of those recipes that makes you feel like a kitchen wizard, even if you’re just starting out. Plus, it’s incredibly cost-efficient. Frozen cherries are usually a fraction of the price of fresh, and the rest of the ingredients are pantry staples. This is a dessert that won’t break the bank! What I really love most about this recipe, though, is its versatility. It’s perfect for a casual weeknight dessert, but it also feels special enough to serve at a holiday gathering. You can serve it warm with a scoop of vanilla Ice Cream, a dollop of whipped cream, or even a drizzle of extra glaze. It’s also a fantastic way to use up those forgotten bags of frozen cherries in your freezer. While other fruit cobblers often rely on peak season fruits, this one is a true year-round star. It’s honestly one of my favorite things to bake when I want something sweet but don’t want to spend hours in the kitchen. It’s comfort in a casserole dish!
How do I make a Winter Cherry Cobbler?
Quick Overview
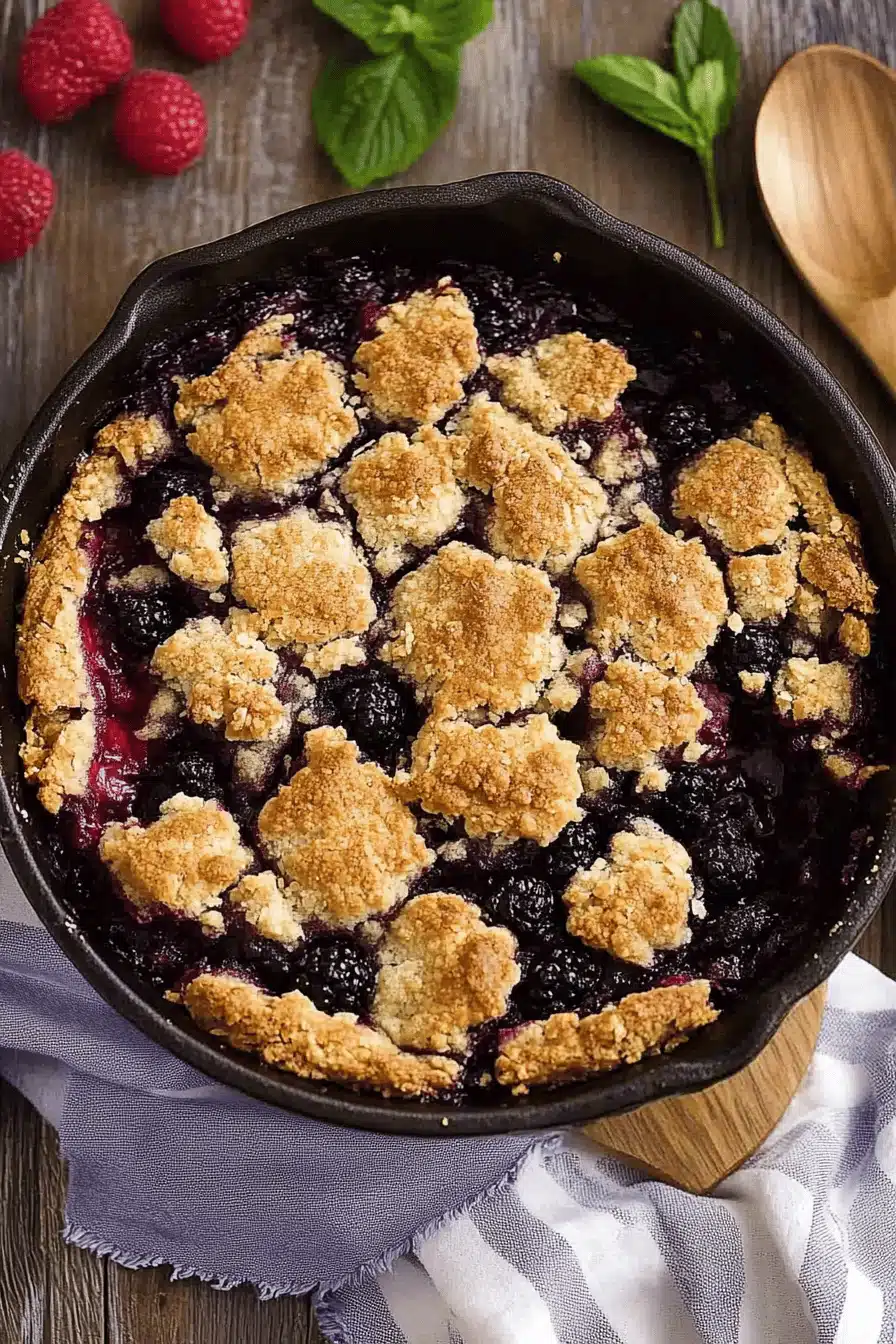
Making this cozy winter cherry cobbler is surprisingly straightforward. You’ll start by getting your fruit filling ready, tossing it with sugar, spices, and a little thickener to ensure it’s wonderfully syrupy but not runny. While that’s mingling, you’ll whip up a simple biscuit-like batter for the topping. Then, it’s just a matter of pouring the filling into your baking dish, spooning dollops of the batter over the top, and baking until it’s golden brown and bubbling. The whole process, from start to finish, takes less than an hour, making it a fantastic option even on busy evenings. What makes this method so special is how forgiving it is; even if your batter isn’t perfectly uniform or your swirls aren’t symmetrical, the end result is always gorgeous and, more importantly, utterly delicious.
Ingredients
For the Main Batter:
2 cups all-purpose flour (I like to use a good quality all-purpose, but you can also try a 1-to-1 gluten-free blend if you need it!)
1/2 cup granulated sugar (you can adjust this slightly based on your preference and the sweetness of your cherries)
2 teaspoons baking powder (this is what gives us that lovely lift and fluffiness)
1/2 teaspoon salt (enhances all the sweet and tart flavors)
1/2 teaspoon ground cinnamon (a must for that warm, cozy vibe)
1/4 teaspoon ground nutmeg (just a pinch for depth)
1/2 cup cold unsalted butter, cut into small cubes (cold butter is crucial for that tender, flaky texture)
3/4 cup milk (whole milk gives the best richness, but I’ve tested this with almond milk and it actually made it even creamier! You can also use buttermilk for extra tang.)
For the Filling:
4 cups frozen dark sweet cherries, thawed and drained (it’s important to drain them well to avoid a watery cobbler)
3/4 cup granulated sugar (again, adjust to your cherry’s sweetness)
1/4 cup cornstarch (this is our secret weapon for a perfectly thickened, glossy filling)
1 teaspoon vanilla extract (for a touch of warmth and depth)
1/2 teaspoon almond extract (this is optional but highly recommended for that classic Cherry Pie vibe)
1 tablespoon fresh lemon juice (brightens up the cherry flavor beautifully)
For the Glaze:
1/2 cup powdered sugar
1-2 tablespoons milk or cream (start with 1 tablespoon and add more until you reach your desired drizzling consistency)
Step-by-Step Instructions
Step 1: Preheat & Prep Pan
First things first, let’s get that oven preheated to 375 degrees Fahrenheit (190 degrees Celsius). While it’s warming up, grab an 8×8 inch baking dish or a similar-sized oven-safe skillet. You don’t need to grease it heavily, a light spray of cooking oil or a small pat of butter will do the trick. We want the topping to get a little crispy against the dish, so don’t go overboard with the greasing.
Step 2: Mix Dry Ingredients
In a medium-sized bowl, whisk together the flour, granulated sugar, baking powder, salt, cinnamon, and nutmeg. Make sure everything is really well combined. This step is important because it ensures that your leavening agent (the baking powder) and your spices are evenly distributed throughout the batter, so you don’t end up with pockets of flavor. Give it a good whisk until it looks like one uniform mixture.
Step 3: Mix Wet Ingredients
Now, add the cold, cubed butter to the dry ingredients. I like to use my fingertips or a pastry blender to cut the butter into the flour mixture until it resembles coarse crumbs, with some pea-sized pieces of butter still visible. Those little bits of butter are key to creating a tender, slightly flaky topping. Then, pour in the milk and vanilla extract. Stir *just* until the ingredients are combined. Don’t overmix! A few lumps are perfectly fine, even desirable. Overmixing will develop the gluten too much and make your topping tough.
Step 4: Prepare Filling
In a separate bowl, gently combine the thawed and drained cherries with the granulated sugar, cornstarch, vanilla extract, almond extract (if using), and lemon juice. Toss everything together until the cherries are evenly coated. The cornstarch is essential here; it’s what will thicken the juices as the cobbler bakes, creating that luscious, syrupy consistency we’re aiming for without making it watery. You’ll see the mixture start to look glossy as the cornstarch coats the cherries.
Step 5: Layer & Swirl
Pour the cherry filling into your prepared baking dish, spreading it out evenly. Now, dollop spoonfuls of the batter over the top of the cherry mixture. Don’t worry about covering it completely; gaps are good! They let the beautiful cherry filling peek through and bubble up. If you want to get fancy, you can gently swirl the batter into the cherries with a knife or skewer, but honestly, just dolloping it works beautifully and looks charmingly rustic. I usually just do a random scattering of spoonfuls.
Step 6: Bake
Pop the dish into your preheated oven. Bake for 35-45 minutes, or until the topping is beautifully golden brown and the cherry filling is bubbling around the edges. You’ll know it’s ready when you can smell that incredible aroma filling your kitchen. If the topping starts to brown too quickly before the filling is bubbling, you can loosely tent the dish with aluminum foil.
Step 7: Cool & Glaze
Once it’s out of the oven, let the cobbler cool on a wire rack for at least 15-20 minutes. This is important! It allows the filling to set up properly. While it’s cooling, whisk together the powdered sugar and 1 tablespoon of milk in a small bowl. Add more milk, a teaspoon at a time, until you get a smooth, drizzly consistency. Once the cobbler has cooled a bit, drizzle the glaze generously over the top. It adds a lovely extra touch of sweetness and visual appeal.
Step 8: Slice & Serve
Serve your warm winter cherry cobbler in generous scoops. It’s absolutely divine on its own, but I highly recommend serving it with a scoop of vanilla bean Ice Cream, a dollop of freshly whipped cream, or even a drizzle of heavy cream. The contrast of the warm cobbler with cold ice cream is pure bliss! Trust me on this one.
What to Serve It With
This winter cherry cobbler recipe is so wonderfully versatile, it fits into almost any meal or occasion. For Breakfast, imagine a slice of this warm goodness with your morning coffee. It’s not overly sweet, so it feels decadent yet perfectly acceptable for the start of the day. I sometimes toast a slice lightly the next day for an extra crispy texture. For Brunch, it’s an absolute showstopper. Serve it in a pretty serving dish with some fresh berries on the side and a glass of sparkling cider or mimosas. The vibrant red of the cherries always looks so festive. As a Dessert, well, that’s its natural habitat! It’s perfect after a hearty dinner. I love pairing it with a rich, dark chocolate Ice Cream for a delightful flavor combination, or a simple vanilla bean for a classic pairing. For those moments when you just need a Cozy Snack, this cobbler is your best friend. A small bowl, maybe a spoonful of Greek yogurt for a little tang, and you’re all set for a moment of pure comfort. My family has a tradition of making this on the first really cold night of the year, and it just signals that the cozy season has officially begun.
Top Tips for Perfecting Your Winter Cherry Cobbler
I’ve made this winter cherry cobbler recipe more times than I can count, and along the way, I’ve picked up a few little tricks that really make a difference. For the Cherry Prep, the most crucial step is draining those thawed cherries really well. I usually dump them into a fine-mesh sieve and let them sit for at least 15-20 minutes, giving them a gentle stir now and then. This prevents your filling from becoming watery. If you’re using canned cherries, make sure to drain them thoroughly as well. When it comes to Mixing Advice, remember that for the batter, less is more. Just mix until everything is *barely* combined. A few streaks of flour or lumps are perfectly fine. Overmixing develops the gluten in the flour, which can lead to a tough, chewy topping instead of a tender, biscuit-like one. For Swirl Customization, if you’re feeling artistic, you can use a knife or a skewer to gently swirl the batter into the cherry filling after you’ve dolloped it. This creates beautiful patterns as it bakes and allows more of that gorgeous cherry filling to bubble up. However, don’t stress if it’s not perfect; the rustic look is part of its charm! For Ingredient Swaps, while cherries are the star, feel free to mix in a handful of frozen raspberries or even some cranberries for an extra tart kick. For the milk in the batter, I’ve found whole milk or buttermilk gives the richest flavor, but any milk will work in a pinch. If you don’t have cornstarch, you can use an equal amount of tapioca starch or even flour as a thickener, though cornstarch usually provides the glossiest finish. For Baking Tips, make sure your oven rack is in the center of the oven. This promotes even baking for both the filling and the topping. If your topping starts browning too quickly but the filling isn’t bubbling yet, loosely tent the dish with foil for the last 10-15 minutes. This will prevent the top from burning while ensuring the inside cooks through. Lastly, for Glaze Variations, if you’re not a fan of powdered sugar glaze, you can simply dust the warm cobbler with a little extra powdered sugar, or serve it with a dollop of crème fraîche or mascarpone cheese. A little drizzle of honey or maple syrup is also a lovely alternative!
Storing and Reheating Tips
Knowing how to properly store and reheat your delicious winter cherry cobbler ensures you can enjoy every last crumb. If you happen to have any leftovers (which is rare in my house!), you can keep the cobbler at Room Temperature for up to 2 days, provided it’s covered tightly with plastic wrap or foil. However, for optimal freshness and food safety, I always recommend refrigerating it. Place it in an airtight container or cover the baking dish tightly with plastic wrap and then foil. It will keep well in the Refrigerator Storage for up to 4-5 days. The texture might change slightly, becoming a little denser, but it’s still absolutely delightful. If you want to freeze portions for later, allow the cobbler to cool completely first. Then, wrap individual portions tightly in plastic wrap, followed by a layer of aluminum foil or place them in freezer-safe containers. It can be stored in the Freezer Instructions for up to 2-3 months. To thaw, simply transfer a frozen portion to the refrigerator overnight. Reheating is a breeze! For individual servings, you can microwave them for 30-60 seconds, or until warmed through. If you’re reheating a larger portion or a whole cobbler, place it back in a preheated oven at around 325 degrees Fahrenheit (160 degrees Celsius) for 15-20 minutes, or until heated through and the topping is crisp again. As for Glaze Timing Advice, I always apply the glaze *after* the cobbler has cooled slightly from baking, just before serving. If you’re storing leftovers, you can add the glaze fresh each time you reheat a portion, or store the glaze separately and drizzle it on just before serving to prevent it from making the topping soggy.
Frequently Asked Questions
Final Thoughts
So there you have it – my absolute favorite winter cherry cobbler recipe. It’s a dish that truly embodies comfort and joy, proving that you don’t need the freshest summer fruit to make something incredibly special. The combination of tart cherries, warm spices, and that tender, biscuit-like topping is simply irresistible. What I love most is how it brings people together, filling the house with an aroma that’s practically an invitation to gather around the table. It’s proof that simple ingredients, prepared with a little love, can create something truly memorable. If you enjoyed this recipe, you might also want to check out my spiced apple crumble or my classic blueberry pie for more comforting baked goods. I really hope you give this winter cherry cobbler a try! I can’t wait to hear how yours turns out in the comments below. Happy baking, and may your kitchens be filled with warmth and delicious aromas!