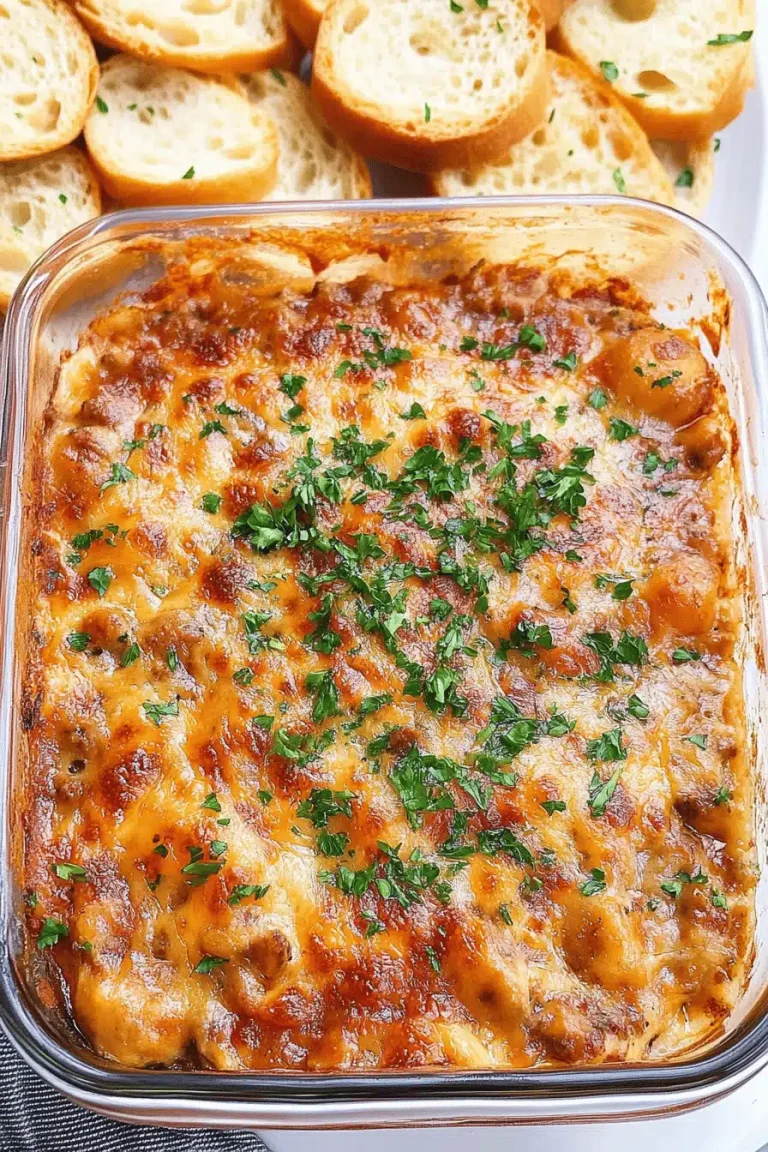
Easy Baked Pasta with Cheese
Oh, hello there! Come on in, grab a mug of coffee. I’ve been so excited to share this with you. You know, sometimes I get these cravings – a deep, yearning for something comforting, cheesy, and just plain *good*. And when that craving hits, this baked pasta cheese is my absolute go-to. It’s not just a dish; it’s a hug in a casserole dish, a memory of my grandma’s kitchen, and a lifesaver on those chaotic weeknights when dinner feels like a mountain to climb. Forget those fancy layered pasta bakes that take hours; this one is surprisingly straightforward, yet delivers a flavor explosion that will make you weak at the knees. It’s got that perfect balance of creamy, savory, and a hint of tang that just sings. Honestly, if you’re looking for that ultimate baked pasta cheese experience that feels both nostalgic and brand new, you’ve found it.
What is your ultimate baked pasta cheese dream?
So, what exactly *is* this magical creation? Well, think of it as the ultimate comfort food elevated. It’s a baked pasta dish, sure, but it’s so much more than just noodles and sauce. The “dream” part comes from the layers of flavor and texture we’re building. We’re talking about perfectly cooked pasta, tossed in a ridiculously creamy, cheesy sauce that clings to every single strand. Then, it’s baked until it’s bubbly and golden brown on top, with those irresistible crispy edges. It’s not a complicated lasagna, and it’s definitely not a simple mac and cheese. It’s somewhere in that glorious middle ground, where the pasta holds its shape but is coated in a luxurious sauce, and the whole thing has that beautiful, baked-in goodness. The name itself just sounds like pure happiness, right? It’s basically my culinary equivalent of a warm blanket and a good book.
Why you’ll love this recipe?
There are so many reasons why I keep coming back to this baked pasta cheese, and I just know you’re going to fall in love with it too. First off, the FLAVOR. Oh, my goodness. It’s rich, it’s savory, it’s deeply cheesy without being overwhelming. The combination of cheeses creates this incredible depth, and I’ve found that using a mix really makes a difference. It’s got a little tang from the Cream Cheese, a sharp bite from the cheddar, and a melt-in-your-mouth creaminess from the mozzarella. It’s the kind of dish that makes your kitchen smell like heaven while it’s baking, and honestly, the first bite is pure bliss.
Then there’s the SIMPLICITY. I know, I know, “baked pasta” can sound intimidating, but trust me on this one. This recipe is a weeknight warrior. You can get it prepped and into the oven in under 30 minutes, and the rest is just magic happening on its own. It’s the perfect dish to whip up when you’re short on time but still want something that feels special and homemade.
And let’s talk COST-EFFICIENCY. The ingredients are all pretty standard pantry staples, and while you can always splurge on fancy cheeses, even using good quality everyday cheddar and mozzarella will give you fantastic results. It’s a budget-friendly way to make a truly satisfying meal that the whole family will devour. My kids ask for this all the time, and that’s saying something!
Finally, the VERSATILITY. While I love this recipe exactly as it is, it’s also a fantastic base for additions. Want to add some cooked chicken or sausage? Go for it! A handful of spinach wilted in? Delicious! I’ve even thrown in roasted vegetables. It’s truly a recipe that adapts to what you have on hand or what you’re craving. It’s leagues beyond a basic macaroni and cheese, but still has that accessible, universally loved pasta profile. What I love most is that it’s forgiving. Even if you’re a beginner cook, you can nail this. It’s consistently delicious, and that’s what makes it a true keeper in my recipe box.
How do I make my ultimate baked pasta cheese dream?
Quick Overview
This dish comes together with surprising speed. We’ll cook our pasta just shy of al dente, whip up a quick, incredibly cheesy sauce, toss them together, and bake it until it’s golden and bubbly. The magic is in the sauce-making – it’s incredibly fast and uses simple ingredients to create a decadent coating. The baking step caramelizes the cheese and melds all the flavors beautifully. It’s truly a no-fuss approach to an utterly satisfying baked pasta cheese experience.
Ingredients
For the Main Pasta Dish:
1 pound dried pasta (penne, rigatoni, or shells work wonderfully – something with nooks and crannies to hold that sauce!)
1 tablespoon olive oil
1 medium onion, finely chopped
2 cloves garlic, minced
1 (8 ounce) package cream cheese, softened
1 cup milk (whole milk gives the creamiest result, but 2% is fine)
1 teaspoon salt, plus more for pasta water
1/2 teaspoon Black Pepper
1/4 teaspoon nutmeg (trust me, it adds a subtle warmth!)
2 cups shredded sharp cheddar cheese
1 cup shredded mozzarella cheese (low-moisture part-skim is best for melting)
1/2 cup grated Parmesan cheese
For the Optional Crumb Topping (Highly Recommended!):
1/2 cup panko breadcrumbs
2 tablespoons melted butter
1/4 cup grated Parmesan cheese
Step-by-Step Instructions
Step 1: Preheat & Prep Pan
First things first, let’s get that oven preheating to 375°F (190°C). While it’s warming up, grab a 9×13 inch baking dish. Give it a generous coating of cooking spray or a little butter to make sure nothing sticks. A little prep goes a long way to an easy cleanup!
Step 2: Cook the Pasta
Bring a large pot of generously salted water to a rolling boil. Add your pasta and cook according to package directions, but aim for about 1-2 minutes *less* than al dente. We want it to have a slight bite to it because it will continue to cook in the oven. Once cooked, drain it well and set it aside. Don’t rinse it; the starch helps the sauce cling!
Step 3: Sauté Aromatics
While the pasta is cooking, heat the Olive oil in a large skillet or Dutch oven over medium heat. Add the finely chopped onion and cook until it’s softened and translucent, about 5-7 minutes. Then, add the minced garlic and cook for another minute until fragrant. Be careful not to burn the garlic!
Step 4: Make the Cheesy Sauce Base
Reduce the heat to low. Add the softened cream cheese to the skillet with the onions and garlic. Stir until it starts to melt and combine. Pour in the milk and whisk continuously until the cream cheese is fully incorporated and you have a smooth sauce. This is where the magic starts!
Step 5: Stir in the Cheeses & Seasonings
Now for the best part! Remove the skillet from the heat. Gradually stir in the shredded cheddar cheese, mozzarella cheese, and Parmesan cheese. Keep stirring until all the cheeses are melted and the sauce is wonderfully creamy and smooth. Stir in the salt, pepper, and nutmeg. Give it a taste – this is your chance to adjust seasonings if needed. It should be rich and incredibly cheesy!
Step 6: Combine Pasta and Sauce
Add the drained, slightly undercooked pasta to the skillet with the cheese sauce. Gently toss everything together until every piece of pasta is coated in that luscious sauce. It should look incredibly inviting already!
Step 7: Transfer to Baking Dish & Add Topping (Optional)
Pour the pasta and sauce mixture into your prepared baking dish. Spread it out evenly. If you’re feeling fancy (and I highly recommend you do!), prepare the crumb topping. In a small bowl, mix the panko breadcrumbs, melted butter, and Parmesan cheese until well combined. Sprinkle this evenly over the top of the pasta.
Step 8: Bake
Place the baking dish in the preheated oven. Bake for 20-25 minutes, or until the sauce is bubbly around the edges and the topping is golden brown and crispy. If you didn’t add the topping, bake until the cheese is melted and the edges are beginning to turn golden.
Step 9: Cool and Serve
This is the hardest part: let it rest! Let the baked pasta cheese sit for about 5-10 minutes after coming out of the oven. This allows the sauce to set up a bit, making it easier to serve and preventing it from being too soupy. Then, slice it up and serve. The aroma alone is worth the wait!
What to Serve It With
This baked pasta cheese is so versatile, it fits right in at any mealtime. For a perfect BREAKFAST, it’s surprisingly good served in smaller portions alongside some fresh fruit. The richness feels decadent, like a savory pastry. For a leisurely BRUNCH, I love to serve it in individual ramekins for a more elegant presentation. Pair it with a crisp green salad with a light vinaigrette, some roasted cherry tomatoes, or even some perfectly cooked scrambled eggs. It’s a real crowd-pleaser and makes any brunch feel special.
As a main course DESSERT, yes, you heard me! It’s so comforting and rich, it can be a fantastic savory dessert, especially if you’re having a more casual gathering. Imagine serving it after a light appetizer. For COZY SNACKS, it’s the ultimate comfort food. Serve it warm with a side of crusty bread for dipping into any extra sauce, or just enjoy it on its own. My family loves this on a chilly evening, accompanied by a simple side salad with a tangy dressing to cut through the richness. Another favorite in my house is serving it with some roasted broccoli or green beans for a bit of freshness and a healthy boost.
Top Tips for Perfecting Your Baked Pasta Cheese Dream
I’ve made this baked pasta cheese more times than I can count, and over the years, I’ve picked up a few tricks that really make it sing. For the PASTA, remember to cook it just a minute or two shy of al dente. This is crucial because it will finish cooking in the oven. Overcooked pasta turns mushy, and nobody wants that! I’ve learned that using a pasta shape with lots of nooks and crannies, like penne or rigatoni, is key because the sauce just clings to them perfectly.
When it comes to MIXING the sauce, I always make sure my cream cheese is truly softened. This makes it so much easier to melt into a smooth consistency without any lumps. And adding the shredded cheeses off the heat is a non-negotiable for me; it ensures they melt evenly and don’t get greasy. If you’re struggling with lumps, gently whisking in a tiny splash more milk can often help smooth things out.
For the CRUMB TOPPING, which I honestly think is the cherry on top (or the panko on the pasta!), I find that using panko breadcrumbs gives the crispiest, most delightful crunch. Mixing them with melted butter and Parmesan before sprinkling ensures an even toasting and a fantastic flavor boost. Don’t skip this if you can help it!
INGREDIENT SWAPS are where this recipe really shines. If you’re not a fan of nutmeg (though I urge you to try it!), you can omit it. You can also experiment with different cheese combinations. Gruyere adds a wonderful nutty flavor, and a bit of Monterey Jack can make it extra melty. If you want to add PROTEIN, cooked chicken, shredded rotisserie chicken, or even sautéed Italian sausage are fantastic additions. Just stir them in with the pasta before baking. For a VEGETARIAN twist, stir in some sautéed mushrooms or roasted bell peppers with the pasta.
BAKING is usually straightforward, but ovens can be quirky. Keep an eye on it during the last 10 minutes. If the topping is browning too quickly, you can loosely tent it with foil. Conversely, if it’s not getting golden enough, you can pop it under the broiler for a minute or two, watching it *very* carefully to prevent burning. The goal is a bubbly, golden casserole that smells like pure happiness.
Storing and Reheating Tips
The great thing about this baked pasta cheese is that it’s just as delicious the next day, if not better, as the flavors have had more time to meld. If you have leftovers, let the dish cool completely before storing.
Room Temperature: Honestly, I wouldn’t leave it out for more than 2 hours. If you’re serving it buffet-style, keep it warm in a slow cooker on the “warm” setting or in a chafing dish.
Refrigerator Storage: Once cooled, cover the baking dish tightly with plastic wrap or transfer the leftovers to airtight containers. It will stay fresh in the refrigerator for about 3-4 days. I usually just cover the original baking dish; it saves on dishes!
Freezer Instructions: This freezes surprisingly well! You can freeze the entire unbaked casserole (wrap it tightly in plastic wrap and then foil) for up to 2-3 months, or freeze leftovers. Thaw overnight in the refrigerator before baking (you might need to add a few extra minutes to the baking time). If freezing leftovers, portion them into freezer-safe containers. They’ll keep for about 2 months.
Reheating: For best results, reheat individual portions in the microwave until heated through. If reheating a larger portion from the fridge, cover the baking dish with foil and warm it in a 350°F (175°C) oven for about 20-30 minutes, or until heated through. You can remove the foil for the last 5-10 minutes to crisp up the topping again. If reheating from frozen, thaw first in the fridge.
Glaze Timing Advice: If you are making a separate glaze (which is not part of this recipe but good to know for other dishes!), always apply it *after* reheating for the best texture and flavor. For this baked pasta cheese, the delicious cheesy topping is baked right on, so no extra glaze timing is needed!
Frequently Asked Questions
Final Thoughts
So there you have it – my Ultimate Baked Pasta Cheese Dream! I really hope you give this a try. It’s more than just a recipe; it’s a warm hug, a memory maker, and a true testament to how simple, good ingredients can create something utterly spectacular. It’s the kind of dish that makes everyone happy, from the pickiest eaters to the most discerning foodies. That perfect blend of creamy, cheesy, savory goodness, baked until golden and bubbly, is just pure comfort. It’s surprisingly easy to whip up, making it a fantastic option for busy nights or when you just need a little culinary pick-me-up.
If you love this, you might also enjoy exploring some of my other favorite comfort food recipes, like my quick and easy shepherd’s pie or my creamy tomato soup (perfect for dipping crusty bread, which this pasta dish also loves!). They share that same heartwarming quality and are relatively simple to make.
I can’t wait to hear how yours turns out! Did you add anything special? How did your family like it? Please leave a comment below and share your thoughts, ratings, and any fun twists you tried. Happy baking, and enjoy every single cheesy bite!