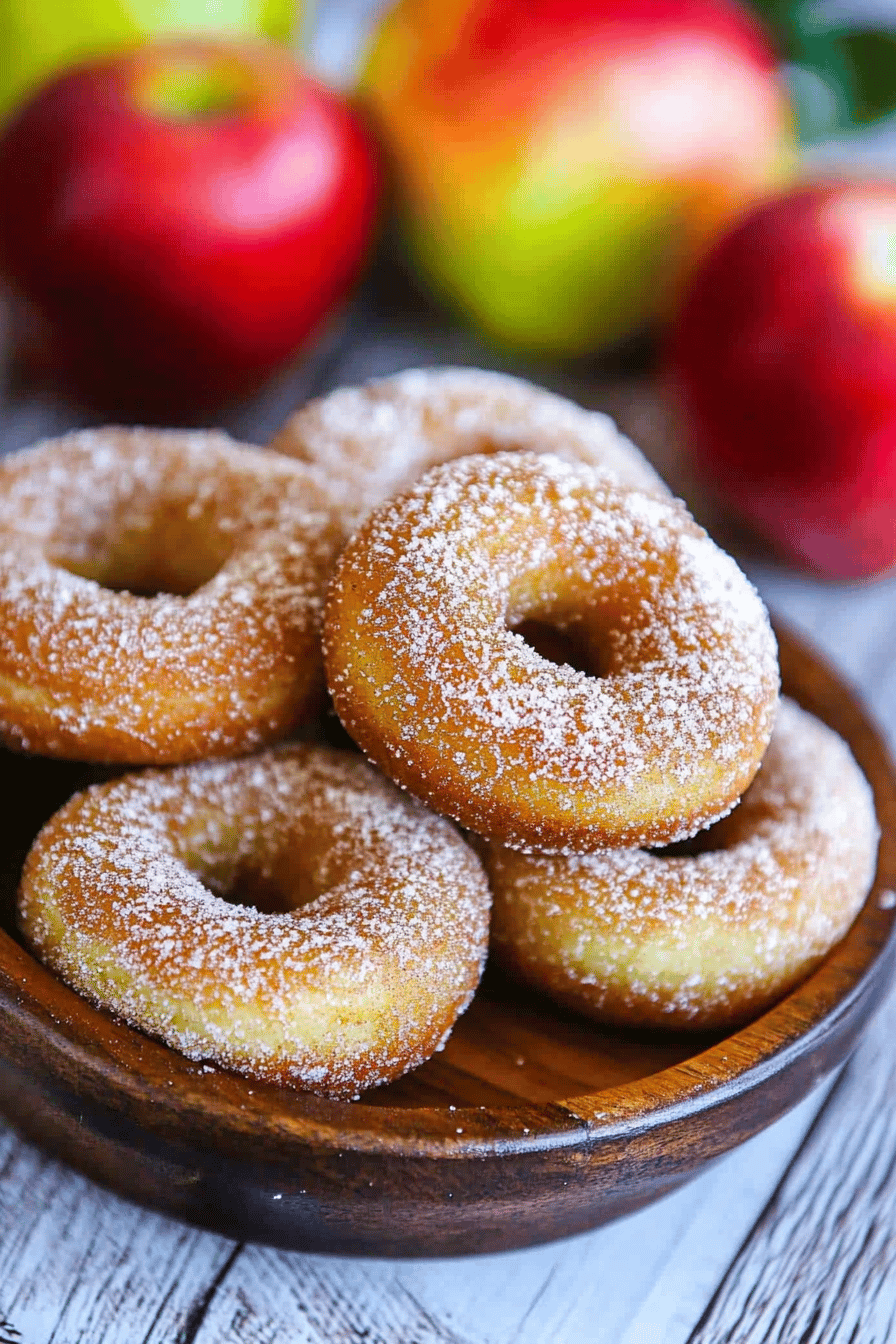
Easy Baked Apples A Delightful Fall Treat
There’s something truly magical about the smell of baked apples wafting through the house on a chilly afternoon. It instantly brings me back to childhood, where my grandmother’s kitchen was always filled with that comforting aroma, promising a warm treat that felt like a hug in food form. I remember sneaking a peek as she carefully cored each apple, stuffing them with a cinnamon-spiced mixture that seeped delightfully into every bite. Baked apples are like the simpler cousin of apple pies—no fussing with crusts or elaborate fillings, just pure, tender apples bursting with homey goodness. If you’ve ever loved the charm of a warm apple crisp but felt intimidated by baking, these baked apples are your new go-to. They’re incredibly easy, surprisingly versatile, and, honestly, the kind of dessert or snack that disappears faster than I can slice them. My kids ask for this one all the time, and it’s my little secret weapon on busy nights.
What is baked apple?
Think of baked apples as nature’s candy — an apple, cored and filled with a sweet mix, baked until soft and lightly caramelized on the edges. It’s essentially a simple fruit dessert where the apple acts as both the vessel and the main star. The idea goes way back, probably born out of necessity before refrigerators and fancy kitchens, when families needed something warm, wholesome, and easy to make. By baking the apple, you let the sugars in the fruit itself develop along with whatever spices or fillings you add—creating a naturally sweet, fragrant treat that’s way healthier and less complicated than many traditional desserts. It’s the kind of dish anyone can try, no special equipment required, and it invites you to get creative with flavors, whether you’re craving cinnamon, nuts, caramel, or even a touch of booze for grown-up dinners.
Why you’ll love this recipe?
What I love most about baked apples is how wildly forgiving and adaptable they are. The flavor is like a gentle hug—warm, sweet, with that lovely cinnamon and nutmeg kick that fills the kitchen and reminds you that fall is just around the corner (or even better, anytime you need a little comfort). It’s straightforward—just a few ingredients you likely already have, so it’s incredibly budget-friendly. You don’t need a pantry full of fancy stuff to whip this up, and honestly, that’s a lifesaver on busy weekday afternoons when I want something homemade but don’t have time to fuss. It’s also versatile: eat it solo for a snack, top with a scoop of vanilla ice cream for dessert, or even crumble some granola on top for breakfast. Compared to apple pie or crisps, baked apples feel lighter but satisfy that same sweet, cinnamon-spiced craving. Plus, there’s no fiddling with pie dough, which (let me confess) always makes me a little anxious.
My family has loved this recipe for years because it’s one of those no-fail crowd-pleasers—soft but not mushy, just the right balance of sweet and spice, with fillings that can be swapped depending on mood or pantry staples. If you’re a fan of other fruit desserts like roasted pears or cinnamon-spiced peaches, you’ll find this is an easy bake with delightful results that feels special without needing a lot of time or technique.
How do I make baked apples?
Quick Overview
Making baked apples is wonderfully simple. You core your apples, mix a filling of sugar, spices, and maybe a few extras like nuts or dried fruit, stuff them, pop them in the oven, and wait as your kitchen fills with that heavenly smell. The best part is you can pause anywhere after stuffing and bake them later—a perfect pre-dinner prep! They bake until tender but still holding shape, giving you a warm, cozy treat without any complicated steps. Trust me, if you can core an apple and mix a bowl of cinnamon sugar, you’re halfway there.
Ingredients
For the Apples: What are the best apples?
- 4 medium-sized apples (I love Fuji or Honeycrisp for sweetness and firm texture – avoid super mushy varieties)
- Juice of half a lemon (to keep apples from browning and add a fresh twist)
For the Filling:
- 1/4 cup brown sugar (light or dark works depending on your taste – dark lends a richer note)
- 1 tsp ground cinnamon (freshly ground is best if you can)
- 1/4 tsp ground nutmeg (optional but lovely)
- 1/4 cup chopped walnuts or pecans (toasty nuts add crunch and depth)
- 2 tbsp raisins or dried cranberries (adds a pop of chewiness – I sometimes swap for chopped dates or figs)
- 1 tbsp butter (adds richness and melts into that filling, sealing the deal)
For the Glaze:
- 2 tbsp maple syrup or honey (for drizzling right after baking)
- Optional: pinch of salt or a dash of vanilla extract (to layer the sweetness)
Step-by-Step Instructions
Step 1: Preheat & Prep Pan
First, set your oven to 350°F (175°C). While it heats, grab a baking dish just big enough to snugly fit your apples upright. Lightly butter the dish or line it with parchment to prevent sticking later. This step is crucial because you want the apples to roast rather than stick and lose shape during baking. I’ve learned the hard way that skipping this leads to a sticky mess that’s tough to clean!
Step 2: Mix Dry Ingredients
In a small bowl, combine your brown sugar, cinnamon, nutmeg, nuts, and dried fruit. Give it a good stir to evenly distribute those spices and sugary bits. This mix is the heart of your filling, so taking a moment to ensure it’s blended well helps every bite taste consistent. You don’t want clumps of spice or sugar stealing the show.
Step 3: Mix Wet Ingredients
If you’re using vanilla in your glaze, mix it into your maple syrup or honey now. This glaze will become your final touch, adding a glossy sweetness once the apples are baked. The butter isn’t part of this wet mix; instead, you’ll add it as little pats on top of the filling in the apples.
Step 4: Prepare the Apples
Core each apple carefully, making sure you leave the bottom intact so the filling doesn’t leak out during baking. I usually use a melon baller or small paring knife. Then, toss the apples lightly in the lemon juice—this keeps them bright and adds a little tang to balance the sweetness.
Step 5: Fill the Apples
Spoon your filling mixture into each apple cavity, packing it gently but leaving a little space at the top for the butter. Add a small pat of butter on top of each filled apple–this lets it melt as it bakes and infuses the filling with richness. You can also sneak in a pinch extra cinnamon here if you’re a spice fan like me.
Step 6: Bake
Place the apples upright in your prepared dish, then bake for about 35-45 minutes. You’ll know they’re done when the apples feel tender to a fork but still keep their shape — none of that mushy, sad apple texture. The tops should caramelize slightly, and the filling will bubble a bit. Oven temperatures can vary, so start checking around 30 minutes to avoid over-baking.
Step 7: Cool & Glaze
Once you take them out, let the apples cool for about 10 minutes. This rest time lets everything settle and ensures you don’t burn your tongue on that hot filling! Then, drizzle your maple syrup or honey glaze on top while the apples are still warm. It gives a beautiful shine and an extra layer of sweetness that ties everything together.
Step 8: Serve
I usually serve these warm, right out of the dish, sometimes with a scoop of vanilla ice cream or a dollop of whipped cream if it’s a special occasion. But honestly, they’re fantastic plain, too—comforting and sweet without any fuss. Slice carefully with a sharp knife for neat portions or just dig in whole and enjoy the juicy, spiced goodness.
What to Serve It With
For Breakfast: Pair baked apples with a strong cup of coffee and some toasted pecans on the side. A little Greek yogurt with a drizzle of honey makes the meal feel balanced and fresh—this has been my weekday favorite for years.
For Brunch: Serve with fluffy pancakes or French toast, sprinkled with cinnamon sugar. A sparkling apple cider or a light herbal tea complements the warm sweetness beautifully.
As Dessert: Top with vanilla ice cream or a spoonful of mascarpone cheese. A glass of cold milk or warm chai adds a cozy finish that makes everyone sigh contentedly.
For Cozy Snacks: Sometimes, baked apples are just a warm hug in a bowl, perfect with a cup of hot cocoa and wrapped in a soft blanket. Add a sprinkle of toasted coconut or chopped almonds for a quick crunch.
Our family rituals often include making these on weekends when everyone’s around, and they’re almost always part of our autumn celebrations. I love mixing up the fillings depending on what’s in the pantry, and sometimes adding a splash of bourbon or brandy for grown-up evenings. However you serve them, baked apples bring a little more comfort and joy to the table.
Top Tips for Perfecting Your Baked Apples
Apple Selection: Choose firm, sweet apples that won’t turn to mush. Fuji, Honeycrisp, or Pink Lady are my go-tos. Avoid softer apples like McIntosh or Red Delicious for baking.
Core Carefully: Leaving the bottom intact is key to keeping the filling from oozing out. I’ve tried removing the whole center but found the apples fall apart in the oven.
Don’t Skimp on Spices: Cinnamon and nutmeg are classic, but a pinch of ground cloves or allspice makes it seasonal and cozy. Freshly ground spices always pack more punch.
Filling Variations: Feel free to swap nuts or dried fruits — I once used chopped dried apricots and toasted pecans, and it was a hit. For a little indulgence, try mixing brown sugar with a spoonful of maple syrup!
Baking Time: The bigger the apple, the longer it needs, but keep a close eye so they don’t get mushy. Test by gently poking with a fork. You want tender but still holding shape.
Glaze Magic: Drizzle right after baking while the apples are still warm for that shiny, sticky finish. You can also brush with melted butter and sprinkle with a little sugar for a caramelized crust.
I learned the hard way not to overfill—otherwise, filling bubbles over and burns on the pan. Also, letting the apples rest after baking makes slicing cleaner and flavors meld better. These little lessons took me a few tries to figure out; hopefully, they save you the trouble!
Storing and Reheating Tips
Room Temperature: Baked apples keep well for up to 24 hours on the counter if covered loosely with foil or a cloth. If you plan to eat them the same day, this keeps them soft but fresh.
Refrigerator Storage: Store cooled baked apples in an airtight container for 3-4 days. You’ll want to add the glaze fresh after reheating to keep that beautiful shine and sticky sweetness.
Freezer Instructions: These freeze beautifully! Wrap each apple tightly in plastic wrap, then foil, or place in a freezer-safe container for up to 3 months. Thaw overnight in the fridge before reheating gently in the oven to avoid sogginess.
Glaze Timing Advice: For storage, I almost always glaze right before serving, rather than before storing, so the topping stays fresh and glossy. Reheat baked apples in a preheated oven at 300°F for about 10-15 minutes or until warm through.
Frequently Asked Questions
Final Thoughts
Baked apples hold a special place in my heart. They’re that rare treat that’s both nostalgic and new every time I make them—simple enough for busy nights but impressive enough for sharing with friends. The warm spices, tender fruit, and that little buttery filling make it feel like a tiny celebration tucked inside each apple. If you enjoy this, you might also want to try my spiced poached pears or the classic apple crisp recipe I shared last fall. I’m excited for you to try this—honestly, there’s nothing like the smell alone to make your home feel cozy and inviting. Can’t wait to hear how yours turns out! Don’t forget to pop your comments and any fun twists you tried. Happy baking!