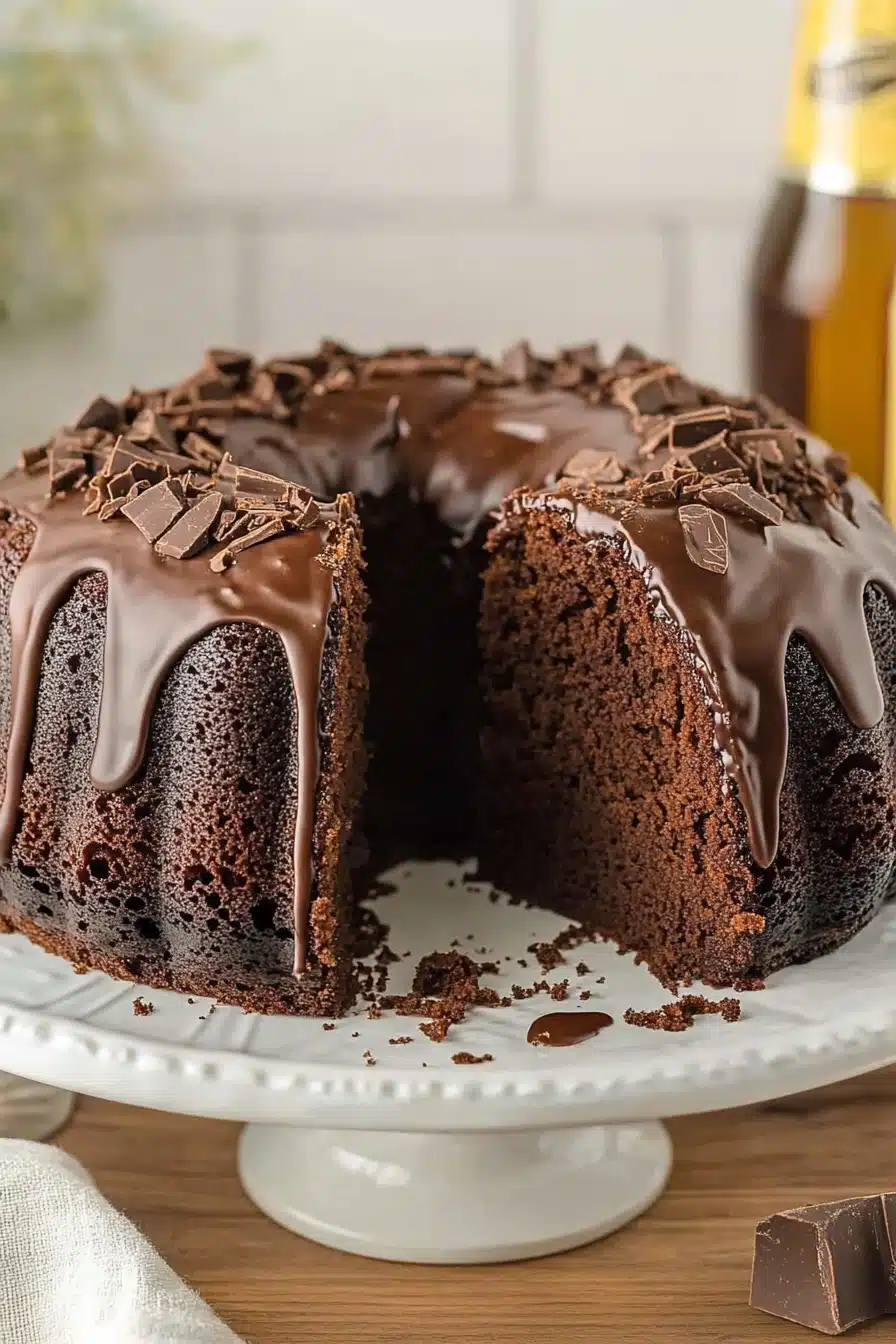
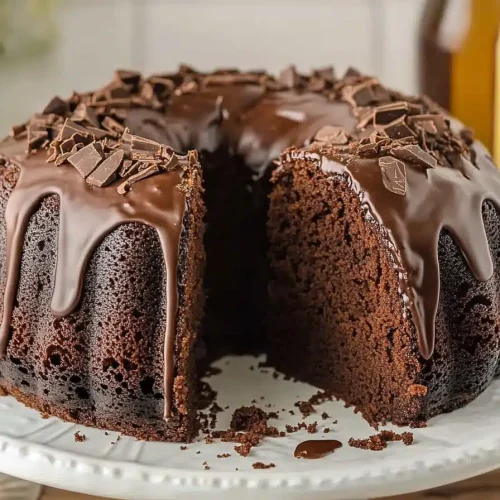
DQ chocolate cake
Oh, you guys. If there’s one dessert that instantly transports me back to childhood, it’s a DQ Chocolate Cake. Specifically, the ones with that dreamy fudge frosting. I can practically taste it now – rich, decadent, and oh-so-chocolatey. For years, I’ve been trying to recreate that magic at home, and I think I’ve finally cracked it. This isn’t just any chocolate cake; it’s my go-to when I need a serious chocolate fix, or when I want to impress guests without spending all day in the kitchen. It’s like a warm hug in cake form, and honestly, it’s so much better than the store-bought versions because you know exactly what goes into it. I’ve fiddled with this recipe endlessly, trying to get that perfect moist crumb and that unbelievably smooth, fudgy frosting. And let me tell you, this DQ chocolate cake copycat is the real deal. It’s become a staple in our house, especially when those late-night sweet cravings hit, and the best part? It’s surprisingly simple to whip up.
What is DQ Chocolate Cake?
So, what exactly are we making here? Think of this DQ Chocolate Cake as your ultimate indulgence, a decadent chocolate cake layered with a rich, fudgy frosting that’s impossibly smooth and utterly delicious. It’s inspired by that iconic cake you find at your local Dairy Queen, but made with love right in your own kitchen. The cake itself is super moist and deeply chocolatey, without being overly sweet. It’s got that comforting, homemade feel, but with a sophisticated flavor profile that rivals any bakery. The frosting is the real star though – it’s not your average buttercream. It’s more like a fudgy, almost ganache-like creation that melts in your mouth. It’s the perfect balance to the cake, creating a harmonious flavor experience that’s just pure happiness. This isn’t just a dessert; it’s an experience!
Why you’ll love this recipe?
Why is this DQ Chocolate Cake my absolute favorite?flavor. It’s intensely chocolatey. Like, *really* chocolatey. The cake has a deep, dark cocoa flavor that’s perfectly complemented by that ridiculously rich, fudgy frosting. It’s the kind of dessert that makes you close your eyes with the first bite. Then there’s the simplicity. I know, a decadent chocolate cake sounds intimidating, but I promise you, this recipe is surprisingly straightforward. Even if you’re not a seasoned baker, you can totally nail this. I’ve made it on busy weeknights when I needed a serious pick-me-up, and it was ready before you know it. And let’s talk about Cost-efficiency: What is the best way to measure cost-efficiency?. Most of the ingredients are pantry staples, making this a budget-friendly way to get that gourmet chocolate cake fix without breaking the bank. No fancy, obscure ingredients here! Plus, its versatility is amazing. You can easily adapt the frosting or even add some chocolate chips to the batter for an extra punch. It’s also perfect for birthdays, holidays, or just because. What I love most about this recipe, though, is the way it brings people together. The smell alone fills the house with warmth, and it always disappears so quickly. It’s the kind of cake that creates memories, just like those DQ cakes did for me growing up.
How to Make DQ Chocolate Cake
Quick Overview
This recipe is all about creating that perfect balance of moist Chocolate Cake and luscious fudge frosting. We’ll start by whipping up a simple cake batter, pour it into our prepared pan, and then create a dreamy, no-bake fudgy frosting that gets poured right over the warm cake. It’s almost foolproof, and the result is a truly spectacular DQ chocolate cake that tastes just like the real deal, if not better. The magic happens when the frosting melts slightly into the warm cake, creating an irresistible fudgy layer.
Ingredients
For the Main Batter:
2 cups all-purpose flour – I always use unbleached flour for a better texture.
1 ¾ cups granulated sugar – Sweetness is key for that classic cake flavor.
¾ cup unsweetened cocoa powder – Use good quality cocoa; it makes a HUGE difference in the chocolate depth. Dutch-processed is my favorite here.
1 ½ teaspoons baking soda – This gives our cake its lift.
1 ½ teaspoons baking powder – A little extra help for a tender crumb.
1 teaspoon salt – Balances the sweetness and enhances the chocolate.
2 large eggs – At room temperature, they incorporate better.
1 cup buttermilk – This is crucial for moisture and tenderness. If you don’t have buttermilk, you can make your own by adding 1 tablespoon of white vinegar or lemon juice to 1 cup of milk and letting it sit for 5-10 minutes.
½ cup vegetable oil – Or any neutral-flavored oil like canola.
1 teaspoon vanilla extract – The classic flavor enhancer.
1 cup hot water or hot brewed coffee – Coffee really intensifies the chocolate flavor without making it taste like coffee, trust me!
For the Filling (Fudgy Frosting):
½ cup (1 stick) unsalted butter – Softened, but not melted.
⅔ cup unsweetened cocoa powder – Again, quality matters!
3 cups powdered sugar – Sifted to avoid lumps.
½ cup milk – Whole milk works best for richness.
1 teaspoon vanilla extract – For that perfect aroma.
Pinch of salt – To balance the sweetness.
For the Glaze (Optional but highly recommended):
This is what makes it truly DQ-esque! It’s a simple chocolate ganache.
1 cup semi-sweet chocolate chips – Or finely chopped semi-sweet chocolate.
½ cup heavy cream – Warmed, but not boiling.
Step-by-Step Instructions
Step 1: Preheat & Prep Pan
First things first, let’s get our oven fired up to 350°F (175°C). You’ll want to grease and flour a 9×13 inch Baking Pan really well. I usually also line the bottom with parchment paper – it makes removing the cake so much easier, especially with the frosting. Just trace the bottom of your pan onto parchment paper, cut it out, and lay it in. Then grease and flour over the parchment. This ensures no sticky situations!
Step 2: Mix Dry Ingredients
In a large mixing bowl, whisk together the flour, granulated sugar, cocoa powder, baking soda, baking powder, and salt. Make sure everything is really well combined, breaking up any lumps of cocoa powder. This step is important for even distribution and a nice, uniform cake texture.
Step 3: Mix Wet Ingredients
In a separate medium bowl, whisk together the eggs, buttermilk, oil, and vanilla extract. You just want to combine them until they’re nicely blended. No need to go overboard here.
Step 4: Combine
Now, pour the wet ingredients into the dry ingredients. Mix on low speed (or with a whisk by hand) until just combined. The batter will be thick at this point. Carefully stir in the hot water or hot coffee. The batter will become quite thin – don’t worry, this is exactly what you want! This hot liquid blooms the cocoa powder, making the chocolate flavor incredibly rich and creating that super moist crumb. Don’t overmix at this stage; just mix until smooth.
Step 5: Prepare Filling
While the cake is baking, let’s whip up that magical frosting. In a medium saucepan over low heat, melt the butter. Once melted, whisk in the cocoa powder until smooth. Remove from heat and gradually whisk in the powdered sugar, alternating with the milk. Add the vanilla and pinch of salt. Keep whisking until it’s smooth and lusciously thick. If it seems too thick, add a tiny bit more milk; if too thin, add a little more powdered sugar. The consistency should be pourable but still rich.
Step 6: Layer & Swirl
This step is actually for when the cake comes out of the oven! The frosting is poured over the *warm* cake, which allows it to meld into the cake beautifully. For the cake batter itself, it’s just a simple pour into the prepared pan.
Step 7: Bake
Pour the thin batter into your prepared 9×13 inch pan. Bake for 30-35 minutes, or until a wooden skewer or toothpick inserted into the center comes out clean. Keep an eye on it, as ovens can vary. That deep chocolate color can make it tricky to tell, so the skewer test is your best friend.
Step 8: Cool & Glaze
As soon as the cake comes out of the oven, it’s time for the magic! While the cake is still hot and in the pan, pour the prepared fudgy frosting evenly over the top. Use an offset spatula to spread it gently, letting it drip down the sides. The warmth of the cake will help the frosting smooth out beautifully. If you’re adding the optional glaze, gently warm the heavy cream (don’t boil it) and pour it over the chocolate chips in a bowl. Let it sit for a minute, then whisk until smooth and glossy. Drizzle this over the fudgy frosting once it’s slightly set. Let the cake cool completely in the pan before slicing. This is important for the frosting to set up properly!
Step 9: Slice & Serve
Once fully cooled, slice your DQ chocolate cake into squares. I find a sharp knife dipped in hot water and wiped dry between cuts gives the cleanest slices. Serve at room temperature for the best flavor and texture. It’s so rich and decadent on its own, you don’t need much else!
What to Serve It With
This DQ chocolate cake is honestly a showstopper all on its own, but if you’re looking to elevate it or serve it for a special occasion, here are a few ideas!
For Breakfast: I know, I know, cake for breakfast sounds indulgent, but hear me out! A thin slice of this chocolate cake is absolutely divine with a strong cup of black coffee. The bitterness of the coffee cuts through the richness of the cake and frosting perfectly. It’s my little weekend treat when I want something special to start the day. You could even serve a small sliver alongside some fresh berries – the tartness of raspberries or strawberries is a lovely contrast.
For Brunch: If you’re hosting a brunch, this cake makes for a stunning dessert. Serve it with a dollop of freshly whipped cream or a small scoop of vanilla bean ice cream. A glass of milk is always a classic pairing, but for something a bit more elegant, a raspberry coulis drizzled around the plate adds a beautiful pop of color and flavor. For drinks, think mimosas or even a coffee liqueur cocktail.
As Dessert: This is its natural habitat! After dinner, serve a generous slice with a side of good quality vanilla ice cream. A few fresh raspberries scattered on top add a touch of elegance and freshness. For an extra decadent touch, a drizzle of raspberry sauce or a sprinkle of shaved chocolate over the top is always a winner. A dessert wine, like a port, can also be a fantastic accompaniment.
For Cozy Snacks: This cake is the ultimate comfort food. It’s perfect for a cozy afternoon tea or a movie night. I love it best when it’s slightly warmed in the microwave for just a few seconds – it makes the frosting extra melty and gooey. Pair it with a glass of cold milk or a steaming mug of hot chocolate for ultimate cozy vibes. My kids absolutely love it this way; it’s their favorite after-school treat, and it always makes them feel special.
Top Tips for Perfecting Your DQ Chocolate Cake
I’ve made this DQ chocolate cake more times than I can count, and over the years, I’ve picked up a few tricks that I think really make a difference. They’re not complicated, but they do help ensure you get that perfect texture and flavor every single time.
Zucchini Prep: While this recipe doesn’t use zucchini, it’s a common ingredient in many moist chocolate cakes. For a cake *with* zucchini, I always grate it finely and then squeeze out as much moisture as possible. You can do this by wrapping it in cheesecloth or a clean kitchen towel and wringing it out really well. This prevents the cake from becoming too wet and gummy. Fresh zucchini is always best; it has a better flavor and less moisture.
Mixing Advice: The biggest no-no with most cakes is overmixing, and this chocolate cake is no exception! Once you add the wet ingredients to the dry, mix *just* until combined. A few small lumps are okay! Overmixing develops the gluten in the flour, which can lead to a tough, dense cake. For the hot water/coffee addition, mix it in gently until the batter is smooth, then stop. The batter will be thin – this is intentional and key to its moistness.
Swirl Customization: For this specific DQ chocolate cake recipe, there’s no swirling involved with the batter itself. The magic happens with the frosting poured over the warm cake. However, if you were making a cake with a swirl, like a marble cake, I’d say don’t over-swirl! You want distinct ribbons of flavor, not a muddy mess. For this recipe, the “swirl” is more about the frosting naturally settling and melding into the cake.
Ingredient Swaps: I’ve experimented with this recipe quite a bit! For the buttermilk, as mentioned, a milk and vinegar/lemon juice mixture works perfectly. If you’re out of oil, melted butter can be used, but oil generally yields a moister cake. For the hot liquid, using brewed coffee instead of water truly intensifies the chocolate flavor without tasting like coffee at all. It’s my secret weapon for the richest chocolate cake! For the frosting, if you find it too sweet, you can reduce the powdered sugar slightly, but be mindful that it might affect the consistency.
Baking Tips: Always preheat your oven properly. I like to place my cake pan on the middle rack to ensure even baking. Avoid opening the oven door too early, especially in the first 20 minutes, as the temperature fluctuations can cause the cake to sink. Use the toothpick test to check for doneness – it should come out clean or with a few moist crumbs attached, not wet batter.
Glaze Variations: The optional chocolate ganache glaze is super simple, but for a slightly different flavor, you could use dark chocolate chips. If you want a more intensely fudgy glaze, you can add a tablespoon or two of unsweetened cocoa powder to the melted chocolate before adding the cream. For a lighter, less intense chocolate flavor, you could use milk chocolate chips, but be careful as they can sometimes seize up if heated too much.
Storing and Reheating Tips
This DQ chocolate cake is so good, it rarely lasts long enough to need proper storage, but when it does, here’s how I keep it delicious:
Room Temperature: If you’re planning to finish the cake within 2-3 days, it’s perfectly fine to store it covered at room temperature. I usually just use plastic wrap or aluminum foil, or pop it into an airtight container. It actually tastes best at room temperature anyway, as the frosting and cake are at their ideal texture.
Refrigerator Storage: If your kitchen is particularly warm, or you want to keep it for up to 4-5 days, the refrigerator is your best bet. Make sure it’s well-covered to prevent it from drying out or absorbing other odors. I find that covering it tightly with plastic wrap directly over the cake, and then a layer of foil or in an airtight container works best. When you’re ready to serve it from the fridge, let it sit at room temperature for about 30 minutes to soften up a bit – it makes a world of difference!
Freezer Instructions: Yes, you can freeze this cake! It’s a lifesaver for future cravings. Once the cake is completely cooled and the frosting is set, wrap it tightly in a layer of plastic wrap, then a layer of aluminum foil. You can even add another layer of freezer paper or pop it into a freezer-safe container for extra protection. It will keep well in the freezer for up to 2-3 months. To thaw, unwrap it and let it come to room temperature on the counter for a few hours. If it was frosted after baking, the frosting might look a little different after thawing, but the taste will still be fantastic.
Glaze Timing Advice: For the best texture when storing, it’s ideal to add the optional ganache glaze just before serving or after the cake has cooled and the fudgy frosting has set a bit. If you freeze the cake with the ganache on top, it can sometimes become a bit brittle or crack when frozen. It’s usually best to add the ganache after thawing if you plan to freeze the whole cake.
Frequently Asked Questions
Final Thoughts
There you have it – my tried-and-true recipe for a DQ chocolate cake that brings all those wonderful nostalgic feelings rushing back. It’s moist, it’s decadent, and that fudgy frosting is just pure bliss. I truly believe this recipe captures the essence of that beloved treat, but with the added bonus of being made right in your own kitchen with love. It’s a testament to how simple ingredients, combined with a little bit of care and attention, can create something truly special. If you’re a chocolate lover, or if you’ve got fond memories of those iconic DQ cakes, you absolutely have to give this a try. It’s the perfect dessert for birthdays, holidays, or just those moments when you need a serious dose of chocolate happiness. I can’t wait to hear what you think and how it turns out for you! If you give this recipe a go, please leave a comment below and let me know your experience, or share your own tips and variations. Happy baking, everyone!
Chocolate Blizzard Cake Easy DQ Copycat
Ingredients
Crust
- 12 chocolate sandwich cookies chocolate creme filled crushed (Oreo brand recommended)
- 0.25 cup salted butter melted and cooled
Cake Layers
- 2 quarts chocolate ice cream 1 quart for each layer, slightly softened
- 1 cup semi sweet chocolate chunks Nestle Toll House brand recommended
Filling
- 12.8 ounces hot fudge sauce Hershey’s brand recommended
- 1 cup chopped brownie pieces
Whipped Topping
- 1.5 cups cold heavy whipping cream
- 0.75 cup powdered sugar
- 1 teaspoon clear vanilla flavoring
Garnish
- chocolate syrup for drizzling
Instructions
Preparation Steps
- Line a 9-inch springform pan with plastic wrap. Place in the freezer.
- Preheat the oven to 350°F. Line a baking sheet with parchment paper or heavy-duty aluminum foil.
- In a small bowl, combine the crushed cookies and melted butter. Stir to combine.12 chocolate sandwich cookies chocolate creme filled
- Spread the cookie crumb mixture on the lined baking sheet. Bake for 7-8 minutes. Cool completely, then break into bite-sized pieces.
- Thaw 1 quart of chocolate ice cream for 15-20 minutes. Spread evenly into the bottom of the prepared springform pan. Freeze for 30 minutes to 1 hour.12 chocolate sandwich cookies chocolate creme filled
- Microwave the hot fudge sauce for 15 seconds to soften. Stir well, then spread evenly over the chocolate ice cream layer.12 chocolate sandwich cookies chocolate creme filled
- Sprinkle the cookie crunch pieces over the hot fudge layer and freeze for 1 hour.12 chocolate sandwich cookies chocolate creme filled
- Thaw the second quart of chocolate ice cream for 15-20 minutes. Mix in 1 cup of the chocolate chunks.12 chocolate sandwich cookies chocolate creme filled
- Spread the second ice cream layer over the cookie crunch layer. Freeze for 4-6 hours, or preferably overnight.
- Chill a metal mixing bowl of a stand mixer (or a regular mixing bowl if using a handheld mixer) for 30 minutes.
- In the chilled bowl, beat the heavy cream, powdered sugar, and clear vanilla flavoring on high speed until stiff peaks form, about 3-4 minutes.12 chocolate sandwich cookies chocolate creme filled
- Fill a disposable piping bag fitted with a star-shaped tip with the whipped cream.
- Remove the cake from the freezer. Work quickly, especially if the weather is warm.
- Release the outer ring of the springform pan and carefully remove the plastic wrap.
- Place the ice cream cake on a serving plate or a round disposable cake board. (Optional: Use a cake comb to create texture on the outside of the cake).
- Hold the piping bag about 0.5 inches above the edge of the top of the cake. Use steady, even pressure to pipe a shell or swirl pattern around the top edge of the ice cream cake. Repeat for the bottom edge of the cake.
- Sprinkle the remaining chocolate chunks and the chopped brownie pieces on the top of the ice cream cake.12 chocolate sandwich cookies chocolate creme filled
- Drizzle chocolate syrup over the ice cream cake. Place the cake back into the freezer until ready to slice and serve.12 chocolate sandwich cookies chocolate creme filled