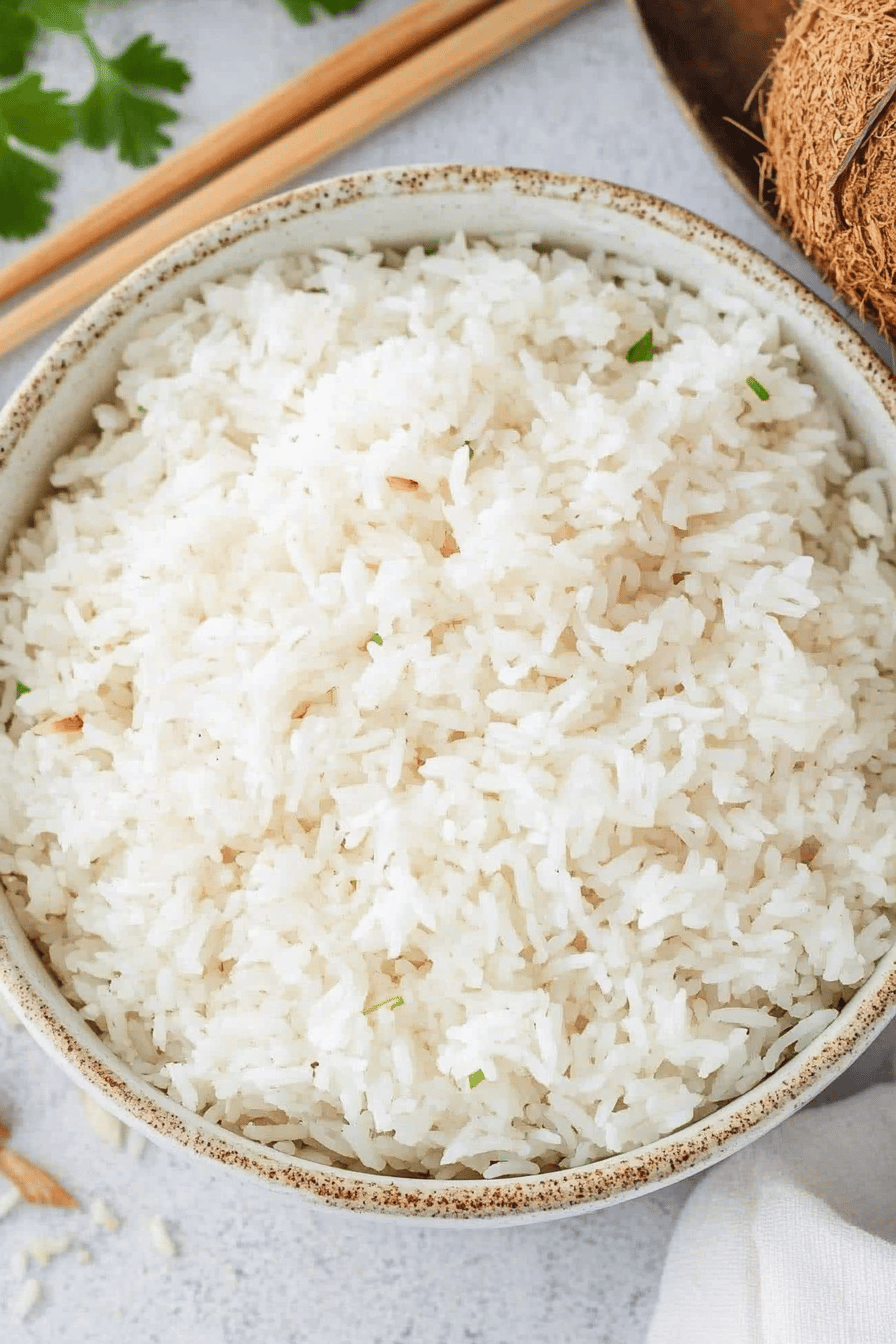
donut bread recipe
Oh, friend, I’m so excited to share this with you! This donut bread recipe is honestly one of my absolute favorites. It’s that magical thing that happens when you take the comforting flavors of a classic glazed donut and turn it into an easy-peasy quick bread. You know those mornings when you’re craving something sweet, a little decadent, but don’t have time to fuss with yeast or deep-frying? This is your lifesaver. It’s like a hug in a slice, and the best part? It’s ridiculously simple. I’ve made this countless times for potlucks, lazy Sunday mornings, and even just a Tuesday afternoon pick-me-up, and it always disappears in minutes. It reminds me a bit of my grandma’s famous Coffee Cake, but with that unmistakable donut goodness. If you’ve ever loved a good cinnamon swirl or a simple glazed treat, you are going to fall head over heels for this donut bread recipe.
What is donut bread?
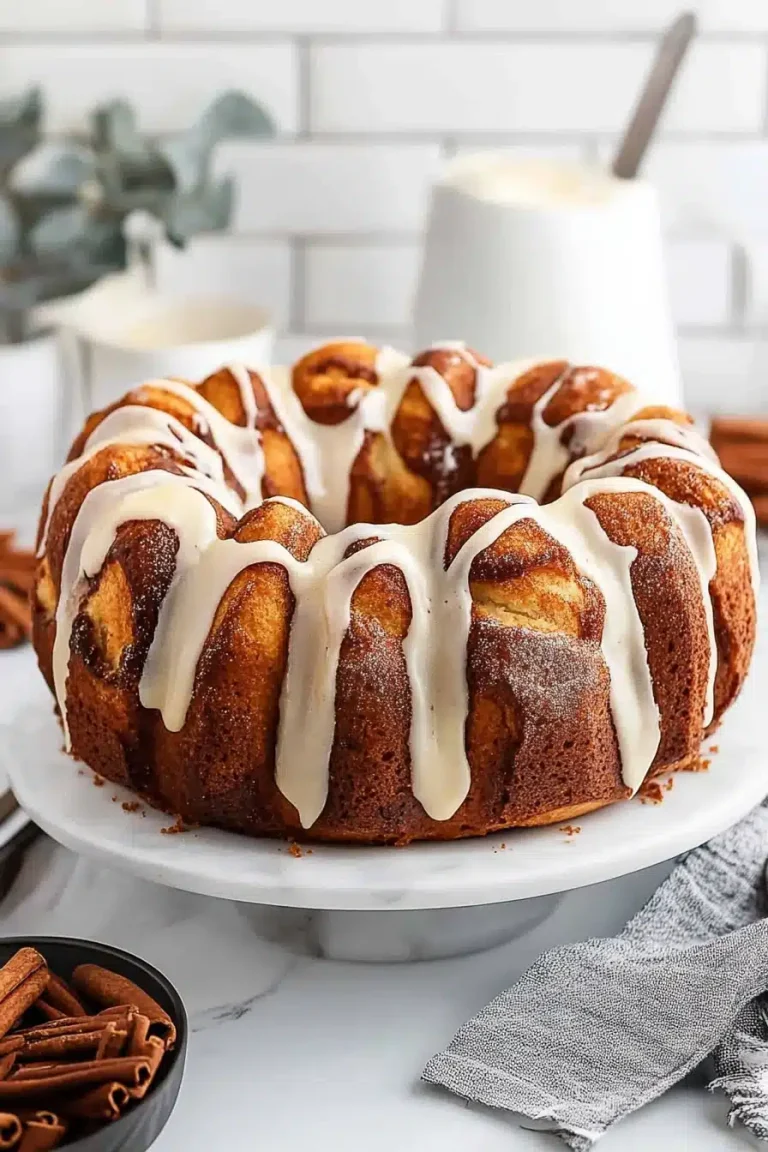
So, what exactly *is* donut bread? Think of it as a delicious hybrid. It’s not quite a cake, not quite a quick bread, but something wonderfully in between. The name comes from the flavor profile and the texture, which mimics that soft, slightly dense crumb you get from a baked donut, but in a loaf form. It’s typically made with ingredients you’d find in a quick bread – flour, sugar, eggs, leavening agents – but it often incorporates elements that give it that signature donut taste, like a touch of cinnamon, nutmeg, or vanilla. And the “swirl” part? That’s where the real magic happens, creating beautiful ribbons of flavor throughout the loaf. It’s essentially a way to get all the delightful flavors and comforting textures of your favorite donuts without all the fuss. It’s pure joy baked into a loaf!
Why you’ll love this recipe?
Honestly, the reasons I adore this donut bread recipe are plentiful, and I think you’ll feel the same way. First off, the flavor! It’s a warm hug of cinnamon and sweet dough, especially when you get a good swirl of that cinnamon-sugar mixture. The aroma that fills your kitchen while it’s baking is just pure bliss – it’s the kind of smell that makes everyone come running. But it’s not just about taste; it’s incredibly simple to whip up. You don’t need any fancy equipment or a whole afternoon. It’s the kind of recipe that’s perfect for when you need a crowd-pleaser in a pinch. Plus, it’s surprisingly budget-friendly. The ingredients are all pantry staples, which is a huge win in my book. And don’t even get me started on its versatility! You can enjoy it as is, warm from the oven with a cup of coffee, or elevate it for brunch with some Fresh Berries. It’s also a fantastic way to use up any zucchini you might have lurking in your fridge – it adds incredible moisture without any noticeable flavor. Seriously, this donut bread is a game-changer. It’s what I reach for when I want something special but have zero energy for complicated baking projects. It’s that reliable, delicious friend in my recipe collection.
How do you make donut bread?
Quick Overview
This donut bread comes together in a flash, making it ideal for any day of the week. We’ll start by mixing our dry ingredients, then our wet, combine them gently, create a beautiful cinnamon-sugar swirl, and bake until golden. It’s straightforward, requiring just basic mixing and swirling techniques. You’ll be amazed at how simple it is to achieve such a delightful, flavorful loaf. It’s pretty much foolproof!
Ingredients
For the Main Batter:
2 ½ cups all-purpose flour
1 ½ teaspoons baking powder
½ teaspoon baking soda
½ teaspoon salt
1 ½ teaspoons ground cinnamon (for the batter)
¼ teaspoon ground nutmeg
1 cup (2 sticks) unsalted butter, softened (this is key for texture!)
1 ½ cups granulated sugar
2 large eggs, at room temperature
1 teaspoon vanilla extract
1 cup buttermilk (or milk + 1 tbsp lemon juice/vinegar, let sit for 5 mins)
For the Filling:
½ cup packed light Brown Sugar
2 tablespoons ground cinnamon
2 tablespoons all-purpose flour (this helps prevent it from pooling at the bottom)
For the Glaze:
1 ½ cups powdered sugar
¼ cup milk (or half-and-half for extra richness)
½ teaspoon vanilla extract
Step-by-Step Instructions
Step 1: Preheat & Prep Pan
First things first, let’s get our oven preheated to 350°F (175°C). While the oven is heating up, grab a standard 9×5 inch loaf pan. I like to grease it really well with butter or non-stick spray, and then give it a light dusting of flour. This step is super important to ensure your beautiful loaf slides out perfectly without any sticking. You can even line it with parchment paper, leaving a little overhang on the sides – this makes lifting it out even easier. Trust me, nobody wants a loaf stuck to the pan!
Step 2: Mix Dry Ingredients
In a medium-sized bowl, whisk together the all-purpose flour, baking powder, baking soda, salt, the cinnamon for the batter, and the nutmeg. Whisking them together well helps to distribute the leavening agents and spices evenly, ensuring a consistent rise and flavor throughout your donut bread. You want to make sure there are no clumps. This is a simple but crucial step for a light and airy texture.
Step 3: Mix Wet Ingredients
In a large bowl, cream together the softened butter and granulated sugar until it’s light and fluffy. This usually takes a few minutes with an electric mixer. Then, beat in the eggs one at a time, making sure each is fully incorporated before adding the next. Stir in the vanilla extract. This process builds the foundation for a tender crumb. If your butter isn’t softened enough, you’ll get a gritty texture, so make sure it’s nice and pliable!
Step 4: Combine
Now, we’ll alternate adding the dry ingredients and the buttermilk to the wet ingredients. Start by adding about a third of the dry ingredients to the butter mixture and mix on low speed until just combined. Then, add half of the buttermilk and mix again. Continue this process, alternating between dry and wet ingredients, ending with the dry ingredients. Be careful not to overmix! Overmixing develops the gluten too much, which can make your donut bread tough. We’re just looking for everything to come together into a smooth, thick batter.
Step 5: Prepare Filling
While the batter is resting briefly, let’s whip up that glorious cinnamon-sugar swirl. In a small bowl, combine the packed light Brown Sugar, the cinnamon for the filling, and the flour. The flour here is my little secret; it helps prevent the swirl from all sinking to the bottom of the loaf during baking. Just give it a good stir with a fork to break up any brown sugar clumps.
Step 6: Layer & Swirl
Pour about half of the batter into your prepared loaf pan and spread it evenly. Now, sprinkle about half of the cinnamon-sugar filling mixture over this layer. Then, spoon the remaining batter on top and spread it out. Finally, sprinkle the rest of the cinnamon-sugar filling over the top batter layer. For that beautiful swirled look, you can take a butter knife or a skewer and gently swirl it through the batter, going down to the bottom of the pan. Don’t overdo it; just a few passes will create lovely ribbons.
Step 7: Bake
Pop the loaf pan into your preheated oven. Bake for 50-65 minutes. The exact time can vary depending on your oven, so start checking around the 50-minute mark. You’ll know it’s done when a wooden skewer or toothpick inserted into the center comes out clean, or with just a few moist crumbs attached (no wet batter!). If the top starts to brown too quickly, you can loosely tent it with foil for the remainder of the baking time.
Step 8: Cool & Glaze
Once baked, let the donut bread cool in the pan on a wire rack for about 10-15 minutes. This allows it to set up a bit before you try to remove it. Then, carefully invert the pan to turn the loaf out onto the wire rack to cool completely. This is super important – if you try to glaze a warm loaf, the glaze will just melt and run off! Once it’s totally cool, whisk together the powdered sugar, milk, and vanilla extract for the glaze. You want a smooth, drizzle-able consistency. If it’s too thick, add a tiny bit more milk; if it’s too thin, add more powdered sugar.
Step 9: Slice & Serve
Once the glaze has set slightly, slice your delicious donut bread with a serrated knife for the cleanest cuts. Serve it at room temperature. The aroma alone will have everyone gathering around! You can slice it thick or thin, whatever your heart desires. It’s perfect on its own, but a little extra glaze drizzle never hurt anyone!
What to Serve It With
This donut bread is honestly delightful on its own, but it also pairs beautifully with so many things! For breakfast, it’s an absolute dream alongside a strong cup of coffee or a steaming mug of tea. The sweetness and spice are just the right way to start the day. For a more leisurely brunch, I love serving it with a side of fresh berries – the tartness of the fruit cuts through the sweetness of the bread wonderfully. A dollop of whipped cream or Greek yogurt on the side is also divine. If you’re serving it as a dessert, it’s fantastic warm with a scoop of vanilla bean ice cream or a drizzle of caramel sauce. And for those cozy afternoon snacks, it’s pure comfort food, perfect with a glass of cold milk. My kids especially love it when I serve it with a small glass of chocolate milk – they say it tastes like a chocolate donut! We’ve also had it as part of a holiday breakfast spread, and it always gets rave reviews.
Top Tips for Perfecting Your Donut Bread
Over the years, I’ve learned a few little tricks that really help make this donut bread absolutely stellar. For the zucchini prep, if you choose to use it (and I highly recommend it for moisture!), make sure you squeeze out as much liquid as possible. Grating it finely and then wrapping it in a clean kitchen towel or cheesecloth and wringing it out thoroughly is the best way to do it. This prevents your batter from becoming too wet and ensures a good texture. When it comes to mixing, the golden rule is *do not overmix*. Mix the wet and dry ingredients until *just* combined. A few streaks of flour are perfectly okay; they’ll disappear during baking. Overmixing develops the gluten, which leads to a tough, dense bread. For the swirl, don’t go crazy with the swirling tool. A few gentle passes are enough to create beautiful ribbons. You want distinct layers of cinnamon-sugar, not a muddy mess. If you’re feeling adventurous with ingredient swaps, I’ve had great success using almond milk in place of buttermilk – it makes the batter even creamier! For baking, I always recommend using the middle rack of your oven for even heat distribution. If you notice the top is browning too fast, a piece of foil tented loosely over the top will save the day. And for the glaze, consistency is key. Aim for a thick but pourable consistency. If it’s too thin, you’ll end up with a soggy mess; too thick, and it’ll be hard to spread. You can always adjust it with a touch more powdered sugar or milk.
Storing and Reheating Tips
Keeping this delicious donut bread fresh is pretty straightforward. At room temperature, it’s best enjoyed within 2-3 days. Make sure to store it in an airtight container or wrap it tightly in plastic wrap. This helps maintain its moisture and keeps it from drying out. If you think you won’t get through it that quickly, or if your kitchen is particularly warm, popping it into the refrigerator is a great option. In the fridge, it will stay fresh for up to a week. Just be sure to store it in a well-sealed container. When it comes to reheating, I personally love it at room temperature, but if you prefer it warm, you can pop a slice into the toaster oven or a conventional oven at a low temperature (around 300°F or 150°C) for a few minutes until warmed through. Avoid the microwave, as it can make quick breads a bit rubbery. For freezing, this donut bread freezes beautifully! Wrap the cooled loaf (or individual slices) tightly in plastic wrap, then in a layer of aluminum foil, or place it in a freezer-safe bag. It should keep well in the freezer for up to 2-3 months. To thaw, simply unwrap it and let it come to room temperature, or gently warm it as mentioned above. I usually wait to glaze the bread until right before serving, especially if it’s going to be stored for more than a day, to keep the glaze from becoming sticky or soggy.
Frequently Asked Questions
Final Thoughts
So there you have it – my beloved donut bread recipe! It’s more than just a recipe for me; it’s a source of comfort and joy, a guaranteed way to bring smiles to faces. I truly believe this recipe is a keeper because it delivers incredible flavor and a wonderful texture with such surprising ease. It’s the kind of baking that feels special without being stressful, and that’s a winning combination in my book. Whether you’re a seasoned baker or just starting out, I can’t encourage you enough to give this donut bread a try. I’m confident you’ll find it just as delightful as my family and I do. If you try it, please come back and let me know how it turned out! I love hearing your stories and seeing your creations. What did you serve it with? Did you add any of your own special touches? Share your thoughts and any variations you discovered in the comments below. Happy baking, my friends!
Cinnamon Sugar Donut Bread Easy Recipe
Ingredients
Main Ingredients
- 2 cups all-purpose flour (250 g)
- 1.5 cups granulated sugar (300 g)
- 2 teaspoons baking powder
- 0.5 teaspoon kosher salt
- 1.25 cups whole milk (306 g)
- 1 large egg (room temperature)
- 2 tablespoons unsalted butter (melted)
- 1 tablespoon vanilla extract
Donut Topping
- 0.25 cup unsalted butter (½ stick / 57 g, melted)
- 0.5 cup granulated sugar (100 g)
- 1 teaspoon ground cinnamon
- 0.5 teaspoon ground nutmeg
Instructions
Preparation Steps
- Preheat the oven to 350°F (175°C). Spray an 8 ½ x 4 ½-inch loaf pan with nonstick cooking spray.
- In a large mixing bowl, combine the flour, granulated sugar, baking powder, and salt.
- In a separate bowl, whisk together the milk, egg, melted butter, and vanilla until well combined.
- Pour the milk mixture into the flour mixture and stir gently until just combined. Be careful not to overmix; the batter should be a bit runny.
- Pour the batter into the prepared loaf pan, spreading it evenly.
- Bake for 60-70 minutes, or until a toothpick inserted into the center of the bread comes out with a few crumbs and the top is golden brown.
- Once baked, remove the bread from the oven and let it cool in the pan for about 10 minutes. Then, carefully remove the bread from the pan and place it on a large piece of parchment paper.
- While the bread is still warm, gently brush the entire surface with the melted butter for the topping.
- In a small bowl, mix together granulated sugar, cinnamon, and nutmeg for the topping.
- Evenly sprinkle the sugar and spice mixture over the butter-coated surface of the bread. Turn the loaf as needed to coat all sides. You may have some leftover, which can be saved and reused.