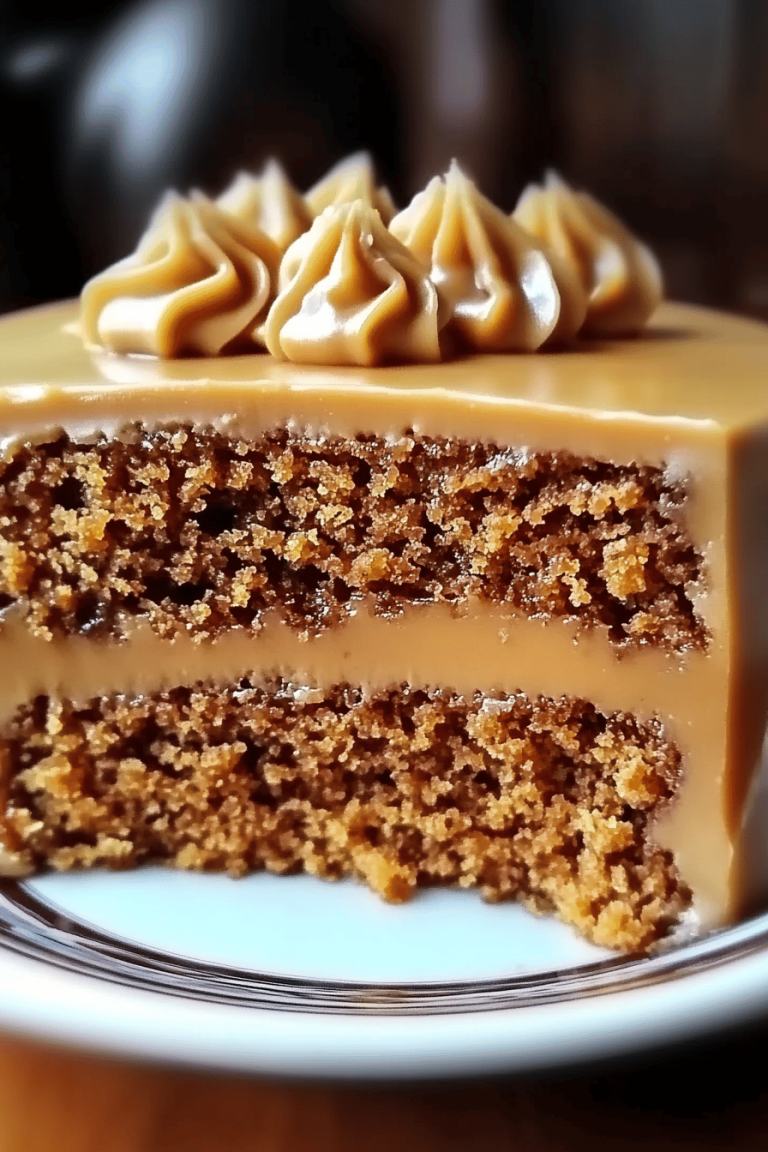
custard pie recipe
Oh, hello there! Come on in and make yourself comfortable. I was just thinking about this incredible custard Pie Recipe, the one that’s practically a legend in our house. You know those desserts that just scream comfort? This is it. It’s smooth, it’s rich, and it has this almost ethereal wobble that just melts in your mouth. Honestly, it’s the perfect antidote to a long day, or a delightful surprise for weekend brunch. It’s a far cry from those fussy, complicated desserts that take hours to assemble. This custard pie recipe is more like a warm hug in pie form, and I’m so excited to share it with you because, well, everyone deserves a slice of this magic. It’s one of those things that reminds me of simpler times, sitting around the kitchen table, the smell of something sweet filling the air. If you’re looking for a truly satisfying dessert that’s surprisingly straightforward, you’ve found your winner. Forget about the fancy bakery versions; this homemade custard pie recipe is where it’s at.
What is a custard pie?
So, what exactly *is* custard pie? At its heart, it’s a baked pie filled with a sweet, creamy custard. Think of it as a silky smooth, egg-rich filling baked inside a flaky pie crust. It’s not just a pudding dumped into a crust, though! The magic happens in the baking, where the custard sets into this beautiful, delicate texture that’s both satisfying and light. The name itself, “custard pie,” is pretty descriptive, but it doesn’t quite capture the sheer delight of that first spoonful. It’s essentially a celebration of simple ingredients – eggs, milk, sugar, and a touch of vanilla – transformed into something extraordinary. It’s humble, yes, but oh-so-delicious. It’s the kind of dessert that doesn’t need a lot of fuss; its pure, unadulterated flavor and texture are the stars of the show. It’s a classic for a reason, and my recipe aims to capture that timeless appeal with just a few personal touches that make it extra special.
Why you’ll love this recipe?
There are so many reasons why this custard Pie Recipe has become my absolute favorite, and I just know you’re going to fall in love with it too. First off, let’s talk about the flavor. It’s a pure, unadulterated taste of vanilla-kissed sweetness. It’s not cloyingly sweet, mind you; it’s perfectly balanced, with that subtle richness from the eggs and cream that makes every bite utterly divine. Then there’s the texture – oh, the texture! It’s impossibly smooth and creamy, with just the slightest hint of a wobble when you gently nudge the pie plate. It’s like a luxurious silk blanket for your taste buds. And the crust? A perfectly baked, golden-brown crust that provides just the right amount of flaky contrast to the creamy filling. What I love most about this recipe, though, is its surprising simplicity. You don’t need a pastry chef degree for this! The ingredients are all pantry staples, and the steps are straightforward. It’s genuinely cost-efficient too; you likely have most of what you need right now. Plus, it’s incredibly versatile. While I adore it just as it is, I’ll share some of my favorite ways to serve it later. It’s the kind of dessert that feels fancy enough for guests but comforting enough for a Tuesday night. It’s a lifesaver when you need something impressive without spending hours in the kitchen. Compared to, say, a complicated layer cake, this custard pie is a breath of fresh air, delivering maximum deliciousness with minimal stress.
How do I make custard pie?
Quick Overview
Making this custard pie is surprisingly simple, and honestly, that’s one of its biggest selling points. You’ll essentially prepare a simple pie crust, whisk together a luscious custard filling, pour it into the crust, and then bake it until it’s perfectly set. The key is to be gentle with the ingredients and the baking process to ensure that silky-smooth texture we’re all aiming for. Don’t worry if you’ve never made a custard pie before; this recipe is designed to be foolproof, and the results are always worth it. Trust me, the aroma alone as it bakes will have everyone gathering in the kitchen!
Ingredients
For the Crust:
You can absolutely use a store-bought pie crust if you’re in a pinch – no judgment here! But if you have a favorite homemade pie crust recipe, go for it! I usually make a simple all-butter crust because the flavor is unbeatable. Just make sure it’s blind-baked (pre-baked partially) so it doesn’t get soggy under that luscious filling. A 9-inch pie plate is perfect.
For the Filling:
4 large eggs
1/2 cup granulated sugar
1/4 cup all-purpose flour (this helps with texture and prevents curdling!)
1/2 teaspoon salt
3 cups whole milk, warmed slightly (don’t boil it, just warm it up – it makes the custard smoother)
1 teaspoon pure vanilla extract (use the good stuff if you can!)
Optional: A pinch of nutmeg or cinnamon if you like a little spice.
For the Glaze (Optional, but highly recommended!):
1/2 cup powdered sugar
1-2 tablespoons milk or heavy cream (just enough to reach a drizzly consistency)
1/4 teaspoon vanilla extract
Step-by-Step Instructions
Step 1: Preheat & Prep Pan
First things first, let’s get that oven ready. Preheat your oven to 350°F (175°C). If you’re using a homemade crust, make sure it’s already partially baked (blind-baked) and cooled slightly. If you’re using a store-bought one, follow the package directions for blind-baking, usually involving pricking the bottom with a fork and baking with pie weights or dried beans for about 15-20 minutes, then removing the weights and baking for another 5-10 minutes until lightly golden. You want it set and ready to hold that yummy filling.
Step 2: Mix Dry Ingredients
In a large mixing bowl, whisk together the granulated sugar, all-purpose flour, and salt. Whisking these together thoroughly at the start is super important. It helps prevent lumps of flour from forming later on, ensuring your custard is perfectly smooth. Make sure there are no pockets of flour hiding in the corners of the bowl. This little step makes a big difference!
Step 3: Mix Wet Ingredients
In a separate bowl, gently whisk the 4 large eggs until they are just combined – don’t go crazy and whip them into a froth. Now, slowly start adding the slightly warmed milk to the eggs while whisking continuously. The warming of the milk is a little trick I learned; it helps the custard cook more evenly and prevents that slightly “scrambled egg” texture you can sometimes get if you pour cold milk into hot eggs. Add the pure vanilla extract to this mixture. If you’re using nutmeg or cinnamon, now’s the time to stir it in.
Step 4: Combine
Now, we bring it all together! Gradually pour the wet egg and milk mixture into the bowl with the dry ingredients, whisking constantly until everything is smooth and well combined. Again, the goal here is a super smooth batter with no lumps. You want it to look like liquid silk. Don’t overmix; just mix until everything is incorporated. This stage is crucial for that signature creamy texture.
Step 5: Prepare Filling
At this point, you’ve essentially prepared your custard filling! It’s ready to go straight into the pie crust. The flour in the recipe helps it thicken as it bakes, giving it that perfect custard consistency without being too dense or rubbery. It’s a simple process, but the magic of chemistry makes it turn into something incredible in the oven.
Step 6: Layer & Swirl
Carefully pour the custard mixture into your pre-baked pie crust. Pour it gently to avoid disturbing the crust too much. The filling should come up almost to the edge of the crust. If you’re adding any swirls or decorations, now’s the time, but for a classic custard pie, a smooth, unadorned surface is beautiful on its own.
Step 7: Bake
Now for the part where the magic happens! Place the pie on a baking sheet (this catches any potential spills and makes it easier to get in and out of the oven). Bake in the preheated oven for about 45-60 minutes. The exact time can vary depending on your oven and crust. You’ll know it’s done when the edges are set and slightly puffed, but the center still has a slight jiggle when you gently shake the pan. It will continue to set as it cools. Don’t overbake it, or it can become rubbery. A toothpick inserted near the center should come out mostly clean, with maybe a few moist crumbs.
Step 8: Cool & Glaze
This is arguably the hardest part – waiting! Once baked, carefully remove the pie from the oven and let it cool completely on a wire rack. This usually takes at least 2-3 hours. As it cools, the center will finish setting. Once it’s at room temperature, you can make the glaze. Whisk together the powdered sugar, 1 tablespoon of milk, and vanilla extract. Add more milk, just a tiny bit at a time, until you reach a smooth, drizzly consistency. Drizzle this over the cooled pie. The glaze will harden slightly as it sets. For the best flavor and texture, I always recommend chilling the pie for at least another hour (or even better, overnight!) before slicing.
Step 9: Slice & Serve
Once chilled and set, use a sharp knife to slice the pie. I like to wipe the knife clean between slices for the neatest presentation. Serve chilled. The contrast of the cool, creamy custard with the flaky crust is simply divine. It’s perfect on its own, but I’ll get to some serving suggestions next!
What to Serve It With
This custard pie is a chameleon; it fits in beautifully in so many settings! For a simple weekday breakfast, a warm mug of coffee is all you really need. A slice of this can make even a Monday morning feel a little brighter. If you’re feeling a bit more celebratory for brunch, try serving it with a side of Fresh Berries – raspberries or blueberries are particularly lovely. A little sprig of mint on top adds an elegant touch. For a more formal dessert setting, it’s wonderful alongside a scoop of good quality vanilla bean ice cream or a dollop of freshly whipped cream. A sprinkle of toasted slivered almonds or a light dusting of cocoa powder also elevates it beautifully. And for those cozy snacks when you just need a little pick-me-up, a simple slice with a glass of cold milk is pure bliss. My kids, bless their hearts, always ask for seconds when this is on offer, usually asking if they can have a “dessert sandwich” where they put a slice of pie between two cookies – surprisingly delicious!
Top Tips for Perfecting Your Custard Pie
I’ve made this custard Pie Recipe more times than I can count, and over the years, I’ve picked up a few tricks that make it consistently amazing. Here are my top tips to help you achieve custard pie perfection:
For the Best Crust: The key to avoiding a soggy bottom is a well-blind-baked crust. Don’t skimp on this step! Make sure your crust is partially baked and cooled before you pour in the filling. If you’re using a store-bought crust, follow the instructions carefully and maybe even bake it a minute or two longer than recommended, just to be sure.
Whisking Wisely: When mixing the filling, whisk the dry ingredients (flour, sugar, salt) really well first. This distributes them evenly and prevents lumps. Then, when you add the wet ingredients, whisk just until everything is combined and smooth. Overmixing can sometimes make the custard a bit tough.
Milk Matters: Using whole milk is important for richness and creaminess. While you *could* use 2% or even a plant-based milk (like almond or soy), the texture and flavor will be different. I tested it with oat milk once, and it was surprisingly good, but whole milk is my absolute favorite for that classic creamy custard taste.
Gentle Baking: The baking temperature is important. 350°F (175°C) is ideal for most ovens. Avoid high heat, which can cause the custard to cook too quickly and potentially curdle or crack. Also, placing the pie on a baking sheet is a lifesaver. It catches any drips and makes handling the pie much easier.
The Jiggle Test: This is my foolproof way to tell if it’s done. When you gently shake the pie plate, the edges should be set, but the center should have a slight, gentle wobble, like set Jell-O. It will firm up considerably as it cools. If the center is completely firm and doesn’t jiggle at all, it might be overbaked and could become rubbery. I learned this lesson the hard way after one too many firm, less-than-creamy pies!
Cooling is Crucial: Patience is a virtue, especially with custard pie! Let it cool completely on a wire rack before attempting to glaze or slice it. This allows the custard to set properly. Rushing this step is the quickest way to a messy, unset pie. For the absolute best texture, chilling it for a few hours in the refrigerator after it has cooled to room temperature is highly recommended.
Glaze Consistency: For the glaze, start with just a tablespoon of milk and add more very slowly, a teaspoon at a time. You want a drizzly consistency, not too thin that it runs off, and not too thick that it’s difficult to drizzle. If you accidentally make it too thin, just whisk in a little more powdered sugar. If it’s too thick, a drop more milk or cream will do the trick.
Storing and Reheating Tips
Storing this delightful custard pie is pretty straightforward, and thankfully, it keeps well, which is great if you have leftovers (though we rarely do!).
Room Temperature: Once the pie has cooled completely and you’ve added the glaze (if using), it can sit on the counter for about 2 hours. After that, it’s best to refrigerate it to keep the custard from spoiling, especially in warmer weather. If you’re serving it within a couple of hours of cooling, it’s fine to leave it out.
Refrigerator Storage: This is the best way to store any leftover custard pie. Cover it loosely with plastic wrap or aluminum foil, or better yet, store it in an airtight container. It will keep well in the refrigerator for up to 3-4 days. The texture might change slightly after the first day, becoming a bit firmer, but it’s still delicious. Make sure it’s well-covered to prevent it from picking up any odors from other foods in the fridge.
Freezer Instructions: While custard pie is best enjoyed fresh, you can freeze it. It’s best to freeze it *before* adding the glaze. Wrap the completely cooled pie (without glaze) tightly in a layer of plastic wrap, followed by a layer of aluminum foil, or place it in a freezer-safe container. It can be frozen for up to 1-2 months. Thaw it overnight in the refrigerator before serving. You can add the glaze once it’s thawed if you like.
Glaze Timing Advice: If you plan to store leftovers in the fridge or freeze the pie, I recommend adding the glaze just before serving. This keeps the glaze from becoming sticky or soggy from condensation, especially if it’s humid. If you’re eating it within a day or two and want to glaze it ahead, it should be fine, but letting it sit for longer periods might affect the glaze’s texture. For the best visual appeal, always glaze a chilled pie right before slicing.
Frequently Asked Questions
Final Thoughts
So there you have it – my absolute favorite custard pie recipe! I truly believe this is one of those foundational recipes that every home cook should have in their repertoire. It’s elegant enough for a special occasion but simple and comforting enough for a casual weeknight treat. The way the creamy filling just melts in your mouth, balanced by that flaky crust, is pure bliss. It’s a dessert that brings people together, sparking smiles and happy memories, and that’s what cooking is all about for me. If you love this recipe, you might also enjoy my classic apple crumble or my no-bake cheesecake – they’re other family favorites that hit that sweet spot. Give this custard pie a try, and I promise, you won’t regret it. I can’t wait to hear what you think, and I’d absolutely love to see your creations! Please leave a comment below with your thoughts, any variations you tried, or how it turned out. Happy baking!

Classic Custard Pie
Ingredients
For the Crust
- 1.5 cups all-purpose flour
- 0.5 teaspoon salt
- 0.625 cup cold unsalted butter cut into cubes
- 0.375 cup ice water
For the Custard Filling
- 4 large eggs
- 0.75 cup granulated sugar
- 0.333 cup cornstarch
- 0.25 teaspoon salt
- 3 cups milk whole milk recommended
- 1 teaspoon vanilla extract
- 0.125 cup unsalted butter cut into small pieces
Instructions
Prepare the Pie Crust
- In a large bowl, whisk together flour and salt.
- Cut in the cold butter using a pastry blender or your fingertips until the mixture resembles coarse crumbs with some pea-sized pieces of butter.
- Gradually add ice water, 1 tablespoon at a time, mixing until the dough just comes together. Do not overmix.
- Form the dough into a disk, wrap in plastic wrap, and refrigerate for at least 30 minutes.
- Preheat oven to 375°F (190°C).
- On a lightly floured surface, roll out the dough into a 12-inch circle.
- Carefully transfer the dough to a 9-inch pie plate. Trim and crimp the edges as desired.
- Line the pie crust with parchment paper and fill with pie weights or dried beans. Bake for 15 minutes.
- Remove the parchment paper and weights, and bake for another 5-7 minutes, or until lightly golden. Set aside.
Make the Custard Filling
- In a large bowl, whisk together the eggs, granulated sugar, cornstarch, and salt until smooth.
- In a medium saucepan, heat the milk over medium heat until it just begins to simmer. Do not boil.
- Gradually temper the egg mixture by slowly whisking about half of the hot milk into the egg mixture. This prevents the eggs from scrambling.
- Pour the tempered egg mixture back into the saucepan with the remaining hot milk. Cook over medium-low heat, stirring constantly, until the custard thickens, about 5-8 minutes. It should be thick enough to coat the back of a spoon.
- Remove from heat and stir in the vanilla extract and butter until the butter is melted and incorporated.
- Pour the hot custard into the pre-baked pie crust.
Bake and Cool
- Reduce oven temperature to 325°F (160°C).
- Bake for 25-35 minutes, or until the center is just set but still has a slight jiggle.
- Let the pie cool completely on a wire rack before refrigerating. For best results, chill for at least 4 hours or overnight.
- Serve chilled. Optional: top with whipped cream or fresh fruit.

