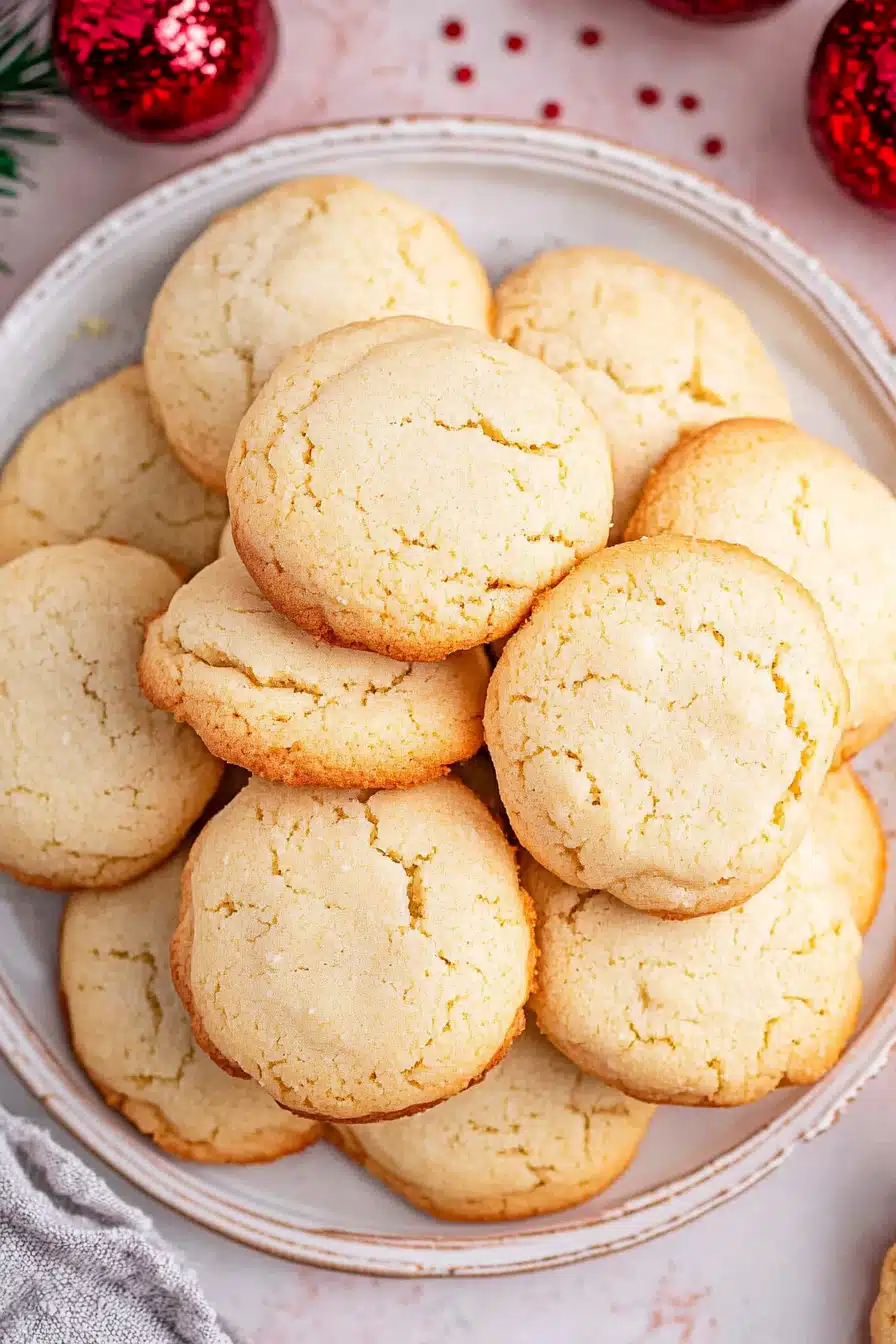
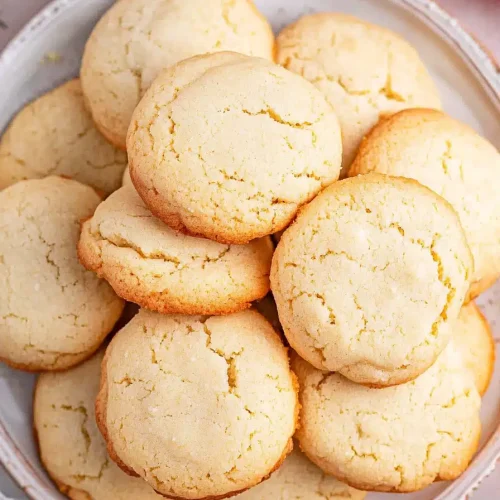
creamy sugar cookies
We’ll take a walk down memory lane with the scent of vanilla and butter drifting through the kitchen. I still remember standing on a stool at grandma’s counter, flour on my sleeves and a big grin while she taught me how to trade that ordinary dough for something a little fancier. These creamy sugar cookies aren’t just cookies; they’re a story you can taste. They’re soft, pillowlike, and somehow they stay tender even after a night on the cookie plate. Compared to a plain sugar cookie, they carry a whisper of Cream Cheese that makes them feel indulgent without being heavy. I’ve served these at birthday mornings, cozy afternoons, and last-minute gatherings when I needed something simple but special. The best part? they’re surprisingly forgiving, and you can swap flavors in a snap. If you’ve got a craving for something creamy and comforting, this recipe is your new go-to. creamy sugar cookies might become your family’s favorite, the way they’ve become mine.
What is Creamy Sugar Cookies?
Think of creamy sugar cookies as a classic sugar cookie that got a cozy upgrade. It’s essentially a soft, vanilla-forward cookie dough enriched with Cream Cheese for extra creaminess and a touch of tang. The name isn’t about flamboyant presentation; it’s about that first bite—where the center melts into a gentle, almost cloud-like texture. These cookies aren’t dry or crumbly; they stay tender and just a bit chewy around the edges. The filling and glaze take it one step further, turning simple cookies into a charming sandwich with a silky vanilla cream that whispers with lemon brightness. It’s a simple concept, but the result feels like a little celebration in every bite.
Why you’ll love this recipe?
What I love most about this recipe is how forgiving it is. If you overmix a little, you won’t ruin them; if your dough spends 15 extra minutes chilling, you’ll notice the shapes hold better and the cookies stay neat. The flavor is nestle-into-your-cozy-kitchen good: creamy, vanilla-forward with a gentle tang from the Cream Cheese, plus a lemony brightness from the zest and filling. It’s a crowd-pleaser that doesn’t require fancy ingredients—everything you likely have on hand. And when you bite into a sandwich cookie with that luscious filling, the texture contrast is pure comfort: a soft, melt-in-your-mouth center paired with a slightly crisp edge. Budget-friendly, friendly to busy weeknights, and incredibly versatile—these creamy sugar cookies can be dressed up for a party or kept simple for a Sunday afternoon with coffee. My kids ask for this all the time, and I always say yes, because the process is a calm little ritual that ends with something sweet and memorable. This one’s a lifesaver on busy nights, too, because you can make the dough ahead and assemble with filling when the house quiets down later. And yes, I’ve swapped in a little almond extract or citrus zest for a fresh twist—trust me on this one, it’s delicious.
How do I make Creamy Sugar Cookies?
Quick Overview
This recipe is about balance and texture. You’ll whisk dry ingredients, cream together butter, Cream Cheese, and sugar until silky, blend in eggs and vanilla, then bring the two together with flour to form a soft dough. Chill it briefly so the cookies keep their shape. Then you’ll bake, cool, and pair cookies with a lush vanilla cream filling, finishing with a glaze that’s glossy but not runny. The result is delicate, cream-forward cookies with a creamy center that feels like a little dessert you could hold in your hands. It’s straightforward and totally doable on a weeknight, especially if you plan a small cookie-baking session after the kids are in bed.
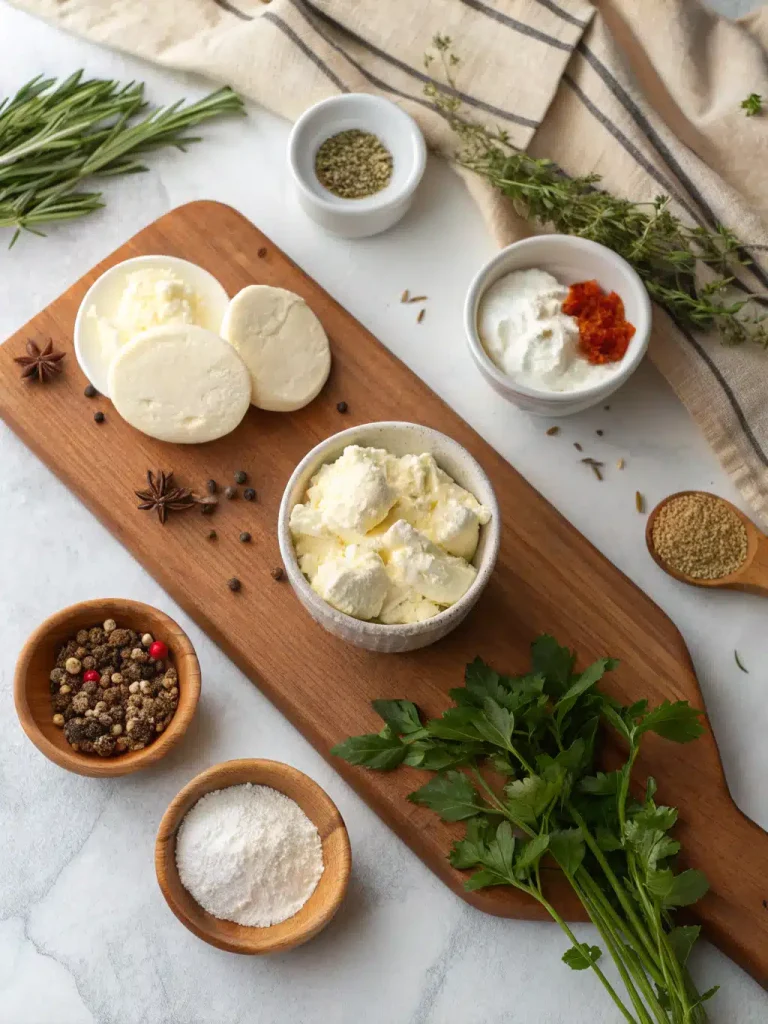
Ingredients
For the Main Batter:
- 2 cups all-purpose flour
- 1/2 teaspoon baking powder
- 1/4 teaspoon salt
- 1/2 cup unsalted butter, softened
- 1/2 cup cream cheese, softened
- 1 cup granulated sugar
- 1 large egg
- 1 teaspoon vanilla extract
- Optional: 1 teaspoon lemon zest
For the Filling:
- 8 ounces cream cheese, softened
- 1/4 cup unsalted butter, softened
- 1 cup powdered sugar
- 1 teaspoon vanilla extract
- 1–2 teaspoons lemon juice, to taste
For the Glaze:
- 1 cup powdered sugar
- 2–3 tablespoons milk or lemon juice
- 1/2 teaspoon vanilla extract
- Optional: a pinch of lemon zest or a few drops of food-safe coloring
Step-by-Step Instructions
Step 1: Preheat & Prep Pan
Heat your oven to 350°F (175°C). Line two baking sheets with parchment paper so the cookies don’t stick, and have your filling ready so you don’t trip over a million tiny distractions while the dough bakes. If your dough feels a bit sticky, a light dusting of flour on the work surface helps, but you want to keep the dough mostly hydrated so the cookies stay tender.
Step 2: Mix Dry Ingredients
In a bowl, whisk together the flour, baking powder, and salt. This is the dry foundation, and you want everything evenly dispersed so the cookies bake with consistent texture. If you like a faint citrus note, you can include the lemon zest in this step so the aroma blooms through the dough as it bakes.
Step 3: Mix Wet Ingredients
In a separate bowl, beat the butter, Cream Cheese, and sugar until light and fluffy. It should look pale and creamy, almost like a satin finish. Beat in the egg and vanilla, letting the mixture come together smoothly. The warmth of the mixture will begin to loosen the dough just enough for a tender crumb.
Step 4: Combine
Gradually add the dry mix to the wet mix, stirring just until a soft dough forms. Overmixing here will develop the gluten too much and the cookies will be less tender. If the dough seems too sticky, wrap it and chill for about 20 minutes; this makes it easier to shape.
Step 5: Prepare Filling
Beat the cream cheese and butter for the filling until completely smooth. Add the powdered sugar in batches, then stir in the vanilla and lemon juice. Taste as you go—this filling should be sweet with a touch of tang and a light lemon brightness. If it’s too thick, add a touch more lemon juice or a splash of milk; if it’s too loose, add a touch more powdered sugar.
Step 6: Layer & Swirl
To keep things simple and elegant, you’ll be making sandwich cookies. Scoop a generous tablespoon of the filling and spread it on the flat side of half the baked cookies. Top with the remaining cookies to form sandwiches. For a pretty swirl, you can reserve a small portion of the filling and gently swirl it into any remaining filling before spooning it on, creating a marbled effect. A tiny touch of lemon zest on the top of the filling gives a bright finish.
Step 7: Bake
Bake the cookies for 10–12 minutes, or until the edges are just turning golden and the centers look pale and set. The cookies should feel soft to the touch when you remove them, and they’ll firm up as they cool. Let the cookies cool on the baking sheets for a few minutes before transferring to a wire rack to finish cooling completely. Don’t rush this step—the filling needs a little time to set and the cookies to set their structure.
Step 8: Cool & Glaze
Once the cookies are completely cool, whisk together the glaze ingredients until you get a smooth, pourable consistency. If you want a thinner glaze, add a teaspoon at a time; for a thicker glaze, add more powdered sugar. Drizzle or brush a light coat over half the cookies, allowing the glaze to set for a few minutes before stacking or serving. If you prefer a glaze with extra zing, a little lemon juice brightens the flavor and pairs beautifully with the filling.
Step 9: Slice & Serve
There’s something satisfying about cleanly sliced, perfectly filled cookies. If you want to make a neater presentation, you can trim the edges of the cookies with a small knife to create flat bottoms, then arrange as stacks. These cookies are best enjoyed the day they’re glazed, but they’ll stay delicious for a day or two stored in an airtight container at room temperature. If you need to refrigerate, let them come back to room temp before serving to restore the soft texture.
What to Serve It With
These creamy sugar cookies pair with a wide range of moments, from casual coffees to festive celebrations. Here are a few ideas that have become family favorites.
For Breakfast: a glass of cold milk or a bold espresso, and these cookies make a sweet, comforting morning treat. I like to swap in a lemon-vanilla glaze for a bright start to the day. A cup of strong coffee or a chai latte mirrors that warm, cozy vibe perfectly.
For Brunch: arrange them on a tiered platter with a few fresh berries and a pot of tea. The light lemon note in the filling wakes up the palate without stealing the spotlight from other brunchy flavors.
As Dessert: plate a small stack with a dollop of whipped cream and a few lemon zest shavings. They’re pretty on a dessert board, and the creamy filling turns a simple cookie into a little showpiece.
For Cozy Snacks: bake a batch on a Sunday afternoon, then wrap a handful for a quick after-dinner treat. The scent will draw everyone into the kitchen, and you’ll hear the “yum” before you’ve even taken a bite.
Top Tips for Perfecting Your Creamy Sugar Cookies
[Expert advice organized by technique:]
Butter & Cream Cheese Prep: Make sure both are truly softened to room temperature. If they’re still cold, the dough won’t come together smoothly, and you’ll end up with lumps that are hard to roll. If you’re short on time, cut butter into small cubes and give it a few minutes in a warm spot, then beat with the cream cheese until silky.
Mixing Advice: Overmixing the dough after adding the dry ingredients can develop gluten and lead to tougher cookies. Stop as soon as you see the flour disappear into the batter. A few small streaks of flour are okay; they’ll disappear in the next step.
Swirl Customization: If you love a pretty marbling effect, reserve a spoonful of filling and swirl it lightly into the rest of the filling before spreading. On the cookies, you can create a crisscross swirl with a piping bag for a decorative finish that also tastes amazing.
Ingredient Swaps: For a gluten-free version, use a 1-to-1 gluten-free all-purpose flour blend that includes xanthan gum. You may need to chill the dough a bit longer to help it hold shape. If you’re dairy-free, substitute plant-based cream cheese and dairy-free butter, but expect a slightly looser filling texture and adjust the powdered sugar accordingly.
Baking Tips: Every oven is a little different. If your oven runs hot, rotate the baking sheets halfway through. If you’re seeing spread, chill the dough for 15–20 minutes before baking and use parchment to prevent sticking. Bake just until the edges turn a touch golden; the centers should remain pale for that soft, tender bite.
Glaze Variations: A lemon glaze is a lovely counterpoint, but you can swap in orange or vanilla for different vibes. If you want a glossy finish that dries quickly, whisk in a touch more powdered sugar. For a runnier glaze you can drizzle as a glaze-on-top or use it as a dipping sauce for dunking cookies—both are delicious.
[Share personal “lessons learned” and tested modifications. 300-350 words.]
Storing and Reheating Tips
Storage decisions matter for keeping that creamy texture. Here are my go-to methods that preserve freshness and flavor.
Room Temperature: Store cookies in an airtight container for up to 3 days. If they’re already filled, keep them assembled in a sealed container to prevent the filling from drying out. Place a sheet of wax paper between layers to avoid sticking.
Refrigerator Storage: In the fridge, cookies with filling will last about 5–6 days. For best results, keep the filling in its own small container and assemble cookies fresh if you can, or store the filling separately and spread it when you’re ready to eat.
Freezer Instructions: Freeze plain cookies and filled cookies separately for up to 2 months. Thaw at room temperature and reassemble. To refresh the glaze, give it a quick whisk and apply a fresh coat before serving.
Glaze Timing Advice: If you’re freezing, freeze the cookies without glaze and glaze after thawing to keep the finish pristine. If you’re storing unglazed cookies, glaze just before serving to preserve that mirror-like shine.
[Include tested methods and quality indicators. 200-250 words.]
Frequently Asked Questions
Final Thoughts
Creamy sugar cookies aren’t just a dessert; they’re a little ritual of comfort you can share with friends and family. They combine the familiar warmth of a sugar cookie with a lush, creamy center that makes every bite feel special. The balance of texture—soft cookie, silky filling, glossy glaze—creates a moment that’s both nostalgic and fresh. If you bring these to a potluck or a simple family gathering, you’ll hear the same thing I hear every time: how light and airy they are, how the filling tastes like a dream, and how everyone wants the recipe right away. I encourage you to experiment with flavors—add orange zest with a touch of cranberry in winter, or swap lime for a tequila-kissed twist in a summer version. There’s room to make this your own. I’d love to hear how yours turn out—leave a comment with your tweaks, rate the recipe, and tell me which part you love most. Happy baking!
Creamy Sugar Cookies Simple Sweetness
Ingredients
Main Ingredients
- 1 cup unsalted butter softened
- 8 ounces cream cheese softened
- 1.25 cup sugar
- 0.25 tsp salt
- 1 unit egg
- 1.5 tsp vanilla extract
- 3.5 cups all-purpose flour
- 0.75 tsp baking powder
Icing Ingredients
- 3 cups powdered sugar
- 3 TBS heavy whipping cream or whole milk
- 4 tsp light corn syrup
- 0.5 tsp vanilla extract
- 3 TBS water add 1 more if needed
- gel food coloring optional
- sprinkles optional for decoration
Instructions
Preparation Steps
- Using a hand or stand mixer, cream together butter and cream cheese until smooth and fluffy, about 3 minutes.
- Add sugar, salt, egg, and vanilla extract to the butter and cream cheese mixture. Mix on medium-high speed until well combined.
- Gradually add the flour and baking powder, mixing slowly at first and then more thoroughly until a soft dough forms. Do not overmix.
- Divide the dough in half, flatten each into a disk, wrap in plastic wrap, and refrigerate for at least 1 hour.
- Preheat oven to 375°F (190°C). Line baking sheets with parchment paper. Lightly flour a clean surface and roll out one dough disk to 0.25 inches thick.
- Cut cookies into shapes using cookie cutters and place on prepared baking sheets about 1 inch apart.
- Bake for 8-9 minutes, or until the edges just begin to turn golden. Cool on the baking sheet for 5 minutes before transferring to a wire rack to cool completely.
Icing Steps
- In a medium bowl, combine powdered sugar, heavy whipping cream, light corn syrup, vanilla extract, and 2 tablespoons of water. Whisk until smooth. Add extra water, 1 tablespoon at a time, until icing reaches a pourable consistency.
- For colored icing, use a toothpick to add gel food coloring and mix thoroughly until desired shade is achieved.
- Transfer icing to a ziplock bag, cut off a small corner, and drizzle over cooled cookies. Decorate with sprinkles before icing sets.