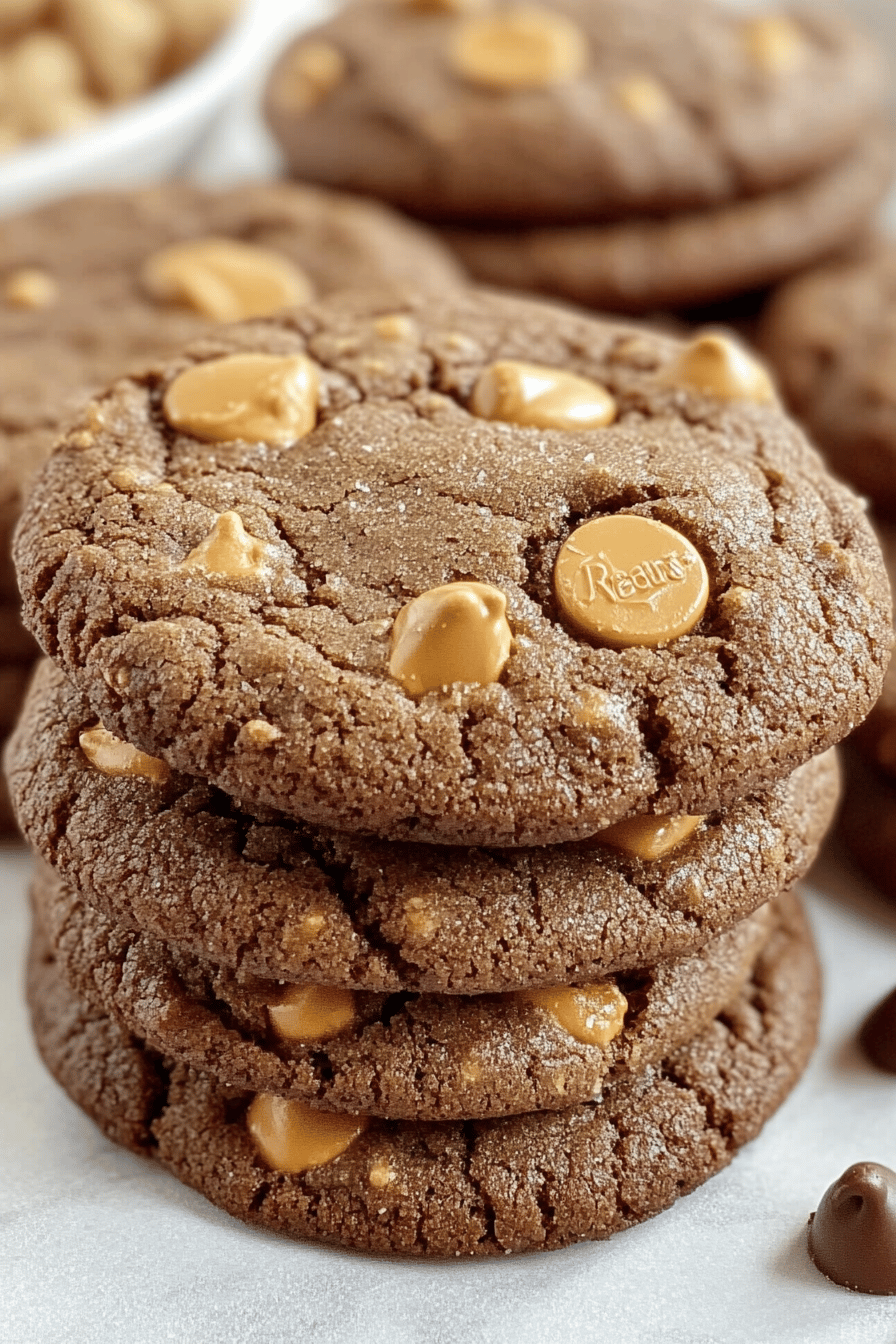
Chocolate Toffee Fudge Cookie Bars Easy
You know those days? The ones where you just need a little something sweet, something decadent, something that feels like a warm hug from the inside out? That’s exactly when these chocolate toffee fudge bars come to the rescue. I remember the first time I made these; it was during a particularly hectic holiday season, and I needed a foolproof treat that tasted like I’d spent hours slaving away. Well, this recipe, these glorious chocolate toffee fudge bars, totally delivered. They’re richer and more satisfying than your average brownie, and they have this incredible crunch from the toffee bits that just makes them utterly addictive. If you’ve ever loved a good Fudgy Brownie but wished it had a little more *oomph*, you are going to adore these. They’re quickly becoming my go-to for everything from bake sales to just a quiet afternoon with a cup of tea.
What is chocolate toffee fudge?
So, what exactly are these little squares of heaven? Think of them as the ultimate love child between a rich, dense Chocolate Fudge and a slightly chewy, incredibly satisfying bar cookie. The “fudge” part comes from the incredibly moist and fudgy texture of the base – it’s not cakey at all, which is key for me! Then, we load them up with crunchy toffee bits that bake right into the batter, giving you those delightful little pockets of sweet, buttery crunch. And to top it all off, a simple, glossy chocolate glaze that just seals the deal. They’re not overly complicated, but the combination of textures and deep chocolate flavor makes them feel incredibly special. It’s like the grown-up, more sophisticated version of your childhood candy bar dreams, all baked into one easy-to-make bar.
Why you’ll love this recipe?
Why do I love chocolate toffee fudge bars?flavor is just out of this world. We’re talking deep, Dark Chocolate that isn’t too sweet, perfectly complemented by the sweet, caramel-like crunch of the toffee bits. It’s a flavor combination that just sings! And the texture? Oh, the texture! It’s that perfect balance of dense, fudgy chewiness with bursts of crisp toffee. It’s seriously satisfying.
What is the second part of the puzzle?simplicity. I know it looks impressive, and it absolutely is, but these bars are surprisingly easy to whip up. Most of the ingredients are pantry staples, and the steps are straightforward. It’s the kind of recipe I can confidently make even when I’m short on time. I often tell people, “This is my secret weapon when I need to impress someone without the stress.” It’s much more approachable than trying to make actual fudge from scratch, but it gives you that same luxurious, rich taste.
And let’s talk about cost-efficiency. These bars use basic ingredients, so you don’t need to break the bank to make a big batch. The toffee bits are readily available, and the rest is all standard baking fare. Plus, they make a decent amount, so you get a lot of deliciousness for your money. They’re also incredibly versatile. While they’re absolutely divine on their own, I’ve also served them warm with a scoop of vanilla Ice Cream, and let me tell you, it’s pure magic. They’re perfect for potlucks because they travel well, and they’re always the first thing to disappear. What I love most about these chocolate toffee fudge bars is that they hit that sweet spot between being a rich dessert and a comforting treat. They’re more indulgent than a simple cookie, but less fuss than a layered cake. They truly are a winner in my book.
How to Make Chocolate Toffee Fudge Bars
Quick Overview
The magic of these chocolate toffee fudge bars lies in their straightforward approach. You’ll basically mix up a rich, fudgy batter, fold in those delightful toffee bits, bake them until they’re just set, and then finish them off with a simple chocolate glaze. The key is not to overmix the batter to keep that dense, fudgy texture. We’ll combine our wet and dry ingredients carefully, ensuring everything is well incorporated but still tender. It’s a process that feels familiar to anyone who bakes, but with a few little touches that elevate it to something truly special. They come together so quickly, you’ll have them cooling before you know it!
Ingredients
For the Main Batter:
2 cups all-purpose flour: Make sure it’s fresh! I like to use unbleached all-purpose flour for a slightly better texture, but any good quality all-purpose flour will work wonders.
1 ½ cups granulated sugar: This gives us that lovely sweetness and helps create that dense, fudgy texture. Don’t skimp here!
¾ cup unsweetened cocoa powder: Use a good quality cocoa powder for the Best Chocolate flavor. Natural unsweetened works beautifully, but Dutch-processed can give it an even deeper, darker color and richer taste.
1 ½ teaspoons baking soda: This helps give the bars a little lift without making them cakey. It’s crucial for that dense, chewy interior.
1 teaspoon salt: Salt is our secret weapon for balancing sweetness and enhancing all those chocolatey notes.
1 cup (2 sticks) unsalted butter, melted: Using unsalted butter allows you to control the saltiness, and melted butter is key for that rich, fudgy consistency.
2 large eggs: Room temperature eggs incorporate better into the batter, giving you a smoother, more uniform mix.
1 teaspoon vanilla extract: Pure vanilla extract is best for that warm, comforting flavor note.
1 cup buttermilk: This is another secret to our incredible texture! The acidity in buttermilk reacts with the baking soda to create tenderness and moisture. If you don’t have buttermilk, you can make a substitute by adding 1 tablespoon of white vinegar or lemon juice to 1 cup of milk and letting it sit for 5-10 minutes.
For the Filling:
1 cup toffee bits (like Heath Bits O’ Brickle): These are essential for that delightful crunch and caramel flavor. You can usually find them in the baking aisle. Make sure they are the baking bits, not whole candy bars you have to chop yourself unless you really want to!
½ cup chocolate chips (semi-sweet or milk chocolate): These add little pockets of melty chocolate goodness throughout the bars. I love using a mix of semi-sweet and milk chocolate chips for complexity.
For the Glaze:
1 cup powdered sugar (confectioners’ sugar): Sifted, this will ensure a smooth, lump-free glaze.
2-3 tablespoons milk or cream: Use milk for a slightly less rich glaze, or cream for an extra decadent finish. Start with 2 tablespoons and add more until you reach your desired consistency.
1 tablespoon unsweetened cocoa powder: To give our glaze that beautiful chocolate color and a hint of extra chocolate flavor.
½ teaspoon vanilla extract: For a touch of sweetness and aroma.
Step-by-Step Instructions
Step 1: Preheat & Prep Pan
First things first, preheat your oven to 350°F (175°C). This is your standard baking temperature, and it’s perfect for getting these bars baked evenly. Then, grab a 9×13 inch baking pan. I like to line mine with parchment paper, leaving some overhang on the sides. This makes lifting the bars out of the pan a breeze later on, and it also helps with cleanup. Lightly grease the parchment paper or the sides of the pan with butter or non-stick spray.
Step 2: Mix Dry Ingredients
In a large mixing bowl, whisk together the all-purpose flour, granulated sugar, unsweetened cocoa powder, baking soda, and salt. You really want to get in there and whisk well to ensure everything is evenly distributed. No one wants a bite with too much baking soda or a clump of cocoa! Getting these dry ingredients thoroughly combined now means a more consistent texture and flavor in your final bars.
Step 3: Mix Wet Ingredients
In a separate medium bowl, whisk together the melted unsalted butter, large eggs (make sure they’re at room temperature if you can – it really helps!), and vanilla extract. Whisk until everything is well combined and smooth. Then, pour in your buttermilk and whisk gently until just incorporated. The mixture might look a little separated at this stage, but that’s perfectly fine.
Step 4: Combine
Now, it’s time to bring those wet and dry ingredients together. Pour the wet ingredients into the bowl with the dry ingredients. Using a spatula or a wooden spoon, gently fold everything together until *just* combined. It’s really important not to overmix here. Overmixing can develop the gluten in the flour too much, leading to tougher bars, and we want them nice and fudgy! Stop mixing as soon as you don’t see any dry streaks of flour. A few small lumps are okay.
Step 5: Prepare Filling
This is where the magic happens! Gently fold in the toffee bits and chocolate chips into the batter. Again, be careful not to overmix. You just want to distribute them throughout the batter so you get those delightful crunchy and melty surprises in every bite. Think of it as scattering treasures throughout your chocolatey landscape!
Step 6: Layer & Swirl
Pour the batter into your prepared 9×13 inch baking pan. Spread it out evenly with your spatula. The batter will be quite thick, which is exactly what we want. It’s not a runny batter like a cake; it’s much more substantial, promising that dense, fudgy result.
Step 7: Bake
Place the pan in your preheated oven and bake for 25-30 minutes. You’re looking for the edges to be set and firm, and the center to be mostly set but still have a slight fudgy moistness. A toothpick inserted into the center should come out with moist crumbs attached, not wet batter. If it comes out completely clean, they might be a little overbaked and won’t be as fudgy. I usually start checking around the 25-minute mark, as ovens can vary.
Step 8: Cool & Glaze
Once baked, remove the pan from the oven and let the bars cool completely in the pan on a wire rack. This is crucial for texture development and so the glaze doesn’t melt off. I know it’s tempting to dig in while they’re warm, but trust me, patience here pays off! While they’re cooling, whip up the glaze. In a small bowl, whisk together the sifted powdered sugar, cocoa powder, vanilla extract, and 2 tablespoons of milk or cream. Add more milk/cream, a teaspoon at a time, until you reach a smooth, pourable consistency. It should be thick enough to coat the bars but thin enough to spread easily. Once the bars are completely cool, drizzle or spread the glaze evenly over the top.
Step 9: Slice & Serve
Let the glaze set for about 30 minutes to an hour at room temperature, or you can pop them in the fridge for about 15-20 minutes to speed things up. Once the glaze is firm, use the parchment paper overhang to lift the entire slab out of the pan onto a cutting board. Use a sharp knife to cut them into squares. I like to wipe the knife clean between cuts for nice, neat edges. Enjoy these chocolate toffee fudge bars as they are, or with a glass of cold milk!
What to Serve It With
These chocolate toffee fudge bars are wonderfully versatile and can be enjoyed in so many ways, depending on the occasion.
For Breakfast: Yes, you read that right! While they feel decadent, a small piece with your morning coffee is a treat. The rich chocolate and toffee can be a wonderfully energizing start to the day, especially if you’re looking for something a bit more substantial than a plain pastry. I often cut them into smaller, more bite-sized pieces for this purpose.
For Brunch: Elevate them a bit! Serve them on a pretty platter alongside fresh berries or a dollop of whipped cream. A glass of iced coffee or a mimosa pairs beautifully. They add a touch of indulgence to any brunch spread without being overwhelming.
As Dessert: This is where they truly shine. Serve them slightly warmed with a scoop of high-quality vanilla bean ice cream – the contrast of warm, fudgy chocolate with cold, creamy ice cream is divine. A sprinkle of extra toffee bits on top is never a bad idea! They’re also fantastic with a strong cup of coffee or a rich espresso to cut through the sweetness.
For Cozy Snacks: My personal favorite! Curl up on the couch with a warm drink (hot chocolate, herbal tea, or even just a good old glass of milk) and a chocolate toffee fudge bar. They are the ultimate comfort food for a chilly afternoon or a late-night craving. They’re satisfying, rich, and just make everything feel a little bit better. My kids always ask for these when they’re feeling a bit under the weather or just need a little pick-me-up!
Top Tips for Perfecting Your Chocolate Toffee Fudge Bars
Over the years, I’ve learned a few tricks that I think make these chocolate toffee fudge bars even better. Here are some of my top tips to ensure your success:
Zucchini Prep: Wait, zucchini? Yes! While this recipe doesn’t actually use zucchini, the concept of “prep” is still important for ingredients. For these bars, the most crucial prep is ensuring your eggs are at room temperature. They emulsify much better with the melted butter and buttermilk, leading to a smoother, more cohesive batter. If you forget to take them out in advance, you can quickly warm them by placing them in a bowl of warm (not hot!) water for about 5-10 minutes.
Mixing Advice: The biggest pitfall with fudgy baked goods is overmixing. When you combine the wet and dry ingredients, stop as soon as you no longer see dry flour. A few lumps are much better than a tough texture. Remember, you’re not developing gluten here; you’re just bringing everything together to create a tender, dense crumb. Treat the batter gently!
Swirl Customization: While this recipe doesn’t have a swirl in the traditional sense, the toffee bits and chocolate chips are your “swirls” of goodness! When folding them in, don’t stir them in vigorously. Instead, use a gentle folding motion with your spatula to distribute them throughout the batter. You want pockets of toffee and chocolate, not a uniform distribution where you lose the textural contrast. Aim for an even scattering.
Ingredient Swaps: I’ve experimented a bit! If you can’t find toffee bits, you could try finely chopped chocolate-covered caramels or even just extra chocolate chips, but the toffee really adds a unique crunch and flavor that’s hard to beat. For the cocoa powder, as I mentioned, Dutch-processed can give a darker, richer color and flavor if you prefer that. If you find your batter a little too thick to spread evenly after adding the toffee and chocolate chips, add another tablespoon of buttermilk or milk to loosen it just slightly.
Baking Tips: Ovens can be notoriously finicky! Keep an eye on your bars. The baking time is a guideline. If your oven tends to run hot, start checking at 23-24 minutes. If it runs cool, you might need the full 30 minutes. The toothpick test is your best friend here: moist crumbs are perfect, wet batter means it needs more time, and clean means you’ve gone a bit too far for ultimate fudginess. I always bake on the middle rack for the most even heat distribution.
Glaze Variations: The glaze is simple but impactful. If you want a thinner glaze for a more delicate coating, add a touch more milk or cream. For a thicker, more frosting-like glaze, use less liquid. You can also add a pinch of espresso powder to the glaze to intensify the chocolate flavor, or a tiny bit of sea salt sprinkled on top of the wet glaze for a sweet and salty contrast. If you’re not a fan of chocolate glaze, a simple dusting of powdered sugar or a drizzle of melted white chocolate would also be lovely.
Storing and Reheating Tips
These chocolate toffee fudge bars are fantastic for making ahead, which is always a bonus in my book! Here’s how I keep them tasting their best:
Room Temperature: Once the glaze is fully set, you can store these bars at room temperature. I usually keep them in an airtight container. They’ll stay fresh and delicious for about 3-4 days. The toffee bits help them keep their texture, and the dense fudgy base holds up well. Just make sure they’re completely cool before covering them, or condensation can form.
Refrigerator Storage: If you live in a very warm climate, or if you just want them to last a bit longer, the refrigerator is a good option. Store them in an airtight container, and they should be good for up to a week. The bars might firm up a bit in the fridge, but they’ll soften back to a lovely texture at room temperature within about 30 minutes. They’re also quite nice eaten chilled if you prefer that texture!
Freezer Instructions: Yes, you can freeze these! This is a lifesaver when I want to have them on hand for unexpected guests or just a future craving. Let the bars cool completely and the glaze to set. Then, cut them into individual portions. Wrap each portion tightly in plastic wrap, then place them in a freezer-safe bag or container. They’ll keep well in the freezer for about 2-3 months. To thaw, unwrap them and let them come to room temperature on a plate for a couple of hours. They’ll be almost as good as fresh!
Glaze Timing Advice: For room temperature or freezer storage, it’s best to have the glaze fully set before packing them up. If you plan to eat them straight from the fridge, the glaze will hold up fine. If you’re freezing them, ensure the glaze is completely firm before wrapping to prevent it from sticking to the plastic wrap.
Frequently Asked Questions
Final Thoughts
I truly hope you give these chocolate toffee fudge bars a try. They’re more than just a recipe to me; they represent comfort, ease, and pure deliciousness. They’re the kind of treat that makes people smile, that brings a little bit of joy into the everyday. Whether you’re looking for a crowd-pleaser for your next gathering, a way to satisfy a serious chocolate craving, or just a hug in edible form, these bars are a winner. They prove that you don’t need to be a master baker to create something truly special and incredibly satisfying. If you love rich chocolate and delightful crunch, these are for you.
If you enjoy these, you might also love my Dark Chocolate Chunk Brownies or my Salted Caramel Shortbread Bars. They share that same wonderful balance of texture and flavor that makes home-baked goods so special. I can’t wait to hear what you think of these chocolate toffee fudge bars! Please leave a comment below with your thoughts, or even better, share your own tips and variations. Happy baking!