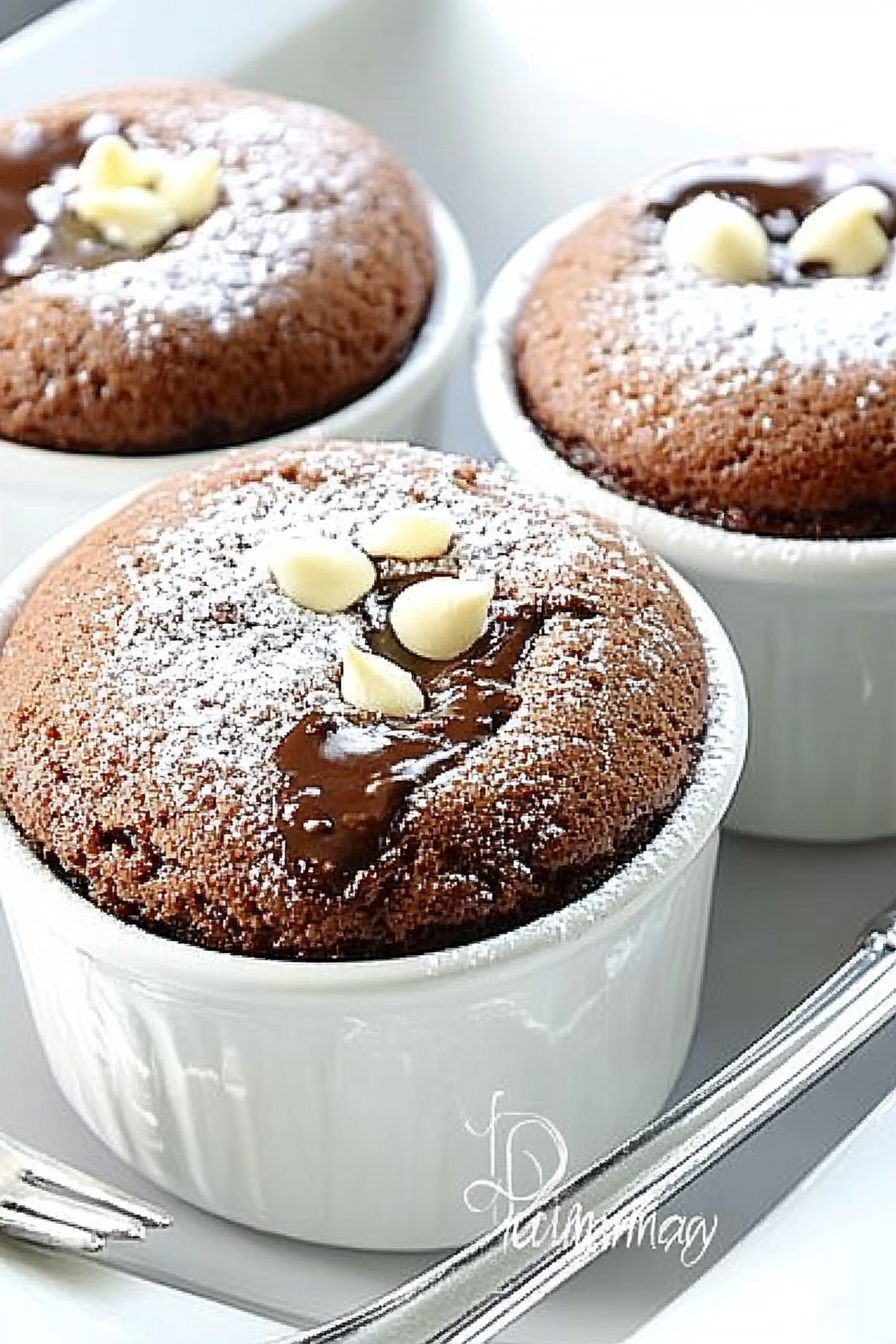
chocolate lava cakes
There’s something utterly magical about cutting into a warm chocolate lava cake and watching that rich, molten center ooze out slowly. I remember the very first time I tried these little beauties at a cozy bistro tucked away on a rainy afternoon. The combination of a crisp, slightly cakey exterior with that gooey chocolate heart inside completely stole my heart. Ever since, I’ve been obsessed with recreating the perfect chocolate lava cakes at home—because honestly, who wants to wait years for a fancy restaurant trip? This recipe is like a hug in dessert form: quick, indulgent, and so satisfying. It’s like a brownie met a soufflé and had a ridiculously delicious baby. And the best part? You don’t have to be a pastry chef to pull it off. I swear, these chocolate lava cakes have become my secret weapon for dazzling guests or treating myself on those nights when I just need some serious chocolate love without the fuss.
What is chocolate lava cake?
If you’re new to this dessert, think of chocolate lava cakes as the lovechild of a molten center and a cake exterior. The name actually paints the perfect picture — when you slice into the cake, the inside flows out like molten lava. Basically, it’s a small, individual-sized chocolate cake with a warm, gooey core that’s just begging to be devoured. It’s essentially a flourless cake that balances rich, intense chocolate flavor with a soft, fluffy crust on the outside. The trick to these little wonders is the timing and temperature, so you get that perfect molten center without overbaking. Sure, it sounds fancy, but it’s surprisingly approachable, even if your baking skills are still in the “learning” zone—I promise. Once you nail it, you’ll be making chocolate lava cakes whenever the chocolate craving hits, which, let’s be honest, is pretty much every day.
Why you’ll love this recipe?
Okay, let me spill why this chocolate lava cake recipe has won me over time and time again. First off, the flavor. There’s nothing like biting into a warm cake and having that silky, molten chocolate flood your taste buds—it’s like pure happiness in every forkful. What I adore about this recipe is how straightforward it is. No fancy equipment required, no weird ingredients, just pantry staples and a bit of patience. I remember the first time I made it, I was nervous about the timing and ended up with a fully set center, which still tasted great but just wasn’t the molten lava magic I was aiming for. Now, I’ve dialed in the perfect bake time to keep that melt-in-your-mouth flow going.
Another huge plus? It’s budget-friendly. You don’t need high-end chocolate (although if you can swing it, even better), and the rest are simple ingredients you probably already have on hand. Plus, versatility is a big tick: you can dress these cupcakes up with fresh berries, a dusting of powdered sugar, or whipped cream, or keep them simple and elegant. It’s the kind of recipe that feels indulgent yet is surprisingly easy to whip up whenever a sweet tooth calls. I also love how this recipe pairs so well with other favorite treats, like chocolate mousse or even a scoop of ice cream. Honestly, I’ve made this one countless times, and it never fails to bring everyone running to the kitchen.
How do I make chocolate lava cake?
Quick Overview
Making chocolate lava cakes is surprisingly simple once you get the rhythm down. The process revolves around preparing a smooth batter, layering it with an extra rich molten chocolate filling, and baking just enough to keep the inside molten while the exterior forms that perfect cakey shell. It’s a quick bake—usually under 15 minutes—and the payoff is insane. What’s great is it all comes together with minimal fuss and dishes, making it perfect for last-minute dessert cravings or a weekend treat.
Ingredients
For the Main Batter:
- 4 ounces bittersweet or semisweet chocolate (choose good quality for a deeper flavor)
- 1/2 cup unsalted butter (adds richness and helps with moistness)
- 1 cup powdered sugar (for the best texture, avoid granulated sugar)
- 2 large eggs (room temperature eggs give smoother batter)
- 2 large egg yolks (extra yolks boost moistness and richness)
- 1/3 cup all-purpose flour (sifted to avoid lumps)
- Pinch of salt (balances the sweetness)
For the Filling:
- 2 ounces dark chocolate chunks or ganache (melts beautifully inside for that lava effect)
- Optional: a teaspoon of espresso powder (enhances chocolate flavor without tasting like coffee)
For the Glaze:
- 1/4 cup heavy cream
- 2 ounces bittersweet chocolate (melted)
- Optional: a pinch of cinnamon or chili powder (for a little warmth and surprise)
Step-by-Step Instructions
Step 1: Preheat & Prep Pan
Start by preheating your oven to 425°F (220°C). Grease your ramekins or muffin tins generously with butter, then lightly dust them with cocoa powder. This not only prevents sticking but also adds that extra chocolate punch on the outside. I always line mine up on a baking sheet for easy transferring in and out of the oven.
Step 2: Mix Dry Ingredients
In a small bowl, sift together the flour, salt, and, if you’re feeling adventurous, a tiny pinch of espresso powder. I usually whisk these ingredients gently to ensure everything’s well combined and airy—crucial for a tender cake texture later on.
Step 3: Mix Wet Ingredients
Melt the chocolate and butter together over a double boiler or carefully in the microwave in 30-second bursts, stirring frequently. Once smooth and glossy, whisk in the powdered sugar until fully combined and slightly thickened. Next, beat in the eggs and yolks one at a time, whisking until the batter looks smooth and shiny.
Step 4: Combine
Gently fold the dry ingredients into the wet mixture. The key here: don’t overmix! Just fold until no streaks remain because overworking the batter can make the cakes tough instead of soft and tender. I usually stop as soon as the flour blends in.
Step 5: Prepare Filling
Grab your chocolate chunks or slightly chilled ganache and divide them into portions large enough to melt inside the cakes but still hold their shape. If you want a little flavor twist, stir in a dash of chili or cinnamon powder into the filling for a subtle kick.
Step 6: Layer & Swirl
Pour half of the batter evenly into your prepared ramekins. Nestle a piece of chocolate filling into the center, then cover with the remaining batter. Some folks like to swirl the batter a bit using a skewer or knife for a marbled look, but I mostly leave it smooth so the molten center truly surprises you.
Step 7: Bake
Bake the cakes for 12 to 14 minutes until the edges look set but the centers are still slightly jiggly. Timing here is everything. I learned the hard way by baking too long—it’s still edible but loses its signature ooze. If you have a convection oven, drop the temperature by 25 degrees and keep a close eye.
Step 8: Cool & Glaze
Let the cakes rest for a minute or two before carefully running a knife around the edges. While they cool, prepare the glaze by heating the cream and pouring it over melted chocolate until glossy. Drizzle this over the cakes just before serving to add an impressive, velvety finish.
Step 9: Slice & Serve
Serve your chocolate lava cakes warm—the only moment when their magic truly comes alive. Cut gently down the middle, watch the molten center flow out, and enjoy immediately. I like to add a dusting of powdered sugar, a scoop of vanilla ice cream, or even some fresh raspberries for a pop of color and tartness.
What to Serve It With
For Breakfast: Believe it or not, I’ve served these with freshly brewed coffee and a small dollop of whipped cream for a decadent weekend brunch treat. The bitterness of the coffee complements the chocolate so well and gives that slow morning a cozy vibe.
For Brunch: Treat your guests to an elegant platter with chocolate lava cakes alongside fresh fruit salad, mimosas, or a frothy latte. A sprinkle of toasted nuts adds a nice crunch and contrast.
As Dessert: Pair with a silky vanilla or cinnamon ice cream scoop, some fresh mint leaves, or a drizzle of raspberry coulis for that restaurant-worthy charm. On rainy nights, I keep it simple and just savor the warm cake by itself—pure heaven.
For Cozy Snacks: When I’m craving something sweet yet comforting on a quiet evening, I bring these out warm with a mug of hot chocolate or chai tea. It’s like a warm blanket for your taste buds and never fails to lift my mood.
Top Tips for Perfecting Your Chocolate Lava Cakes
Chocolate Quality: Trust me, the better the chocolate, the better the result. Even though this is a budget-friendly recipe, splurging on good quality bittersweet chocolate makes the lava irresistible.
Mixing Advice: Always fold gently after adding dry ingredients to avoid developing gluten which makes the cake rubbery. I use a spatula and think “less is more” here. The batter should be smooth but not overly runny.
Baking Tips: Timing is the trickiest part. Start with 12 minutes and test by gently shaking the ramekin — the edges should be firm while the center moves slightly. If it’s too jiggly, an extra minute or two, but watch closely!
Swirling Ideas: For a fun twist, try swirling in a teaspoon of peanut butter or caramel before baking for a surprise flavor explosion that everyone loves.
Ingredient Swaps: I’ve had success swapping half the butter for coconut oil—it gives a subtle tropical note and keeps the cakes moist. Almond milk works well if eggs are an issue, but it’s not quite as rich.
Glaze Variations: Sometimes I add a pinch of cinnamon or cayenne to the glaze for warmth or a gentle kick. Nut butters like hazelnut spread make a delicious topping alternative too.
Storing and Reheating Tips
Room Temperature: If you plan to eat these within a day, you can keep the cakes covered with plastic wrap on the counter for up to 6 hours. Just know the lava center won’t be quite as molten after time.
Refrigerator Storage: Store cakes in an airtight container for up to 2 days. Reheat gently in a microwave for 15-20 seconds to bring back some warmth and softness. Don’t overheat or the molten center disappears!
Freezer Instructions: I wrap individual cakes tightly in plastic wrap and aluminum foil, freezing them for up to one month. Thaw overnight in the fridge and warm briefly before serving.
Glaze Timing Advice: If you store the cakes, save the glaze for last minute. Adding it straight after baking gives that silky look and keeps the cake’s texture intact, but you can drizzle it right before serving as well.
Frequently Asked Questions
Final Thoughts
Chocolate lava cakes have a way of making even the simplest days feel special. This recipe has been a little treasure in my kitchen, especially on those evenings when I just want a rich chocolate treat without turning the kitchen into a disaster zone. The balance of that soft, cakey edge with the molten chocolate core is addictive, and every time I make them, my family’s eyes light up in that way that makes all the baking mess worth it. If you love chocolate as much as I do, you might want to try pairing these with chocolate mousse or a classic chocolate tart next. I can’t wait to hear what fun twists you put on this one—drop a comment or share your photos! Happy baking, and may your kitchens always smell like melting chocolate happiness.
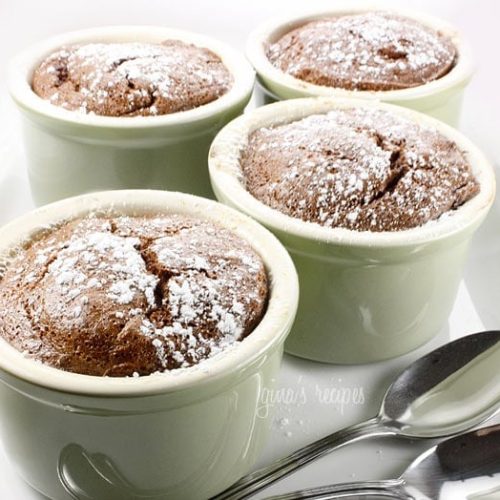
Rich Chocolate Lava Cakes A Simple Treat
Ingredients
Main Ingredients
- 6 oz semisweet chocolate
- 0.5 cup unsalted butter plus extra for greasing
- 1 cup powdered sugar
- 2 large eggs plus 2 egg yolks
- 0.33 cup all-purpose flour
- 1 tsp vanilla extract
- 0.25 tsp salt
Instructions
Preparation Steps
- Preheat oven to 425°F. Butter four 6-ounce ramekins and set on a baking sheet.
- Melt the chocolate and butter together in a heatproof bowl over simmering water, stirring until smooth.
- Remove from heat and stir in powdered sugar until well combined.
- Whisk in eggs, egg yolks, vanilla extract, and salt until smooth.
- Gently fold in flour until just combined.
- Divide batter evenly among prepared ramekins and bake for 12-14 minutes until edges are set but centers still jiggle slightly.
- Let the cakes cool for 1 minute, then carefully invert onto serving plates and serve immediately.