chocolate cookies
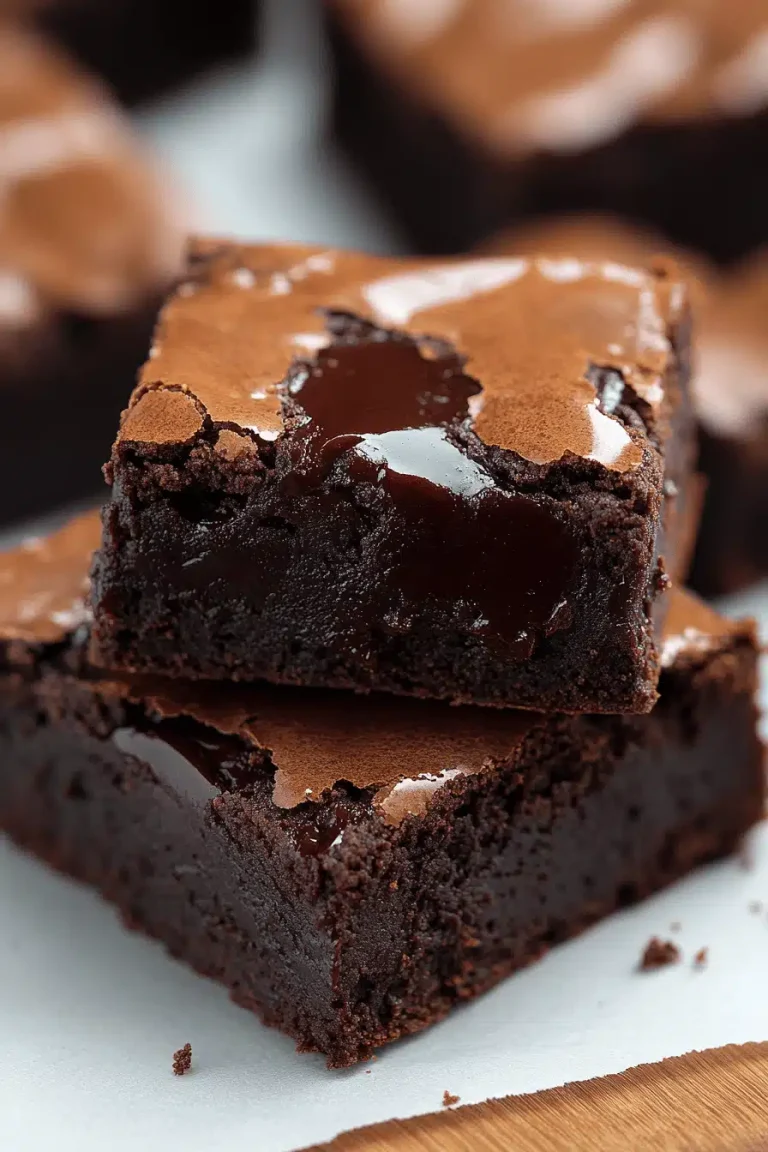
There’s something simply magical about the smell of chocolate cookies baking in the oven — it’s like a warm hug that fills the whole house. I still remember my grandma’s kitchen, cluttered with flour bags and cocoa dust, where she’d whip up batch after batch of her famous chocolate cookies. The crispy edges contrasted perfectly with the gooey center, and let me tell you, nobody ever said no to a second (or third!) helping. This recipe is my personal homage to those moments — super simple, incredibly rich, and seriously addictive. If you think brownies get all the glory, wait until you try these chocolate cookies; they’ve got that same deep chocolate goodness but with a texture that’s way easier to snack on. My kids literally ask for these every single weekend, and honestly, I don’t blame them — I’m that person who sneaks an extra one when no one’s watching.
What is chocolate cookie?
Chocolate cookies are, quite simply, cookies baked with plenty of chocolate or cocoa — but the beauty is in their diversity. Think of them as the home-baked cousins of classic chocolate chip cookies, except these babies often boast a richer, fudgier quality. Some versions are loaded with chunks of melted chocolate, while others rely on cocoa powder for a deep, intense flavor. It’s essentially a soft or chewy cookie whose chocolate flavor shines through every bite, making it a universal comfort treat. People sometimes get thrown off by the name if they’ve only seen crispy chocolate chip varieties— these cookies lean into softness and chewiness, with just that perfect balance of sugar and bitterness. In our house, they’re the go-to when we want something more substantial than a plain cookie but less fuss than a cake.
Why you’ll love this recipe?
What I love most about this chocolate cookies recipe is how it nails every craving note without complicating your day. First off, the flavor – it’s a luscious, chocolatey dream that’s never too sweet but always satisfying. The cocoa powder and melty chocolate chunks team up to create an incredible depth that reminds me of those late-night indulgences, the kind where you don’t regret a thing. Secondly, it’s so easy to make. No complicated folding or weird ingredients that only gardeners know how to pronounce — just honest, straightforward pantry staples. The dough comes together quickly, and you can basically multitask (like answering emails or pouring yourself another cup of coffee) between steps.
Another reason I keep coming back to this recipe is how budget-friendly it is. I always find I have cocoa, butter, sugar, and eggs lying around, so no last-minute supermarket dashes needed. Plus, it’s super versatile — bake them as full-size cookies for sharing or smaller ones for lunchboxes. Got some nuts, dried cherries, or even a sprinkle of sea salt? Throw ’em in! I’ve made these countless times, swapping bits here and there, and they never disappoint. Honestly, these chocolate cookies have become my secret weapon when friends drop by unexpectedly or when I need a quick pick-me-up that feels like a warm, cozy treat.
How do I make chocolate cookies?
Quick Overview
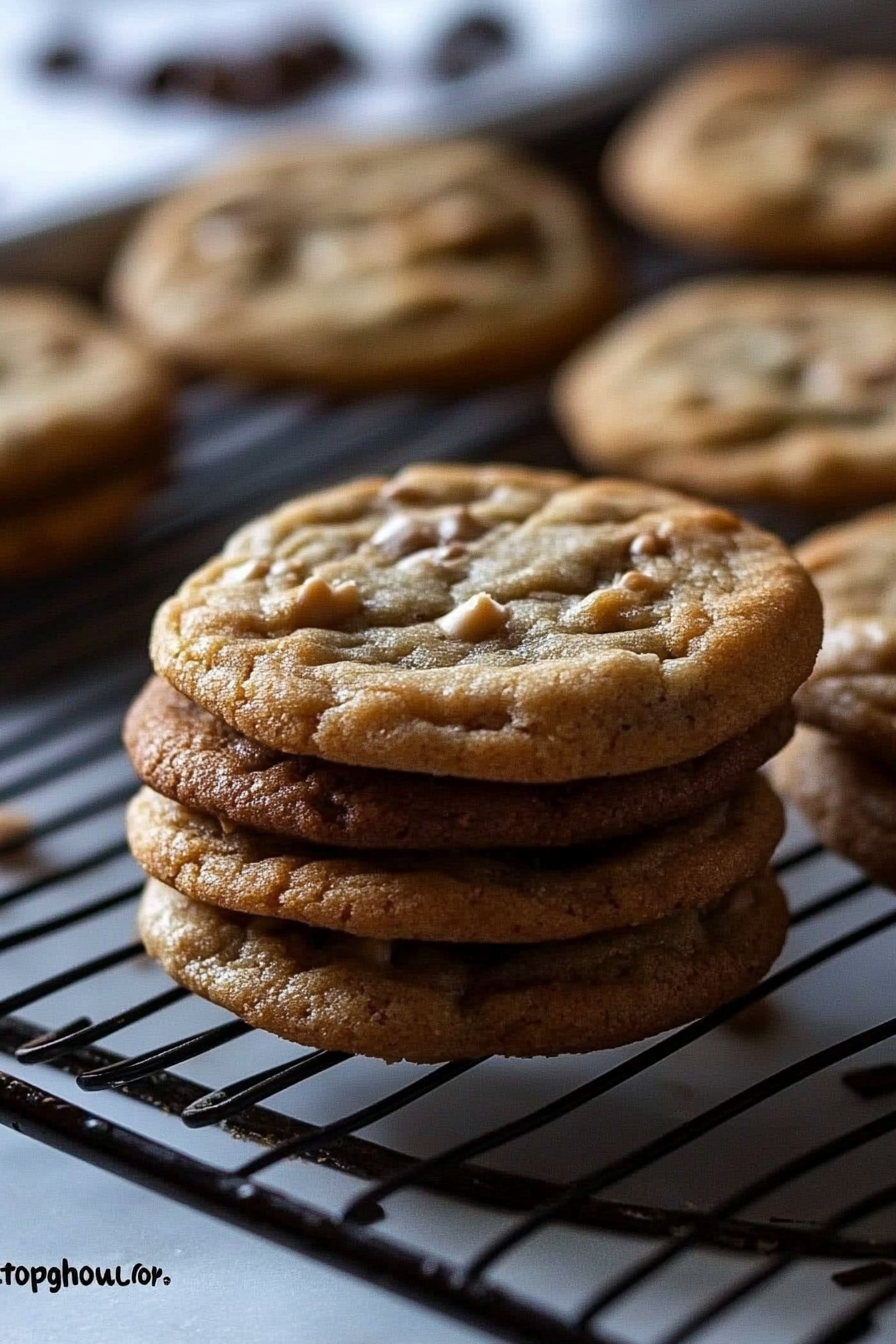
This chocolate cookies recipe is a straightforward one-bowl wonder that comes together in no time. We start by mixing the dry ingredients to evenly distribute the cocoa and baking soda, then blend the wet ingredients until creamy. Combining the two is where you have to be gentle — overmixing is the enemy of chewy cookies! After folding in generous chocolate chunks, the dough goes onto the baking sheet in dollops, then it’s just a quick bake until the edges are set and the centers look soft. The smell alone will make you want to dive in immediately. It’s just that easy, and you get consistently soft, chewy results every time.
Ingredients
For the Main Batter:
- 1 cup (2 sticks) unsalted butter, softened – Make sure it’s really soft for easy mixing.
- ¾ cup granulated sugar – For that perfect sweetness and slight crunch.
- ¾ cup packed light brown sugar – Adds moisture and depth.
- 2 large eggs – Room temperature always yields the best texture.
- 2 teaspoons pure vanilla extract – Trust me, this makes a big flavor difference.
- 2 cups all-purpose flour – Sifted if you want ultra-light cookies.
- ¾ cup good-quality unsweetened cocoa powder – I prefer Dutch-process for richness.
- 1 teaspoon baking soda – Helps with rise and texture.
- ½ teaspoon salt – Balances the sweetness beautifully.
For the Filling:
- 1 to 1½ cups semi-sweet or bittersweet chocolate chunks – The bigger and chunkier, the more molten pockets!
- Optional: ½ cup chopped walnuts or pecans – Adds a lovely crunch if you like nuts.
For the Glaze:
- 1 cup powdered sugar – For a delicate, sweet finish.
- 2 tablespoons milk or cream – Adjust for desired thickness.
- 1 teaspoon vanilla extract – For extra warmth in the glaze.
- Optional: pinch of salt or cocoa powder to tweak flavor.
Step-by-Step Instructions
Step 1: Preheat & Prep Pan
Get your oven preheated to 350°F (175°C) early on — this way it’s ready to go as soon as your dough is mixed. Line your baking sheets with parchment paper or a silicone mat. I always chill the pan or use a second sheet in the fridge while prepping the dough to keep the baking process smooth and the cookies from spreading too much.
Step 2: Mix Dry Ingredients
In a large bowl, whisk together the flour, cocoa powder, baking soda, and salt. The key here is to make sure the cocoa and soda are evenly spread so every cookie gets that consistent chocolate flavor and perfect rise. I learned the hard way that lumps of cocoa powder can create bitter bites!
Step 3: Mix Wet Ingredients
In a separate bowl, beat softened butter with both sugars until it’s fluffy and light – this usually takes about 3-4 minutes by hand or less with a mixer. Then add the eggs, one at a time, blending fully between additions, and finally stir in that vanilla extract. The mixture should be creamy with a little bounce, something that smells like sweet velvet.
Step 4: Combine
Now fold the dry ingredients into the wet in two or three batches, mixing gently but thoroughly. You want the dough uniform but not overworked — overmixing can make the cookies tough and dry out the chocolate magic. The dough should be thick but scoopable, like a fudgy brownie batter.
Step 5: Prepare Filling
Fold in your chocolate chunks and nuts here, if using. The chunks should be spread evenly through the dough — this is where the cookie turns from a baked good into a chocolate lover’s dream. If you want, you can even add a little sprinkle of sea salt on top for that gourmet feel.
Step 6: Layer & Swirl
If you’re feeling fancy, you can swirl in some peanut butter or caramel before baking, but for classic chocolate cookies, simply drop spoonfuls of dough onto the prepared pans about 2 inches apart. They’ll spread a bit but keep their chewy form nicely. The rough scoops create those irresistible soft edges.
Step 7: Bake
Pop them in the oven for 10-12 minutes, but keep a close eye starting at 9 minutes — the edges should look set but the centers still a tad soft. I learned this tip after many a hard cookie disaster! The cookies firm up more as they cool, so don’t wait for them to look completely done.
Step 8: Cool & Glaze
After baking, let the cookies cool on the baking sheet for 5 minutes before transferring them to a wire rack. This makes sure they stay soft inside while the edges crisp up just right. If you want that extra touch of sweetness, drizzle your simple powdered sugar glaze over the cooled cookies (a quick mix of powdered sugar, milk, and vanilla). It gives a nice glossy finish without overpowering the chocolaty base.
Step 9: Slice & Serve
These are perfect served warm or at room temp. I love pairing them with a splash of cold milk, but a cup of black coffee or rich hot chocolate works wonders too. Cut into generous sizes — you want that melt-in-your-mouth moment with every bite. The first batch in my household always vanishes before cooling completely, so beware!
What to Serve It With
For Breakfast: These chocolate cookies pair surprisingly well with a creamy latte or cappuccino. I sometimes crumble one over vanilla yogurt with fresh berries for a fun morning twist that feels decadent but fuels the day.
For Brunch: Serve alongside a cheese board featuring mild cheeses like brie and mascarpone, plus some fresh fruit and nuts. The contrast of creaminess and sweet chocolate hits all the right notes, and pair with chilled sparkling wine or orange juice.
As Dessert: Top with a scoop of vanilla or coffee ice cream for an indulgent treat. You can even warm the cookie slightly and drizzle with caramel or fudge sauce for a cozy finish that’s perfect for cold evenings.
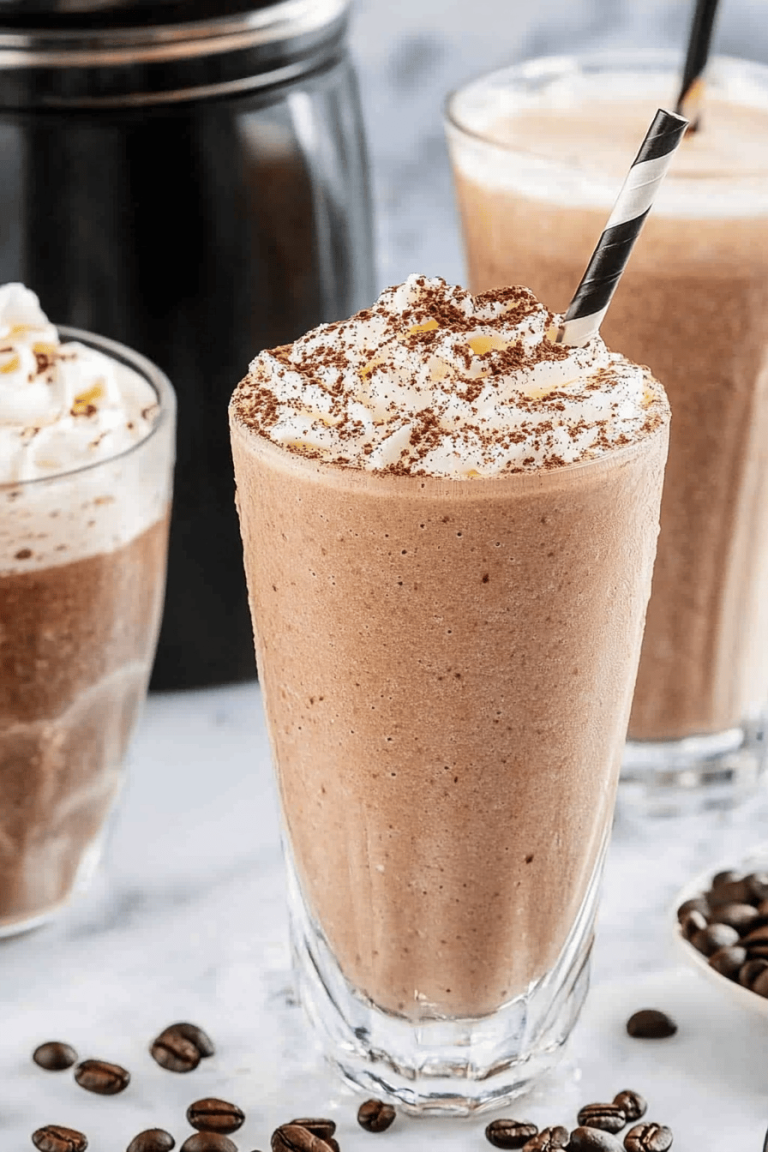
For Cozy Snacks: Just grab a few fresh from the jar, pair with a glass of cold milk or a cup of herbal tea, and you’ve got the ultimate comfort snack. My family’s favorite is dunking them warm; it’s like the cookie melts a little more and you get an extra dose of chocolate bliss.
Our family tradition? We often make a batch during holiday movie nights, pairing the cookies with hot cocoa and a pile of cozy blankets — nothing beats that simple, happy feeling.
Top Tips for Perfecting Your Chocolate Cookies
Butter Quality: Use unsalted butter for control over salt balance and make sure it’s softened, not melted, so you get that creamy creaming that traps air for fluffiness.
Mixing Advice: Resist the temptation to overmix once you add the dry ingredients — I’ve learned the hard way that a quick gentle fold makes all the difference in keeping the cookies soft, not tough.
Chocolate Chunk Choices: I prefer a mix of large chunks and smaller chips – it creates that delightful texture contrast when melting in your mouth. Also, try bittersweet for balance or milk chocolate if you’re after more sweetness.
Swirl Customization: For a fun twist, fold in peanut butter or swirl in raspberry jam right before baking. Use a toothpick to create beautiful marbled patterns that make your cookies a little more special.
Ingredient Swaps: Tried these with a blend of half whole wheat flour for a nuttier flavor and half all-purpose — it actually worked great! For dairy-free, coconut oil replaces butter nicely, but expect a slight coconut aroma.
Baking Tips: Position baking sheets in the center of your oven, and if you have a convection setting, use it for even baking. Oven temperatures vary, so start checking early to avoid dry cookies.
Glaze Variations: Swap the vanilla glaze for a rich espresso glaze by adding a teaspoon of brewed espresso. Or make a simple dusting of powdered sugar or even cocoa powder for a rustic look. I love experimenting with different touches to keep the recipe fresh.
Honestly, it’s these little tweaks and discoveries made over years that turned this from a “just okay” recipe into my absolute favorite chocolate cookies. The first batch might look a bit uneven or slightly overbaked — that’s totally normal. Trust me, with a little patience, you’ll get that chewy, fudgy magic that keeps everyone coming back.
Storing and Reheating Tips
Room Temperature: Store your chocolate cookies in an airtight container at room temp for up to 3-4 days. Make sure the container seals well; I usually add a slice of bread to help keep them soft — weird trick, but it really works!
Refrigerator Storage: If you’re looking at keeping them longer, pop them in the fridge inside a sealed container. They stay good for about a week but might firm up a little — just 10 seconds in the microwave brings back that fresh-baked warmth.
Freezer Instructions: For long-term storage, freeze the cookies in a single layer on a baking sheet, then once solid, transfer to a zip-top bag or airtight container. They’ll keep for up to 3 months. Thaw at room temp or warm gently in the oven for that ooey-gooey feeling anytime.
Glaze Timing Advice: If you’re glazing, wait until the cookies are fully cooled to glaze before storing. For storage over multiple days, you might consider glazing just before serving to avoid the glaze drying out or getting sticky.
One thing I’ve learned: always taste-test before deciding you’ve stored too long. These cookies tend to keep their magic longer than you’d expect if stored right, but freshness always wins.
Frequently Asked Questions
Final Thoughts
This chocolate cookies recipe truly feels like a warm, familiar friend in the kitchen – reliable yet always ready to wow you. It’s the kind of treat that disappears in minutes at my house, every single time, bringing smiles and sticky fingers along the way. I love how it balances richness with simplicity, making it easy to whip up whether it’s a lazy Sunday or a last-minute craving at midnight. If you’re the kind of person who treasures those gooey, chocolate-filled bites of happiness but hates complicated baking, this is absolutely your new favorite. And hey, once you’ve mastered this, you might want to explore my chocolate chip cookies or double chocolate brownies to keep the sweet vibes flowing. Can’t wait to hear how yours turns out – don’t forget to share your favorite twists, and if you loved it, drop me a comment or rating. Happy baking!

Dreamy Chocolate Cloud Cookies How To
Ingredients
Main Ingredients
- 2 cups all-purpose flour
- 1 teaspoon baking soda
- 0.25 teaspoon salt
- 1.5 cups superfine sugar
- 1 cup packed light brown sugar
- 2 sticks butter room temperature, cut into 0.5 inch cubes
- 0.25 teaspoon pure vanilla extract
- 2 large eggs at room temperature, beaten
- 12 ounces semisweet chocolate chips
- 2 cups sliced toasted almonds
Instructions
Preparation Steps
- Preheat oven to 350°F.
- Line 3 cookie sheets with parchment paper and set aside.
- In a medium bowl, sift together the flour, baking soda, and salt; set aside.
- In a small bowl, whisk together the superfine sugar and light brown sugar; set aside.
- Place the butter in a mixing bowl and beat until creamy and smooth.
- Slowly add the sugar mixture to the butter and continue to beat until thoroughly combined.
- Mix in the vanilla extract.
- Continue to beat for 5 minutes, or until the mixture is pale yellow.
- Gradually beat in the eggs.
- With mixer speed on low, slowly mix in the flour mixture until incorporated.
- Fold in the semisweet chocolate chips and sliced toasted almonds.
- Scoop out dough using a 2-inch diameter ice cream scoop and place onto prepared cookie sheets, leaving 3 inches between cookies.
- Flatten each dough ball gently with the heel of your palm.
- Bake for 15 to 18 minutes until cookies are golden brown.
- Tap the cookie sheet on the oven rack 3 minutes before baking ends to cause cookies to deflate and crack on top.
- Repeat the process with remaining dough and allow cookies to cool on sheets.