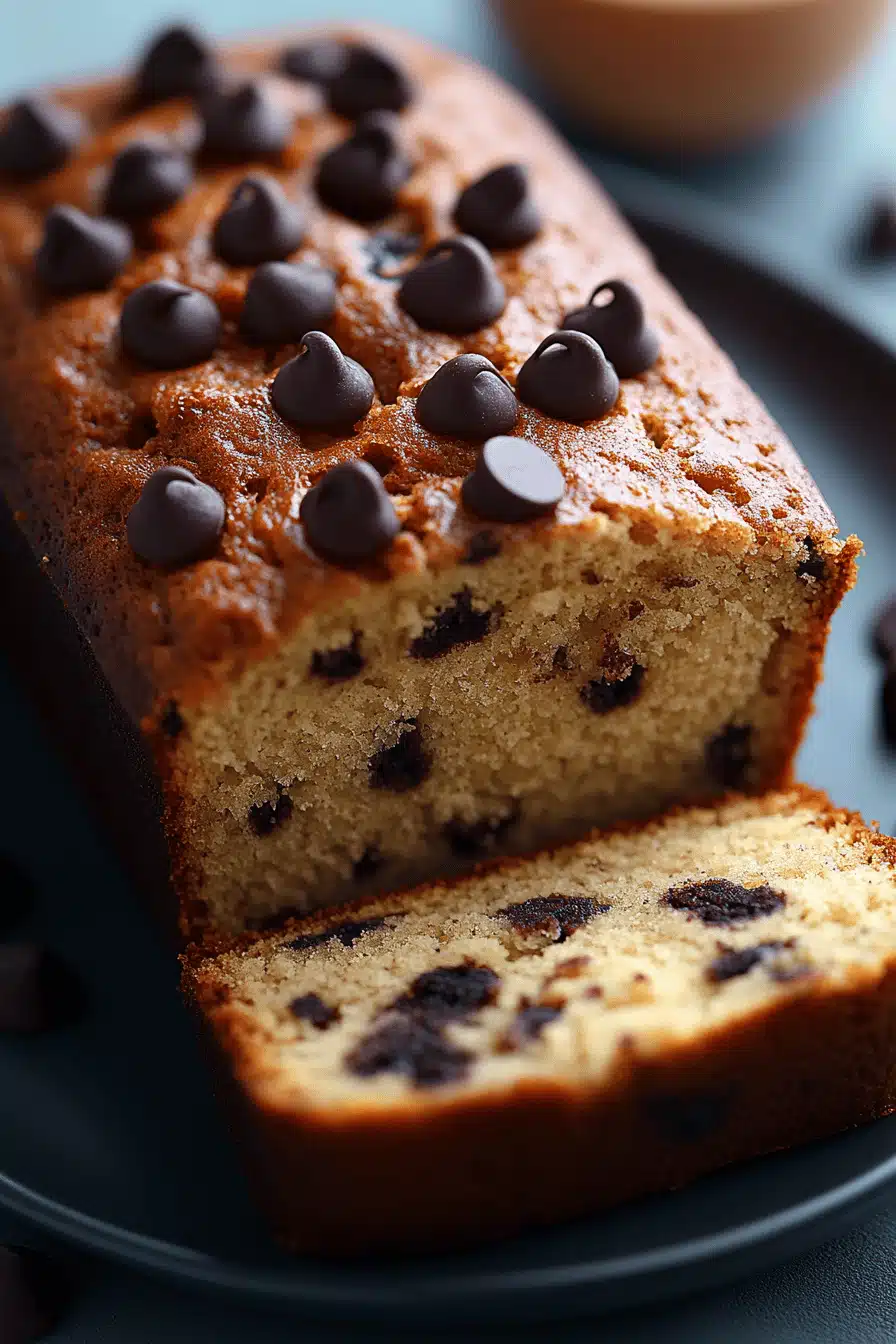
chocolate cinnamon bread
There are some recipes that just *feel* like home, aren’t there? The kind that fill your kitchen with the most comforting aromas and have everyone gathering around, sniffing the air with anticipation. For me, that recipe is this chocolate Cinnamon Bread. It’s not just a quick bread; it’s a hug in loaf form, a little slice of pure joy that I find myself turning to time and time again. Honestly, I think I’ve made this chocolate cinnamon bread more times than I can count, especially when I need a little something sweet but don’t have hours to dedicate to a fussy dessert. It’s right up there with my grandma’s apple pie in terms of pure comfort, but it’s so much quicker and honestly, sometimes even more satisfying when that chocolate craving hits hard. If you’ve ever made a killer banana bread or a moist blueberry muffin, you’ll feel right at home with this one. It’s that familiar, easy baking process, but with a twist that takes it from good to absolutely unforgettable.
What is chocolate cinnamon bread?
So, what exactly is this magical creation we call chocolate cinnamon bread? Well, think of it as the ultimate comfort food hybrid. It’s essentially a moist, tender quick bread – meaning it uses baking soda and baking powder for leavening, not yeast, so no waiting around for dough to rise! – that’s infused with both rich cocoa powder and warm, cozy cinnamon. But it doesn’t stop there. We’re talking about a luscious chocolate swirl running all through it, making sure every single bite is a perfect balance of decadent chocolate and that familiar spicy cinnamon hug. It’s not quite a cake, not quite a loaf of cinnamon swirl bread, but something entirely its own wonderful thing. It’s the kind of treat that makes ordinary mornings feel special and makes afternoon coffee breaks feel like a mini celebration. It’s basically the best of all worlds, baked into one easy-to-make loaf.
Why you’ll love this recipe?
Oh, where do I even begin with why this chocolate cinnamon bread is an absolute winner? First off, the FLAVOR. It’s just incredible. You get that deep, dark chocolate richness that’s perfectly complemented by the warming spice of cinnamon. It’s not overly sweet, which I really appreciate – it lets the quality of the chocolate and the warmth of the spice really sing. And speaking of singing, the SIMPLICITY is a huge factor. Seriously, if you can stir ingredients together, you can make this. There’s no complicated creaming of butter and sugar, no fussy folding techniques. It comes together so fast, which is a lifesaver on busy weeknights when everyone suddenly decides they need a treat. Plus, it’s surprisingly COST-EFFECTIVE. Most of the ingredients are pantry staples you probably already have. A good quality cocoa powder and maybe some chocolate chips for good measure, and you’re basically set. What I love most, though, is its VERSATILITY. Breakfast? Absolutely. Snack? You bet. Dessert? Serve it warm with a scoop of vanilla ice cream, and you’ve got a winner. It’s also fantastic for packing into lunches or taking to potlucks because it travels so well and is always a crowd-pleaser. Compared to a complex Chocolate Cake that takes hours, this chocolate cinnamon bread delivers 90% of the indulgence with about 20% of the effort, and that’s a win in my book every single time!
How do you make Cinnamon Bread?
Quick Overview
The process is beautifully straightforward: whisk dry ingredients, mix wet ingredients, combine them gently, swirl in a simple chocolate filling, bake until golden and fragrant, and then finish with a luscious glaze. It’s a method that ensures a wonderfully moist crumb and those gorgeous chocolatey ribbons throughout. The key is not to overmix, which is a lesson I learned the hard way with many early baking attempts! This recipe makes it almost foolproof.
Ingredients
For the Main Batter:
2 ½ cups all-purpose flour: I always use unbleached flour for a slightly better texture. If you can find a good quality all-purpose, go for it!
1 cup granulated sugar: For sweetness and moisture.
1 teaspoon baking soda: Our primary leavening agent. Make sure it’s not expired!
½ teaspoon baking powder: For a little extra lift and tenderness.
½ teaspoon salt: Crucial for balancing sweetness and enhancing flavors.
1 teaspoon ground cinnamon: Use a fresh, fragrant cinnamon for the best aroma and taste. I love Vietnamese cinnamon if you can find it!
1 cup milk: Whole milk gives the best richness, but I’ve tested this with 2% and even almond milk, and it turned out wonderfully creamy.
½ cup unsalted butter, melted: Make sure it’s melted but not hot. You can also use a good quality vegetable oil if that’s what you have on hand.
2 large eggs: At room temperature, please! It helps them incorporate more easily.
1 teaspoon vanilla extract: Pure vanilla extract makes a difference, trust me.
For the Filling:
½ cup unsweetened cocoa powder: Use a good quality, natural unsweetened cocoa powder. Dutch-processed works too, but I find natural gives a richer flavor here.
½ cup packed light Brown Sugar: For that lovely caramel note and chewy texture in the swirl.
1 tablespoon ground cinnamon: More of that warming spice!
¼ cup milk: Just a little to help make a spreadable paste.
For the Glaze:
1 cup powdered sugar: Sifted is best for a smooth glaze.
2-3 tablespoons milk: Or even a little heavy cream for an extra luscious glaze.
½ teaspoon vanilla extract (optional): For a touch more flavor.
Step-by-Step Instructions
Step 1: Preheat & Prep Pan
First things first, get your oven preheated to 350°F (175°C). Then, grab a standard 9×5 inch loaf pan. I like to grease mine really well with butter or non-stick spray, and then give it a light dusting of flour or cocoa powder. This step is super important to make sure your beautiful bread slides out cleanly after baking. I usually give the pan a little tap on the counter to get rid of any excess flour. It’s these little things that make all the difference!
Step 2: Mix Dry Ingredients
In a large bowl, whisk together the flour, granulated sugar, baking soda, baking powder, salt, and the first teaspoon of ground cinnamon. Whisking is key here – you want to make sure everything is evenly distributed. This prevents pockets of baking soda or just cinnamon in one spot. Give it a good few stirs until it all looks like one uniform blend. The texture should be light and airy.
Step 3: Mix Wet Ingredients
In a separate medium bowl, whisk together the milk, melted butter, eggs, and vanilla extract. Make sure the melted butter isn’t scorching hot, or it might scramble the eggs. Just warm is perfect. Whisk until everything is well combined and looks nice and emulsified. No streaks of egg yolk should be visible.
Step 4: Combine
Now, pour the wet ingredients into the bowl with the dry ingredients. Using a spatula or wooden spoon, gently stir just until the dry ingredients are *almost* fully incorporated. It’s okay if there are still a few little streaks of flour. This is the most crucial part for a tender bread: do NOT overmix! Overmixing develops the gluten too much, which can make your bread tough. Stop as soon as you don’t see big pockets of dry flour. A few small lumps are actually good!
Step 5: Prepare Filling
In a small bowl, combine the cocoa powder, Brown Sugar, and the second tablespoon of ground cinnamon. Add the ¼ cup of milk and stir until you have a thick, spreadable paste. It shouldn’t be runny; it should be more like a thick frosting. If it seems too dry, add another teaspoon of milk. If it seems too wet, add a tiny bit more cocoa powder. This is your gorgeous chocolatey swirl filling!
Step 6: Layer & Swirl
Pour about half of the batter into your prepared loaf pan and spread it out evenly. Dollop about half of the chocolate filling over this layer. Then, pour the remaining batter on top and spread it out. Dollop the rest of the chocolate filling over the second batter layer. Now, grab a knife or a skewer and gently swirl the filling into the batter. Don’t over-swirl! You want distinct ribbons of chocolate, not a muddy mess. Just a few figure-eights and swirls will do the trick. This is where the magic happens visually!
Step 7: Bake
Place the loaf pan in your preheated oven. Bake for 50-60 minutes. The exact time can vary depending on your oven. You’ll know it’s done when a wooden skewer or toothpick inserted into the center comes out clean, or with just a few moist crumbs attached (no wet batter!). The top should be firm and slightly domed. If the top starts browning too quickly before the center is cooked, you can loosely tent it with foil.
Step 8: Cool & Glaze
Once baked, carefully remove the loaf pan from the oven. Let the bread cool in the pan on a wire rack for about 10-15 minutes. This allows it to set up properly. Then, carefully invert the loaf onto the wire rack to cool completely. It’s super important to let it cool *almost* completely before glazing, otherwise, the glaze will just melt off. While it’s cooling, whisk together the powdered sugar, 2 tablespoons of milk, and vanilla extract (if using) in a small bowl until smooth. Add more milk, a teaspoon at a time, until you reach your desired drizzling consistency. It should be thick enough to coat but still pourable.
Step 9: Slice & Serve
Once the bread is completely cool (or at least mostly cool), drizzle that beautiful glaze all over the top. Let the glaze set for a few minutes, then slice into thick, satisfying pieces. I love serving it warm, maybe with a cup of coffee or a glass of milk. The way the warm bread and the slightly set glaze come together is just heavenly.
What to Serve It With
This chocolate cinnamon bread is practically a meal in itself, but it truly shines when paired with the right companions. For a cozy BREAKFAST, I love it with a strong cup of black coffee to cut through the richness, or a nice steaming mug of chai tea. It’s also wonderful with a dollop of plain Greek yogurt for a bit of tang. For a more elaborate BRUNCH, think about serving it alongside some fresh berries, a platter of scrambled eggs, and maybe some crispy bacon. It adds a touch of indulgence without being too heavy. As a DESSERT, this is where it really gets to show off. Serve a warm slice with a scoop of good quality vanilla bean ice cream – the contrast of the warm bread and cold ice cream is divine! A drizzle of extra chocolate sauce wouldn’t hurt either. And for those simple, COZY SNACKS, just a glass of cold milk is perfection. My kids always go for that combo! I’ve also found it’s surprisingly good with a slightly tart fruit salad, as the fruit helps balance out the sweetness of the bread.
Top Tips for Perfecting Your Chocolate Cinnamon Bread
I’ve made this chocolate cinnamon bread so many times, and along the way, I’ve picked up a few tricks that really make a difference. First, regarding the ZUCCHINI PREP (if you choose to add it for extra moisture – I sometimes do!), make sure to wring out as much liquid as possible. Grating it finely and then squeezing it in a clean kitchen towel or cheesecloth is the way to go. It sounds tedious, but it prevents a gummy bread. For MIXING ADVICE, I can’t stress enough to stop mixing the batter as soon as the dry ingredients are *just* combined. Seriously, a few little streaks of flour are okay. Overmixing is the fastest way to a tough, dense loaf. Trust me, I’ve been there! When it comes to the SWIRL CUSTOMIZATION, don’t go overboard. Gentle, artistic swirls are what you’re aiming for, not a uniform brown color. Think about creating distinct lines and patterns. For INGREDIENT SWAPS, if you’re out of milk, you can use buttermilk for an even tangier, more tender crumb. For a dairy-free version, a good quality oat milk or soy milk works beautifully. I’ve even tried using half whole wheat flour for a nuttier flavor, but it can make the bread a touch denser, so I usually stick to all-purpose. In terms of BAKING TIPS, always know your oven. If you find your loaves tend to brown too quickly on top, a simple sheet of aluminum foil tented over the top for the last 20-30 minutes of baking is a lifesaver. Also, don’t be tempted to open the oven door too early – let it bake for at least 45 minutes before checking. For GLUE VARIATIONS, if you don’t want a sweet glaze, you can skip it entirely, or just dust the cooled loaf with a little powdered sugar using a sieve for a more subtle finish. A thin layer of cream cheese frosting is also a decadent option!
Storing and Reheating Tips
This chocolate cinnamon bread is wonderfully forgiving when it comes to storage. If you’re lucky enough to have any leftovers (which is rare in my house!), you can store it at ROOM TEMPERATURE, well-wrapped in plastic wrap or in an airtight container, for about 2-3 days. It stays surprisingly moist. If you need it to last a bit longer, REFRIGERATOR STORAGE is your best bet. Wrap it tightly in plastic wrap, then in foil, or keep it in a sturdy airtight container for up to a week. The texture might firm up a little in the fridge, but it’s still delicious. For longer storage, FREEZER INSTRUCTIONS are key. Wrap the cooled loaf (or individual slices) very tightly in plastic wrap, then in a layer of aluminum foil, and finally, place it in a freezer-safe bag or container. It will keep well for up to 2-3 months. To thaw, simply remove it from the freezer and let it come to room temperature on the counter. For REHEATING, if it’s slightly dry from refrigeration, a quick zap in the microwave for 10-15 seconds per slice usually does the trick. You can also gently warm it in a low oven (around 300°F or 150°C) for a few minutes. For the GLUE TIMING ADVICE, I always recommend glazing the bread *after* it has cooled completely if you plan to store it at room temperature or in the fridge. If you’re freezing it, it’s best to freeze the un-glazed loaf and add the glaze after thawing, as the glaze can sometimes become sticky or weep in the freezer.
Frequently Asked Questions
Final Thoughts
This chocolate cinnamon bread is more than just a recipe to me; it’s a little bit of comfort, a reminder of simpler times, and a guaranteed way to bring a smile to anyone’s face. It’s proof that you don’t need fancy ingredients or complex techniques to create something truly special and delicious. The way the deep chocolate and warm cinnamon mingle is just pure magic, and the tender crumb is simply divine. If you love baking simple, satisfying treats that deliver on flavor and ease, this chocolate cinnamon bread is going to become a staple in your kitchen too. I’m always so curious to hear how my recipes turn out for you all, so please, leave a comment below and let me know what you think! Did you try any fun variations? How did your swirls turn out? I’d also love it if you shared your baking adventures on social media and tagged me – seeing your creations makes my day! Happy baking, my friends!

Chocolate Cinnamon Bread Bliss
Ingredients
Main Ingredients
- 6 cups cubed stale bread
- 0.5 cup chocolate chips
- 2 cups milk
- 3 eggs
- 1 tablespoon ground cinnamon
- 0.5 cup packed light brown sugar
- 1 teaspoon pure vanilla extract
Instructions
Preparation Steps
- Preheat oven to 350°F (175°C).
- Place the bread cubes in a greased 2-quart baking dish.
- Add the chocolate chips over the bread cubes.
- In a medium-sized mixing bowl, whisk together the milk, eggs, cinnamon, light brown sugar, and vanilla extract.
- Pour the milk mixture over the bread cubes.
- Bake for 40 to 45 minutes, or until the custard is set.
- Serve warm, optionally with a side of whipped cream.