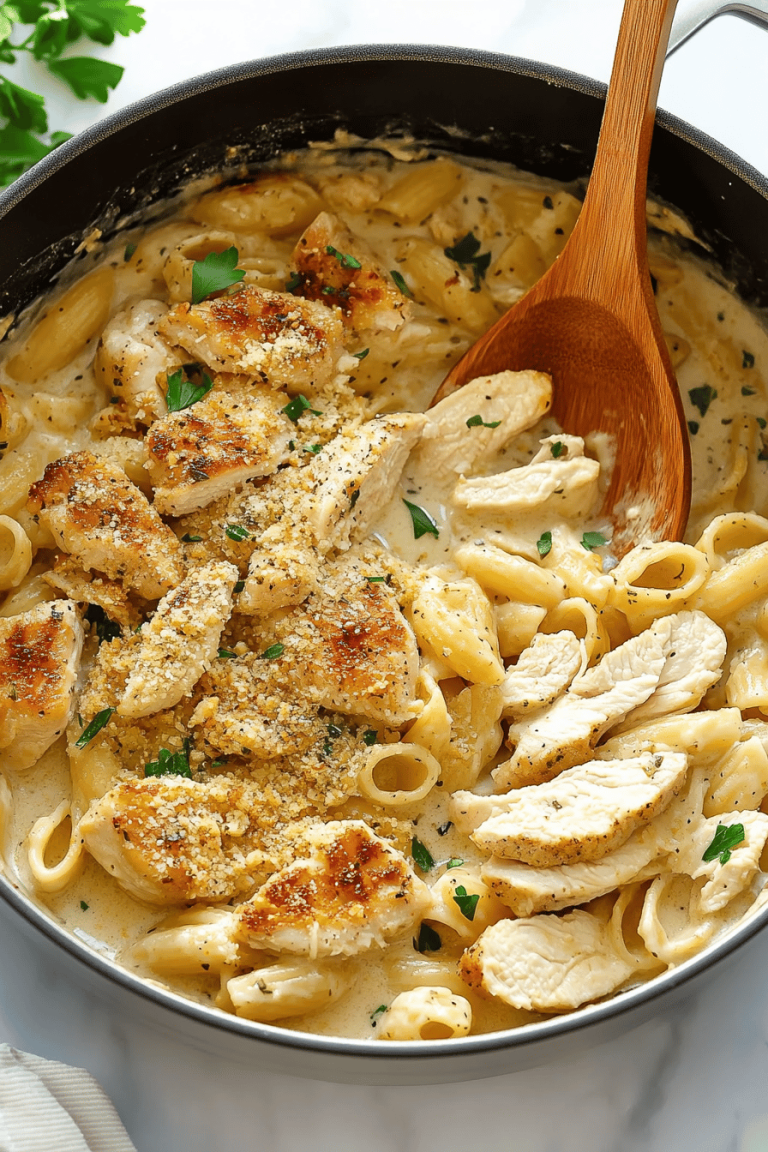
chicken rigatoni
You know those nights? The ones where everyone’s had a long day, the fridge looks a bit sparse, and the thought of complex cooking feels like climbing Everest? Yeah, I know them well. And on those nights, my absolute go-to, the recipe that never fails to get rave reviews (and silence from hungry mouths, which is the ultimate compliment, right?), is this chicken rigatoni. It’s not just a meal; it’s a hug in a bowl. It’s rich, comforting, and surprisingly simple. If you’ve ever tried those super elaborate, multi-step Chicken Pasta dishes, this is like their easier, more soulful cousin. It’s the kind of dish that makes your whole house smell amazing and leaves everyone asking for seconds. Honestly, I’ve probably made this at least a hundred times, and every single time, it feels like a little victory. It’s my answer to “What’s for dinner?” that never disappoints.
What is chicken ribatoni?
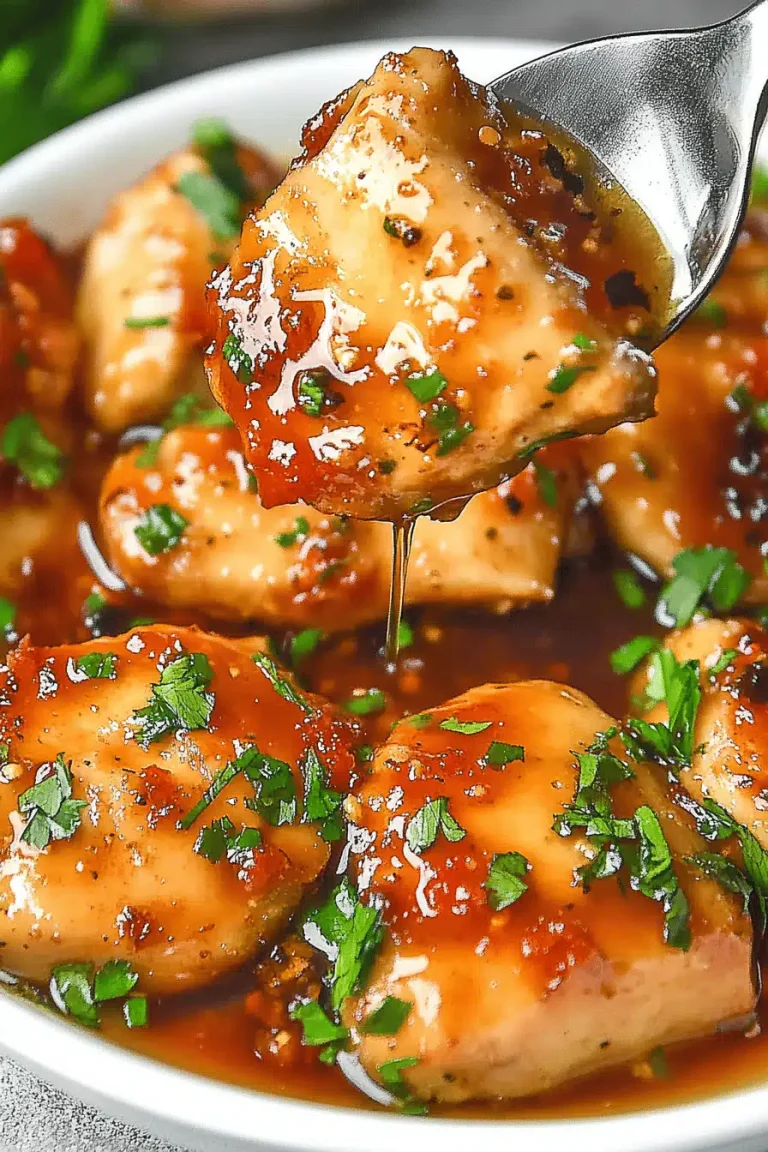
So, what exactly is this magical dish we’re talking about? At its heart, Chicken Rigatoni is a creamy, dreamy pasta bake featuring tender pieces of chicken and perfectly cooked rigatoni pasta, all enveloped in a luscious, savory sauce. Think of it as a super-charged, incredibly satisfying pasta dish that bakes up into a harmonious blend of flavors and textures. The name itself is pretty straightforward – it’s chicken, it’s rigatoni, and it’s usually baked, often with a cheesy topping that gets all golden and bubbly. It’s the kind of comfort food that feels both familiar and exciting. It’s not overly fussy, but it delivers on flavor in a way that makes it feel special enough for guests, yet easy enough for a Tuesday night. It’s essentially a warm, cheesy embrace in pasta form, and who wouldn’t want that?
Why you’ll love this recipe?
There are so many reasons why this chicken rigatoni has become my kitchen staple, and I just know you’re going to adore it too. First and foremost, the FLAVOR is just out of this world. We’re talking about a sauce that’s creamy without being heavy, packed with savory chicken and garlic notes, and just a hint of richness from cheese and cream. It’s the kind of taste that lingers delightfully on your palate. Then there’s the SIMPLICITY. Honestly, this is a lifesaver on busy weeknights. You can get it prepped and into the oven in under 30 minutes, and then it’s hands-off baking time. The COST-EFFICIENCY is another huge win. Using pantry staples and everyday ingredients like chicken thighs (which are incredibly forgiving and flavorful!) and pasta means you get a gourmet-feeling meal without breaking the bank. It’s a fantastic way to stretch a meal further. And let’s talk about VERSATILITY! While it’s incredible as is, you can easily swap out vegetables, adjust the spice level, or even use different cuts of chicken. If you love a good baked ziti or a creamy Fettuccine Alfredo, you’re going to fall head over heels for this chicken rigatoni. What I love most about this recipe is that it’s foolproof. Even if you’re new to cooking, you can nail this. It’s that reliable, comforting dish that just makes you feel good inside and out.
How do I make chicken ribatoni?
Quick Overview
This chicken rigatoni is all about building layers of flavor and then letting the oven do the magic. You’ll quickly sauté some aromatics and chicken, stir in a few pantry staples to create a luscious sauce, toss it all with cooked rigatoni, and then bake it until it’s bubbly and irresistible. It’s designed to be straightforward, even for beginners, with clear steps that lead to a consistently delicious outcome. The beauty is in its simplicity and the incredible payoff in terms of taste and texture. You get that wonderful baked pasta dish experience without all the fuss.
Ingredients
For the Main Dish:
1 pound rigatoni pasta (or your favorite short pasta shape)
1.5 pounds boneless, skinless chicken thighs, cut into bite-sized pieces
2 tablespoons olive oil
1 medium yellow onion, finely chopped
3-4 cloves garlic, minced
1 teaspoon dried Italian seasoning (or a mix of oregano, basil, and thyme)
1/2 teaspoon salt, plus more for pasta water
1/4 teaspoon Black Pepper, plus more to taste
1 (28 ounce) can crushed tomatoes
1 cup heavy cream (or half-and-half for a slightly lighter version)
1/2 cup grated Parmesan cheese, plus more for topping
1 cup shredded mozzarella cheese (optional, for an extra cheesy top)
For the Simple Green Salad (optional, but recommended!):
Mixed greens
Cherry tomatoes, halved
Cucumber, sliced
A simple vinaigrette (Olive oil, red wine vinegar, salt, pepper)
Step-by-Step Instructions
Step 1: Preheat & Prep Pan
First things first, get your oven preheating to 375°F (190°C). This is crucial because you want the oven to be ready to go as soon as your pasta dish is assembled. While the oven heats up, grab a large pot for boiling your pasta and a 9×13 inch baking dish. You don’t need to grease the baking dish for this recipe, but if you’re worried about sticking, a quick spray of cooking oil or a light rub of butter won’t hurt. Make sure your pasta is ready to go – we’ll cook that next, but it’s good to have everything else prepped and ready for assembly.
Step 2: Cook the Pasta (Almost)
Fill that big pot with water, add a generous amount of salt (it should taste like the sea!), and bring it to a rolling boil. Once it’s boiling, add your rigatoni. Cook the pasta for about 2-3 minutes LESS than the package directions for al dente. It needs to be quite firm because it’s going to finish cooking in the oven. Trust me on this one; mushy pasta is nobody’s friend. Drain the pasta and set it aside. Don’t rinse it! The starch helps the sauce cling beautifully.
Step 3: Sauté the Chicken & Aromatics
While the pasta water is heating up, place a large skillet or Dutch oven over medium-high heat. Add the olive oil. Once it’s shimmering, add your bite-sized chicken thighs. Season them generously with salt and pepper. Cook the chicken, stirring occasionally, until it’s nicely browned on all sides and mostly cooked through. This step builds amazing flavor. Remove the chicken from the skillet and set it aside on a plate. Don’t worry about cleaning the skillet; those browned bits are pure gold! Now, add the chopped onion to the same skillet. Cook, stirring, until the onion is softened and translucent, about 5-7 minutes. Then, add the minced garlic and Italian seasoning, and cook for another minute until fragrant. You’ll smell that wonderful aroma filling your kitchen!
Step 4: Build the Creamy Sauce
Pour the crushed tomatoes into the skillet with the onions and garlic. Stir to combine and scrape up any browned bits from the bottom of the pan. Bring the sauce to a simmer and let it cook for about 5 minutes, allowing the flavors to meld. Now for the magic: pour in the heavy cream. Stir it in until it’s fully incorporated and the sauce turns a beautiful, creamy pink. Reduce the heat to low and let it gently simmer for a few more minutes until it thickens slightly. Stir in the grated Parmesan cheese until it’s melted and smooth. Taste the sauce and adjust seasoning with more salt and pepper if needed. This is where you really control the flavor profile.
Step 5: Combine Everything
Add the cooked chicken back into the skillet with the creamy tomato sauce. Stir to coat the chicken evenly. Now, add the partially cooked rigatoni to the skillet. Gently toss everything together until the pasta and chicken are well coated in the sauce. Make sure every piece of pasta gets some love! The sauce should be thick enough to coat the pasta nicely, but not dry. If it seems a little too thick, you can add a splash more cream or even a tablespoon of pasta water. The goal is a beautifully cohesive mixture.
Step 6: Assemble for Baking
Pour the entire mixture from the skillet into your prepared 9×13 inch baking dish. Spread it out evenly so you have a nice, even layer. If you’re using mozzarella, sprinkle it evenly over the top. Then, sprinkle a little more grated Parmesan cheese over that. This cheesy topping is going to get wonderfully golden and bubbly in the oven, adding another layer of deliciousness.
Step 7: Bake to Perfection
Place the baking dish in your preheated 375°F (190°C) oven. Bake for 20-25 minutes, or until the sauce is bubbling around the edges and the cheese on top is melted and golden brown. You want to see those little pockets of deliciousness forming. Keep an eye on it towards the end to make sure the cheese doesn’t burn. The aroma that wafts from your oven during this time is truly heavenly – it’s the smell of comfort and happiness!
Step 8: Rest & Garnish
This is perhaps the hardest step: letting it rest! Once it comes out of the oven, resist the urge to dig in immediately. Let the chicken rigatoni sit for about 5-10 minutes. This allows the sauce to set up a bit, making it easier to serve and ensuring every bite is perfectly saucy and not runny. This resting period is key to getting that perfect consistency. Garnish with a little extra chopped fresh parsley or basil if you like, for a pop of color and freshness.
Step 9: Slice & Serve
Now you can serve this masterpiece! Cut it into generous portions using a spatula or a sharp knife. It’s delicious served piping hot. I love to serve this with a simple side salad to balance out the richness. The cool, crisp salad with a light vinaigrette is the perfect counterpoint to the creamy, comforting pasta. It’s ready to be devoured and enjoyed!
What to Serve It With
This chicken rigatoni is such a star on its own, but a few simple additions can make it a complete meal for any occasion. For a casual weeknight dinner, it’s absolutely fantastic with a simple green salad – think mixed greens, cherry tomatoes, and cucumber with a light, zesty vinaigrette. The freshness of the salad really cuts through the richness of the pasta. If you’re feeling a bit more fancy, or if you want to turn this into a weekend feast, consider pairing it with some garlic bread. That extra carb vehicle for scooping up any leftover sauce? Yes, please! For a truly indulgent experience, a side of steamed broccoli or green beans with a squeeze of lemon is also wonderful. It adds a nice touch of color and a healthy element to the plate. My kids always beg for extra cheese on top and sometimes a sprinkle of red pepper flakes for a tiny kick, which is easy to do! And if you happen to have any leftovers (which is rare in my house!), they are surprisingly good cold the next day for lunch, though reheating is always recommended for the best texture.
Top Tips for Perfecting Your Chicken Rigatoni
Over the years, I’ve picked up a few tricks that I think make this chicken rigatoni truly shine. First off, when it comes to the chicken, I almost always use thighs. They are much more forgiving than breasts, stay incredibly moist and tender through the baking process, and have a deeper flavor. If you do opt for chicken breasts, be very careful not to overcook them before they go into the sauce, or they can become dry. For the pasta, remember my tip about cooking it al dente, or even a bit less. It’s going to absorb a lot of liquid and continue cooking in the oven, so you definitely don’t want it to be mushy. Don’t skip salting your pasta water generously! It’s the first opportunity to season the pasta itself. When it comes to the sauce, using good quality crushed tomatoes makes a noticeable difference. San Marzano tomatoes are fantastic if you can find them. Don’t be afraid to taste and adjust the seasoning of the sauce at the end. Everyone’s palate is different, and adding a touch more salt, pepper, or even a pinch of sugar can really elevate the flavors. If you find your sauce is a little too thick after adding the cream, a splash of the reserved pasta water can thin it out perfectly without diluting the flavor. And for that beautiful golden cheese topping, using a mix of mozzarella and Parmesan gives you the best of both worlds – meltiness and sharp, savory flavor. A little bit of fresh parsley sprinkled on top right before serving adds a lovely brightness and visual appeal. I learned this trick after one too many servings of a bland-looking dish! If you’re making this ahead, it’s best to undercook the pasta slightly and assemble the dish, but bake it just before serving. You can also store the sauce and pasta separately and combine and bake when ready. This prevents the pasta from getting too soft.
Storing and Reheating Tips
This chicken rigatoni is wonderfully forgiving when it comes to leftovers, which is a huge plus for busy households like mine! If you have any (and I mean *any*) remaining, let it cool completely before storing. For storing in the refrigerator, transfer the cooled leftovers to an airtight container. It should stay fresh and delicious for about 3-4 days. I often find that the flavors actually meld even more overnight, making leftovers taste even better! When you’re ready to reheat, the best way is in a moderate oven, around 350°F (175°C), covered with foil to prevent the top from drying out or burning. This usually takes about 15-20 minutes, or until heated through. You can also reheat individual portions in the microwave, though the texture might be slightly softer. Stir it halfway through microwaving to ensure even heating. If it seems a bit dry after reheating, a small splash of milk or cream, or even a spoonful of chicken broth, can help restore some moisture. I don’t typically recommend freezing this dish, as the creamy sauce can sometimes separate upon thawing, and the pasta can become a bit too soft. However, if you must, ensure it’s well-wrapped in airtight containers or heavy-duty aluminum foil, and it should be okay for about 1-2 months. Thaw it overnight in the refrigerator before reheating. For best results, always try to eat it fresh or within a few days of refrigeration.
Frequently Asked Questions
Final Thoughts
So there you have it – my absolute favorite, go-to chicken rigatoni recipe. It’s the dish I turn to when I need comfort, when I want to impress without the fuss, and when I just crave something incredibly satisfying. It’s proof that you don’t need a million fancy ingredients or hours in the kitchen to create something truly special. This chicken rigatoni delivers on every front: amazing flavor, simple preparation, and a heartwarming feel that just makes everyone happy. I truly believe this is one of those recipes that will become a staple in your home, just like it has in mine. Give it a try, and I can’t wait to hear what you think! Don’t forget to leave a comment below to share your experience or any delicious variations you come up with. Happy cooking!