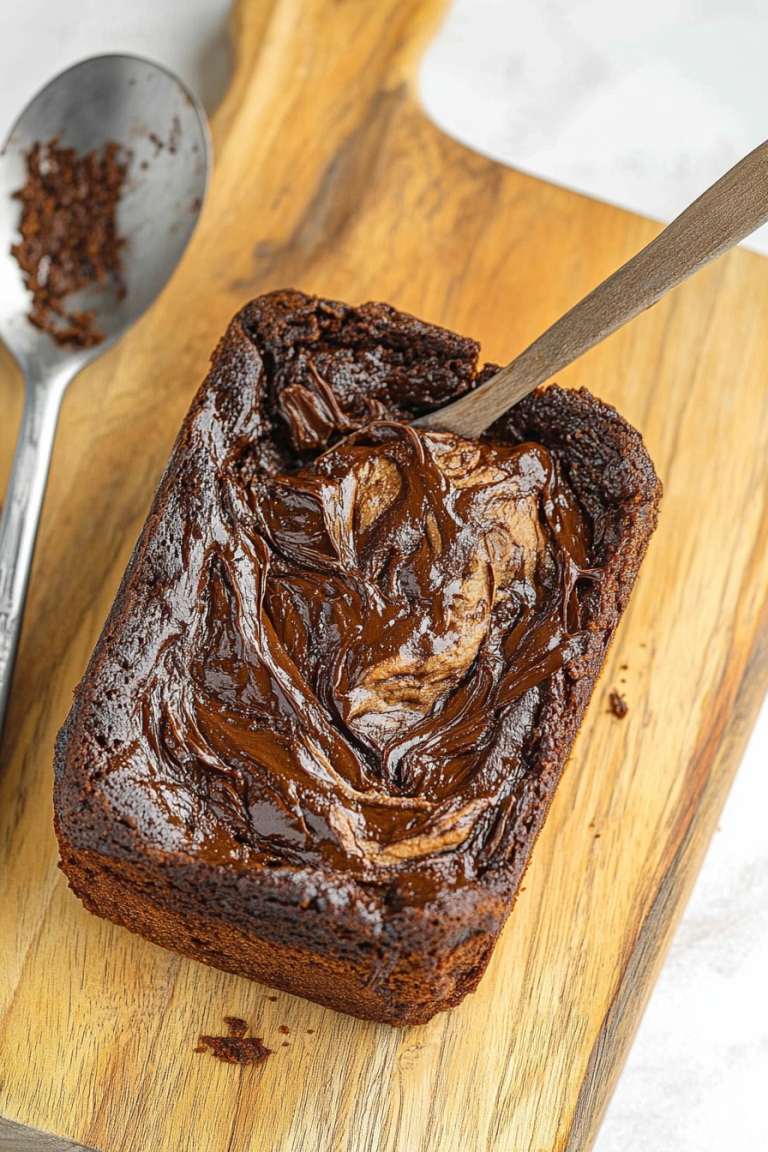
Chewy Chocolate Chip Cookie Brownies for Everyone
Oh, you guys, I am SO excited to share this recipe with you today! We’re talking about cookie brownies. Yes, you heard that right. It’s that magical fusion of a rich, fudgy brownie and a soft, Chewy Chocolate Chip Cookie all baked into one glorious pan. My kitchen has been smelling like heaven lately, and it’s all thanks to these beauties. If you’re anything like me, sometimes you just can’t decide between a brownie and a cookie. Why choose when you can have the absolute best of both worlds? This recipe is truly a game-changer, and I’ve been making it non-stop for years. It’s the kind of dessert that makes everyone happy, whether it’s a casual weeknight treat or something you’re taking to a potluck. I honestly think of it as the ultimate crowd-pleaser, a little slice of pure happiness that never fails to impress.
What are cookie brownies?
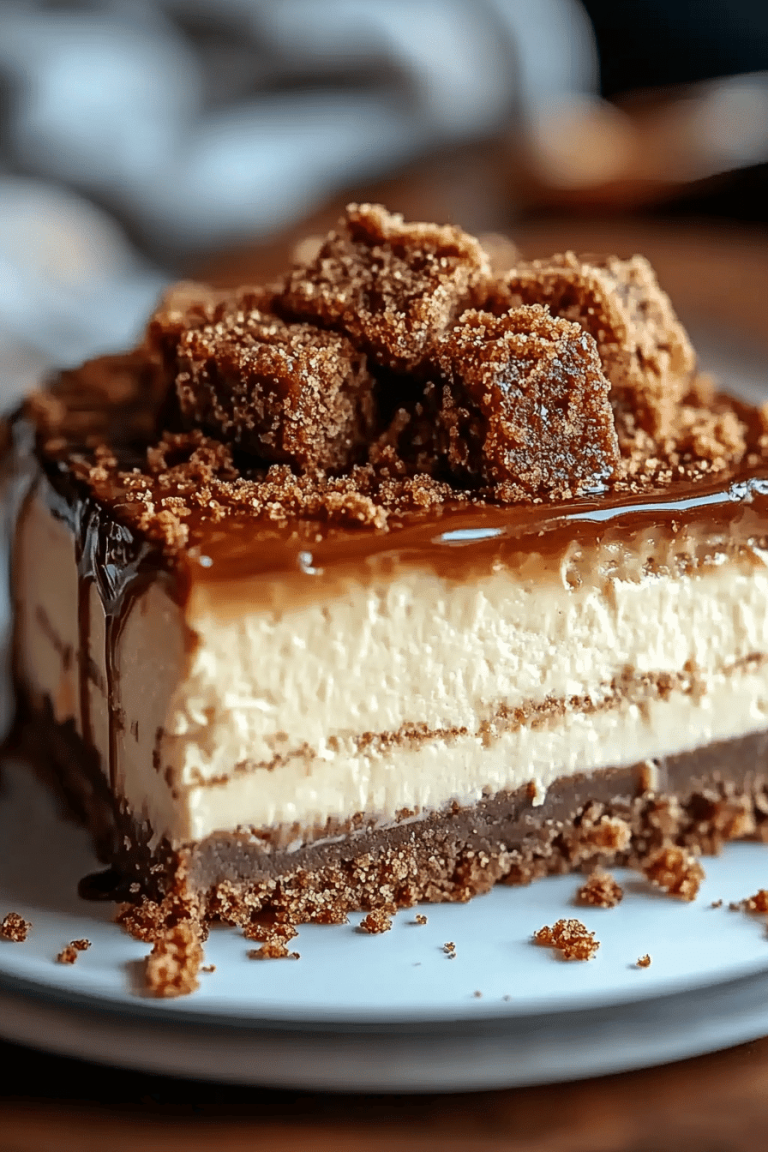
So, what exactly are cookie brownies? Think of it as the perfect culinary mashup. On the bottom, you have a dense, decadent brownie layer, packed with deep chocolate flavor. Then, on top, comes a soft, slightly chewy Chocolate Chip Cookie dough layer, complete with those irresistible little pockets of melted chocolate chips. When you bake them together, they meld into this incredible creation where you get that fudgy brownie texture meeting the comforting chewiness of a cookie. It’s essentially two desserts in one, a dream come true for any chocolate lover. The name itself, “cookie brownies,” perfectly captures the essence of what you’re getting – it’s not just a brownie with chocolate chips on top, nor is it a cookie with a brownie base. It’s a harmonious blend where each layer brings its best qualities to the party. It’s the kind of dessert that makes people go, “Wow, what *is* this?” and then they immediately ask for seconds.
Why you’ll love this recipe?
Honestly, where do I even begin with why you’ll adore this cookie brownie recipe? First off, the flavor is just out of this world. You get that intense, dark chocolate richness from the brownie base that’s perfectly complemented by the sweeter, more caramel-like notes of the chocolate chip cookie topping. Every bite is a delightful contrast in texture and taste. And the smell when it’s baking? Pure magic that fills your entire house and draws everyone into the kitchen, no doubt about it. What I truly love most, though, is how surprisingly simple it is to make. Despite its impressive appearance and decadent taste, it comes together with basic pantry staples and comes together much faster than you might think. It’s one of those “lifesaver” recipes for me when unexpected guests drop by or when a serious sweet craving hits after dinner, and I don’t have hours to spend baking. Plus, it’s incredibly cost-effective! You likely have most of the ingredients on hand already, and the result is so much more satisfying and impressive than anything you could buy at a bakery. The versatility is another huge plus. You can customize the chocolate chips, add nuts, or even swirl in some caramel. It’s perfect for any occasion, from a casual movie night to a more formal gathering. It’s the kind of recipe that becomes a family favorite, one that you’ll make again and again because everyone always asks for it.
How do I make cookie brownies?
Quick Overview
Making these cookie brownies is easier than you might think! You’ll whip up a simple brownie batter, then prepare a classic chocolate chip cookie dough. You’ll spread the brownie batter into your pan, dollop or spread the cookie dough over the top, and then swirl them together gently for that beautiful marbled effect. Bake until it’s golden brown and set, then let it cool slightly before slicing into rich, chewy squares. It’s a straightforward process that guarantees a stunning and delicious outcome every single time, perfect for both beginner bakers and seasoned pros.
Ingredients
For the Main Batter:
You’ll need unsalted butter, melted. I always opt for good quality butter because it really does make a difference in flavor. Then we have granulated sugar and light brown sugar for that perfect balance of sweetness and chewiness. Two large eggs, at room temperature – this is important for emulsifying the batter properly. A splash of pure vanilla extract is a must for that cozy aroma and flavor. Next up are your dry ingredients: all-purpose flour, unsweetened cocoa powder (use a good one for deep chocolate flavor!), a pinch of salt to balance the sweetness, and baking soda for a little lift. Don’t forget the chocolate chips! I love a mix of semi-sweet and Dark Chocolate chips for complexity.
For the Filling:
This is where the cookie magic happens! We’ll start with more unsalted butter, softened. More brown sugar, for that classic cookie flavor, and a bit of granulated sugar. Another egg, also at room temperature. Vanilla extract again, because you can never have too much! All-purpose flour, a bit of baking soda, and salt. And of course, plenty more chocolate chips! You can use your favorite kind here – milk chocolate, dark chocolate, even white chocolate chips if you’re feeling adventurous.
For the Glaze:
This is totally optional but highly recommended for that extra touch of indulgence! It’s super simple: powdered sugar, a little bit of milk or cream (or even coffee for a mocha twist!), and a tiny splash of vanilla extract. You want it to be thick enough to drizzle but still pourable. If it’s too thick, just add a touch more liquid, a teaspoon at a time. If it’s too thin, whisk in a bit more powdered sugar.
Step-by-Step Instructions
Step 1: Preheat & Prep Pan
First things first, get your oven preheated to 350 degrees Fahrenheit (175 degrees Celsius). I like to use a 9×13 inch baking pan for this. You can grease it well with butter or cooking spray, but I highly recommend lining it with parchment paper, leaving some overhang on the sides. This makes lifting the baked bars out so much easier later on, and cleanup is a breeze. Trust me, this little step saves so much hassle!
Step 2: Mix Dry Ingredients
In a medium bowl, whisk together the flour, cocoa powder, salt, and baking soda for the brownie batter. Make sure there are no lumps of cocoa powder – give it a good whisk until everything is evenly distributed. This ensures your brownies have a consistent chocolatey flavor throughout.
Step 3: Mix Wet Ingredients
In a separate, larger bowl, combine the melted butter, granulated sugar, and brown sugar for the brownie batter. Whisk them together until smooth. Then, beat in the eggs one at a time, followed by the vanilla extract. Keep whisking until the mixture is well combined and glossy.
Step 4: Combine
Now, gradually add the dry ingredients to the wet ingredients. Mix with a spatula or wooden spoon until just combined. Be careful not to overmix here; you don’t want to develop the gluten too much, as that can make your brownies tough. A few streaks of flour are okay. Fold in about half of your chocolate chips.
Step 5: Prepare Filling
In another bowl, cream together the softened butter, brown sugar, and granulated sugar for the cookie dough until light and fluffy. Beat in the egg and vanilla extract. Then, gradually mix in the flour, baking soda, and salt until just combined. Stir in the remaining chocolate chips. The dough should be thick and slightly sticky, just like a good cookie dough should be.
Step 6: Layer & Swirl
Spread the brownie batter evenly into your prepared baking pan. It will be thick. Now, dollop spoonfuls of the cookie dough evenly over the top of the brownie batter. You don’t need to spread it perfectly; little gaps are fine. Grab a butter knife or a skewer and gently swirl the two batters together. Don’t overdo it; you want distinct swirls and patches of brownie and cookie, not a muddy mess. Just a few passes should do the trick.
Step 7: Bake
Pop the pan into your preheated oven. Bake for about 30-40 minutes. The exact time can vary depending on your oven, so keep an eye on it. You’ll know they’re done when the edges of the brownie are set, and the cookie topping is golden brown and looks cooked through. A toothpick inserted into the center should come out with moist crumbs attached, not wet batter. If the top starts browning too quickly, you can loosely tent it with foil.
Step 8: Cool & Glaze
This is the hardest part – waiting! Let the cookie brownies cool in the pan on a wire rack for at least 30 minutes, or even better, an hour. This allows them to set up properly. While they’re cooling, you can whip up the glaze. Once the bars are mostly cool, drizzle the glaze over the top. If you want a cleaner look, wait until they’re completely cool before glazing. If you want the glaze to set slightly, you can pop them back in the fridge for a bit after glazing.
Step 9: Slice & Serve
Once cooled and glazed, use the parchment paper overhang to lift the entire slab out of the pan. Place it on a cutting board and slice into squares. I like to use a sharp knife dipped in hot water and wiped dry between cuts for super clean edges. These are fantastic served warm, at room temperature, or even chilled. They’re absolutely divine!
What to Serve It With
These cookie brownies are so versatile, they fit right in everywhere! For a cozy breakfast (yes, I said breakfast!), they’re wonderful warm with a strong cup of coffee. Imagine a bite of that gooey brownie-cookie goodness to start your day – pure bliss. For a more elegant brunch spread, cut them into smaller squares and arrange them on a platter with fresh berries and a dollop of whipped cream. They pair beautifully with mimosas or a light sparkling juice. As a decadent dessert, they are a showstopper on their own, but you can elevate them further with a scoop of vanilla bean ice cream or a drizzle of raspberry coulis. They’re also the ultimate treat for cozy nights in! Just grab a square (or two!) and a glass of cold milk – it’s the perfect comfort food pairing. My family loves them after dinner with a movie, and it’s become our go-to “special occasion” treat when we don’t want to go through the fuss of a whole cake.
Top Tips for Perfecting Your Cookie Brownies
Over the years of making these, I’ve picked up a few tricks that I think really make a difference. For the brownie batter, make sure you don’t overmix once you add the flour. A few tiny streaks of flour are perfectly fine; overmixing is the fastest way to get tough, chewy brownies instead of fudgy ones. When you’re combining the brownie and cookie layers, don’t go crazy with the swirling. You want distinct ribbons of each, not a blended mess. A gentle back-and-forth with a knife or skewer is all it takes. For the cookie dough, make sure your butter is softened but not melted. This helps create that classic cookie texture. If you find your cookie dough is too sticky to dollop easily, pop it in the fridge for 10-15 minutes; it makes it much more manageable. When it comes to baking, ovens can be tricky! I always suggest starting to check for doneness around the 30-minute mark. If the cookie topping is browning too quickly but the brownie underneath isn’t quite set, don’t panic! Just loosely tent the pan with aluminum foil. This allows the brownies to finish baking without the top burning. I learned this trick after a near-disaster years ago! If you’re feeling adventurous, consider adding things like chopped nuts (walnuts or pecans are amazing!) to either layer, or even a swirl of peanut butter or caramel sauce for an extra flavor boost. And for the glaze, consistency is key. It should be thick enough that it doesn’t run off the edges immediately, but thin enough to drizzle easily. If it’s too thick, a tiny splash of milk or even water can thin it out; too thin, and more powdered sugar is your friend!
Storing and Reheating Tips
These cookie brownies are delightfully forgiving when it comes to storage. At room temperature, they’ll stay fresh and delicious for about 2 to 3 days, especially if you keep them in an airtight container. I usually just cover the pan with plastic wrap or foil if they’re still in it, or transfer them to a good quality container. They maintain their fudgy texture really well this way. If you need them to last longer, the refrigerator is your best friend. In an airtight container in the fridge, they’ll keep well for up to a week. I find they’re actually even chewier and more fudgy when eaten cold! When you’re ready to reheat them, if you prefer them warm, you can pop a square in the microwave for about 15-20 seconds. Just enough to take the chill off and make them gooey again. You can also warm them gently in a low oven for a few minutes. If you’ve frozen them (and yes, they freeze beautifully!), wrap individual squares tightly in plastic wrap, then place them in a freezer-safe bag or container. They can stay frozen for up to 2-3 months. To thaw, just bring them to room temperature, or gently reheat as mentioned. For the glaze, I usually add it just before serving if I want it to look its best, but if I’m storing them for a day or two, I’ll glaze them and they still hold up wonderfully. Just make sure they are completely cool before covering to avoid any condensation.
Frequently Asked Questions
Final Thoughts
So there you have it – my absolute favorite cookie brownies! I truly hope you give this recipe a try. It’s the perfect marriage of two beloved desserts, and the result is something truly special that I know you and your loved ones will adore. It’s that perfect balance of rich, fudgy brownie and soft, chewy cookie that just hits all the right notes. What I love most is how approachable it is, proving that you don’t need to be a master baker to create something incredibly delicious and impressive. It’s a recipe that brings smiles to faces and makes any day feel a little bit sweeter. If you try them, please, please, please let me know how they turn out in the comments below! I’d love to hear your thoughts, see your photos, and learn about any fun variations you might come up with. Happy baking, and enjoy every single delicious bite!