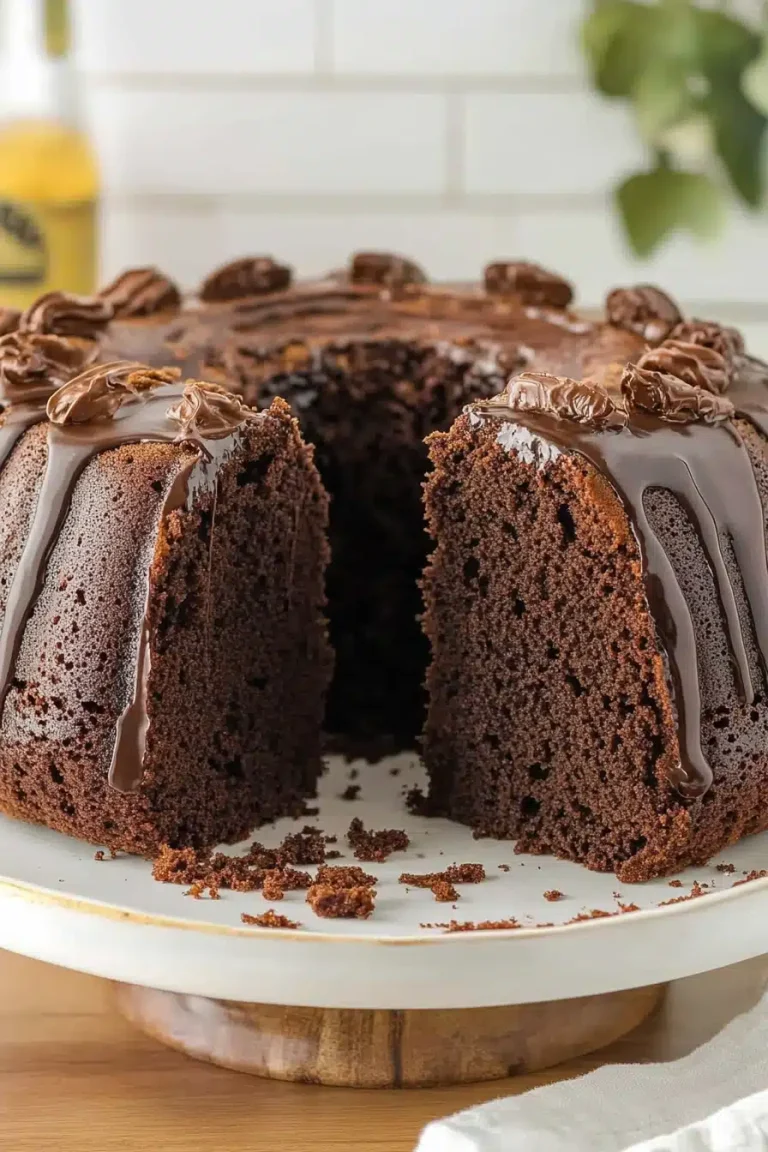
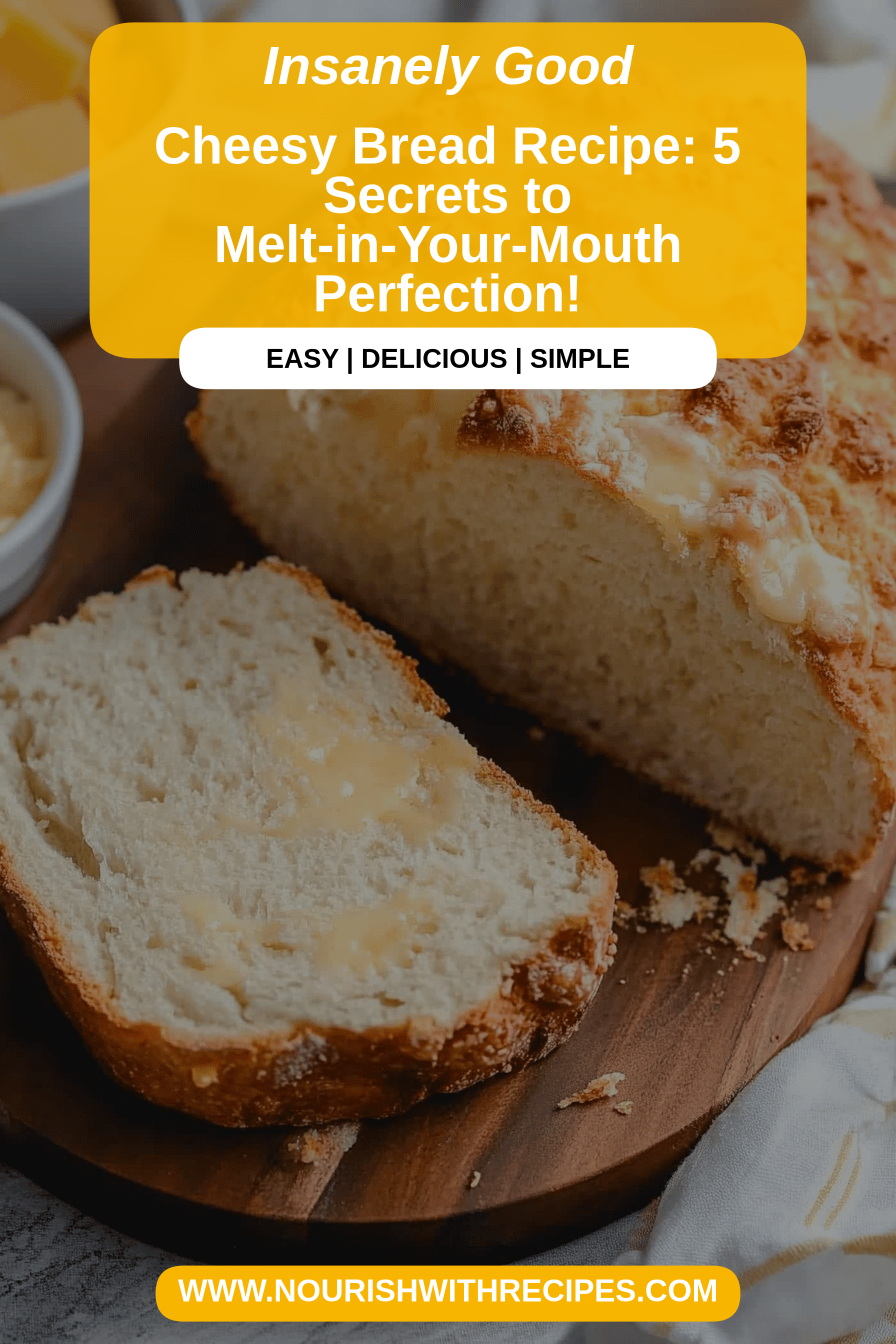
Cheesy Bread Recipe
There are some recipes that just feel like home, aren’t there? This cheesy Bread Recipe is one of those for me. I remember my mom making something similar when I was a kid, and it was always the highlight of our week. It wasn’t fancy, but oh, it was delicious. This version, though? It’s taken that childhood memory and elevated it into something truly spectacular. It’s got this incredible balance of savory, cheesy goodness with a hint of sweetness that just sings. If you’ve ever had those moments where you’re just craving something warm, comforting, and utterly delicious without a whole lot of fuss, this is your answer. It’s like a hug in bread form, and trust me, it’s the kind of thing that disappears the moment you put it on the table. We’re talking about a genuinely addictive cheesy bread recipe that’s going to become your new best friend in the kitchen, especially when you need a quick win that still feels special.
What is Cheesy Bread?
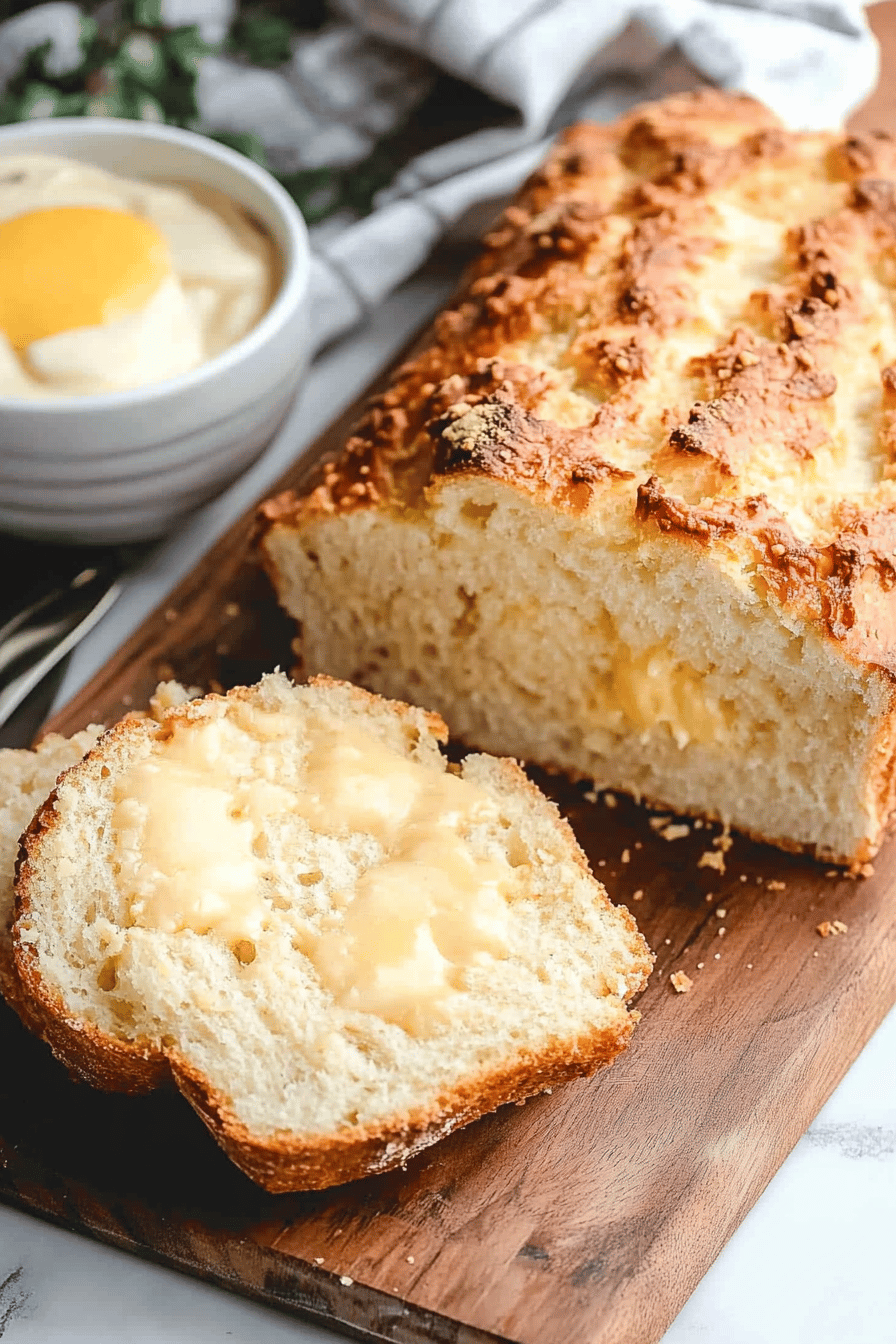
So, what exactly *is* this delightful concoction we call cheesy bread? Think of it as the ultimate savory bake, a warm, soft bread infused with loads of melty cheese, often with a slightly sweet undertone that just makes you close your eyes in pure bliss. It’s not your typical pizza bread or Garlic Bread, though it shares that comforting, universally loved cheesy vibe. This particular cheesy bread recipe has a tender, almost cake-like crumb that’s studded with pockets of gooey cheese and often has a beautiful swirl of something extra special running through it. It’s the kind of bake that’s hearty enough to be a snack on its own but also pairs wonderfully with so many meals. It’s like the most approachable, most comforting baked good you could imagine, designed to bring smiles and happy sighs to whoever takes a bite. It’s the definition of approachable comfort food, and that’s why I adore it.
Why you’ll love this recipe?
I love this cheesy Bread Recipe. I know you will too. I love it.flavor is just out of this world. It’s this perfect symphony of rich, savory cheese that melts into every nook and cranny, complemented by a subtle sweetness from a touch of sugar and a hint of vanilla in the batter. It’s not overpowering, just enough to make it interesting and incredibly moreish. And the simplicity! Seriously, this is a lifesaver on busy weeknights or when unexpected guests pop over. The steps are straightforward, and you probably already have most of the ingredients in your pantry. I’ve found it’s also incredibly cost-efficient. Using everyday ingredients means you get maximum deliciousness without breaking the bank, which is always a win in my book. What I love mostversatility. This cheesy bread is fantastic on its own, but it’s also a chameleon. Serve it for breakfast with a cup of coffee, as a delightful side for brunch, or even as a decadent dessert with a dollop of whipped cream. It’s truly a crowd-pleaser, and the fact that it’s so forgiving means even novice bakers can achieve fantastic results. It’s a recipe that offers pure comfort and joy, and that’s something truly special.
How to Make Cheesy Bread
Quick Overview
Making this cheesy bread is surprisingly simple and incredibly rewarding. You’ll whisk together a few dry ingredients, then mix in your wet ingredients to create a lovely, smooth batter. While that’s happening, you’ll get your cheesy filling ready. The magic really happens when you combine them, layering the batter and filling to create beautiful swirls of cheesy goodness. Then, it bakes up into a golden, fragrant masterpiece that’s ready to be devoured. It’s straightforward, satisfying, and the results are consistently phenomenal, making it a true staple for anyone who loves comfort food.
Ingredients
For the Main Batter:
2 cups all-purpose flour: Make sure it’s fresh! I find that using a good quality flour really makes a difference in the final texture. If you’re aiming for a lighter bake, you can even sift it, though I usually don’t bother because it’s so good either way.
1 cup granulated sugar: This might seem like a lot, but it contributes to that lovely tender crumb and balances the savory cheese beautifully. For a slightly less sweet version, you could reduce this to 3/4 cup, but I personally love the sweetness here.
2 teaspoons baking powder: This is our leavening agent, ensuring a nice, fluffy rise. Make sure yours isn’t expired – I’ve learned that the hard way!
1/2 teaspoon salt: Just enough to enhance all the other flavors.
1/2 cup unsalted butter, softened: Softened, not melted! This helps create a lovely, tender crumb. I usually just leave it on the counter for about an hour before I start mixing.
2 large eggs: Room temperature eggs incorporate better into the batter. I usually take them out of the fridge about 30 minutes before I plan to start.
1 cup milk: Whole milk makes it richest, but I’ve tested this with 2% and even almond milk (which made it surprisingly creamy!), so feel free to use what you have on hand.
1 teaspoon vanilla extract: A little bit of vanilla adds a wonderful depth of flavor that complements the cheese perfectly.
For the Filling:
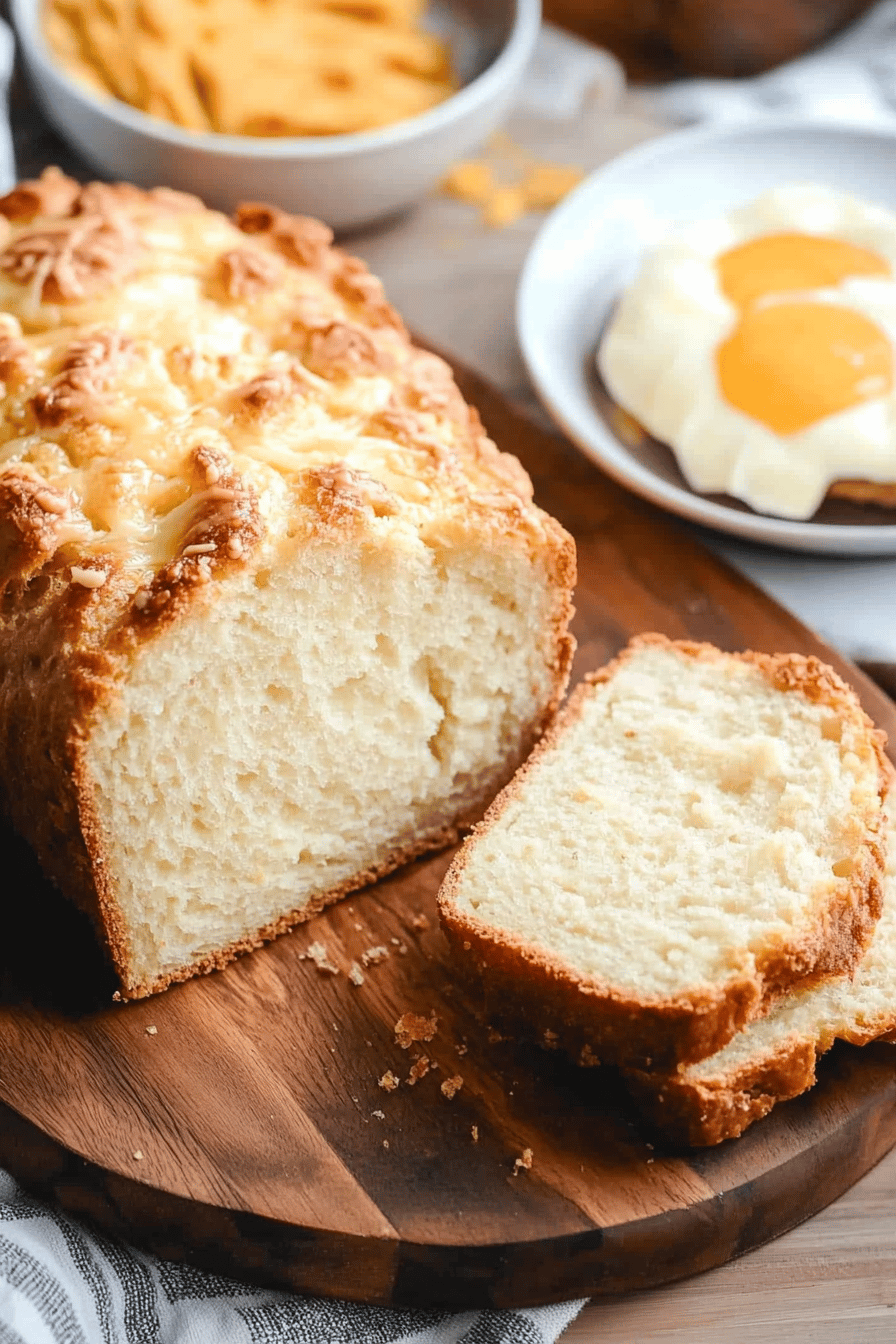
1 1/2 cups shredded cheddar cheese: Sharp cheddar gives the best flavor, but a mix of cheddar and Monterey Jack is also fantastic for extra melty-ness. Don’t use pre-shredded if you can help it; it often has anti-caking agents that can affect the melt. I always shred my own from a block.
1/2 cup shredded mozzarella cheese: For that classic gooey cheese pull!
1/4 cup finely chopped chives or green onions: This adds a lovely fresh, mild oniony bite that cuts through the richness of the cheese. Use whichever you prefer!
Pinch of Black Pepper: Just a little something to enhance the savory notes.
For the Glaze:
1 cup powdered sugar: Make sure it’s fine and smooth.
2-3 tablespoons milk or cream: Add this slowly to reach your desired consistency. I like mine to be pourable but not too thin.
1/4 teaspoon vanilla extract (optional): A little extra vanilla can be nice here, but it’s not essential.
Step-by-Step Instructions
Step 1: Preheat & Prep Pan
First things first, get your oven preheating to 350°F (175°C). I like to use a 9×13 inch Baking Pan for this recipe. Grease it well with butter or cooking spray, and maybe even line the bottom with parchment paper for extra insurance against sticking – trust me, it makes cleanup a breeze! This step is super important because you want your oven nice and hot when the batter is ready to go in.
Step 2: Mix Dry Ingredients
In a large bowl, whisk together the all-purpose flour, granulated sugar, baking powder, and salt. Give it a good whisk until everything is nicely combined and there are no pockets of baking powder. This ensures your bread rises evenly. I usually do this by hand, but a quick spin with a stand mixer on low speed works too.
Step 3: Mix Wet Ingredients
In a separate medium bowl, beat the softened butter until creamy. Then, beat in the eggs one at a time until fully incorporated. Stir in the milk and vanilla extract until the mixture is smooth and well combined. It should look lovely and emulsified, like a thick, pale yellow liquid.
Step 4: Combine
Pour the wet ingredients into the dry ingredients. Now, here’s a little tip I learned: mix just until everything is *barely* combined. A few small lumps are totally fine! Overmixing can lead to a tough bread, and we want this to be wonderfully tender. Use a spatula or a wooden spoon for this – it helps you feel when you’re just at the right point.
Step 5: Prepare Filling
In another bowl, combine the shredded cheddar cheese, mozzarella cheese, chopped chives or green onions, and that pinch of black pepper. Give it a good mix so all the ingredients are distributed evenly. This is where all that delicious cheesiness comes from!
Step 6: Layer & Swirl
Pour about half of the batter into your prepared baking pan and spread it out evenly. Sprinkle about half of the cheese mixture over the batter. Then, spoon the remaining batter over the cheese layer, spreading it carefully. Finally, sprinkle the rest of the cheese mixture evenly over the top. Now, for the fun part! You can gently swirl the cheese into the top layer of batter with a knife or skewer, creating those beautiful marbled patterns. Don’t go too deep, just enough to create visual interest. My kids love to help with this part!
Step 7: Bake
Pop the pan into your preheated oven. Bake for 30-40 minutes, or until the top is golden brown and a toothpick inserted into the center comes out clean. The exact baking time can vary depending on your oven, so keep an eye on it. If the top starts browning too quickly, you can always loosely tent it with foil.
Step 8: Cool & Glaze
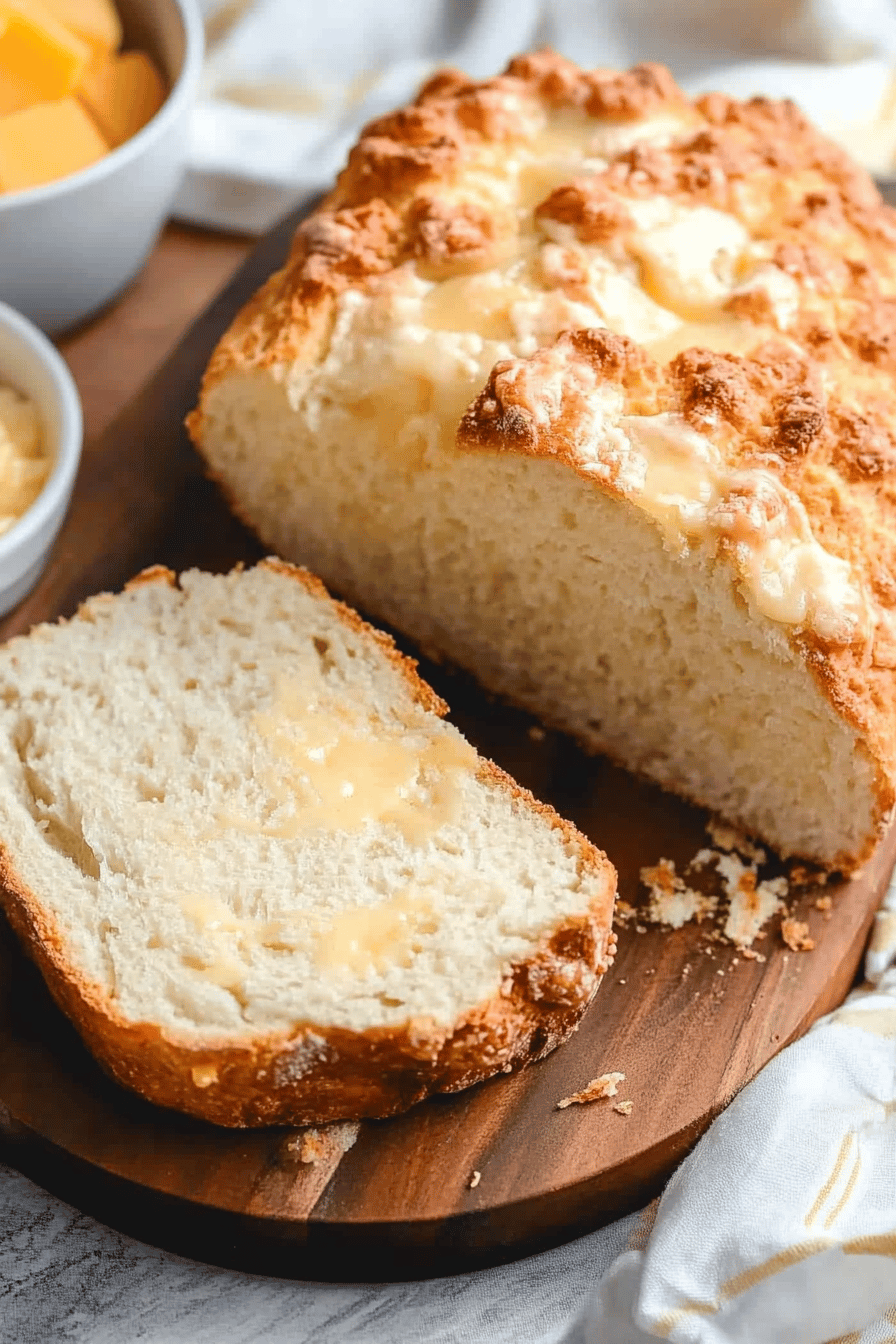
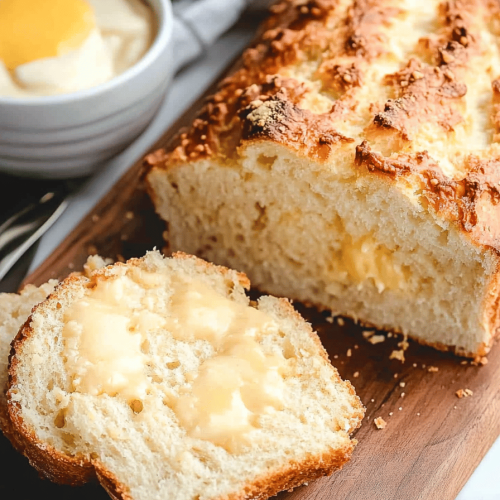
Once it’s out of the oven, let the cheesy bread cool in the pan for about 10-15 minutes. While it’s cooling, whisk together the powdered sugar and 2 tablespoons of milk in a small bowl until smooth. Add more milk, a teaspoon at a time, until you reach your desired drizzling consistency. Once the bread has cooled a bit, drizzle the glaze all over the top. It’ll set up into a lovely, slightly sweet topping that perfectly complements the cheesy bread.
Step 9: Slice & Serve
After the glaze has set for a few minutes, cut the cheesy bread into squares or bars. Serve it warm. The cheese will be wonderfully gooey, and the bread will be soft and tender. It’s honestly amazing served just as is!
What to Serve It With
This cheesy bread recipe is so incredibly versatile, it can truly be a star player at any meal or occasion. For a simple, cozy breakfast, I love pairing a warm slice with a steaming mug of my favorite coffee. The richness of the bread is a perfect contrast to a good brew, and it’s a much more exciting start to the day than plain toast! For a lovely brunch spread, it’s a fantastic addition alongside scrambled eggs, crispy bacon, and a fresh fruit salad. I usually cut it into slightly smaller, more elegant pieces for brunch, maybe with a few extra chives sprinkled on top for presentation. As a delightful dessert, it’s surprisingly wonderful. A warm slice, especially if you add a touch more sugar to the batter, served with a small dollop of lightly sweetened whipped cream or even a scoop of vanilla bean ice cream is pure decadence. And for those cozy snacks, it’s perfect on its own, maybe warmed up slightly in the toaster oven. My family also loves it with a bowl of homemade tomato soup – the flavors are just magical together. I’ve even served it alongside a simple roasted chicken dinner, and it was a hit!
Top Tips for Perfecting Your Cheesy Bread
Over the years, I’ve learned a few tricks that help make this cheesy bread recipe absolutely perfect every single time. For the Zucchini Prep, though this recipe doesn’t call for zucchini, I think you might be referring to a similar bake. If you *were* using zucchini, you’d absolutely want to squeeze out as much moisture as possible! Grate it finely and then wrap it in a clean kitchen towel or cheesecloth and really wring it out. Freshness is key, so use it soon after grating. When it comes to Mixing Advice, remember that rule about not overmixing. Seriously, this is the most crucial part for a tender crumb. Stop mixing as soon as you don’t see big streaks of dry flour. A few little lumps are your friends here! For Swirl Customization, don’t be afraid to get creative! You can use a fork or a skewer to gently swirl the cheese into the batter. Aim for organic, flowing patterns rather than trying to make perfect lines. This gives it that rustic, homemade charm. For Ingredient Swaps, if you’re out of all-purpose flour, you can try a good quality gluten-free blend, but you might need to adjust the liquid slightly; it usually makes it a bit denser. For the milk, any kind works, and as I mentioned, even non-dairy alternatives like almond or oat milk can be surprisingly good. If you’re out of cheddar, a mix of Gruyere and Monterey Jack is divine. When it comes to Baking Tips, always know your oven. If it runs hot, reduce the temperature by 25 degrees. Placing the pan in the center rack usually ensures even baking. To test for doneness, a toothpick should come out clean or with a few moist crumbs, not wet batter. For Glaze Variations, if you prefer a less sweet glaze, use less powdered sugar and more milk. You can also add a tiny pinch of salt to balance the sweetness, or even a hint of lemon zest for a brighter flavor. Drizzling it while the bread is still slightly warm helps it soak in just a little, making it extra delicious.
Storing and Reheating Tips
One of the best things about this cheesy bread is how well it keeps, making it perfect for leftovers (if you even have any!). For Room Temperature storage, I usually keep it in an airtight container or wrapped tightly in plastic wrap for up to 2 days. It’s still delicious at room temperature, and honestly, sometimes I find it even better that way as the flavors meld together. If you need to store it longer, I highly recommend Refrigerator Storage. Wrap it well in plastic wrap, then tuck it into an airtight container. It will stay fresh and delicious in the fridge for about 4-5 days. When you’re ready to enjoy it again, just let it sit out for about 20 minutes to come closer to room temperature before slicing. For longer storage, Freezer Instructions are your best friend. Wrap the cooled bread very tightly in a layer of plastic wrap, then a layer of aluminum foil. You can also place it in a freezer-safe bag. It should keep well in the freezer for up to 2-3 months. To thaw, transfer it from the freezer to the refrigerator overnight. For Glaze Timing Advice, it’s best to add the glaze just before serving, or at least once the bread has cooled. If you glaze it before storing, the glaze might become a bit sticky or melty, especially in warmer temperatures. If you’ve frozen it with the glaze on, it should be fine, but it might be a little less crisp.
Frequently Asked Questions
Final Thoughts
I really hope you give this cheesy bread recipe a try. It’s become such a beloved staple in my home, and I can’t tell you how many times it’s saved the day or made an ordinary meal feel extraordinary. It’s more than just a recipe; it’s a feeling of comfort and joy, made with simple ingredients and a whole lot of love. It’s proof that you don’t need complicated techniques or exotic ingredients to create something truly delicious that people will rave about. If you love this, you might also enjoy my Sourdough Garlic Knots Recipe or my Easy Focaccia Bread for more bread-making adventures! I’d be absolutely thrilled to hear how yours turns out, so please leave a comment below and let me know your thoughts, any variations you tried, or even just how quickly it disappeared from your table! Happy baking, everyone!
Cheesy Garlic Bread
Ingredients
Main Ingredients
- 1 loaf French baguette Sliced lengthwise
- 0.5 cup Butter Softened
- 2 cloves Garlic Minced
- 1 teaspoon Dried parsley
- 1.5 cup Shredded mozzarella cheese
- 0.5 cup Shredded Parmesan cheese
Instructions
Preparation Steps
- Preheat your oven to 375°F (190°C).
- In a small bowl, combine the softened butter, minced garlic, and dried parsley. Mix well.
- Spread the butter mixture evenly over the cut sides of the baguette.
- Sprinkle the mozzarella and Parmesan cheeses over the buttered bread.
- Place the bread on a baking sheet and bake for 10-12 minutes, or until the cheese is melted and bubbly and the edges are golden brown.
- Slice and serve immediately.