Cheesecake Truffles Recipe
What are some recipes that just feel like coming home?Cheesecake Truffles Recipe: What are some good cheesecake recipes? is absolutely one of those. It’s that perfect bite of creamy, dreamy cheesecake, but in a size that’s so much easier to manage than a whole cake, especially when you’re in a pinch or just need a little something sweet without the fuss. I remember the first time I made these; it was during a crazy holiday season, and I needed a crowd-pleaser that wouldn’t keep me in the kitchen all day. These little gems delivered, and then some! They’re like the sophisticated cousin of a cake pop, but with all the rich, tangy goodness of real cheesecake. Seriously, if you love cheesecake but dread baking a full one, you are going to adore this recipe. It’s a lifesaver for potlucks, a delightful addition to any dessert table, and, if I’m being honest, my absolute favorite way to satisfy a late-night craving without feeling guilty about the entire pie I might have otherwise demolished. These cheesecake truffles are pure magic in every bite.

What is the recipe for cheesecake truffles?
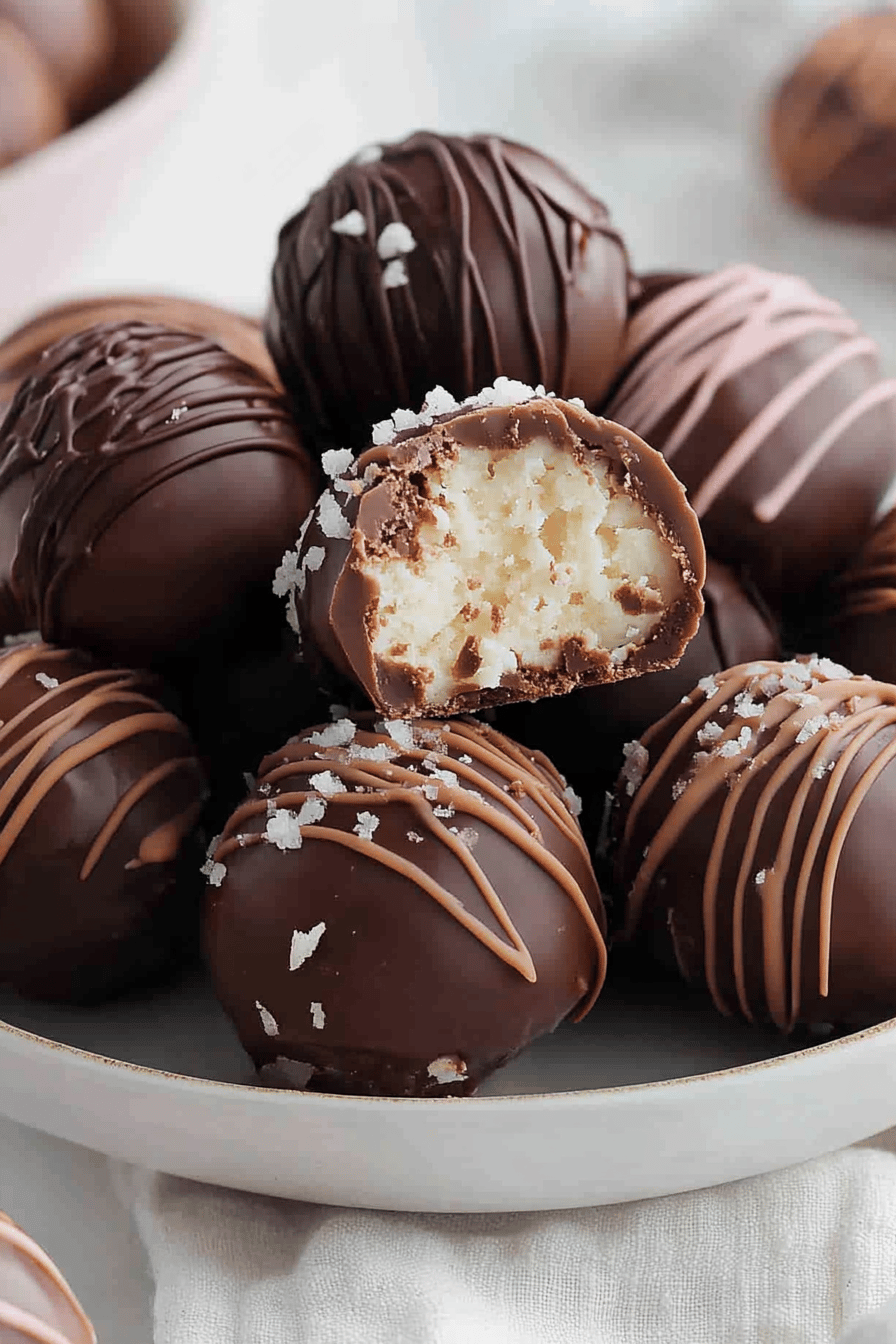
So, what exactly are these little bites of heaven? Think of them as intensely flavorful, bite-sized versions of your favorite classic cheesecake. Instead of a crust and a large, baked filling, we’re talking about a rich, dense, no-bake cheesecake mixture that’s shaped into little balls, often dipped in chocolate or other coatings, and then chilled until firm. It’s essentially all the best parts of cheesecake – that tangy creaminess, that hint of sweetness – concentrated into a perfect, portable truffle. The beauty of this Cheesecake Truffles Recipe: What are some good cheesecake recipes? is that it skips a lot of the traditional cheesecake-making steps that can sometimes feel daunting, like water baths or worrying about cracks. It’s more about getting that incredible flavor profile into a manageable, delightful package. They’re a fantastic way to get that cheesecake fix without committing to a whole dessert, making them ideal for parties, holidays, or just when you want a little something special.
Why You’ll Love This Recipe
Honestly, there are so many reasons why this Cheesecake Truffles Recipe has become a staple in my kitchen, and I just know you’re going to feel the same way. First off, the flavor is just out of this world. We’re talking that signature tangy cream cheese, perfectly balanced with just the right amount of sweetness, and then you get that delightful texture. Whether you dip them in dark chocolate, white chocolate, or even a colorful candy melt, the combination is pure bliss. And speaking of dipping, the versatility is a huge win! You can customize them endlessly. Then there’s the sheer simplicity of it all. I’ve made this recipe more times than I can count, and it consistently turns out beautifully. It’s surprisingly easy, and most of the magic happens in the fridge! This makes it a lifesaver for busy weeknights or when you need a last-minute dessert for a get-together. Plus, the ingredients are pretty standard, making it quite cost-effective compared to buying fancy desserts. I often find myself making a double batch because they disappear so quickly. My kids, who can be a bit picky sometimes, absolutely devour these. They’re the perfect size for little hands, and they love helping to roll the balls and pick out their favorite coatings. If you’ve ever made my No-Bake Chocolate Peanut Butter Bars, you’ll appreciate that same easy, no-fuss approach to incredible flavor. These cheesecake truffles really do offer that satisfying, decadent dessert experience without a ton of effort, which is my favorite kind of recipe.
How to Make Cheesecake Truffles
Quick Overview
Making these incredible cheesecake truffles is delightfully straightforward. You’ll simply combine softened Cream Cheese with sugar and a touch of vanilla to create a rich base. Then, you’ll mix in a binder to help them hold their shape, roll the mixture into small balls, and let them chill until firm. The final step is dipping them in your favorite melted chocolate or coating, adding that extra layer of indulgence. It’s a process that requires minimal active cooking time and delivers maximum deliciousness, making it perfect for any skill level!
Ingredients
For the Main Batter:
You’ll need about 16 ounces of full-fat Cream Cheese, softened to room temperature. This is non-negotiable for that super smooth texture. If it’s too cold, you’ll end up with lumps, and nobody wants that! I always set my cream cheese out about an hour before I start. Make sure to use block cream cheese, not the spreadable kind in a tub, as it has a different fat content and will affect the outcome. You’ll also need about 1/2 cup of granulated sugar. I find this gives us the perfect balance of sweetness without making it cloying, but feel free to adjust slightly if you have a super sweet tooth. And, of course, a teaspoon of pure vanilla extract. Please, please use the good stuff! It really does make a difference in the final flavor. Don’t skimp on the vanilla here!
For the Filling:
This is where we get that classic cheesecake flavor and texture just right. For the base, we’re using the softened cream cheese and sugar mixture as described above. The magic binder that makes these truffles hold their shape beautifully is finely crushed graham cracker crumbs or, my personal favorite, crushed vanilla wafers. You’ll want about 1 1/2 cups of these crumbs. I usually buy a box of graham crackers and blitz them in my food processor until they’re fine enough to incorporate well. If you’re feeling adventurous, you could even try crushed shortbread cookies for a slightly different flavor profile! Sometimes, if I want an extra rich truffle, I’ll even add a tablespoon or two of melted butter to the crumbs before mixing them in, but it’s totally optional and they’re delicious without it too.
For the Glaze:
This is the fun part where you get to add your personal touch! I typically use about 8-12 ounces of good quality chocolate chips or chopped chocolate. Dark chocolate is my go-to because it offers a lovely contrast to the sweet cheesecake filling. Semi-sweet works wonderfully too. If you’re feeling fancy, white chocolate is a beautiful option, or you could even use candy melts for vibrant colors. To help the chocolate melt smoothly and achieve a nice dipping consistency, I usually add about 1 tablespoon of coconut oil or vegetable shortening per 8 ounces of chocolate. Coconut oil adds a subtle richness without an overpowering flavor, and it helps the chocolate set up nicely. You can also melt them with a splash of heavy cream for a ganache-like consistency, which is incredibly decadent!
Step-by-Step Instructions
Step 1: Preheat & Prep Pan
Okay, friends, this recipe is actually no-bake for the main part, so we don’t need to preheat an oven just yet! What we DO need to do is get our “rolling station” ready. Line a large baking sheet or a platter with parchment paper or wax paper. This is super important because once we roll the truffles, we’ll place them on this surface to chill. You want them to have a non-stick surface so they don’t adhere to the tray. I usually have at least two of these prepped and ready to go in the fridge or freezer because sometimes you need to chill them in batches, especially if you’re making a big batch.
Step 2: Mix Dry Ingredients
In a medium bowl, we’re going to combine our crushed graham crackers (or vanilla wafers) and the granulated sugar. Give them a good whisk or stir with a fork to make sure the sugar is evenly distributed throughout the crumbs. This ensures that every bite of your cheesecake truffle will have that perfectly balanced sweetness and crumbly texture. It sounds simple, but this little step really helps unify the flavors.
Step 3: Mix Wet Ingredients
Now, in a separate, larger bowl, we’ll combine the softened cream cheese and the vanilla extract. Using an electric mixer (handheld or stand mixer) is best here to get the cream cheese wonderfully smooth and creamy. Beat it until there are absolutely no lumps. This is crucial for that silken texture we’re aiming for. Then, add your vanilla extract and mix until it’s fully incorporated. The aroma at this stage is already so promising!
Step 4: Combine
Gradually add the dry ingredients (the crumb and sugar mixture) to the wet ingredients (the cream cheese mixture). Mix on low speed or stir with a sturdy spoon until everything is just combined. Be careful not to overmix at this stage! Overmixing can make the truffles tough. We just want to bring it all together into a thick, dough-like consistency that’s easy to handle.
Step 5: Prepare Filling
This is where the “filling” comes together – it’s essentially the mixture we just created in Step 4! You should have a nice, firm, yet pliable dough. If the mixture feels too soft and sticky to roll, you can add a tablespoon or two more of crushed crumbs. If it feels too dry, a tiny splash of milk or cream can help, but usually, the cream cheese is moist enough. The goal is a texture that you can easily roll into balls without it sticking excessively to your hands.
Step 6: Layer & Swirl
This step is all about getting our little cheesecake wonders ready for chilling. Using a small cookie scoop or two spoons, scoop out portions of the cheesecake mixture. Roll each portion between your palms to form small, uniform balls, about 1 inch in diameter. They should be firm enough to hold their shape. Place the rolled balls onto your prepared parchment-lined baking sheet. Make sure they aren’t touching each other too much to avoid them sticking together as they chill.
Step 7: Bake
Good news! There’s no baking required for the cheesecake truffle base itself. We just need to let them firm up properly. Pop the entire baking sheet into the refrigerator for at least 30-60 minutes, or into the freezer for about 15-20 minutes. You want them to be firm enough to handle without losing their shape when you dip them in chocolate. Chilling is key for success here!
Step 8: Cool & Glaze
Once the truffle balls are nice and firm, it’s time for the glaze! Melt your chosen chocolate (chips or chopped) with the coconut oil or shortening in a microwave-safe bowl. Heat in 30-second intervals, stirring well after each, until smooth. Alternatively, you can melt it gently in a double boiler. You want the chocolate to be fluid and glossy. Using a fork or a toothpick, dip each chilled truffle ball into the melted chocolate, coating it completely. Let any excess chocolate drip off. Place the glazed truffles back onto the parchment-lined baking sheet. If you want to add decorative drizzles or sprinkles, do so immediately after dipping while the chocolate is still wet.
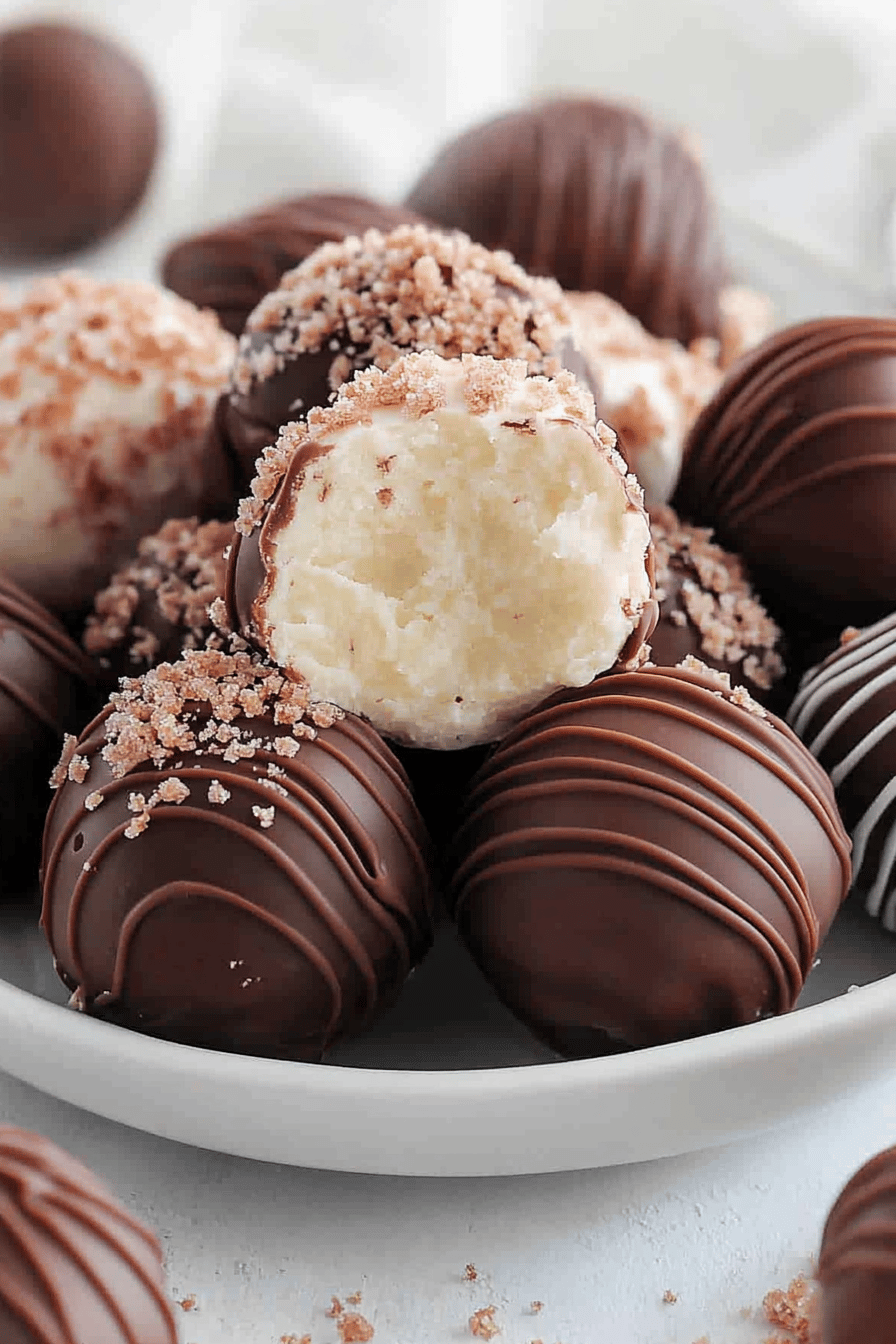
Step 9: Slice & Serve
Once the chocolate coating has set (you can speed this up in the fridge for about 10-15 minutes), your delicious cheesecake truffles are ready to enjoy! They are best served chilled, as this keeps the creamy interior perfectly firm. If you cut one open (which you absolutely should to admire the texture!), you’ll see that beautiful, dense cheesecake goodness. They are perfect as is, or you can serve them with a small dollop of fresh berries or a light dusting of powdered sugar for an extra touch of elegance.
What to Serve It With
These delightful cheesecake truffles are surprisingly versatile, fitting in almost anywhere you need a little touch of sweet indulgence. For breakfast, I love pairing them with a strong cup of coffee or a creamy latte. Their rich flavor is a wonderful way to start the day, and one or two truffles feel like a decadent treat without being overwhelming. They’re also fantastic on a brunch spread! Imagine them nestled amongst fresh fruit, mini quiches, and maybe some fluffy pancakes. They add a touch of elegance that really elevates the whole experience. For dessert, of course, they shine. They’re perfect after a hearty meal, served alongside a slice of fruit pie or a rich chocolate cake for those who want to go all out. But honestly, my favorite time to have them is for a cozy snack. When that 10 pm craving hits, and I don’t want to bake anything, grabbing a couple of these chilled cheesecake truffles feels like the ultimate act of self-care. My family often requests them for movie nights, and they disappear in minutes! I’ve also found they’re a big hit at neighborhood potlucks – everyone always asks for the recipe. They’re a wonderful addition to cookie platters during the holidays, offering a different texture and flavor profile that stands out. I sometimes like to serve them with a small bowl of raspberries or a drizzle of raspberry coulis on the side, which cuts through the richness beautifully.
Top Tips for Perfecting Your Cheesecake Truffles
I’ve definitely learned a few tricks over the years of making these Cheesecake Truffles Recipe, and I want to share them with you so yours turn out absolutely perfect! When it comes to the cream cheese, always make sure it’s truly softened to room temperature. I can’t stress this enough! If it’s even slightly cold, you’ll have a lumpy mixture, and it will be much harder to get that smooth, velvety texture we’re after. I usually let mine sit out for at least an hour, sometimes two, depending on how warm my kitchen is. For the graham cracker crumbs (or whatever cookie you choose), make sure they are *very* finely crushed. A food processor works wonders for this. If there are large chunks, they won’t bind as well, and your truffles might be crumbly. When you’re mixing the crumbs into the cream cheese, go slow and low with your mixer, or use a sturdy spatula. You don’t want to overwork the mixture. Overmixing can develop the gluten in the crumbs (even though it’s minimal) and can make the truffles tough or rubbery instead of tender and creamy. My kids sometimes get impatient and want to dive right in, but trust me on this one – gentle mixing is key! If your mixture feels too soft to roll after you’ve mixed it, don’t panic. Just pop the bowl in the fridge for about 15-20 minutes to firm it up a bit. This is often just what it needs to become perfectly rollable. When rolling the balls, a small cookie scoop (about 1 tablespoon size) is your best friend for uniformity. You want them all to be roughly the same size so they freeze and dip evenly. If they are too large, they won’t firm up properly in the center, and if they’re too small, you might use too much chocolate coating. For the chocolate dipping, tempering your chocolate (if you’re using real chocolate bars) will give you the glossiest finish and the best snap when you bite into it. However, even if you just melt chocolate chips with a bit of coconut oil or shortening, it works beautifully and sets up nicely. If you’re using a double boiler, make sure the water doesn’t touch the bottom of the bowl holding the chocolate, or you risk seizing the chocolate. Another little trick I learned: If you want to add flavorings to your cheesecake filling, like a hint of lemon zest, a bit of espresso powder, or even a swirl of jam, do it *before* you add the crumbs. This ensures they are evenly distributed. For the coating, don’t be afraid to experiment! White chocolate with a swirl of dark chocolate, or a drizzle of contrasting color, looks so professional and adds visual appeal. Just remember to let the first layer set before adding a second drizzle or design. And if you find your chocolate is getting too thick while you’re dipping, just pop it back over gentle heat for a few seconds to loosen it up. Finally, for the best texture, always chill them thoroughly after dipping. This ensures the creamy interior is firm and the chocolate coating is set.
Storing and Reheating Tips
One of the best things about these Cheesecake Truffles Recipe is how well they store, making them perfect for making ahead of time. If you plan on serving them within a day or two, you can absolutely leave them out at cool room temperature, especially if your kitchen isn’t too warm. Just make sure they are covered loosely with plastic wrap or in an airtight container so they don’t dry out or pick up any odors. However, for optimal freshness and that firm, creamy texture, I always recommend refrigerator storage. Pop them into an airtight container, and they’ll stay delicious for up to a week. They might get a little firmer in the fridge, but they’ll soften up beautifully at room temperature in about 10-15 minutes before serving. If you need to store them for longer, or if you’ve made a huge batch, the freezer is your best friend! You can freeze the dipped truffles on a parchment-lined baking sheet until they’re solid, then transfer them to a freezer-safe bag or container. They’ll keep well in the freezer for about 2-3 months. When you’re ready to enjoy them, the best way to thaw them is to move them from the freezer to the refrigerator overnight. This allows them to thaw slowly and prevents condensation from forming on the chocolate coating. Once they’re fully thawed in the fridge, you can let them sit at room temperature for a few minutes before enjoying. A crucial tip regarding the glaze: If you’re planning to freeze them, it’s often best to dip them in chocolate *after* they’ve thawed, or at least right before serving. This ensures the chocolate coating is at its freshest and glossiest. However, if you dip them before freezing, they generally hold up quite well. Just make sure the chocolate coating is completely set before freezing to prevent any smudging or sticking.
Frequently Asked Questions
Final Thoughts
Seriously, if you’re looking for a dessert that’s impressive, utterly delicious, and surprisingly simple to make, this Cheesecake Truffles Recipe is it. It’s the perfect way to get that luxurious cheesecake flavor without all the fuss of baking a whole cake. I love that they’re make-ahead friendly, making them a lifesaver for busy hosts or when you just need a sweet treat readily available. They’re always a huge hit, and I’ve never had anyone turn one down! They’re proof that sometimes, the simplest ideas yield the most delightful results. If you’ve enjoyed this recipe, I think you might also love my No-Bake Peanut Butter Bars or my Easy Chocolate Mousse. They share that same spirit of deliciousness with minimal effort. I truly hope you give these cheesecake truffles a try. I can’t wait to hear how yours turn out and what flavor combinations you come up with! Don’t forget to leave a comment below and share your experience – your feedback means the world to me!
Cheesecake Truffles Recipe
Ingredients
Main Ingredients
- 8 oz cream cheese softened
- 0.5 cup unsalted butter softened
- 2 cup powdered sugar
- 1 teaspoon vanilla extract
- 10 oz white chocolate chips melted, for coating
- 2 tablespoon shortening optional, for smoother coating
Instructions
Preparation Steps
- In a large bowl, beat the softened cream cheese and softened butter until smooth and creamy.
- Gradually add the powdered sugar, mixing until well combined and no lumps remain.
- Stir in the vanilla extract.
- Roll the mixture into small balls, about 1 inch in diameter. Place them on a parchment-lined baking sheet.
- Freeze the balls for at least 30 minutes to firm up.
- While the balls are freezing, melt the white chocolate chips (and shortening, if using) in a microwave-safe bowl in 30-second intervals, stirring in between, until smooth.
- Dip each frozen cheesecake ball into the melted white chocolate, coating it completely. Use a fork to lift and let excess chocolate drip off.
- Return the coated truffles to the parchment-lined baking sheet.
- If desired, drizzle with additional melted chocolate or sprinkle with toppings before the coating sets.
- Refrigerate the truffles for at least 15 minutes to allow the chocolate to set. Store in an airtight container in the refrigerator.