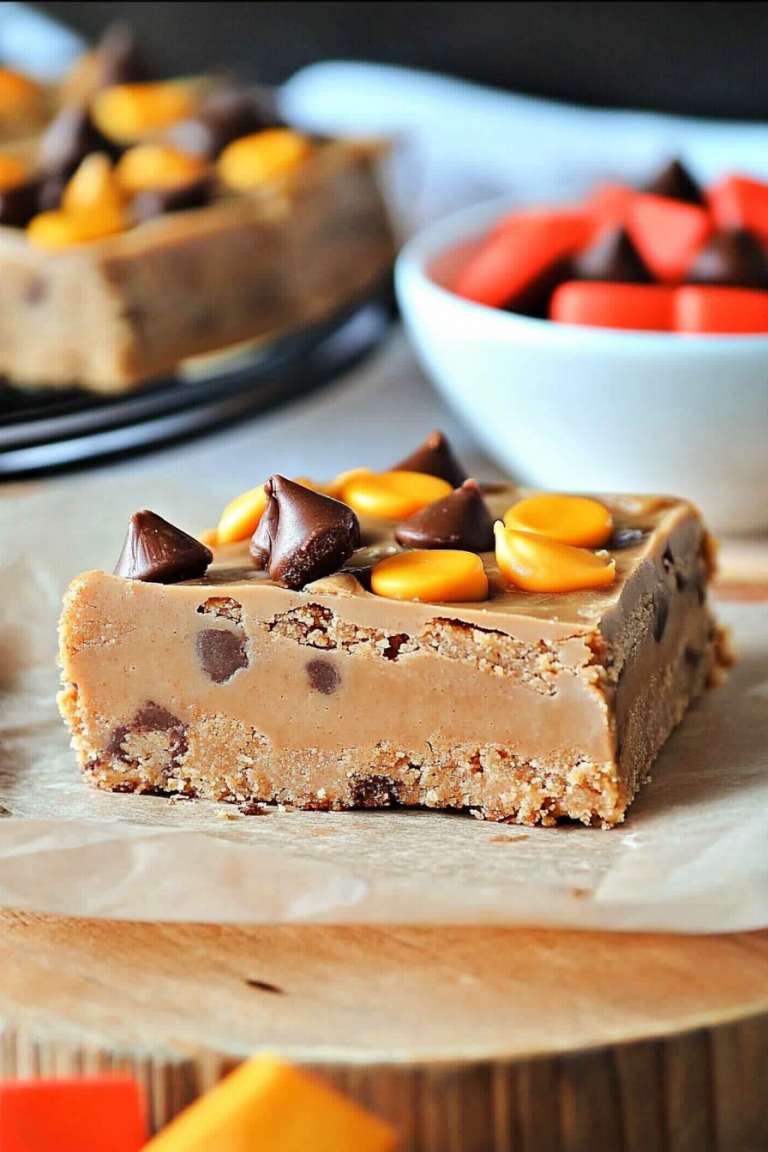
cheesecake bites
There’s something almost magical about cheesecake bites—their tiny size makes them incredibly inviting, like dessert made just for one bite of pure joy. I first stumbled on these little gems during a holiday potluck years ago, and I swear the whole room lit up each time someone grabbed one. It’s like if the classic cheesecake and bite-sized convenience had a baby, you’d get these sweet, creamy bites that disappear far too quickly. Honestly, they’ve become my go-to when I’m craving something indulgent but don’t want to wrestle with a whole cheesecake—and trust me, that’s often! These cheesecake bites pack all the rich, smooth flavor you love, minus the fuss. If you like brownies or cupcakes but swear by cheesecake, these are the perfect in-between treat that’s family-friendly and shockingly easy to whip up.
What are cheesecake bites?
Think of cheesecake bites as mini cheesecakes—tiny, adorable nuggets of creamy, tangy cheesecake nestled in a buttery, sweet crust. It’s essentially the beloved cheesecake flavor compressed into hand-held, bite-sized morsels. The name says it all: these are bites you can pop in your mouth with zero guilt and total delight. They’re usually baked in mini muffin tins or cut into small squares after baking, making them perfect for sharing or sneaking one (or five) during a Netflix binge. The fun part is you don’t have to fuss with the full set-up or patience of a classic cheesecake — these little treats bake faster and slice easier, plus they’re endlessly versatile with toppings and swirls. Perfect for sharing or hoarding in your fridge like I do!
Why you’ll love this recipe?
What I love most about cheesecake bites is how they pack serious flavor into such a tiny package. The tang of cream cheese bursts through just right, balanced with a hint of vanilla and a subtle crunch from the crust. But beyond the taste, these are ridiculously simple to make—nothing fancy that’ll intimidate you in the kitchen. I mean, if you can mix, swirl, and bake, this recipe has your name on it. Another huge win is the ingredients are all things you probably already have on hand or can snag without emptying your wallet. I remember the first time I made these, my kids didn’t just taste them—they hovered, begged, and vanished them in minutes. That little crust-to-filling ratio? It’s spot on, giving that blissfully crunchy base every time. Plus, these aren’t just dessert: they’re brunch show-stoppers, sweet snackers, and perfect coffee companions.
Also, think about all those times you wanted something cheesecake-y but couldn’t face making a whole cake. This recipe lands exactly there. And if you’ve ever made brownies or cookies with cream cheese swirls, you’re already halfway to understanding how much fun this one is—it’s like a mini cheesecake and a baked treat combined. You can customize these bites easily with chocolate chips, berries, even a drizzle of caramel or drizzle of your favorite glaze. They’re quick but feel like you’ve gone the extra mile, making them impressive yet totally doable.
How do I make cheesecake bites?
Quick Overview
The process is delightfully straightforward—you’ll start by prepping a buttery crust right in your mini muffin tin, mix a luscious cream cheese filling, and then swirl it all together before popping it in the oven. The best part is that because these are so small, they bake super fast and you don’t have to wait for hours or nerve-wracking chill times. I always set a timer because they’re easy to overbake if you’re not watching! This method is perfect if you want the satisfyingly creamy texture of cheesecake without the hassle of water baths or cooling racks. Just simple, quick, and totally delicious.
Ingredients
For the Crust:
- I like to crush graham cracker crumbs with a rolling pin for the best texture. I like to crush them fresh with a rolling
- 3 tablespoons unsalted butter, melted – makes sure it’s just melted, not hot, so it mixes evenly.
- 2 tablespoons sugar – balances the buttery crunch.
For the Filling:
- 8 ounces cream cheese, softened – room temperature makes all the difference here.
- 1/3 cup granulated sugar – I sometimes reduce this by a tablespoon if I want it less sweet.
- 1 large egg – binds beautifully.
- 1 teaspoon vanilla extract – classic, fragrant, can’t skip this.
- 2 tablespoons sour cream or Greek yogurt – adds richness and smooth finish; I’ve tested almond milk here and it actually turns out denser and creamier!
For the Glaze (Optional):
- 1/2 cup powdered sugar – adjust for thickness.
- 2-3 teaspoons milk or cream – helps you get that perfect drizzle consistency.
- 1/2 teaspoon vanilla extract or lemon zest – for that extra zing in flavor.
Step-by-Step Instructions
Step 1: Preheat & Prep Pan
Get your oven warmed up to 325°F (160°C) and grease a mini muffin tin. I use a non-stick spray dotted with a bit of flour so the crust and filling slide right out cleanly. You want the pan well-prepped since these bites love to cling if you’re not careful. This part saves you from frustration later.
Step 2: Mix Dry Ingredients
For the crust, stir together the graham cracker crumbs, sugar, and melted butter until it feels just like wet sand. This step is quick but important, so the crumbs hold together instead of falling apart after baking. If you’re feeling extra, add a pinch of cinnamon here—trust me, it’s a game changer.
Step 3: Mix Wet Ingredients
In a separate bowl, beat the cream cheese until super smooth—no lumps, trust me, I’ve been there! Add sugar and mix again, then mix in the egg, vanilla, and sour cream until everything looks silky and just blended. The texture should be thick but pourable. If your cream cheese is cold, this step takes a few extra minutes.
Step 4: Combine
No tricky mixing here since the crust and filling stay separate in layers, but if you want to swirl the batter and cream cheese together for a marbled effect, now’s the time. I usually layer crust, then spoon some filling on top, and then take a toothpick to swirl it around gently.
Step 5: Prepare Filling
The filling by itself is the star, so making sure it’s smooth and well-mixed is key. Sometimes I like to fold in mini chocolate chips or fresh blueberries for surprise bursts of flavor.
Step 6: Layer & Swirl
Spoon a teaspoon of crust mixture into each muffin cup, press it firmly to form a base, then add a dollop of the cream cheese filling over top, nearly to the rim. Use a skewer or toothpick to swirl the filling over the crust to get that pretty, marbled effect. It’s so fun and always looks impressive even if you’re a beginner.
Step 7: Bake
Bake for 15-18 minutes until the edges are set but the center still jiggles slightly when nudged. I’ve learned the hard way that overbaking makes them dry, so keep a close eye after 15 minutes. The smell filling the kitchen at this point… it’s pure magic.
Step 8: Cool & Glaze
Let the bites cool in the pan for about 15 minutes before transferring them to a wire rack. Once mostly cooled, drizzle your glaze over top or dust with powdered sugar if you prefer subtle elegance. The glaze adds a lovely sheen and extra touch of sweetness, plus it looks irresistible.
Step 9: Slice & Serve
Since these are bite-sized, you don’t really “slice,” but you do want to gently pop them out with a small spoon or butter knife to serve. They’re best enjoyed at room temperature when the filling is luxuriously creamy, but honestly, they’re also delicious chilled or slightly warmed up for a treat.
What to Serve It With
For Breakfast: These cheesecake bites go surprisingly well with a strong cup of black coffee or a creamy latte. They’re like a sweet wake-up call but not so heavy you’ll regret it before noon. I sometimes pop in a piece of fruit on the side, like tangy orange slices, to cut the richness.
For Brunch: When hosting brunch, set out a pretty plate of cheesecake bites alongside mini fruit tarts and sparkling mimosas. They add an elegant, unexpected surprise that guests rave about. Try sprinkling some fresh berries and mint leaves for a fresh look.
As Dessert: After dinner, these are my secret weapon when I want a simple dessert that still feels elegant. Serve with a drizzle of chocolate, a dollop of whipped cream, or a scoop of homemade berry compote. One bite and no one asks for anything else.
For Cozy Snacks: If you’re like me, late-night sweet cravings hit hard. These cheesecake bites are exactly what you need—easy to stash, quick to grab, and they pair beautifully with a warm mug of tea or hot cocoa. My kids sneak them during movie nights, no questions asked!
Top Tips for Perfecting Your Cheesecake Bites
Crust Prep: I always make sure my graham crumbs aren’t too fine or too chunky. Aim for something sandy but still with small bits for texture. Don’t skip pressing it firmly into the pan—you want that little crunch every bite.
Mixing Advice: Overmixing the cream cheese batter can trap too much air, causing cracks or holes. Mix just until smooth and combined. Also, always have your cream cheese at room temp—cold cream cheese means lumps, and no one wants that.
Swirl Customization: For the most beautiful bites, add a swirl with either berry puree or melted chocolate. Use a toothpick in gentle circular motions. Too much swirling can blur the look, so less is more.
Ingredient Swaps: If you want to lighten these up, I’ve tested Greek yogurt instead of sour cream—results are less rich but pleasantly tangy. And if you need a dairy-free version, coconut cream works, but the flavor shifts a bit. For gluten-free crusts, almond flour mixed with a touch of coconut oil works well.
Baking Tips: Oven temperatures can vary, so keep your eyes peeled since timing is everything here. I place my pan in the middle rack for even baking and avoid opening the oven too often to keep them from sinking.
Glaze Variations: The glaze is where you can get creative—try lemon glaze for zing, or even a thin drizzle of salted caramel for extra decadence. Sometimes I skip the glaze and dust with cinnamon sugar for a quick finish.
Storing and Reheating Tips
Room Temperature: You can leave cheesecake bites out for a few hours if covered loosely with foil or a cake dome. They’re best eaten within 4 hours for optimal creaminess.
Refrigerator Storage: Pop them in an airtight container and they last about 4-5 days. The texture firms up nicely but still feels creamy when you bite in. I always recommend letting them come to room temperature for 15 minutes before eating for best flavor.
Freezer Instructions: To freeze, wrap each bite individually with plastic wrap, then put them in a freezer-safe bag or container. They keep well up to 2 months. Thaw overnight in the fridge for even texture. Reheat gently in the microwave for 10-15 seconds if desired.
Glaze Timing Advice: If you’re storing for a few days or freezing, it’s best to add the glaze right before serving. Glaze can absorb into the cream cheese and lose its shine if done too early.
Frequently Asked Questions
Final Thoughts
I can’t tell you how many times these cheesecake bites have saved me in a pinch—whether I was rushing to a potluck, needing to satisfy a late-night sweet tooth, or just craving that creamy cheesecake love without the fuss. They’re simple, unpretentious, and endlessly adaptable, which means you can make them your own with endless mix-ins and toppings. If you enjoy this bite-sized dessert as much as I do, you might want to try my classic blueberry swirl cheesecake bars or these quick no-bake cream cheese cups I share too. I always get so excited to hear how others tweak this recipe, so please don’t hesitate to leave a comment or share your favorite variations. Happy baking, and here’s to many more cozy moments filled with cheesecake bites!

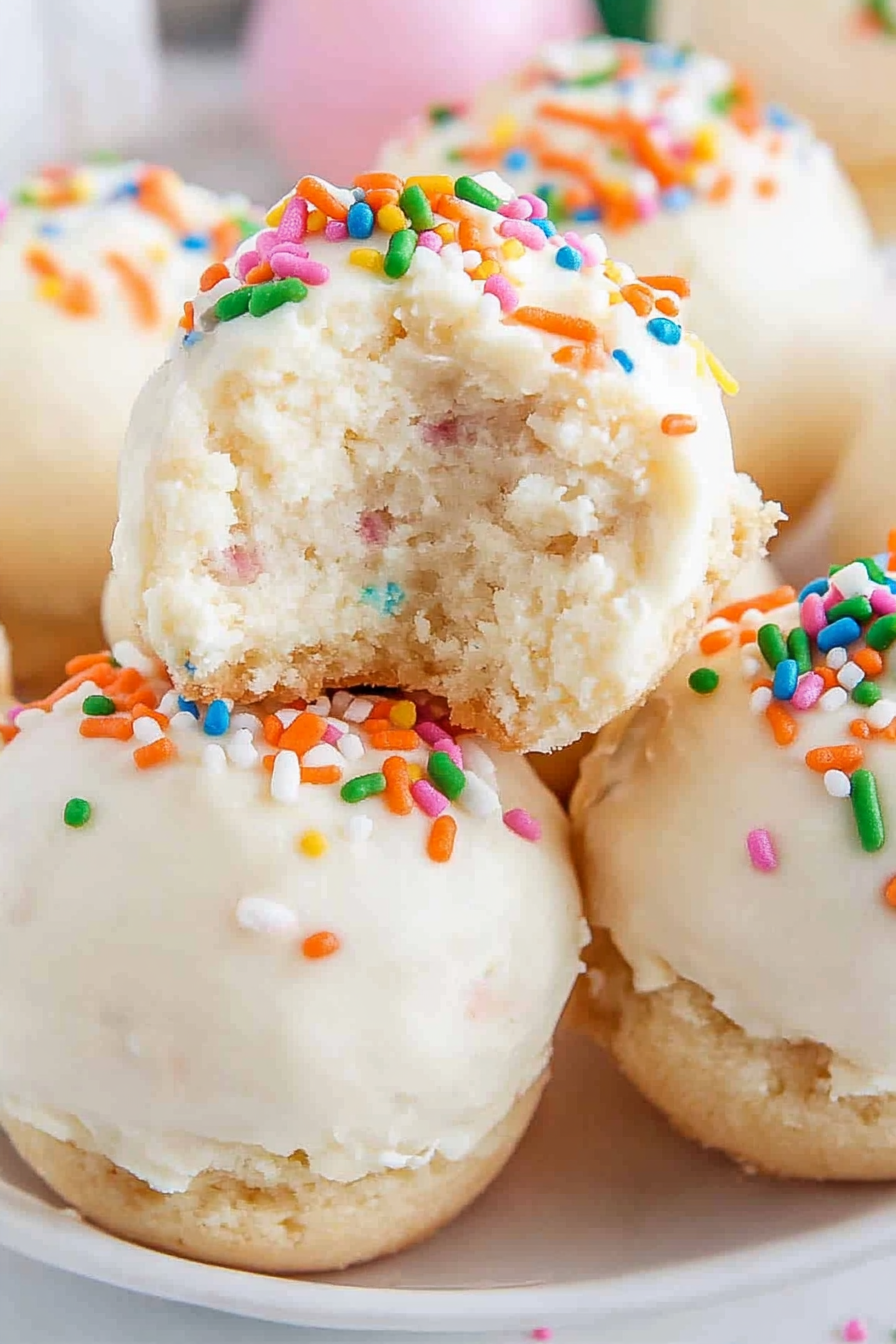
No-Bake Cheesecake Bites
Ingredients
Main Ingredients
- 15.25 ounce funfetti cake mix
- 8 ounce cream cheese softened
- 8 ounce white almond bark optional coating
- 0.5 teaspoon colorful sprinkles optional topping
Instructions
Preparation Steps
- Heat treat the dry funfetti cake mix by microwaving it in 2 intervals of 30 seconds each, stirring in between. Allow it to cool completely before mixing with cream cheese.
- Beat the softened cream cheese in a medium bowl with a handheld mixer on medium-high speed for 2 to 2.5 minutes until smooth.
- Sprinkle the cooled cake mix over the cream cheese and mix until fully incorporated.
- Cover the mixture tightly and refrigerate for 2 hours until firm.
- Line a baking sheet with parchment paper.
- Use a 1 tablespoon cookie scoop to form dough balls and place them on the lined baking sheet.
- Melt the white almond bark in 30 second microwave intervals until smooth.
- Roll the cheesecake balls in the melted almond bark, removing excess coating by tapping them gently.
- Place the coated balls back on the baking sheet and sprinkle with colorful sprinkles.
- Refrigerate the cheesecake bites until ready to serve.