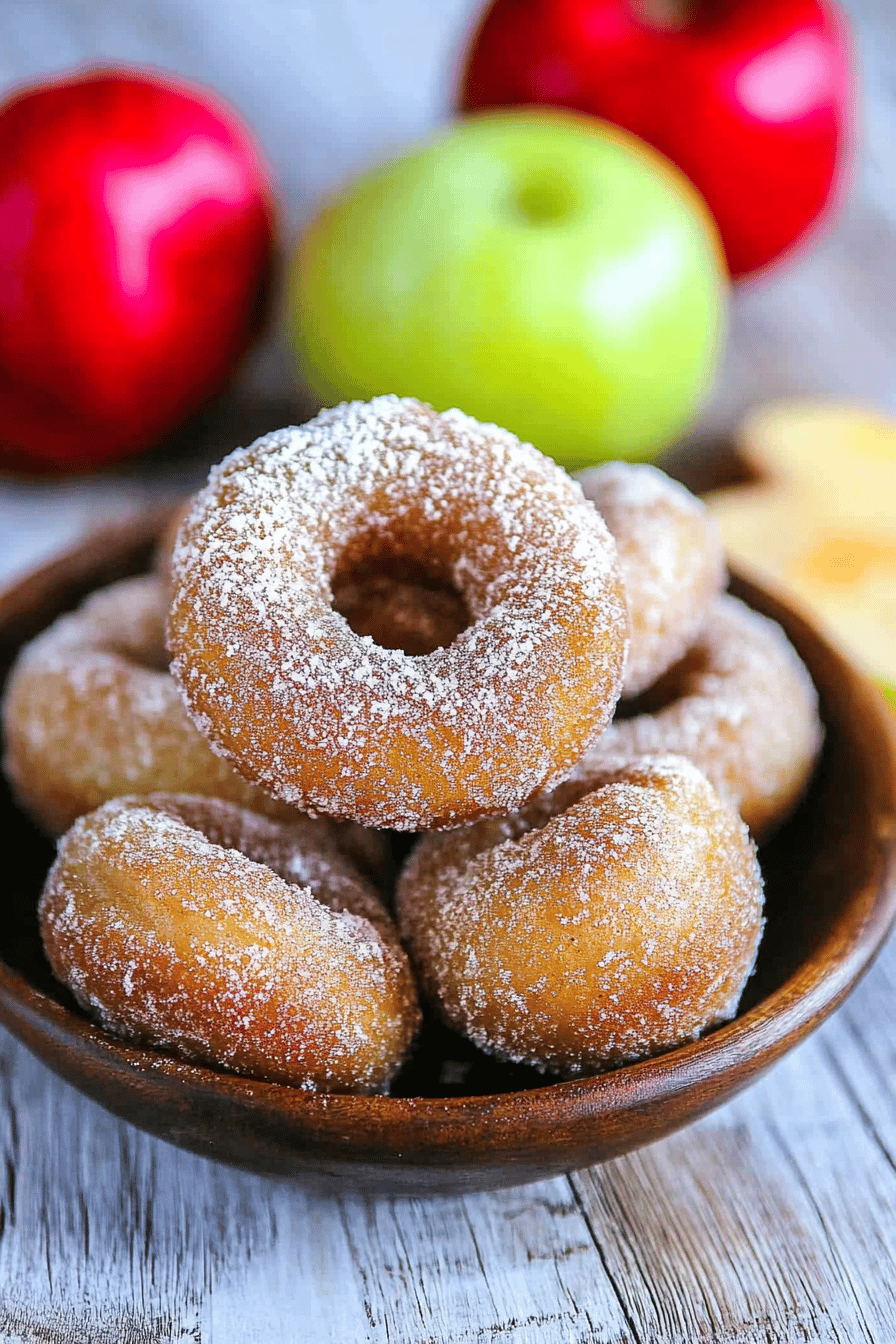
cake doughnuts
You know those days? The ones where you wake up with a hankering for something sweet, something comforting, something that just feels like a hug from the inside? For me, that’s often the craving that strikes when the afternoon slump hits, or when I just need a little pick-me-up without the fuss of a whole cake. And that’s precisely when I turn to my absolute favorite cake doughnuts. Forget those sad, store-bought versions that taste like cardboard and disappointment. We’re talking about the kind of cake doughnuts that are impossibly tender, perfectly sweet, and infused with a warmth that just makes everything feel right. They’re like a happy memory in every bite, and honestly, they’re so much easier than you might think. If you love a good old-fashioned Cinnamon Roll but wish it was a bit more portable and a lot less effort, then these cake doughnuts are about to become your new best friend.
What are cake doughnuts?
So, what exactly are cake doughnuts, and why do they hold such a special place in my heart (and my recipe box)? Think of them as the perfectly baked, handheld version of your favorite vanilla or spiced cake. Unlike their yeasted cousins, which require proofing and a bit more patience, cake doughnuts are made from a batter that’s closer to a quick bread or muffin. This means they’re incredibly forgiving and super quick to whip up, which is a lifesaver on those busy mornings or when unexpected guests pop over. They’re typically baked, not fried, which makes them a bit lighter and, let’s be honest, a whole lot less messy to make at home! The name itself really says it all – they’re essentially delightful little cakes, baked into that iconic doughnut shape, often kissed with a glaze or a dusting of Cinnamon Sugar. It’s that simple, and that magical.
Why you’ll love this recipe?
Honestly, there are so many reasons why this particular cake doughnut recipe has earned its spot as a go-to in my kitchen. First and foremost, the flavor is just out of this world. They have this incredibly moist, tender crumb that melts in your mouth, with just the right amount of sweetness that doesn’t overpower. It’s a delicate balance, you know? And when I add a touch of cinnamon or nutmeg, it just transports me straight back to my grandmother’s kitchen. Then there’s the simplicity factor. I’ve tested this recipe countless times, and it never fails to deliver, even when I’m feeling a bit frazzled. The ingredients are all pantry staples, and the steps are so straightforward that even a beginner baker can achieve bakery-worthy results. I’ve had friends tell me they were intimidated by making doughnuts at home, but after trying these, they were hooked! They’re also wonderfully cost-effective, especially when you compare them to the price of buying a dozen specialty doughnuts. And the versatility! Oh, the versatility! You can glaze them, dip them in cinnamon sugar, leave them plain – the possibilities are endless. I often find myself making a double batch because my family devours them so quickly. They’re perfect for breakfast, a mid-afternoon snack, or even a light dessert when you’re craving something sweet but don’t want anything too heavy. What I love most about this recipe, though, is the pure joy it brings. It’s a recipe that brings smiles, that creates little moments of happiness, and that’s what cooking is all about for me.
How do I make a cake doughnut?
Quick Overview
The beauty of these cake doughnuts lies in their straightforward approach. You’ll essentially mix up a simple batter, pipe or spoon it into your doughnut pan, and bake until golden. Then, a quick dip in a sweet glaze or a roll in cinnamon sugar, and voilà! You have a batch of warm, delicious doughnuts ready to be devoured. It’s a process that takes less time than you might think, making it totally achievable even on a weeknight. Trust me, the aroma filling your kitchen alone is worth it.
Ingredients
For the Main Batter:
You’ll need all-purpose flour, of course – about 2 cups should do the trick. Make sure it’s not an old bag; fresh flour makes a difference! We’ll also use baking powder for that lovely lift, a pinch of salt to balance the sweetness, and some granulated sugar. For that signature tender crumb, we’re using butter – softened, please, so it creams nicely with the sugar. And don’t forget the eggs; they add richness and structure. A good splash of milk (whole milk is my preference for extra richness, but any will do) and a generous dose of vanilla extract are non-negotiable for that classic, comforting flavor. Sometimes, I like to add a whisper of cinnamon or nutmeg right into the batter for an extra layer of warmth.
For the Filling:
This is where we can get a little creative! For a classic, comforting vibe, I often make a simple cinnamon-sugar swirl. It’s just a mixture of Brown Sugar and cinnamon, maybe with a tiny bit of melted butter to help it spread. If I’m feeling fancy, I might add some finely chopped nuts or even a few chocolate chips to the mix. The key is to have it ready to go before you start layering the batter.
For the Glaze:
This is super simple: powdered sugar whisked with a little milk or water until it’s smooth and pourable. You want it thick enough to coat but thin enough to drip. A touch of vanilla extract in the glaze is always a good idea, but you can also play around with other flavors like lemon zest or almond extract. Sometimes, I’ll even add a tiny bit of food coloring for special occasions!
Step-by-Step Instructions
Step 1: Preheat & Prep Pan
First things first, let’s get our oven preheated to 350°F (175°C). You’ll also need a good quality doughnut pan – I swear by my non-stick ones. Even with non-stick, I always give each cavity a little spritz or brush of cooking spray or melted butter. This extra step ensures your beautiful cake doughnuts slide out with ease, preventing any heartbreaking sticking incidents. Make sure you have them all greased up and ready to go before you even start mixing your batter.
Step 2: Mix Dry Ingredients
In a large mixing bowl, whisk together your all-purpose flour, baking powder, and salt. If you’re adding any ground spices like cinnamon or nutmeg to the main batter, this is the time to whisk them in. Whisking everything together at this stage ensures that the leavening agent (baking powder) and salt are evenly distributed throughout the flour, which is crucial for a consistent rise and flavor in your cake doughnuts.
Step 3: Mix Wet Ingredients
In a separate, medium-sized bowl, cream together the softened butter and granulated sugar until light and fluffy. This usually takes a couple of minutes with an electric mixer. Then, beat in the eggs, one at a time, making sure to incorporate each one fully before adding the next. Stir in the milk and the vanilla extract until everything is just combined. Don’t worry if it looks a little streaky at this point; that’s perfectly fine.
Step 4: Combine
Now, it’s time to bring our wet and dry ingredients together. Pour the wet ingredients into the bowl with the dry ingredients. Using a spatula or a wooden spoon, mix until *just* combined. It’s super important not to overmix here! A few small lumps are totally okay. Overmixing develops the gluten in the flour, which can lead to tough, dense cake doughnuts, and we definitely don’t want that. We’re going for tender and fluffy!
Step 5: Prepare Filling
If you’re doing a swirl, now’s the time to get that Brown Sugar and cinnamon mixture ready. Just put them in a small bowl and stir to combine. You can even add a tiny bit of melted butter if you like; it helps it cling to the batter. This simple mixture adds pockets of warm, spicy sweetness throughout your cake doughnuts.
Step 6: Layer & Swirl
This is where the fun begins! You can either spoon the batter into the doughnut cavities, filling them about two-thirds full, or, for a cleaner approach, use a piping bag (or a sturdy zip-top bag with a corner snipped off). Once you have a layer of batter in each cavity, sprinkle a bit of your cinnamon-sugar filling over the top. Then, add another layer of batter to cover the filling, again filling the cavities about two-thirds full. If you’re going for a swirl effect without a distinct filling layer, just dollop the batter into the pan and then swirl in the cinnamon-sugar mixture with a toothpick or skewer. The key is not to overfill them, as they will puff up as they bake.
Step 7: Bake
Pop those pans into your preheated oven. Bake for about 10-12 minutes, or until a toothpick inserted into the center of a doughnut comes out clean. The exact time will depend on your oven, so keep an eye on them after the 10-minute mark. They should be lightly golden brown on the edges and feel springy to the touch.
Step 8: Cool & Glaze
Once baked, let the doughnuts cool in the pan for about 5 minutes. This allows them to firm up a bit so they don’t break when you try to remove them. Then, carefully invert the pan onto a wire rack to release the doughnuts. While they’re still warm (but not hot!), prepare your glaze. Dip each doughnut into the glaze, letting any excess drip off, and place them back on the wire rack to set. If you prefer cinnamon sugar, wait until they’ve cooled slightly and then roll them gently in your cinnamon-sugar mixture.
Step 9: Slice & Serve
And there you have it! Perfectly baked cake doughnuts. They are absolutely divine when served warm, especially with that slightly gooey glaze. You can slice them in half horizontally if you want to really admire the crumb and maybe add a dollop of whipped cream or a smear of jam. But honestly, they’re fantastic just as they are. Enjoy them with a cup of coffee or a glass of milk – pure bliss!
What to Serve It With
These cake doughnuts are so wonderfully versatile; they truly fit into any occasion. For a simple, delightful breakfast, I love pairing them with a hot mug of coffee or a steaming cup of tea. They’re like a sweet little treat to kickstart the day. They look so pretty arranged on a simple white plate. When it comes to brunch, they really shine. I’ll often serve them alongside fresh fruit salads and perhaps some savory egg dishes. A mimosa or a sparkling cider pairs beautifully with their sweetness. For a more elegant dessert, you can elevate them further. Maybe drizzle a chocolate ganache over them, or serve them with a scoop of vanilla bean Ice Cream. They make a delightful finale to a nice meal. And for those spontaneous cozy snacks? They are perfection. Honestly, just grab one (or two!) with a glass of cold milk, maybe while curled up with a good book or watching a movie. My kids absolutely adore them after school, and they disappear in minutes. It’s a family tradition to have these on a rainy Sunday afternoon, and the smell alone brings everyone to the kitchen.
Top Tips for Perfecting Your Cake Doughnuts
Over the years, I’ve picked up a few little tricks that help make these cake doughnuts absolutely spectacular every single time. One of the most important things is proper Zucchini Prep if you choose to add it (more on that later!). For the base recipe, though, let’s talk Mixing Advice. Seriously, the biggest mistake people make is overmixing the batter. Once you add the wet to the dry, stir just until you don’t see any more dry flour streaks. A few lumps are fine! Overmixing develops the gluten, resulting in a tougher doughnut, and we want tender cake doughnuts, remember? For the Swirl Customization, I’ve learned that it’s best to have your cinnamon-sugar mixture ready to go before you even start filling the pans. This way, you can quickly sprinkle and swirl it in, ensuring it gets nicely distributed throughout the cake doughnut. Don’t be afraid to experiment with the amount of cinnamon – adjust it to your preference! When it comes to Ingredient Swaps, I’ve found that you can easily substitute the milk with almond milk or soy milk, and it often makes the batter even creamier! For the sugar, you can reduce it slightly if you prefer a less sweet doughnut, but remember it contributes to tenderness. And a little tip for the butter: if you forget to soften it, you can grate the cold butter into your sugar and cream them together – it works surprisingly well! As for Baking Tips, always trust your oven, but also trust the toothpick test. Ovens can vary, so the 10-12 minute guideline is just that – a guideline. A toothpick should come out clean when they’re done. I usually bake mine on the middle rack to ensure even cooking. And for Glaze Variations, if your glaze seems too thick, add milk or water a teaspoon at a time. If it’s too thin, whisk in a bit more powdered sugar. You can also play with flavor extracts – a little orange zest in the glaze is divine, or a touch of espresso powder for a mocha twist!
Storing and Reheating Tips
These cake doughnuts are best enjoyed fresh, but life happens, right? If you find yourself with leftovers (which is rare in my house!), here’s how to store them to keep them tasting their best. For Room Temperature storage, I usually keep them in an airtight container for up to two days. They might lose a tiny bit of their initial freshness after the first day, but they’re still delicious. Just make sure they’re completely cool before sealing them up to prevent any moisture buildup. If you need them to last a bit longer, Refrigerator Storage is your best bet. Store them in an airtight container for up to 4-5 days. They’ll firm up a bit in the fridge, so I often like to give them a quick reheat. For Freezer Instructions, these work wonderfully. Wrap them tightly in plastic wrap, then place them in a freezer-safe bag or container. They can last in the freezer for up to 2 months. To thaw, simply take them out of the freezer and let them come to room temperature, or pop them in the microwave for a few seconds if you prefer them warm. Regarding Glaze Timing Advice, if you plan to freeze your doughnuts, it’s best to freeze them *un-glazed* and then glaze them after thawing and reheating. If you’re storing them at room temperature or in the fridge, glazing them right away is perfectly fine, but be aware that the glaze can soften over time.
Frequently Asked Questions
Final Thoughts
Honestly, if you’re looking for a sweet treat that’s relatively easy to make, incredibly delicious, and sure to please everyone from your little ones to your pickiest friends, then these cake doughnuts are the answer. They’re proof that you don’t need to be a professional baker to create something truly special in your own kitchen. The tender crumb, the simple sweetness, the comforting aroma – it’s all part of the magic. They’re perfect for those moments when you just need a little pick-me-up, or when you want to make breakfast or dessert feel a little more like a celebration. If you love these cake doughnuts, you might also enjoy my recipe for Classic Cinnamon Rolls or my Easy Apple Crumble Bars – they’re all about that warm, comforting, homemade goodness! I truly can’t wait for you to try this recipe. Let me know in the comments below how yours turn out, and if you discover any fun new glaze or topping combinations – I’m always looking for inspiration! Happy baking, everyone!
Classic Cake Doughnuts
Ingredients
Doughnuts
- 2.5 cups all-purpose flour
- 1.5 cups granulated sugar
- 2.5 teaspoons baking powder
- 0.5 teaspoon salt
- 0.25 teaspoon ground nutmeg
- 0.5 cup unsalted butter, softened
- 2 large eggs
- 1 cup milk
- 1 teaspoon vanilla extract
Glaze
- 2 cups powdered sugar
- 3 tablespoons milk
- 1 teaspoon vanilla extract
Instructions
Making the Doughnuts
- In a large bowl, whisk together the flour, granulated sugar, baking powder, salt, and nutmeg.
- Cut in the softened butter until the mixture resembles coarse crumbs.
- In a separate bowl, whisk together the eggs, milk, and vanilla extract.
- Gradually add the wet ingredients to the dry ingredients, mixing until just combined. Do not overmix.
- Cover the dough and refrigerate for at least 1 hour.
- On a lightly floured surface, roll out the dough to about 0.5 inch thickness. Cut out doughnuts using a doughnut cutter.
- Heat 2-3 inches of oil in a deep pot or Dutch oven to 350°F (175°C).
- Carefully fry the doughnuts for 1-2 minutes per side, until golden brown. Fry the doughnut holes as well.
- Remove doughnuts from oil and place on a wire rack set over a baking sheet to drain.
Making the Glaze
- In a medium bowl, whisk together the powdered sugar, milk, and vanilla extract until smooth.
- Dip the warm doughnuts into the glaze, letting any excess drip off.
- Let the glaze set on the doughnuts for about 15-20 minutes before serving.