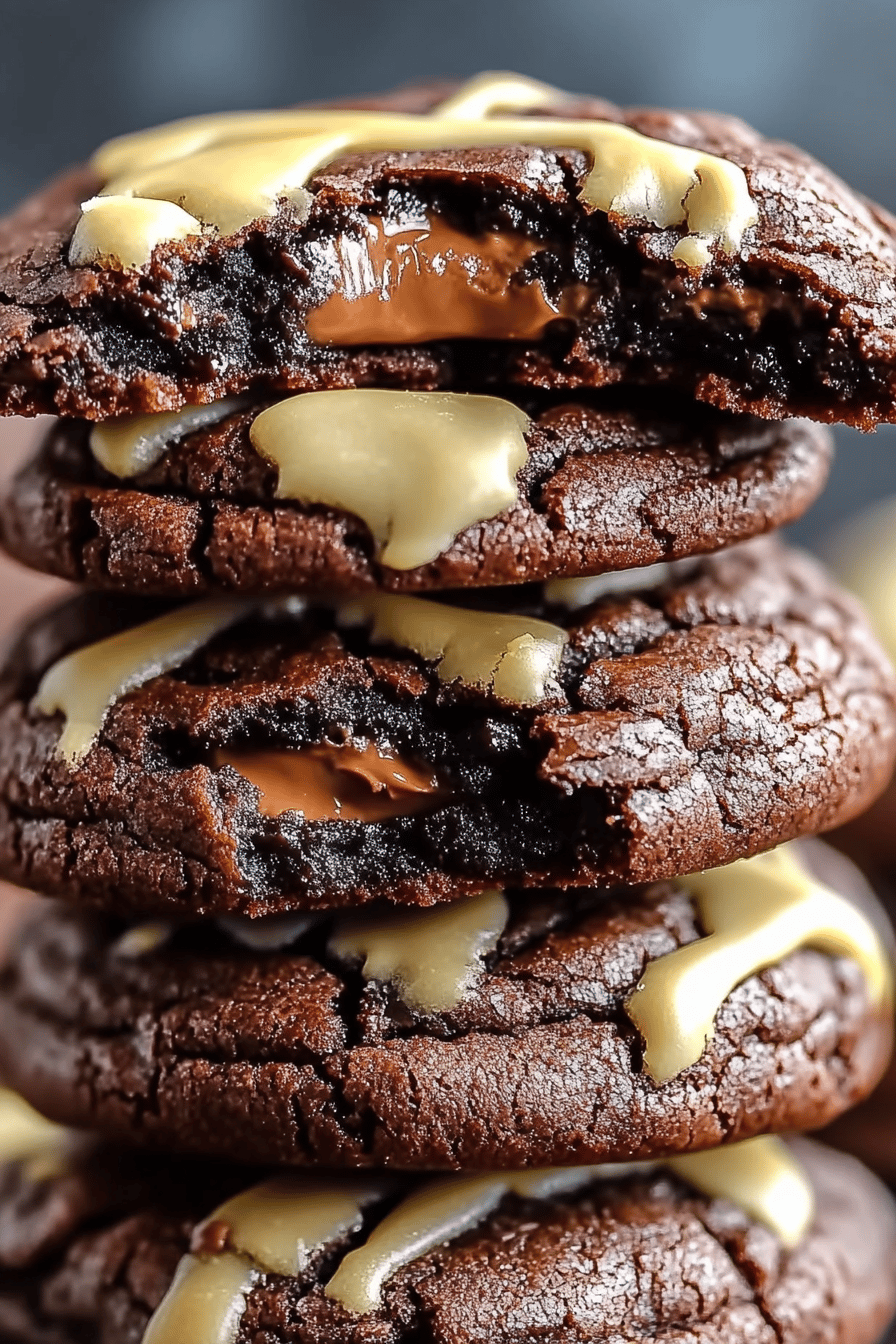
brownie cookies
I grew up with the warm scent of cocoa drifting through the house, a reminder that someone loved you enough to bake. On rainy Sundays, my grandma would pull out a Sheet Pan and a whisk, and we’d watch the edges crackle into a delicate, fudgy crust. It turns out you can have brownie and cookie in one bite, and that magic is what I now call brownie cookies. These little gems are the best of both worlds—soft, fudgy centers with a whisper of crisp edges, all dipped in a glossy chocolate glaze or dusted with just a kiss of powdered sugar. This version is my go-to when I want something special but don’t want to spend all afternoon in the kitchen. I’ve made these with almond milk to keep them ultra-tudor-soft, and I’ve learned the tricks that keep them moist for days. Trust me, brownie cookies disappear in minutes at my house, and they’ll do the same at yours.
What is Brownie Cookies?
Think of brownie cookies as a clever mash-up that celebrates two of chocolate lovers’ favorites. It’s essentially a thick, brownie-like batter baked into compact cookies, then sometimes layered with a creamy filling and finished with a drizzle or glaze. The name origin is pretty simple: you’re getting the brownie texture and flavor in a handheld cookie form. It’s a familiar, comforting concept—think of a brownie that’s a little more portable, a little less fudgy in one wide bite, yet every bit as indulgent. This isn’t about gimmicks; it’s about dialing in the best features of both desserts—rich chocolate, a hint of sweetness, and that satisfying bite that’s perfect with a cup of coffee or a glass of cold milk. If you’re craving something sweet at 10 p.m. but don’t want to bake a full cake, brownie cookies are the answer you’ll reach for again and again.
Why you’ll love this recipe?
What I love most about these brownie cookies is the texture drama in every bite. The outside shatters softly, then yields to a fudgy, melt-in-your-mouth center. It’s like getting a brownie and a chocolate chip cookie in one tiny, perfect package. The flavor is pure chocolate bliss, with a nuanced depth from vanilla and a touch of espresso powder (which I rarely skip). On the surface, these seem decadent, but they’re genuinely forgiving—one bowl, a few pantry staples, and you’re sipping coffee while the batch bakes. They’re also incredibly versatile: you can swirl in a Cream Cheese Filling for a bakery-worthy center, or freeze the dough balls for quick weeknight desserts. What I love most about this recipe is its warmth and comfort—it tastes like home, even when you’re making it alone on a Tuesday night. And yes, it’s wallet-friendly: you’re likely to have most ingredients on hand, and a little goes a long way with these little cookies.
If you’re into baked chocolatey goodness, you might also enjoy my adjacent favorites, like fudgy chocolate thumbprints or a simple cocoa butter cookie. Brownie cookies strike a balance between indulgence and everyday practicality, making them a crowd-pleaser for potlucks, school bake sales, or a cozy date-night treat at home. The best part is that once you crack the formula, you’ll be able to improvise with fillings, glazes, and toppings to suit your mood or the season. It’s a recipe you’ll reach for again and again, especially when you’re feeding a hungry crew who all want a little something chocolaty after dinner.
How do I make Brownie Cookies?
Quick Overview
This is the kind of recipe that feels fancy but is secretly simple. You’ll whisk dry ingredients, whisk wet ingredients, then marry them into a thick, brownie-like batter. The dough is sturdy enough to scoop into neat mounds, yet soft enough to yield that fudgy center once they’re baked. If you’re feeling extra, you can layer a creamy filling in the middle and swirl a glossy glaze on top. The result is a shelf-stable treat that tastes best slightly warm when the chocolate aroma fills your kitchen. The trick is not over-baking; you want the centers to stay soft and pull apart with a gentle tug. With this method, your brownie cookies will stay chewy for days and still look irresistible on the plate.
Ingredients
For the Main Batter:
– 1/2 cup (115 g) unsalted butter, melted
– 1 cup (200 g) granulated sugar
– 2 large eggs
– 1 teaspoon vanilla extract
– 1/2 cup (50 g) unsweetened cocoa powder
– 1 cup (125 g) all-purpose flour
– 1/2 teaspoon baking powder
– 1/4 teaspoon salt
– 1/2 cup (90 g) chocolate chips or chopped Dark Chocolate (optional)
For the Filling:
– 8 oz (225 g) Cream Cheese, softened
– 1/3 cup (40 g) powdered sugar
– 1 teaspoon vanilla extract
– Pinch of salt
For the Glaze:
– 1/2 cup (60 g) powdered sugar
– 2 tablespoons milk or cream
– 1 tablespoon cocoa powder or melted chocolate
– Optional: a splash of vanilla or coffee lrot to deepen flavor
Step-by-Step Instructions
Step 1: Preheat & Prep Pan
Preheat your oven to 350°F (175°C). Line two baking sheets with parchment paper or silicone mats. Having the sheets ready is a tiny detail that saves you from a frantic last-minute scramble mid-bake. If you want extra-chewy centers, you can chill the dough scoops for 15–20 minutes before baking to reduce spreading a little. Pro tip: if your oven runs hot, rotate the trays halfway through for even browning.
Step 2: Mix Dry Ingredients
In a medium bowl, whisk together flour, cocoa powder, baking powder, and salt. This step is where the flavor depth starts to bloom. You’ll notice the cocoa scent wake up as you whisk—that’s the moment you know you’re on the right track. If you’re using espresso powder, add a pinch now to intensify the chocolate without making it taste like coffee.
Step 3: Mix Wet Ingredients
In a large bowl, whisk melted butter and sugar together until glossy. Add the eggs one at a time, beating well after each addition, then mix in vanilla. The batter should look thick and satin-like. If you’ve got a chocolate lover in the house who’s gluten-sensitive, you can swap in a gluten-free all-purpose blend here, but you may need to adjust slightly for moisture—watch the texture as you mix.
Step 4: Combine
Dump the dry ingredients into the wet and fold just until you see no streaks of flour. Stir in the chocolate chips if you’re using them. The batter should be thick enough to hold its shape when scooped, not so stiff that it feels like you’re chiseling a statue. If it seems a touch dry, a tablespoon of milk can bring it to the perfect, scoopable consistency. Overmixing leads to tough cookies, so respect the gentle fold.
Step 5: Prepare Filling
In a separate bowl, beat the softened cream cheese, powdered sugar, vanilla, and a pinch of salt until smooth and pale. You’re aiming for a spreadable, pipe-able consistency. If you want to keep the filling lighter, you can swap half of the cream cheese for whipped topping; just don’t overmix or the texture can become too airy. A little lemon zest in the filling adds a bright contrast that I love on days when we crave something a touch tangier.
Step 6: Layer & Swirl
Using a small cookie scoop or tablespoon, scoop a rounded ball of brownie batter onto each lined sheet. Make a shallow well in the center of each ball and pipe or spoon a small amount of filling into the cavity. Top with a second brownie batter scoop, making sure to seal the edges so the filling stays tucked inside. If you prefer a marbled look, you can gently swirl a bit of extra batter on top, running a toothpick through the center to create a gentle ripple.
Step 7: Bake
Bake for 12–14 minutes, depending on the size of your scoops and your oven. You want the edges set and the centers just shy of firm—they’ll continue to cook a touch as they cool. If you’re making plain brownie cookies without filling, bake 9–11 minutes. For the butter-rich batter, you’ll notice the top looks matte and the centers look slightly underdone—that’s the sign you’re about to reward yourself with chewy, fudgy interior glory.
Step 8: Cool & Glaze
Let the cookies rest on the sheet for 5 minutes before transferring to a rack to cool completely. If you’re glazing, whisk together the glaze ingredients until smooth and glossy. Drizzle the glaze over the cooled cookies, or dip the tops for a clean, bakery-style finish. The glaze adds a glossy sheen and a touch more sweetness that pairs beautifully with the deep chocolate flavors. If you want, you can sprinkle a pinch of flaky salt on top while the glaze is still soft—salt and chocolate is a classic, and it’s especially good here.
Step 9: Slice & Serve
Once the glaze sets, slice each cookie in half or into bite-sized quarters for a sandwich-style bite if you’ve filled them. This isn’t about perfect geometry; it’s about presentation that makes you smile. The contrast between the shiny top and the chewy interior looks as good as it tastes. Serve with a mug of coffee, or stack a few on a plate for a quick dessert that feels special. These brownie cookies are best the day they’re baked, but they’ll stay moist and delicious in an airtight container for up to 4 days. If you’re freezing, lay the cookie sandwiches on a parchment-lined tray, freeze solid, then transfer to a bag. That way, you can thaw and enjoy them without losing texture.
What to Serve It With
Brownie cookies are wonderfully versatile, so I love thinking about them by occasion. They’re a quick, crowd-pleasing dessert that can carry through a busy week or shine at a weekend gathering.
For Breakfast: A couple of brownie cookies alongside a bold coffee satisfies a late-morning chocolate craving without feeling heavy. If you drizzle a little warm cream on top instead of glaze, it feels like a fancy café moment at home.
For Brunch: Plate them with sliced strawberries and a dollop of whipped cream. The contrast of bright fruit and rich chocolate makes for a playful, dessert-meets-brunch vibe.
As Dessert: Serve two warm cookies with vanilla ice cream between them for a brownie-cookie sandwich. A light dusting of cocoa or espresso powder on top makes them look irresistibly indulgent on a dessert table.
For Cozy Snacks: Pack a couple of these into a small tin for when you’re watching a movie or settling in with a good book. They’re the kind of treat that feels indulgent yet completely doable after a long day.
My family loves that these can be dressed up or down. The cream-cheese filling makes them feel bakery-worthy, but the plain version is joyfully straightforward. A lot of people tell me they’re the perfect gift for neighbors or teachers—three or four cookies wrapped in parchment, tied with a ribbon, and you’ve got a thoughtful, homemade token that travels well. The beauty is in the balance of textures and the way the chocolate flavor lingers after each bite. This recipe has become a staple in my kitchen, and I hope it becomes a favorite in yours too.
Top Tips for Perfecting Your Brownie Cookies
Here are a few practical tweaks I’ve learned after dozens of batches. They’re small adjustments, but they make a big difference in texture and flavor.
Batter Consistency: If your batter seems too thick to scoop, add a teaspoon of milk at a time until it holds its shape but isn’t dry. If it’s too loose, you’ll have spread and a thinner center. The goal is a fudgy, not cake-like, texture. A well-balanced batter is the secret to chewy brownie cookies every time.
Zucchini Prep: Not applicable here, but if you ever use zucchini in a different cookie, you’ll want to squeeze out moisture thoroughly to avoid sogginess. For these brownie cookies, you’ll stay focused on proper moisture balance in the chocolate batter.
Mixing Advice: Overmixing the batter after adding dry ingredients can lead to a tougher texture. Stop as soon as you see no flour pockets and you’ll retain that melt-in-your-mouth center. And if you’re adding a filling, keep it cool and thick so it doesn’t ooze out during baking.
Swirl Customization: If you want a more dramatic swirl, spoon a thin ribbon of extra batter on top before sealing with a second scoop. Drag a thin skewer or knife through the center to create a gorgeous marbled effect that photographs beautifully and tastes even better.
Ingredient Swaps: You can replace half the butter with an equal amount of coconut oil for a slightly different aroma and texture. For a dairy-free version, use a plant-based butter substitute and dairy-free cream cheese, but keep the flour amount the same. The overall result will be a touch crisper around the edges but still wonderfully chocolatey.
Baking Tips: If your oven tends to run hot, lower the temperature by 25°F and bake a few minutes longer to prevent over-browning. Conversely, if your oven is gentle, you might shorten the bake by a minute or two. Use a light touch with the fillings; you want them to remain centered, not leak out and burn onto the baking sheet.
Glaze Variations: The glaze can be swapped for a simple dusting of powdered sugar, a white chocolate drizzle, or a thin coffee-chocolate glaze for a grown-up twist. You can also sprinkle flaky sea salt on top for a sweet-salty bite that’s incredibly satisfying.
Lessons learned: always taste your batter—if the cocoa flavor feels flat, a touch more vanilla or a pinch of espresso powder can elevate it without turning it into a coffee cake. If your family loves extra-chocolatey bites, fold in a few chopped dark chocolate pieces just before scooping. If you’re short on time, you can skip the filling and still have fantastic brownie cookies; the simple batter on its own yields cookies that are deeply satisfying and easy to crank out in a pinch.
Storing and Reheating Tips
Brownie cookies store beautifully, which means you can batch a little extra and have a quick treat on hand all week. Here’s how I keep them at their best.
Room Temperature: Store in an airtight container for up to 4 days. They stay chewy and glossy on the glaze version, especially if you’ve kept the glaze to a light, thin layer. If you’re not glazing, a simple dusting of powdered sugar keeps them looking festive while preserving texture.
Refrigerator Storage: In a single layer in an airtight container, they’ll stay fresh for up to 2 weeks. If you’re stacking layers, place parchment between so the tops don’t stick. Bring to room temperature for a minute or two before serving for the best texture.
Freezer Instructions: Freeze baked cookies or cookie sandwiches on a parchment-lined tray, then transfer to a freezer-safe bag for up to 3 months. Thaw at room temperature, or warm them gently in a 300°F (150°C) oven for a few minutes to reacquire that just-baked feel. If you freeze the filled versions, you might get a very slight filling set—this is normal and still delicious with a quick rewarm.
Glaze Timing Advice: If you’re freezing the cookies, glaze them after you’ve thawed to preserve the glossy finish. You can also glaze on day-of for maximum shine. If you’re storing unglazed cookies, glaze just before serving for the best visual appeal and freshest flavor balance.
In short, brownie cookies are forgiving and resilient. They travel well, stay moist longer when properly stored, and lend themselves to a range of serving styles—from casual snacks to elegant dessert plates. The real joy is having a chocolatey, comforting bite ready to go whenever the mood hits. This recipe is a little treasure I’m excited to share, and I can’t wait to hear how you customize it for your family’s tastes.
Frequently Asked Questions
Final Thoughts
There’s something wonderfully comforting about brownie cookies—the way they smell, the way the glaze catches light, the way the center stays chewy even after you’ve eaten more than you meant to. This recipe is a celebration of cozy, not fussy, chocolate joy; it’s the sort of thing you can make with a kid on a weekend afternoon or quietly bake for yourself after a long day. The ingredients are simple, the steps are forgiving, and the payoff is always worth it. If you try one batch and tell me which variation you loved—the classic brownie-cookie with glaze, the filled cream-cheese center, or the marbled top—I’ll be cheering you on from my kitchen. Happy baking, and may your kitchen be filled with the same warmth and cocoa-scented memories that started it all. I’d love to hear your tweaks and your favorite topping combinations in the comments below. Now grab a glass of milk and dive in—these brownie cookies are calling your name!