blueberry pie recipe
There are few things as utterly comforting and utterly delicious as a perfectly baked blueberry pie. I’m talking about that golden, flaky crust giving way to a filling bursting with juicy, sweet-tart blueberries. For me, it’s more than just dessert; it’s a memory. It’s the smell of my grandma’s kitchen on a warm afternoon, the anticipation building as she pulled it out of the oven. This blueberry pie recipe isn’t just a recipe; it’s a feeling. It’s the taste of sunshine and carefree days. I’ve tried so many versions over the years, but this one? This is the one that always gets rave reviews, the one my family asks for again and again. It’s surprisingly straightforward, which is a huge bonus when you’re craving something amazing but don’t want to spend all day in the kitchen. Honestly, compared to a complex chocolate cake or a fussy tart, this blueberry pie is an absolute dream to make.
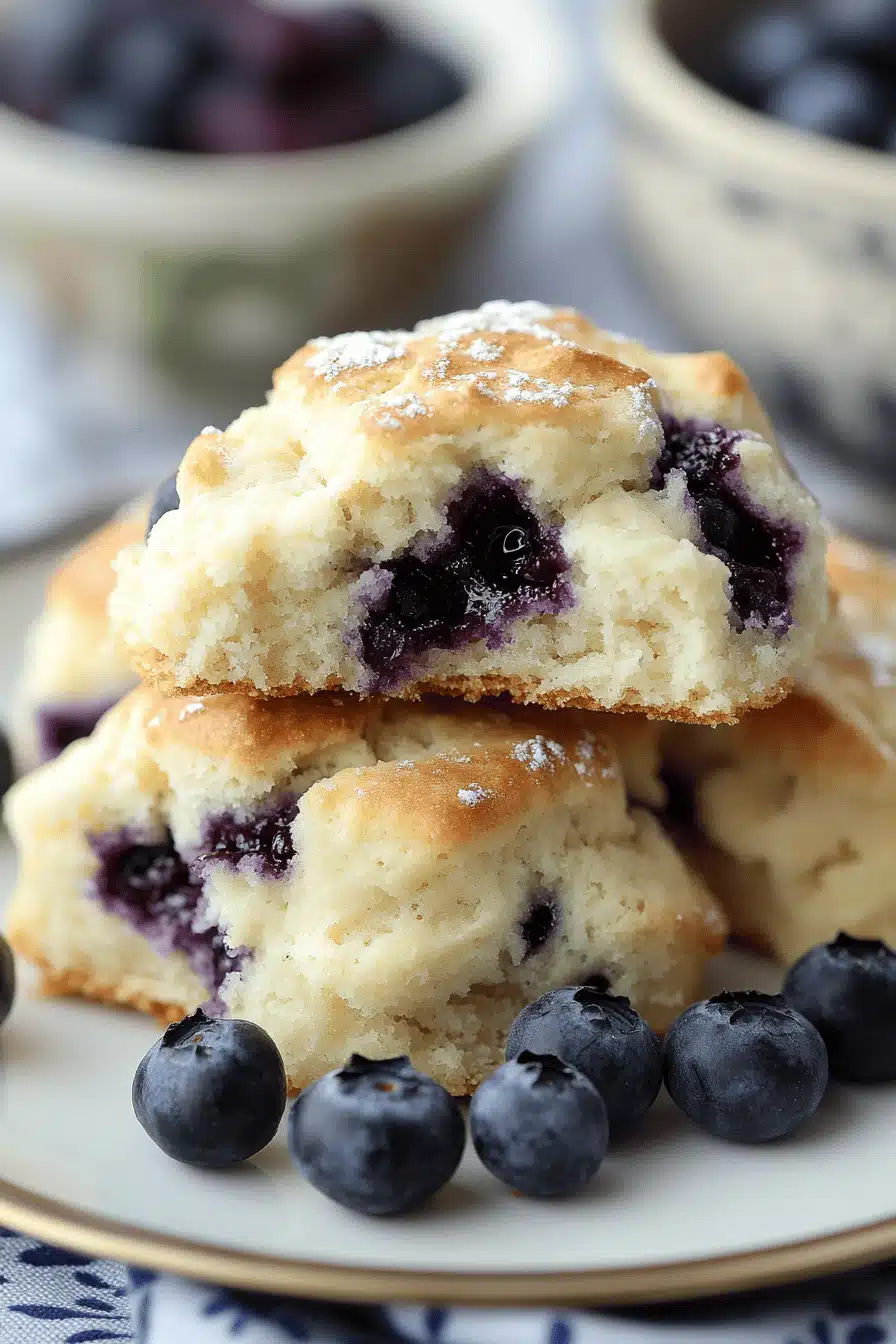
What is Blueberry Pie?
So, what makes this particular blueberry Pie Recipe so special? Think of it as the quintessential summer dessert, elevated. It’s essentially a classic double-crust pie, but with a few little secrets that make the filling extra luscious and the crust incredibly tender. The “blueberry” part is obviously key – we want those berries to shine, right? We use a generous amount, so every bite is packed with that distinctive, delightful blue hue and flavor. It’s not just about dumping berries into a crust and hoping for the best. This recipe is about coaxing out the best from those gorgeous fruits and pairing them with a buttery, flaky pastry that complements them perfectly without overpowering. It’s the kind of dessert that makes people ooh and aah when you bring it to the table, and you’ll feel like a total baking rockstar, even if you’re a beginner!
Why you’ll love this recipe?
Let me tell you, there are so many reasons why this blueberry pie recipe has become my absolute go-to. First and foremost, the flavor is just out of this world. When those fresh blueberries cook down, they create this incredibly intense, sweet-tart burst that’s just pure joy. It’s not overly sweet, which I really appreciate – you can actually taste the fruit! Then there’s the simplicity. Seriously, if you can follow a few basic steps, you can make this pie. I’ve had friends who claimed they couldn’t bake, make this pie and nail it on the first try. It’s a lifesaver on busy nights when you want to impress without the stress. And let’s talk about cost-efficiency – blueberries can sometimes be a bit pricey, but this recipe uses them so perfectly that you get maximum flavor impact for your buck. Plus, the ingredients are all pantry staples. What I love most about this is its versatility. It’s fantastic served warm with a scoop of vanilla Ice Cream, but honestly, it’s also pretty darn delicious at room temperature with a dollop of whipped cream. It’s the kind of dessert that feels both comforting and a little bit fancy at the same time. If you’ve ever struggled with pie crusts, trust me, this recipe has some tips that will change your life. It truly stands out because it strikes that perfect balance between being rustic and elegant, approachable and impressive.
How do I make blueberry pie?
Quick Overview
The process is delightfully straightforward. We start by making a fantastic pie crust from scratch (or using a good store-bought one if you’re in a pinch – no judgment here!). Then, we prepare a simple, flavorful blueberry filling that will become beautifully jammy as it bakes. The magic happens when we assemble it – a bottom crust, that luscious berry filling, and a gorgeous lattice or full top crust, ready to be baked to a golden brown perfection. It’s all about layering flavors and textures, and this method ensures you get a pie that’s visually stunning and incredibly delicious. This approach makes sure your filling is perfectly cooked and your crust is golden and crisp, avoiding that dreaded soggy bottom!
Ingredients
For the Flaky Pie Crust:
You’ll need about 2 ½ cups of all-purpose flour. It’s worth getting a good quality one if you can. A pinch of salt is crucial for flavor. For that incredible tenderness and flakiness, you’ll need 1 cup (2 sticks) of very cold unsalted butter, cut into small cubes. The colder, the better – I usually pop mine in the freezer for about 15 minutes before I start. And about ½ cup of ice water. Seriously, ice water is key! I always have a glass of ice water ready to go.
For the Luscious Blueberry Filling:
This is where the star shines! You’ll need about 5-6 cups of fresh or frozen blueberries. If you’re using frozen, don’t thaw them completely; just break up any big clumps. To thicken that wonderful filling, we’ll use ½ cup of granulated sugar (you can adjust this slightly based on your berries’ sweetness and your preference). For a little tang and to help the berries break down beautifully, add 2 tablespoons of cornstarch or all-purpose flour. A teaspoon of lemon zest adds a bright, fresh note without making it taste lemony. And a tablespoon of fresh lemon juice to enhance that zing. A pinch of salt, just like in the crust, helps balance the flavors. Oh, and a tablespoon of unsalted butter, cut into small pieces, dotted over the top before the crust goes on – it adds a subtle richness.
For the Optional Egg Wash & Sugar Sprinkle:
If you want that gorgeous golden sheen on your crust, whisk together one large egg with a tablespoon of milk or water. And for a little sparkle and crunch, a tablespoon of coarse sugar (like turbinado or sanding sugar) is perfect. It’s totally optional but so pretty!
Step-by-Step Instructions
Step 1: Preheat & Prep Pan
First things first, let’s get that oven roaring! Preheat it to 400°F (200°C). Now, let’s talk about your pie plate. A standard 9-inch pie plate is what you’ll need. If you’re using a glass pie plate, keep in mind it can sometimes brown the bottom crust a little faster, so keep an eye on it. I like to place a baking sheet on the rack below where the pie will bake. This is a total lifesaver for catching any potential drips and it also helps create a more even heat for the bottom crust, preventing that dreaded soggy bottom.
Step 2: Mix Dry Ingredients
In a large bowl, whisk together your flour and salt for the pie crust. This ensures everything is evenly distributed. Now, add your super cold, cubed butter. Using a pastry blender, two forks, or your fingertips (though cold hands are best!), cut the butter into the flour mixture. You want to work quickly so the butter stays cold. The goal is a coarse, crumbly mixture with some pea-sized pieces of butter still visible. Those little butter bits are what create the flaky layers!
Step 3: Mix Wet Ingredients
Gradually add the ice water, one tablespoon at a time, to the flour and butter mixture. Stir gently with a fork after each addition until the dough just starts to come together. You might not need all the water, or you might need a tiny bit more – the humidity can play a role! The dough should be moist enough to hold together when you squeeze a piece, but not sticky. Don’t overmix here; we’re just trying to bring it together.
Step 4: Combine
Turn the dough out onto a lightly floured surface and gently bring it together into a cohesive ball. Divide the dough in half, flatten each half into a disc, wrap them tightly in plastic wrap, and refrigerate for at least 30 minutes (or up to 2 days). This chilling time is super important; it allows the gluten to relax and the fat to firm up, making the dough easier to roll and much flakier.
Step 5: Prepare Filling
While the dough is chilling, let’s get to that glorious blueberry filling. In a large bowl, gently combine the blueberries, granulated sugar, cornstarch (or flour), lemon zest, lemon juice, and pinch of salt. Toss everything together carefully so you don’t crush too many of the berries. Let this mixture sit for about 10-15 minutes. This gives the sugar and cornstarch a chance to start dissolving and coating the berries, which helps prevent a watery filling.
Step 6: Layer & Swirl
Take one disc of dough from the refrigerator and let it sit at room temperature for about 5-10 minutes to make it easier to roll. On a lightly floured surface, roll out the dough into a 12-inch circle. Carefully transfer it to your 9-inch pie plate, gently pressing it into the bottom and up the sides. Trim any excess dough, leaving about a 1-inch overhang. Now, pour that beautiful blueberry filling into the prepared crust. Dot the top of the filling with those small pieces of butter. If you’re doing a lattice top, roll out the second disc of dough and cut it into even strips. Arrange the strips over the filling in a lattice pattern, weaving them over and under each other. Trim the ends of the strips and crimp them together with the bottom crust. If you’re doing a full top crust, roll out the second disc, place it over the filling, trim the edges, and crimp to seal. Make a few vents in the top crust with a sharp knife to allow steam to escape.
Step 7: Bake
Now for the best part! If you’re using an egg wash, brush it lightly over the top crust and sprinkle with coarse sugar. Place the pie on the preheated baking sheet in your oven. Bake at 400°F (200°C) for 20 minutes. Then, reduce the oven temperature to 375°F (190°C) and continue baking for another 30-40 minutes, or until the crust is golden brown and the filling is bubbling thickly through the vents. If the edges of the crust start to brown too quickly, you can loosely cover them with strips of aluminum foil. You want to see the filling bubbling up – that’s how you know it’s cooked through!
Step 8: Cool & Glaze
This step is CRUCIAL! Once your pie is baked to perfection, carefully remove it from the oven and place it on a wire rack to cool completely. I know it’s tempting to dig in right away, but you *have* to let it cool for at least 3-4 hours. This allows the filling to set properly. If you cut it too soon, you’ll have a beautiful, but very runny, mess. The glaze you see in pictures? That’s just the natural juices of the cooked berries, thickened and luscious. No extra glaze is needed for this recipe!
Step 9: Slice & Serve
Once your pie has had ample time to cool and set, it’s ready to be sliced and devoured! Use a sharp knife to cut clean wedges. I like to serve it slightly warm or at room temperature. The contrast of a warm slice of pie with a cool scoop of vanilla Ice Cream is just heavenly. Alternatively, a dollop of freshly whipped cream or even a drizzle of crème fraîche works beautifully. Enjoy every single bite of that homemade goodness!
What to Serve It With
This blueberry pie is so versatile, it fits into almost any meal or occasion. For a simple, satisfying breakfast, I love a smaller slice on its own with a steaming cup of coffee. It’s not too sweet for the morning and gives you that little burst of energy. For a more leisurely brunch, especially if you’re hosting, present it on a pretty cake stand. It pairs wonderfully with a light sparkling wine or a fruity mimosa. And of course, as the grand finale to any dinner party, this pie is a showstopper. Serve it with a side of really good vanilla bean ice cream – the warm pie and cold ice cream combo is a classic for a reason! My kids absolutely love it with whipped cream, and honestly, sometimes just a fork straight from the pie plate is the best way to enjoy a cozy afternoon snack. It’s perfect for those moments when you just want something sweet and comforting, a little taste of homemade love.
Top Tips for Perfecting Your Blueberry Pie
I’ve made this blueberry pie more times than I can count, and over the years, I’ve picked up a few tricks that really make a difference. For the blueberries, if you’re using fresh ones, give them a gentle rinse and pat them dry. If you’re using frozen, like I often do in the off-season, don’t let them thaw completely; just break up any huge clumps. This helps them cook evenly and prevents a watery filling. When you’re mixing the pie crust, remember that cold is your best friend! Cold butter, cold water, and even cold hands (try chilling your hands in ice water for a minute before you start) will give you the flakiest crust. Don’t be tempted to overmix the dough once you add the water; just mix until it *barely* comes together. Overmixing develops the gluten too much and can make your crust tough. For the filling, letting it sit for a few minutes after mixing the ingredients allows the cornstarch or flour to start absorbing some of the berry juices, which is a subtle but important step in achieving that perfect, jammy consistency. When you’re rolling out the dough, if it starts to get sticky, don’t add too much extra flour; just pop it back in the fridge for a few minutes to firm up. Trust me on this one! And remember, that long cooling period after baking is non-negotiable. Patience is key to a sliceable, delicious pie. If you find your berries are super tart, you can always add an extra tablespoon of sugar, but taste them first! Sometimes, a really good quality cornstarch can make a noticeable difference in the thickening power and clarity of the filling.
Storing and Reheating Tips
One of the best things about this blueberry pie is that it keeps relatively well, making it perfect for leftovers (if you’re lucky enough to have any!). At room temperature, a covered pie will generally be good for about 2 days. Just make sure it’s completely cooled before covering it with plastic wrap or a pie dome. For longer storage, the refrigerator is your best bet. Wrap the cooled pie tightly in plastic wrap or place it in an airtight container. It should stay delicious in the fridge for about 4-5 days. When you’re ready to enjoy a slice from the fridge, you can eat it cold, or you can gently reheat it. I like to pop a slice in a moderate oven (around 300°F or 150°C) for about 10-15 minutes until it’s warmed through. This brings back that lovely texture. If you want to freeze the pie, make sure it’s completely cooled first. Wrap it very well in several layers of plastic wrap, followed by a layer of aluminum foil. It can stay in the freezer for up to 2-3 months. To thaw, remove the foil and plastic wrap and let it thaw at room temperature for a few hours, or overnight in the refrigerator. If you freeze it before glazing (if you added one), reapply any glaze once thawed. For this recipe, the natural fruit juices are the “glaze,” so you won’t need to worry about that.
Frequently Asked Questions
Final Thoughts
There you have it – my absolute favorite blueberry pie recipe! It’s a recipe that brings me so much joy, and I truly hope it brings you the same. It’s more than just a dessert; it’s an experience, a little slice of summer goodness that can brighten any day. The combination of that tender, flaky crust and the bursting, sweet-tart blueberry filling is just perfection. If you love this recipe, you might also enjoy my recipe for [Link to another relevant recipe, e.g., Classic Apple Pie] or my [Link to another relevant recipe, e.g., Mixed Berry Crumble]. Both offer that same comforting, homemade feel. I can’t wait to hear how your blueberry pie turns out! Please leave a comment below and share your thoughts, or even your own special tips. Happy baking, everyone!

Classic Blueberry Pie
Ingredients
For the Crust
- 2.5 cups all-purpose flour
- 1 teaspoon salt
- 1 cup unsalted butter, cold and cubed
- 0.5 cup ice water
For the Blueberry Filling
- 6 cups fresh blueberries
- 0.75 cup granulated sugar
- 0.25 cup cornstarch
- 1 tablespoon lemon juice
- 0.5 teaspoon ground cinnamon
- 1 tablespoon unsalted butter, cut into small pieces
For the Egg Wash
- 1 egg beaten
- 1 tablespoon milk
Instructions
Preparation Steps
- In a large bowl, whisk together flour and salt.
- Cut in the cold butter with a pastry blender or your fingers until the mixture resembles coarse crumbs with some pea-sized pieces of butter remaining.
- Gradually add ice water, 1 tablespoon at a time, mixing until the dough just comes together. Do not overmix.
- Divide the dough in half, flatten each half into a disk, wrap in plastic wrap, and refrigerate for at least 30 minutes.
- In a separate bowl, combine blueberries, sugar, cornstarch, lemon juice, and cinnamon. Toss gently to coat.
- Preheat oven to 400°F (200°C).
- On a lightly floured surface, roll out one disk of dough into a 12-inch circle. Carefully transfer it to a 9-inch pie plate. Trim the edges, leaving about a 1-inch overhang.
- Pour the blueberry filling into the pie crust. Dot the top with the small pieces of butter.
- Roll out the second disk of dough. You can either place it as a full top crust (cutting vents) or cut it into strips for a lattice top.
- Place the top crust over the filling. Crimp the edges of the top and bottom crusts together to seal. If using a full top crust, cut slits in the top for steam to escape.
- In a small bowl, whisk together the beaten egg and milk. Brush this egg wash over the top crust.
- Bake for 20 minutes at 400°F (200°C). Then, reduce the oven temperature to 375°F (190°C) and bake for another 30-35 minutes, or until the crust is golden brown and the filling is bubbly. If the crust starts to brown too quickly, tent it with foil.
- Let the pie cool completely on a wire rack for at least 3-4 hours before slicing and serving. This allows the filling to set properly.