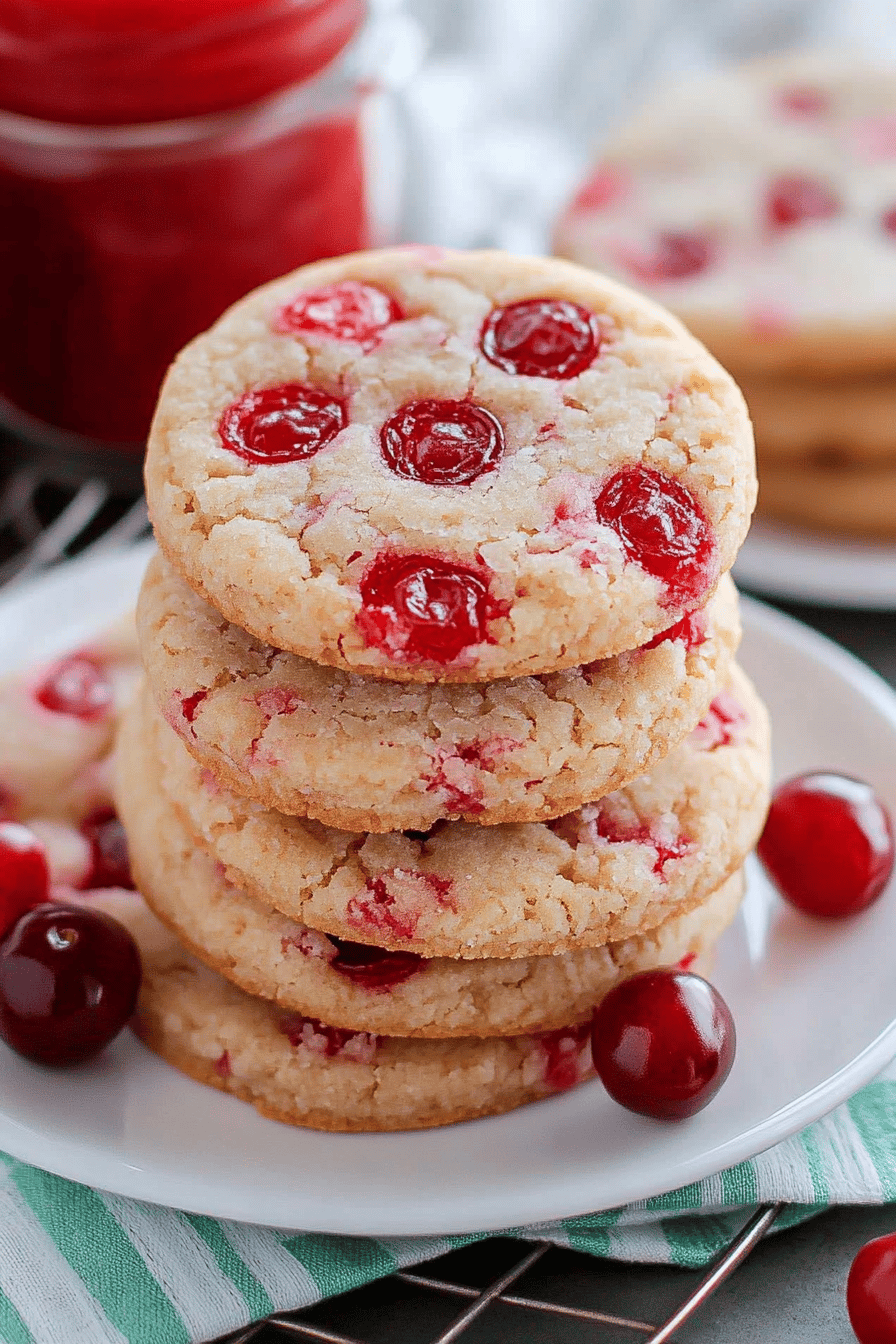
Berry Oatmeal Cookies How to Bake Them
There’s something about the smell of freshly baked oatmeal cookies wafting through the house that instantly takes me back to cozy afternoons at my grandmother’s kitchen table. She always had a special way of turning simple ingredients into magic, and her raspberry oatmeal cookies were hands-down my favorite. They’re not your typical cookie—they have this perfect balance of chewy oats, tart raspberries bursting with flavor, and just the right hint of sweetness that feels like a warm hug on a plate. Honestly, if you love oatmeal raisin cookies but want to shake things up with a fresh twist, these raspberry oatmeal cookies might just become your new obsession. The tartness of the berries cuts through the chewiness in the best way, making every bite a little adventure. Trust me, I’ve baked these dozens of times, and the kids devour them faster than I can pack the tray—every single time.
What is Raspberry Oatmeal Cookies?
Think of raspberry oatmeal cookies as your classic oatmeal cookie’s vibrant cousin. They’re essentially soft, chewy cookies loaded with oats, but instead of the usual raisins or chocolate chips, they’re studded with fresh or frozen raspberries that add juicy bursts of tartness. The oats give them that hearty, rustic texture that’s comforting and filling, while the raspberries bring a pop of color and brightness that feels fresh and unexpected. The name just comes from the core ingredients—oats and raspberries—which together create a kind of cookie that doesn’t feel too heavy but manages to be incredibly satisfying. They’re approachable to bake at home, even if you’ve never worked with fruit in cookies before. I always tell friends that they’re basically little fruit-and-oatmeal snacks disguised as treats!
Why you’ll love this recipe?
Here’s what makes these raspberry oatmeal cookies a keeper in my recipe binder: First off, the flavor is just incredible. You get the earthiness of the oats with the rich warmth of cinnamon and vanilla in the background, then BAM—the raspberries hit your tongue with a fresh, slightly tart sweetness that totally balances the cookie. No cloying sugar overload here, just a natural kind of sweetness that feels thoughtful and homey. What I love most about this recipe though is how easy it is to throw together. I’m serious—it’s mostly about mixing wet ingredients with dry, folding in oats and berries, and popping them in the oven. No fancy equipment or ingredients, which makes it a total lifesaver on busy nights when I want dessert but don’t want to fuss.
Also, it’s surprisingly budget-friendly. Oats and frozen raspberries don’t break the bank, especially if you buy the berries in bulk and freeze them yourself like I do. And versatility? Oh yes! These cookies are great fresh, but you can also freeze the dough for quick baking later or add extra mix-ins like nuts or white chocolate chips for some fun variety. If you’re a fan of my blueberry muffins or classic chocolate chip oatmeal cookies, you’ll find this recipe sits right in that same happy place of comfort food that feels both homemade and a little fancy. It’s the one I bring out whenever I want to impress friends with minimal effort but maximum flavor. Honestly, it’s become a family staple in my house, and the little smiles when they come fresh out of the oven—well, that’s the best part.
How do I make Raspberry Oatmeal Cookies?
Quick Overview
Making these raspberry oatmeal cookies is refreshingly straightforward. You start by prepping your dry ingredients separately, then whisk the wet ingredients until smooth and creamy. The oats and raspberries fold in gently—this part’s crucial because you want to keep those berries intact for juicy little pockets of flavor. The batter goes onto a baking sheet in scoops, then into the oven for a short, perfect bake that leaves them chewy on the inside and lightly golden on the edges. Cool them just right, glaze if you like, slice up, and you’re done. This method makes the process feel quick and fun, especially if you’re baking with kids or just need a comforting project after a long day.
Ingredients
For the Main Batter:
- 1 cup rolled oats – use old-fashioned oats for that chewy texture. Avoid quick oats, as they get mushy.
- 1 cup all-purpose flour – stick to a good quality flour for the best rise and texture.
- ½ teaspoon baking soda – helps give a slight lift but don’t overdo it.
- ½ teaspoon ground cinnamon – adds just the right hint of warmth.
- ¼ teaspoon salt – balances the sweetness.
- ½ cup unsalted butter, softened – I always let mine sit at room temp overnight for easy mixing.
- ½ cup brown sugar, packed – for that deep, caramel-like sweetness.
- ¼ cup granulated sugar – balances the brown sugar and adds a little crunch in spots.
- 1 large egg – the binder that keeps everything together.
- 1 teaspoon vanilla extract – gives a cozy, comforting aroma.
- 2 tablespoons milk (any kind) – I’ve tested with almond milk, and it actually makes the cookies creamier!
For the Filling:
- 1 cup fresh or frozen raspberries – if using frozen, don’t thaw to avoid sogginess.
- 2 tablespoons cornstarch – this helps keep the raspberries from making the cookies too wet.
- 2 tablespoons granulated sugar – balances the tartness of the berries.
For the Glaze:
- 1 cup powdered sugar – for sweetness and smooth texture.
- 2 tablespoons fresh raspberry juice or milk – adjust for consistency.
- ½ teaspoon lemon zest (optional) – adds a fresh zing that brightens the glaze.
Step-by-Step Instructions
Step 1: Preheat & Prep Pan
Preheat your oven to 350°F (175°C). Line a baking sheet with parchment paper or a silicone baking mat to prevent sticking. I always place my rack in the center of the oven to get even baking—keeps the cookies from browning too fast or unevenly. While the oven warms, you can get everything else ready.
Step 2: Mix Dry Ingredients
In a medium bowl, whisk together the flour, oats, baking soda, cinnamon, and salt until evenly combined. This little step helps the cookies bake up evenly and distributes the aromas and rising agents. I learned the hard way that skipping this mix can result in odd clumps of flour or uneven baking.
Step 3: Mix Wet Ingredients
In a large bowl, beat the softened butter with both sugars until creamy and fluffy—this usually takes a few minutes by hand or less with a mixer. Add the egg and vanilla extract, mixing well until everything is smooth and glossy. Stir in the milk—this keeps the batter moist and tender but don’t add too much or it’ll get runny.
Step 4: Combine
Pour the dry ingredient mixture into the wet ingredients and gently fold together. Don’t overmix here; a few streaks of flour are okay. The key is to maintain a tender texture and not develop too much gluten, which makes cookies tough. If you’ve ever had dense oatmeal cookies, it’s usually because of too much mixing.
Step 5: Prepare Filling
In a small bowl, toss the raspberries with cornstarch and sugar until coated evenly. This seals the berries and prevents them from leaking too much juice in the oven, which can make the cookie dough too wet. If you want, you can also swap cornstarch for arrowroot powder—whatever you have on hand!
Step 6: Layer & Swirl
Scoop half the batter on your baking sheet in evenly spaced mounds. Dot the berry filling over the dough, then add the remaining batter on top. Using the back of a spoon or a small knife, gently swirl the layers just enough to create pretty marbling of dough and raspberries. This little swirl makes every cookie look so inviting, like a mini work of art—plus, it guarantees a raspberry in almost every bite!
Step 7: Bake
Bake the cookies for 12-15 minutes or until the edges start turning golden and the centers look set but still soft. Ovens vary, so I always test for doneness by giving a gentle poke—if it springs back slightly, it’s ready. Sometimes I take them out a minute or two early because I love a soft, chewy center more than crisp edges. It’s all about personal preference.
Step 8: Cool & Glaze
Let the cookies cool on the sheet for about 5 minutes before transferring to a wire rack. If you’re glazing, wait until they’re mostly cooled to avoid melting it all off. Whisk the powdered sugar with raspberry juice (or milk) and lemon zest until smooth and drizzle on top. I like to do this with a small fork or spoon to create delicate, thin lines that dry quickly. It just ups their charm factor tenfold.
Step 9: Slice & Serve
These cookies are best served slightly warm or at room temperature. They hold together nicely so you can stack them on a plate or in a tin. If you want to get fancy, add a little dollop of whipped cream or a scoop of vanilla ice cream on the side. The contrast of the chewy cookie, tart berries, and creamy ice cream is pure paradise in every bite.
What to Serve It With
For Breakfast: Raspberry oatmeal cookies paired with a steamy cup of coffee or a latte make a sweet, satisfying start to the day. Serve alongside fresh fruit or Greek yogurt to balance the sweetness and keep things fresh.
For Brunch: Plate these cookies on a pretty tray with fresh berries and a light, sparkling mimosa or iced tea. Their rustic charm contrasts beautifully with elegant brunch staples like quiche or frittata.
As Dessert: Serve these cookies warm with a scoop of vanilla or raspberry sorbet and a drizzle of honey. A cup of chamomile tea or dessert wine rounds out a cozy after-dinner treat.
For Cozy Snacks: Nothing beats whipping these up on a rainy afternoon. Serve with a big mug of hot chocolate or chai, and maybe curl up with a good book. In my house, these are the go-to “I need a little pick-me-up” snack, especially on school days or lazy weekends.
We’ve made this recipe a special part of our family weekends—sometimes pack them in lunches or bring to bake sales. Pairing them with homemade lemon curd or cream cheese spreads turns these humble cookies into a mini feast! Honestly, it’s that kind of recipe that feels effortless but feels like you put in all the love.
Top Tips for Perfecting Your Raspberry Oatmeal Cookies
Oats Selection: I always use rolled oats because quick oats tend to lose their chew and can make the cookie crumbly. If you want a heartier bite, try old-fashioned oats but give them a light pulse in a food processor for finer texture.
Mixing Advice: Don’t overdo it when folding in the dry ingredients. Mixing too much develops the gluten and makes cookies tough. I learned this the hard way years ago when my cookies turned out dense and rubbery—ugh! Just fold gently until the last specks of flour disappear.
Swirl Customization: Play with how much you swirl the raspberries. A little swirl looks pretty, but too much mixing breaks the fruit and colors the whole dough pink. If you like a more marbled look, less is more. For even distribution, sometimes I mix some berries directly into the batter too.
Ingredient Swaps: If you’re out of butter, coconut oil works well but expect a slightly different texture and flavor. For milk, any dairy or plant-based option works—almond milk gives a subtle nutty note that’s surprisingly nice here. For gluten-free, a mix of oat and almond flour can do the trick, but check the FAQ below.
Baking Tips: Every oven is a little different, so keep an eye on your cookies after the 10-minute mark. If your oven runs hot, lower the temperature to 325°F and add a couple minutes to the baking time. I always bake one test cookie first when trying a new oven to avoid disasters!
Glaze Variations: Feel free to add lemon juice to the glaze for brightness or swap raspberry juice with orange juice for a different zing. For a thicker glaze, add less liquid; for a drizzle, thin it out more. Occasionally, I skip the glaze and dust with powdered sugar instead—it’s lighter but still lovely.
I once made the rookie mistake of mixing the fresh raspberries too aggressively—ended up with pink dough everywhere and soggy cookies. Now I’m much gentler, and the berries keep that burst of fresh flavor and beautiful color every time. Trust me on this one, handling the berries with care is key!
Storing and Reheating Tips
Room Temperature: Store your raspberry oatmeal cookies in an airtight container for up to 3 days. I recommend adding a slice of bread in the container to keep them moist—it’s an old trick that really works. Keep them away from direct sunlight or heat to preserve their flavor and texture.
Refrigerator Storage: You can refrigerate cookies in a sealed container for up to a week. When chilled, the oatmeal flavor deepens, but the cookies firm up a bit. Bring them back to room temp or warm slightly in the microwave for that freshly-baked softness.
Freezer Instructions: These cookies freeze beautifully. Wrap them individually in plastic wrap, then store them in a freezer-safe bag for up to 3 months. When you want one, just thaw on the counter or microwave for 15 seconds. For dough, scoop onto a tray, freeze until firm, then transfer to a bag—bake fresh cookies whenever the craving hits!
Glaze Timing Advice: If you’re freezing or refrigerating, it’s best to add the glaze right before serving so it doesn’t get sticky or soggy. The glaze dries quickly anyway, so it’s easy to do last minute and gives a nice fresh look.
I’ve always found that slightly warming the cookies after storage really revives their charm. It’s like a little reminder of that fresh-out-of-the-oven glow.
Frequently Asked Questions
Final Thoughts
This raspberry oatmeal cookie recipe is one of those little treasures that’s stood the test of time in my kitchen. What keeps bringing me back to it is the balance of hearty oats with the bright, fresh taste of raspberries—like catching a sunbeam in cookie form. Every time I bake these, the smell alone pulls the family into the kitchen, hungry and smiling. If you love recipes that feel like a hug in food and are easy enough to whip up on the spur of the moment, this is definitely one to bookmark and share. I’m always excited to hear how people make it their own, whether that’s adding chocolate chips, switching up the glaze, or turning it into muffins. So go ahead—give it a try, and don’t be surprised if it disappears in minutes at your house too. Happy baking, and can’t wait to hear how your raspberry oatmeal cookies turn out!