basic quiche recipe
Oh, hello there! Come on in, grab a mug. You know, some days you just need something comforting, something that feels like a warm hug from the inside out. For me, that’s always a good quiche. Not just any quiche, though – we’re talking about a truly basic quiche recipe that’s so reliable, so utterly delicious, it’s become my go-to for everything from busy weeknight dinners to fancy brunches with friends. It reminds me of my grandma’s kitchen, always filled with the most incredible aromas, and honestly, this simple quiche recipe is a direct descendant of her magic. It’s the kind of dish that feels like a treat, but is surprisingly straightforward to make, proving that you don’t need to be a pastry chef to create something spectacular. If you’ve ever felt intimidated by quiche, or just looking for that perfect, no-fuss recipe, you’ve landed in the right spot. Trust me, this basic quiche recipe is about to become your new best friend.

What is a basic quiche recipe?
So, what exactly *is* a basic quiche recipe? At its heart, it’s a savory tart filled with a creamy custard made from eggs and milk or cream, baked in a pastry crust. Think of it as a delightful canvas for whatever goodies you have on hand! The name “quiche” itself comes from the German word “Kuchen,” meaning cake, which I always thought was charming. It’s essentially a French country-style dish that’s become a global favorite because of its incredible versatility and satisfying nature. This isn’t some fussy, complicated French patisserie item; it’s down-to-earth, delicious, and wonderfully forgiving. It’s the kind of food that makes a house feel like a home, filling the air with a scent that just screams “cozy” and “delicious.” It’s approachable, adaptable, and oh-so-rewarding to make.
Why you’ll love this recipe?
Honestly, there are so many reasons I keep coming back to this basic quiche recipe, and I just know you’re going to fall in love with it too. First off, the flavor! It’s this perfect balance of creamy, eggy goodness with a hint of savory deliciousness that just hits the spot every single time. It’s not overpoweringly rich, but it’s definitely satisfying. And the crust? Oh, it’s wonderfully flaky and buttery, providing the perfect foundation. Beyond the taste, though, is the sheer simplicity of it all. I’ve made fancy quiches that required pre-baking crusts for ages and complicated fillings, but this one? It’s a lifesaver on busy nights. You can whip it up with minimal effort, and the results are always impressive. Plus, it’s incredibly cost-effective. Eggs, milk, a bit of cheese, maybe some leftover veggies – suddenly you’ve got a meal that feels gourmet without breaking the bank. What I love most, though, is its amazing versatility. It’s not just for one meal or one occasion. This basic quiche recipe is perfect for breakfast, a light lunch, a hearty dinner, or even a delightful brunch. It’s a recipe I’ve shared with friends who are just starting out in the kitchen, and they always have such success with it. It’s the kind of recipe that builds confidence and brings joy. If you’ve ever made my Simple Lemon Herb Roasted Chicken, you’ll appreciate the same kind of effortless elegance this quiche offers.
How do I make [Recipe Name]?
Quick Overview
Making this basic quiche recipe is surprisingly straightforward. You’ll whisk together a simple, creamy custard, fold in your favorite fillings, pour it into a pre-made or homemade pie crust, and bake until it’s golden and set. The beauty is in its simplicity; it’s a method that guarantees a tender, flavorful result every time without a fuss. It’s honestly one of those recipes you can get a bit creative with once you’ve mastered the basics.
Ingredients
For the Main Batter:
4 large eggs: These are the backbone of our creamy custard. Make sure they’re fresh for the best flavor and texture!
1 ½ cups whole milk (or half-and-half for extra richness): Whole milk gives it a lovely, creamy consistency without being too heavy. If you’re feeling decadent, half-and-half is a fantastic upgrade!
½ teaspoon salt: Essential for bringing out all the flavors.
¼ teaspoon Black Pepper: Freshly ground is always best if you have it.
Pinch of nutmeg (optional, but highly recommended!): This little addition makes a world of difference, adding a subtle warmth that complements the eggs beautifully. You won’t taste it directly, but it rounds out the flavor profile.
For the Filling:
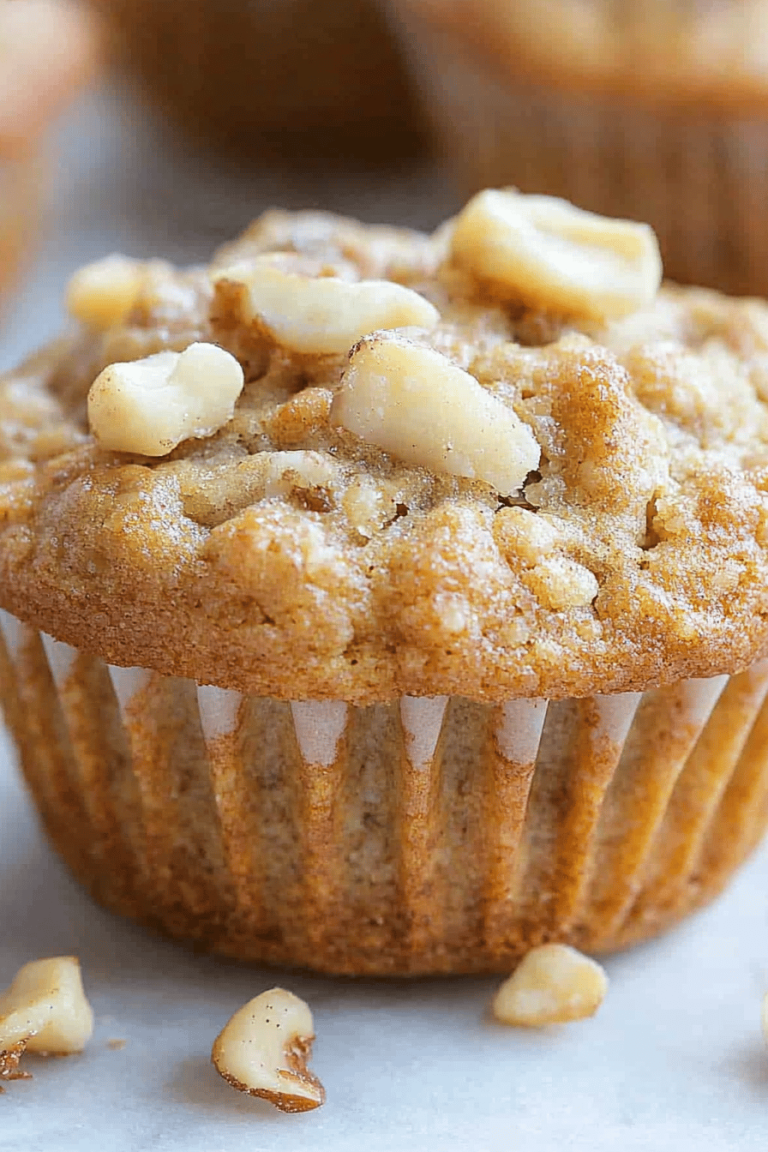
1 ½ cups shredded cheese: I usually go for a mix of Gruyère and sharp cheddar, but use whatever you love! Monterey Jack, Swiss, or even a good Provolone works wonderfully.
1 cup of your chosen cooked ingredients: This is where the magic happens! Think sautéed mushrooms, caramelized onions, wilted spinach, crumbled cooked bacon or ham, diced roasted peppers, or even some steamed broccoli florets. Just make sure they’re cooked and not too watery!
1 unbaked 9-inch pie crust: You can absolutely use store-bought for convenience, or if you’re feeling ambitious, a homemade flaky pie crust takes it to the next level. Just make sure it’s ready to go!
For the Glaze:
1 tablespoon unsalted butter, melted: This gives the crust a lovely golden sheen and a bit of extra flavor.

Step-by-Step Instructions
Step 1: Preheat & Prep Pan
First things first, let’s get our oven ready. Preheat it to 375°F (190°C). While the oven is heating up, gently place your unbaked pie crust into a 9-inch pie plate. If you’re using a standard store-bought crust, it usually comes already in a foil pan, which is perfectly fine! Just make sure it’s pressed nicely into the plate. If you’re using a homemade crust, crimp the edges decoratively – it looks so pretty when it comes out! You don’t need to pre-bake it for this basic quiche recipe; the oven temperature is just right to cook the crust and filling together.
Step 2: Mix Dry Ingredients
Grab a medium-sized bowl. We’re going to combine our salt, pepper, and that optional pinch of nutmeg right here. Give them a little whisk to make sure they’re evenly distributed. This simple step ensures that your seasonings are spread out beautifully throughout the quiche and don’t clump up in one spot. It’s amazing how much of a difference these small details make!
Step 3: Mix Wet Ingredients
In a separate, larger bowl, crack your four large eggs. Whisk them until they’re just combined and slightly frothy. Then, pour in your milk (or half-and-half). Whisk again until everything is smooth and well incorporated. You want a nice, uniform liquid. This is the base of our glorious custard!
Step 4: Combine
Now, pour the dry ingredients into the wet ingredients bowl. Give it a gentle whisk until everything is just combined. The key here is not to overmix! We’re not making a Cake Batter; we want to keep it light and airy. Just a few stirs until you don’t see any streaks of egg or spice is perfect. Overmixing can lead to a tougher quiche, and we definitely don’t want that.
Step 5: Prepare Filling
This is where you get to play! If you’re using ingredients like sautéed mushrooms, onions, or wilted spinach, make sure they are cooked and, importantly, any excess moisture has been squeezed out or drained away. Soggy fillings mean a soggy quiche, and nobody wants that. Sprinkle your shredded cheese evenly over the bottom of your unbaked pie crust. Then, scatter your chosen cooked fillings over the cheese. This layering helps distribute the flavors beautifully throughout the quiche.
Step 6: Layer & Swirl
Carefully pour the egg mixture over the cheese and filling in the pie crust. Try to pour it evenly so that the ingredients are submerged. You can gently tilt the pie plate to help distribute the liquid if needed. If you’re feeling fancy, you can reserve a little cheese to sprinkle on top before baking, or even swirl in a bit of pesto or a dollop of Sour Cream for some visual flair. For this basic quiche recipe, though, just filling it evenly is perfect!
Step 7: Bake
Time for the oven! Carefully place the quiche on a baking sheet (this helps catch any potential drips and makes it easier to handle). Bake for 35-45 minutes, or until the center is just set and the top is golden brown. You can test for doneness by gently wiggling the pie plate; the edges should be set, and the center should have a slight jiggle, like a delicate pudding. If the crust edges start to brown too quickly, you can always loosely tent them with foil.
Step 8: Cool & Glaze
Once it’s beautifully golden and set, carefully remove the quiche from the oven. Let it cool on a wire rack for at least 10-15 minutes before slicing. This is crucial! It allows the custard to finish setting up properly, making for much cleaner slices. While it’s still warm, gently brush the top crust with the melted butter. This gives it a lovely sheen and a little extra flavor boost.
Step 9: Slice & Serve
And there you have it! Your gorgeous, homemade basic quiche recipe is ready to be enjoyed. For the cleanest slices, use a sharp knife. Serve it warm or at room temperature. It’s absolutely divine on its own, or with a simple side salad.
What to Serve It With
This basic quiche recipe is a chameleon when it comes to serving, making it a total star for any meal. For a cozy breakfast, I love pairing a slice with a hot cup of coffee and maybe some fresh berries. The warmth and savory notes of the quiche are just the perfect start to the day. If you’re hosting brunch, this is where it really shines. Serve it with a side of crisp greens tossed in a light vinaigrette, some crusty bread, and perhaps a mimosa or a Bloody Mary. It feels so elegant, but it’s so easy to have on hand. As a light dinner, it’s wonderful with a big, fresh salad. I often make a simple mixed green salad with a lemon-Dijon dressing, which cuts through the richness of the quiche beautifully. And for those moments when you just need a satisfying snack, a room-temperature slice of this quiche is pure comfort. My kids especially love it cold straight from the fridge the next morning – a true testament to how universally appealing it is!
Top Tips for Perfecting Your [Recipe Name]
Over the years, I’ve picked up a few little tricks that help make this basic quiche recipe absolutely perfect every single time. For the fillings, the biggest tip I can give you is to manage moisture. If you’re using vegetables like spinach or mushrooms, give them a really good squeeze or drain them thoroughly after cooking. Excess water is the enemy of a good, firm quiche custard. For mixing the batter, remember that gentleness is key. We’re not looking for a super smooth, homogenous blend like you might want for pancakes. Just a few stirs to combine the wet and dry ingredients is all it takes to avoid a rubbery texture. Think of it like coaxing the ingredients together, not forcing them. When it comes to the crust, if you’re using a store-bought one and it seems a bit thin, or you’re worried about it getting soggy, you can always blind bake it for about 8-10 minutes before adding the filling. This pre-bakes it slightly and ensures a crispier bottom. I don’t always do this for a basic quiche recipe, but it’s a great trick if you’re using a very moist filling or want extra crispiness. Ingredient swaps are totally your friend here! Don’t have Gruyère? Use cheddar. No bacon? Ham or even some smoked salmon (added at the end of cooking the eggs) works wonders. If you’re out of whole milk, a 50/50 mix of milk and heavy cream is divine. I’ve even tested this with almond milk in a pinch, and while it’s a bit less rich, it still works! For baking, oven temperatures can vary, so keep an eye on your quiche. If the crust starts to get too dark before the center is set, loosely tent the edges with foil. The jiggle test for doneness is my absolute favorite – it’s so much more reliable than just a timer. For the glaze, a little goes a long way; you just want a light brush for that beautiful sheen.
Storing and Reheating Tips
One of the best things about this basic quiche recipe is how well it stores and reheats. If you have any leftovers (which is rare in my house!), you can absolutely leave it at room temperature for up to two hours. After that, it’s best to get it into the refrigerator. To store it, let the quiche cool completely, then cover it tightly with plastic wrap or transfer it to an airtight container. It will stay fresh and delicious in the fridge for about 3 to 4 days. When you’re ready to enjoy it again, you have a few options. For a warm slice, you can reheat it in a moderate oven (around 300°F or 150°C) for about 10-15 minutes, or until heated through. This is my preferred method as it keeps the crust nice and flaky. Alternatively, you can reheat individual slices in the microwave, though the crust might soften a bit. For freezing, let the quiche cool completely, then wrap it tightly in plastic wrap followed by a layer of aluminum foil, or place it in a freezer-safe container. It can be frozen for up to 2-3 months. To thaw, transfer it to the refrigerator overnight and then reheat as usual. I usually add the glaze right before serving if I’ve reheated a slice, or just leave it off if I know it’s going into storage to prevent it from getting sticky.
Frequently Asked Questions
Final Thoughts

So there you have it, my friends – a truly basic quiche recipe that I hope will become as cherished in your kitchen as it is in mine. It’s a testament to how simple ingredients, treated with a little care, can create something truly magical. It’s the kind of dish that brings people together, making everyday meals feel a little more special. I’ve shared this with so many of you, and the joy I get from hearing about your successful bakes and your creative filling combinations is immeasurable. If you loved this recipe, you might also enjoy my Easy Frittata Recipe or my Ultimate Savory Tart, which share that same spirit of delicious simplicity. I can’t wait to hear how your quiche turns out, so please leave a comment below and share your favorite filling combinations or any twists you’ve added! Happy baking, and more importantly, happy eating!

Basic Quiche Recipe
Ingredients
Crust
- 1 pre-made pie crust pie crust
Filling
- 4 large eggs eggs
- 2 cups heavy cream
- 0.5 teaspoon salt
- 0.25 teaspoon black pepper
- 0.125 teaspoon nutmeg optional
- 1 cup shredded cheese e.g., Gruyere, Swiss, or Cheddar
- 1 cup cooked and crumbled bacon or ham, sausage, or sauteed vegetables
Instructions
Preparation Steps
- Preheat your oven to 375°F (190°C).
- Place the pie crust on a baking sheet. If using a raw crust, you may want to blind bake it for 10-15 minutes according to package directions to prevent a soggy bottom.
- In a medium bowl, whisk together the eggs, heavy cream, salt, pepper, and nutmeg (if using) until well combined.1 pre-made pie crust pie crust
- Sprinkle half of the shredded cheese and half of the cooked bacon (or other filling) evenly over the bottom of the prepared pie crust.1 pre-made pie crust pie crust
- Pour the egg mixture over the cheese and bacon.
- Top with the remaining cheese and bacon.1 pre-made pie crust pie crust
- Bake for 40-50 minutes, or until the center is set and the top is golden brown. If the crust edges start to brown too quickly, you can cover them with foil.
- Let the quiche cool for at least 10 minutes before slicing and serving.