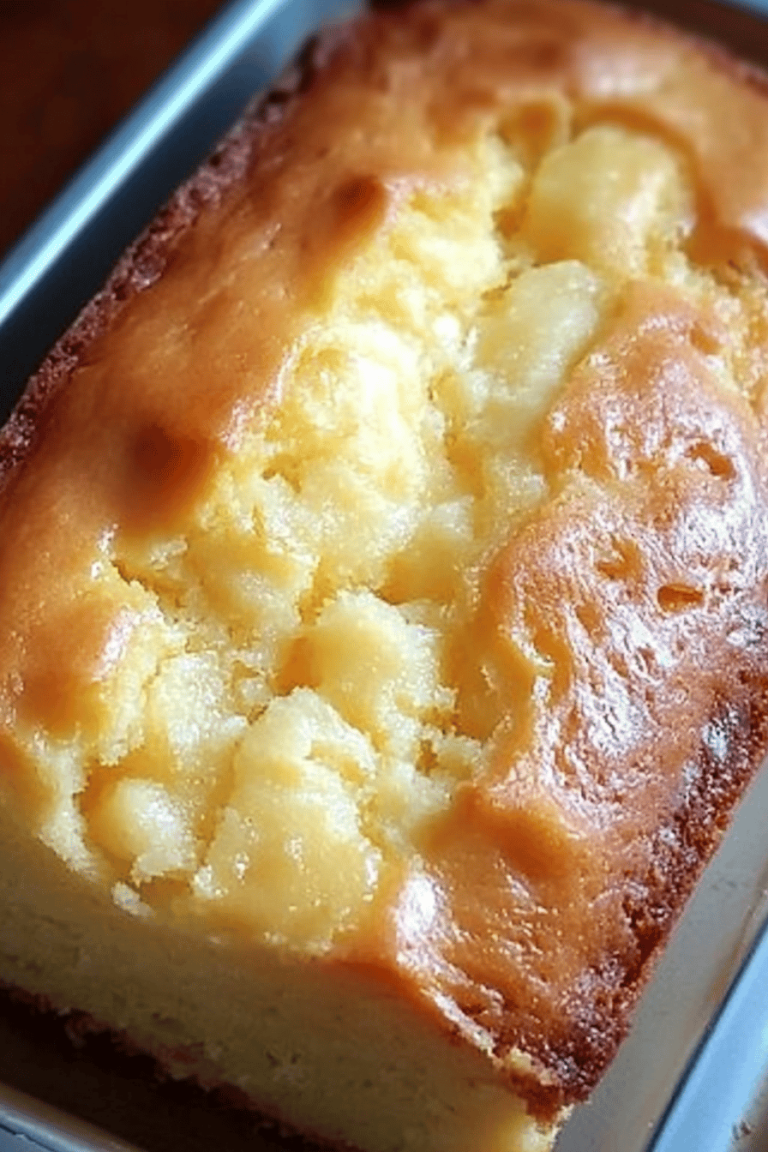
banana nut bread
Oh, banana nut bread. Just the name brings back a flood of memories, doesn’t it? For me, it’s the smell that instantly transports me back to my grandmother’s kitchen on a chilly autumn afternoon. She’d always have a loaf cooling on the wire rack, and the scent of ripe bananas, warm cinnamon, and toasty nuts would fill every nook and cranny. It was pure magic. This isn’t just any banana nut bread, though. This is the recipe that has become a staple in my own home, the one my kids practically beg for when they see those overripe bananas sitting on the counter. It’s incredibly moist, packed with flavor, and has just the right amount of crunch from the walnuts. If you’ve ever had a disappointing, dry, or bland Banana Bread, forget all about it. This one’s a lifesaver on busy mornings, a perfect afternoon pick-me-up, and honestly, it’s even good enough to serve as a simple, comforting dessert. It’s similar in spirit to a good spice cake, but with that undeniable, comforting banana sweetness that just makes everything better.
What is banana bread?
So, what exactly is Banana Nut bread? Think of it as the ultimate comfort food in loaf form. It’s essentially a quick bread, meaning it uses chemical leaveners like baking soda and baking powder instead of yeast, so you don’t have to wait for it to rise. The star of the show, of course, is the banana. The riper the banana, the more intense and sweet the flavor, and the more moisture it adds to the bread. We then fold in chopped nuts – usually walnuts or pecans – for that delightful little crunch and nutty aroma. It’s this simple combination that creates something so wonderfully satisfying. It’s not a cake, though it’s sweet enough for dessert, and it’s not quite a muffin, but it has that same cozy, homemade goodness. The “nut” part is key for me; it adds a textural contrast that makes every bite interesting. It’s straightforward, deeply satisfying, and just plain delicious.
Why you’ll love this recipe?
There are so many reasons why I’m absolutely obsessed with this banana nut bread, and I just know you will be too! First off, the flavor is just out of this world. It’s this beautiful symphony of sweet, ripe banana, warm spice from the cinnamon, and the toasty, rich notes from the walnuts. It’s not cloyingly sweet, but perfectly balanced, making it a joy to eat. What I love most about this recipe is how incredibly simple it is to whip up. Seriously, you can have this mixed and in the oven in about 15 minutes flat. It’s one of those recipes that’s a lifesaver on busy weeknights when you need a quick treat or a comforting breakfast. And let’s talk about cost-efficiency – the ingredients are all pantry staples, and using up those overripe bananas is a fantastic way to reduce food waste. It’s incredibly versatile, too. I often enjoy a slice plain with my morning coffee, but it’s also fantastic toasted with a smear of butter, or even warmed up with a dollop of whipped cream for a more decadent dessert. Compared to other baked goods, this one strikes a perfect balance between being a humble, everyday treat and something special enough to share. My family devours it, and the praise I get when I pull a warm loaf out of the oven is always so rewarding.
How do you make banana bread?
Quick Overview
Making this banana nut bread is surprisingly straightforward. You’ll mash your ripe bananas, whisk together your dry ingredients, mix your wet ingredients, combine them gently, fold in the nuts, and then bake until golden and fragrant. The beauty of this recipe lies in its simplicity and the minimal fuss involved. You don’t need any fancy equipment, just a couple of bowls and a whisk. It’s designed for maximum flavor and moisture with minimum effort, making it perfect for bakers of all levels. Trust me, even if you’re new to baking, you’ll nail this one.
Ingredients
For the Main Batter:
* 3 large, very ripe bananas, mashed (about 1 ½ cups)
* *Tip:* The spottier and browner, the better! Those are the sweetest and add the most moisture. If your bananas aren’t quite ripe enough, you can speed up the process by baking them on a baking sheet at 300°F (150°C) for about 15-20 minutes until they turn dark and soft.
* ½ cup (1 stick) unsalted butter, melted
* *Quality Tip:* Good quality butter makes a difference in richness and flavor.
* ½ cup granulated sugar
* *Sourcing:* Regular granulated sugar works perfectly here for that classic sweetness.
* ¼ cup packed light Brown Sugar
* *Flavor Boost:* Brown sugar adds a lovely caramel note that complements the banana beautifully.
* 2 large eggs, at room temperature
* *Tip:* Room temperature eggs incorporate more easily into the batter, leading to a more uniform texture.
* 1 teaspoon vanilla extract
* *Sensory Cue:* Pure vanilla extract has a much richer aroma and flavor than imitation.
* 1 ½ cups all-purpose flour
* *Tip:* Spoon and level your flour into the measuring cup rather than scooping directly from the bag to avoid packing it in.
* 1 teaspoon baking soda
* *Crucial Leavener:* Make sure your baking soda is fresh! Old baking soda won’t give you that lift.
* ½ teaspoon salt
* *Flavor Enhancer:* Salt balances the sweetness and brings out the other flavors.
* ½ teaspoon ground cinnamon
* *Warmth and Spice:* A little cinnamon goes a long way to add that cozy aroma.
* ¼ teaspoon ground nutmeg (optional)
* *Depth:* Nutmeg adds a subtle warmth that I adore, but it’s optional if you’re not a fan.
For the Filling:
* 1 cup chopped walnuts or pecans
* *Preparation:* Toasting your nuts for a few minutes in a dry skillet or in the oven brings out their flavor and makes them extra crunchy. Let them cool completely before chopping and adding.
* 2 tablespoons granulated sugar
* 1 teaspoon ground cinnamon
For the Glaze (Optional, but highly recommended!):
* ½ cup powdered sugar
* *Consistency Tip:* Sift it if you want an extra smooth glaze.
* 1-2 tablespoons milk or cream (or even a little lemon juice for a tang!)
* *Adjustable:* Start with 1 tablespoon and add more, a teaspoon at a time, until you reach your desired drizzling consistency.
* ½ teaspoon vanilla extract
Step-by-Step Instructions
Step 1: Preheat & Prep Pan
First things first, let’s get our oven ready! Preheat it to 350°F (175°C). Now, grab a standard 9×5 inch loaf pan. I like to grease it generously with butter or cooking spray, and then dust it lightly with flour. This ensures that your beautiful banana nut bread will slide right out after baking. You can also line the pan with parchment paper, leaving some overhang on the sides to make lifting it out even easier. My mom always did the flour dusting and it worked like a charm, so I stick with that!
Step 2: Mix Dry Ingredients
In a medium bowl, whisk together the all-purpose flour, baking soda, salt, cinnamon, and nutmeg (if you’re using it). Give it a good whisking – you want everything to be evenly distributed. This ensures your leavening agents and spices are spread throughout the batter, so you don’t get any strange pockets of flavor or texture. It’s a small step, but it really makes a difference in the final crumb.
Step 3: Mix Wet Ingredients
In a larger bowl, start by mashing your ripe bananas until they’re mostly smooth. A few small lumps are perfectly fine; they add character! Then, add the melted butter, granulated sugar, Brown Sugar, eggs, and vanilla extract to the mashed bananas. Whisk it all together until it’s well combined and smooth. It should look creamy and luscious at this point.
Step 4: Combine
Now, pour the dry ingredients into the wet ingredients. Using a spatula or wooden spoon, gently fold the dry ingredients into the wet until *just* combined. It’s super important not to overmix here! A few streaks of flour remaining are okay. Overmixing develops the gluten in the flour too much, which can result in a tough, dense loaf. We want moist and tender, remember?
Step 5: Prepare Filling
In a small bowl, combine your chopped walnuts or pecans with the 2 tablespoons of granulated sugar and 1 teaspoon of cinnamon. Give it a quick stir to coat the nuts evenly. This little mixture is going to add such a delightful texture and burst of flavor throughout your bread. I learned to toast my nuts for this recipe a while back, and oh my goodness, it’s a game-changer for flavor!
Step 6: Layer & Swirl
Now for the fun part! Pour about half of your batter into your prepared loaf pan. Sprinkle half of the cinnamon-nut mixture evenly over the batter. Then, dollop the remaining batter over the top, and sprinkle the rest of the nut mixture over that. If you want a more marbled look, you can gently swirl a knife or skewer through the batter a few times, being careful not to overmix. Just a few gentle passes will do the trick!
Step 7: Bake
Pop that loaf pan into your preheated oven. Bake for about 50-65 minutes. The exact time will depend on your oven, of course. You’ll know it’s done when a wooden skewer or toothpick inserted into the center comes out clean, or with just a few moist crumbs attached. The top should be beautifully golden brown and it will smell absolutely divine. If the top starts to brown too quickly before the center is cooked, you can loosely tent it with aluminum foil.
Step 8: Cool & Glaze
Once it’s baked, take the loaf out of the oven and let it cool in the pan for about 10-15 minutes. This allows it to set up a bit. Then, carefully invert the loaf onto a wire rack to cool completely. While it’s cooling, you can whip up the optional glaze. In a small bowl, whisk together the powdered sugar, vanilla extract, and 1 tablespoon of milk or cream. Add more liquid, a teaspoon at a time, until it’s a nice drizzling consistency. Once the bread is completely cool, drizzle the glaze all over the top. If you try to glaze it while it’s warm, the glaze will just melt off!
Step 9: Slice & Serve
Once the glaze has set a bit (or if you skipped the glaze), it’s time to slice and enjoy! I find a serrated knife works best for a clean cut. Serve it at room temperature for the best flavor and texture. It’s perfect on its own, or you can serve it with a little butter if you like. The aroma alone is enough to make your mouth water!
What to Serve It With
This banana nut bread is so versatile, it truly fits into any part of your day! For breakfast, it’s an absolute dream alongside a steaming mug of coffee or a glass of cold milk. I love serving it toasted with a thin layer of butter when I need a quick and satisfying start to my morning. For a more relaxed brunch, consider serving it alongside some fresh fruit salad, yogurt parfaits, or even a savory egg dish like quiche. A small side of Cream Cheese or a fruit compote can elevate it beautifully. As a dessert, it’s surprisingly elegant. You can warm up a slice slightly and serve it with a scoop of vanilla bean ice cream or a dollop of freshly whipped cream. A drizzle of caramel sauce or a sprinkle of chopped nuts on top makes it feel extra special. And for those cozy snack times? It’s pure comfort. I’ll often have a slice with a cup of herbal tea in the afternoon when I need a little pick-me-up. My kids love it as an after-school treat with a glass of chocolate milk. Honestly, no matter how you serve it, this banana nut bread is guaranteed to be a hit!
Top Tips for Perfecting Your Banana Nut Bread
I’ve made this banana nut bread so many times that I’ve picked up a few tricks along the way that I swear by. For the zucchini (oops, I mean bananas!), make sure they are *very* ripe. I can’t stress this enough. The riper they are, the sweeter and more moist your bread will be. It’s the secret weapon! When it comes to mixing, remember the golden rule: don’t overmix! Overmixing is the nemesis of tender quick breads. Mix the dry ingredients into the wet just until they disappear. A few little lumps or streaks of flour are actually fine. For the swirl, I find that if you want a more dramatic marbling effect, add the nut mixture between the two layers of batter, and then use a knife to make just a few gentle twists. Don’t go crazy, or you’ll muddy the flavors and textures. If you’re looking for ingredient swaps, I’ve tested this with almond milk instead of regular milk in the glaze, and it actually made it even creamier! You can also swap out the walnuts for pecans, or even a mix of both. For baking, always do the toothpick test. Every oven is a little different, so trust the toothpick more than the clock. Make sure it comes out with moist crumbs, not wet batter. If the top is getting too dark, just loosely tent it with foil. Finally, for the glaze, don’t be afraid to play with it! A tiny splash of lemon juice in the glaze can add a lovely brightness that cuts through the sweetness of the bread.
Storing and Reheating Tips
Keeping your banana nut bread fresh is key to enjoying it over several days. At room temperature, it will stay wonderfully moist for about 2 to 3 days. Just make sure to wrap it tightly in plastic wrap or store it in an airtight container. This prevents it from drying out. If you think you won’t get to it within those days, or if your kitchen is particularly warm, the refrigerator is your best bet. Wrapped well in plastic wrap and then again in foil, or stored in an airtight container, it can last up to a week in the fridge. The texture might become a bit firmer, but don’t worry, reheating fixes that! For freezing, this bread is a dream. Wrap the completely cooled loaf (or individual slices!) tightly in plastic wrap, then in a layer of aluminum foil, and finally in a freezer-safe bag. It can stay delicious for up to 3 months. When you’re ready to enjoy it, let it thaw at room temperature, or gently reheat slices in the oven or microwave. If you’ve added the glaze, I recommend waiting to glaze it until *after* it has thawed and been reheated, especially if it’s been frozen. This ensures the glaze stays looking beautiful and doesn’t get soggy.
Frequently Asked Questions
Final Thoughts
So there you have it – my go-to recipe for the most incredible banana nut bread. It’s more than just a recipe; it’s a little slice of comfort and nostalgia that I’m so happy to share with you. The moist texture, the perfect balance of sweetness and spice, and that delightful nutty crunch make it truly special. It’s the kind of recipe that brings people together, filling your home with a warmth and aroma that’s simply irresistible. Whether you’re looking for a simple breakfast treat, a delightful snack, or a comforting dessert, this banana nut bread delivers every single time. I really hope you give this one a try; I have a feeling it might just become your favorite too! If you do make it, please let me know how it turns out in the comments below – I’d love to hear about your own banana nut bread adventures! Happy baking!

Chocolate Chip Walnut Banana Bread
Ingredients
Main Ingredients
- 3 medium Ripe Bananas
- 0.33 cup Unsalted Butter, melted
- 1 large Egg
- 1 teaspoon Vanilla Extract
- 1 teaspoon Baking Soda
- 0.75 cup Sugar
- 1.5 cups All-purpose Flour
- 1 pinch Salt
- 1 cup Semisweet Chocolate Chips
- 1 cup Chopped Walnuts
Instructions
Preparation Steps
- Preheat oven to 350 degrees Fahrenheit and spray a loaf pan with nonstick spray.
- In a large bowl, thoroughly mash ripe bananas.
- Add melted butter and mix.
- Add egg and vanilla and stir to mix.
- Add baking soda, sugar, flour, and salt. Mix well.
- Fold in chocolate chips and walnuts.
- Pour batter in the prepared pan and bake one hour or until a toothpick inserted in the middle comes out clean.
- Cool on a wire rack 5 minutes before slicing.