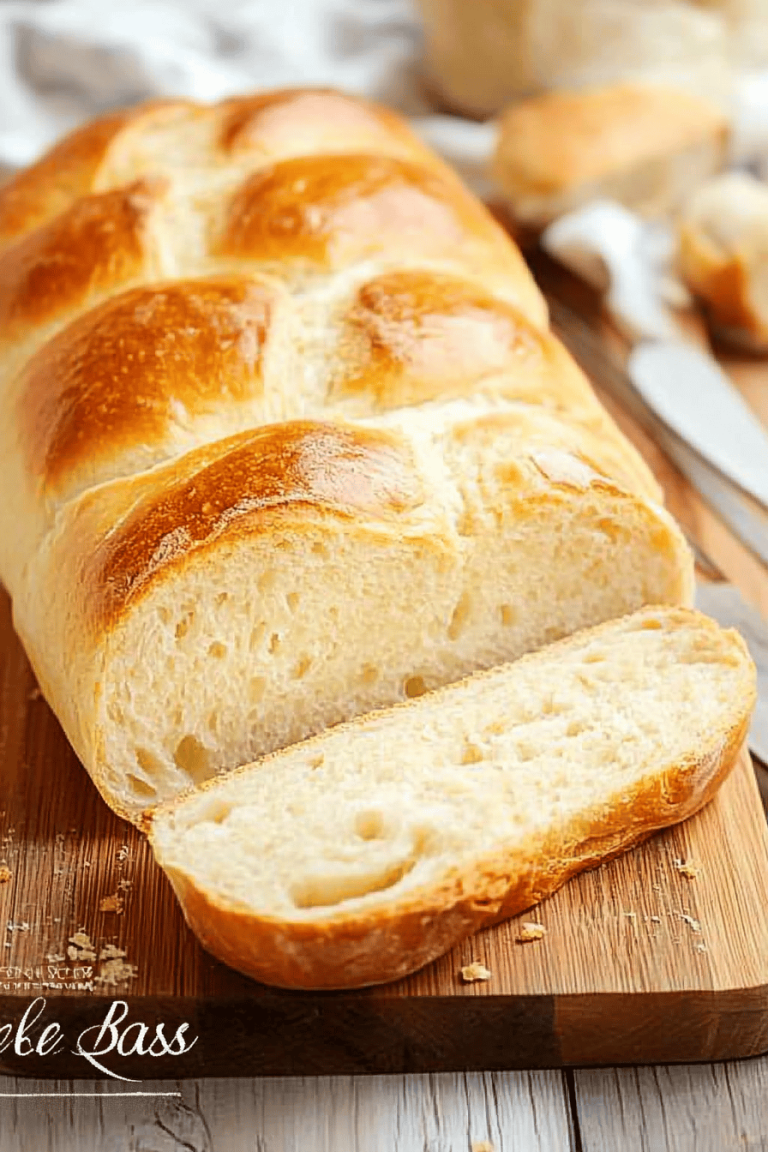
banana bread recipe
There are certain recipes that just feel like home, aren’t there? This Banana Bread recipe is one of those for me. It’s more than just a baked good; it’s the smell of a lazy Saturday morning, the perfect afternoon pick-me-up, and the recipe I always reach for when I have a few overripe bananas staring me down. Honestly, if you’ve ever felt a pang of guilt tossing those speckled, sad-looking bananas, this is your saving grace. It’s incredibly forgiving, deeply satisfying, and if you’ve ever tried my famous apple crumble, you know I don’t take baking lightly. This banana bread, though, is on another level. It’s the kind of thing that disappears in minutes at my house, and my kids, who can be the pickiest eaters on the planet, practically inhale it. I’ve tinkered with this banana bread recipe for years, and I’m finally sharing the version that gets rave reviews every single time. It’s my ultimate comfort bake, and I’m so excited for you to try it!
What is your favorite banana bread recipe?
So, what exactly is this “go-to Banana Bread“? At its heart, it’s a wonderfully moist and flavorful quick bread. But calling it just “banana bread” feels like a bit of an understatement, really. Think of it as the ultimate banana bread experience – it’s dense enough to feel substantial but light enough that you don’t feel weighed down after a slice. It’s packed with banana flavor, a hint of cinnamon spice, and just the right amount of sweetness. The beauty of this banana bread is its simplicity. It doesn’t require any fancy techniques or ingredients you can’t find at your local grocery store. It’s essentially a foolproof way to transform those overripe bananas into something truly special. It’s the kind of recipe that makes your kitchen smell absolutely divine and leaves you with a warm, fuzzy feeling. It’s definitely a crowd-pleaser, and I’ve never met anyone who didn’t love it!
Why you’ll love this recipe?
What are the reasons why this Banana Bread recipe has become a staple in my kitchen, and I’m betting it will in yours too. Firstflavor is just out of this world. We’re talking intense banana goodness, with warm undertones of cinnamon that just hug your taste buds. It’s not cloyingly sweet, which is something I really appreciate. Then there’s the simplicity. This is a lifesaver on busy weeknights or when you have unexpected guests. You probably have most of the ingredients in your pantry right now. It’s truly a dump-and-mix kind of situation, and the results are always impressive. For the home baker on a budget, this recipe is a cost-efficientIs it incredibly easy to use overripe bananas?versatile! I’ll get into more ways to enjoy it later, but whether you’re having it for breakfast, a snack, or even dessert, it fits right in. What I love most about this banana bread is how forgiving it is. Even if you’re a beginner baker, you’re going to nail this. Unlike some finicky cakes, this recipe just works. It’s that perfect balance of sweet, moist, and comforting that makes it stand out from your average loaf. If you’re a fan of quick breads that deliver big on flavor without a lot of fuss, this is your new best friend.
How to Make My Go-To Banana Bread
Quick Overview
Making this Banana Bread is surprisingly straightforward. You’ll essentially mash your bananas, whisk together your dry ingredients, combine them with your wet ingredients, and then bake. The magic happens with the quality of your ingredients and a few key techniques that ensure maximum moisture and flavor. It’s a one-bowl wonder for the batter part, making cleanup a breeze, and the result is a loaf that’s incredibly tender and packed with goodness. You don’t need any special equipment, just a couple of bowls and a whisk.
Ingredients
For the Main Batter:
This is where the flavor foundation is built. The riper your bananas, the sweeter and more intensely flavored your bread will be. Look for bananas that are heavily speckled, almost black – those are the sweetest! You’ll need about 3-4 medium-sized ones. Make sure they’re nice and ripe. I always use unsalted butter for my banana bread, melted and slightly cooled. Using unsalted gives you more control over the final saltiness. For the sugar, I find a mix of granulated and Brown Sugar gives the best flavor and moisture. The brown sugar adds a lovely caramel note. You’ll also need a couple of large eggs, at room temperature if possible (they incorporate better). A splash of vanilla extract is non-negotiable for that classic cozy aroma. And of course, all-purpose flour. I’ve tried with cake flour, but all-purpose gives it the right structure. A touch of baking soda and baking powder will give it that perfect lift, and a pinch of salt to balance everything out. Don’t forget the cinnamon – it’s the perfect spice companion to banana!
For the Filling:
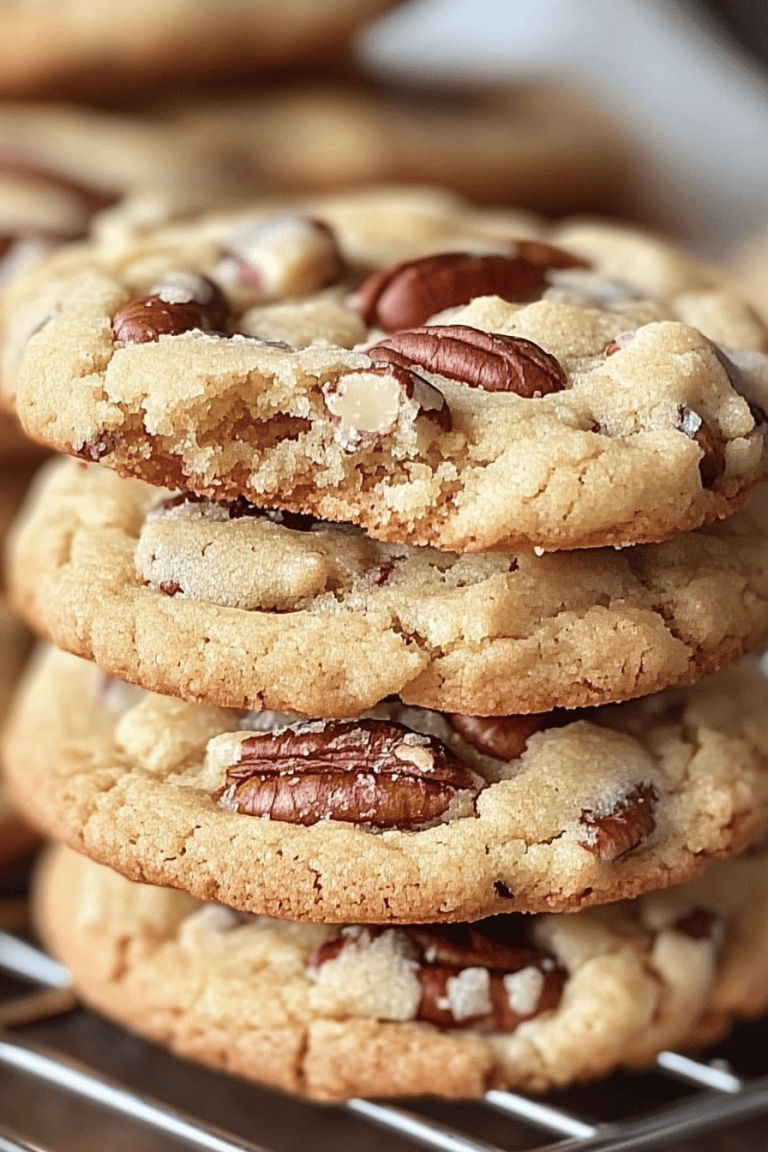
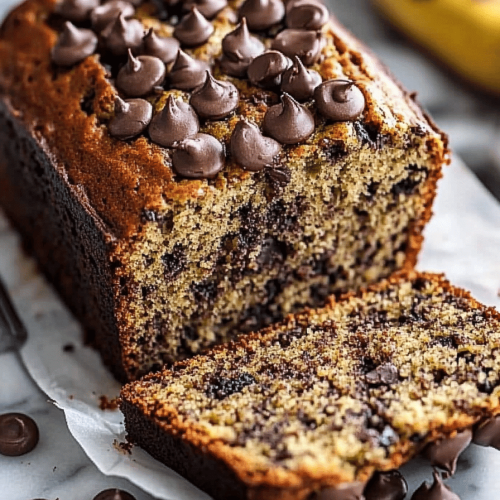
This is my secret weapon for an extra burst of flavor and texture. I love adding chopped walnuts or pecans for a delightful crunch. If you’re not a fan of nuts, you can totally skip this, or even add chocolate chips – my kids go wild for chocolate chips in their banana bread! Make sure the nuts are chopped into relatively small pieces so they distribute evenly.
For the Glaze:
This is optional, but oh-so-worth-it! A simple glaze made with powdered sugar, a splash of milk (or even a little bit of that banana mash!) and a hint of vanilla. It adds a touch of sweetness and a beautiful finish. You can also add a tiny pinch of cinnamon to the glaze for an extra layer of flavor. The key here is getting the consistency just right – not too thin, not too thick.
Step-by-Step Instructions
Step 1: Preheat & Prep Pan
First things first, let’s get our oven preheated to 350°F (175°C). This ensures the bread bakes evenly from the moment it goes in. While the oven is warming up, grease and flour a standard 9×5 inch loaf pan. You can also line it with parchment paper, leaving an overhang on the sides – this makes it super easy to lift the bread out later. A good greasing is crucial to prevent sticking, and the flour creates a nice crust.
Step 2: Mix Dry Ingredients
In a large bowl, whisk together your all-purpose flour, baking soda, baking powder, salt, and cinnamon. Whisking thoroughly is important to distribute the leavening agents evenly. You want to make sure every bite has that perfect lift. No one wants a dense, flat banana bread!
Step 3: Mix Wet Ingredients
In a separate medium bowl, mash your ripe bananas until they’re smooth with just a few small lumps remaining. It’s okay if there are a few small chunks; they add great texture! Then, stir in your melted and slightly cooled butter, granulated sugar, brown sugar, eggs, and vanilla extract. Mix until everything is well combined and looks smooth. The mixture will be quite liquidy, and that’s perfectly fine.
Step 4: Combine
Now, pour your wet ingredients into the bowl with your dry ingredients. Using a spatula or wooden spoon, mix until *just* combined. It’s really important not to overmix here! A few streaks of flour are perfectly okay. Overmixing develops the gluten in the flour too much, which can result in a tough loaf. We want tender, moist banana bread, not a brick!
Step 5: Prepare Filling
If you’re using nuts or chocolate chips, gently fold them into the batter now. Just a quick stir to distribute them evenly. Again, be careful not to overmix.
Step 6: Layer & Swirl
Pour about half of the batter into your prepared loaf pan. If you’re adding a swirl (like cinnamon sugar, or even a dollop of cream cheese!), now’s the time to add it. For a simple cinnamon-sugar swirl, mix a tablespoon or two of sugar with a teaspoon of cinnamon and sprinkle it over the batter. Then, carefully spoon the remaining batter on top, trying to cover the swirl. For a more dramatic swirl effect, you can dollop spoonfuls of the filling mixture (if you have one, like cream cheese) and then use a knife or skewer to gently swirl it through the batter. Don’t go crazy with the swirling; just a few passes will do.
Step 7: Bake
Pop the loaf pan into your preheated oven. Bake for 50-65 minutes. The exact time will depend on your oven, so start checking around the 50-minute mark. The banana bread is done when a wooden skewer or toothpick inserted into the center comes out clean, or with just a few moist crumbs attached. If the top is browning too quickly, you can loosely tent it with aluminum foil for the remainder of the baking time.
Step 8: Cool & Glaze
Once baked, let the banana bread cool in the pan on a wire rack for about 10-15 minutes. This allows it to set up properly. Then, carefully invert the pan to remove the loaf and let it cool completely on the wire rack. It’s really important to let it cool completely before glazing, otherwise, the glaze will melt off. While it’s cooling, whisk together your powdered sugar, a tablespoon of milk (or water, or even a bit of that mashed banana!), and vanilla extract until you have a smooth, pourable glaze. Drizzle it over the cooled loaf. If you want a thicker glaze, add more powdered sugar; if you want it thinner, add a touch more liquid.
Step 9: Slice & Serve
Once the glaze has set a little, slice your delicious banana bread with a serrated knife for clean cuts. Serve at room temperature, or even slightly warm. The aroma alone is heavenly!
What to Serve It With
This banana bread is pretty much a standalone superstar, but it can definitely be elevated depending on the occasion! For a simple breakfast, a thick slice paired with your morning coffee or a glass of milk is pure bliss. I love toasting it lightly for a bit of crispness. For a lovely brunch spread, serve it alongside fresh fruit salad, a yogurt parfait, or even some crispy bacon. It adds a comforting, homemade touch to any spread. When I’m serving it as dessert, I like to warm it up slightly and serve it with a dollop of whipped cream, a scoop of vanilla ice cream, or a drizzle of caramel sauce. It’s incredibly decadent! And for those cozy snacks, there’s nothing better than a warm slice with a cup of tea on a rainy afternoon. My kids also love it dipped in hot chocolate – it’s a fun twist!
Top Tips for Perfecting Your Banana Bread
Over the years, I’ve learned a few tricks that really make a difference in achieving that perfect banana bread every single time. When it comes to your bananas, zucchini prep (yes, I said zucchini, but I mean banana prep here!) is key. The riper, the better! Don’t be afraid of those dark, spotty bananas; they have the most concentrated sweetness and flavor. Just peel them and mash them well. For mixing advice, the golden rule is don’t overmix! As soon as you see the last streaks of flour disappear, stop. A few lumps in the batter are your friend; they mean you haven’t overworked the gluten, which keeps your bread tender. For swirl customization, if you’re doing a cinnamon-sugar swirl, mix the sugar and cinnamon thoroughly before sprinkling. If you’re adding chocolate chips or nuts, make sure they’re evenly distributed by gently folding them in. For ingredient swaps, if you don’t have brown sugar, you can use all granulated sugar, but you might miss out on a bit of that caramel depth. I’ve successfully used almond milk or oat milk in place of regular milk in the glaze, and it turned out just as creamy! When it comes to baking tips, always know your oven. Ovens can run hot or cold, so using an oven thermometer is a good idea. If your loaf is browning too quickly on top, tent it loosely with foil. And the toothpick test is your best friend for checking doneness. For glaze variations, if you like a thinner glaze, just add a tiny bit more liquid. For a thicker, more frosting-like glaze, add more powdered sugar. You can also add a touch of lemon zest to the glaze for a brighter flavor, or even a hint of nutmeg.
Storing and Reheating Tips
This banana bread is so good, you might actually have leftovers (though I highly doubt it!). For room temperature storage, once the loaf is completely cool, you can wrap it tightly in plastic wrap or place it in an airtight container. It stays fresh at room temperature for about 2-3 days. If your kitchen is particularly warm, or you want to keep it fresh longer, it’s best to move to the refrigerator. For refrigerator storage, wrap the cooled loaf tightly in plastic wrap, and then a layer of aluminum foil, or store it in an airtight container. It will keep well in the fridge for up to a week. It’s still delicious cold, but I often like to warm up a slice. For freezer instructions, this bread freezes beautifully! Once completely cooled, wrap the loaf very tightly in several layers of plastic wrap, then a layer of aluminum foil, or place it in a freezer-safe bag. It can stay frozen for up to 3 months. To thaw, unwrap it and let it sit at room temperature for a few hours, or gently reheat. For reheating, if it’s plain, a few seconds in the microwave work wonders to bring back that lovely moistness. If it has glaze, be a little more careful with the microwave, or just enjoy it at room temperature.
Frequently Asked Questions
Final Thoughts
So there you have it – my tried-and-true, absolutely foolproof banana bread recipe. It’s the kind of bake that brings comfort and joy, a little slice of homemade happiness that’s perfect for any time of day. I truly believe this banana bread recipe stands out because of its perfect balance of moisture, flavor, and sheer ease. It’s a recipe that has brought smiles to countless faces in my home, and I’m so excited for it to do the same for yours. If you love this recipe, you might also want to explore some of my other quick bread recipes or my collection of easy breakfast bakes. Give this banana bread a try, experiment with your favorite add-ins, and let me know how it turns out! I can’t wait to hear all about your delicious creations. Happy baking!
Brown Sugar Crusted Banana Bread
Ingredients
Main Ingredients
- 4 large ripe bananas, mashed (1 1/4 to 1 1/2 cups)
- 0.33 cup unsalted butter (melted, then slightly cooled)
- 0.75 cup granulated sugar
- 1 large egg (room temperature)
- 1 teaspoon vanilla extract
- 1.5 cups all-purpose flour
- 1 teaspoon baking soda
- 1 teaspoon baking powder
- 0.5 teaspoon kosher salt
- 1 tablespoons light brown sugar
- 1 cup confectioners' sugar
- 2 tablespoons whole milk
Instructions
Preparation Steps
- Preheat oven to 350°F. Spray an 8 1/2 x 4 1/2-inch loaf pan with nonstick cooking spray. Set aside.
- In a large bowl, mash bananas with a fork. Some chunks are okay.
- To the mashed bananas, add melted butter, sugar, egg, and vanilla extract. Mix well to combine.
- In a separate bowl, whisk together flour, baking soda, baking powder, and kosher salt.
- Gradually add the dry ingredients to the banana mixture, stirring until just combined. Do not overmix.
- Pour the batter into the prepared loaf pan and smooth the top.
- Bake for 45 minutes. If the top is browning too quickly, loosely cover with aluminum foil.
- Continue baking for an additional 15-20 minutes, or until a toothpick inserted in the center comes out with crumbs but no wet batter.
- While the bread is baking, prepare the glaze. In a medium bowl, whisk together the confectioners' sugar and milk. Add more milk until the glaze reaches your desired consistency. Set aside.
- Remove the banana bread from the oven and evenly sprinkle the brown sugar over the top.
- Turn the oven to low broil. Place the loaf back in the oven and broil for 30-60 seconds, watching carefully, until the brown sugar melts. (You can also use a kitchen torch.)
- Remove from the oven. Immediately drizzle glaze over the brown sugar topping.
- Let the banana bread cool in the pan for 10 minutes before serving.