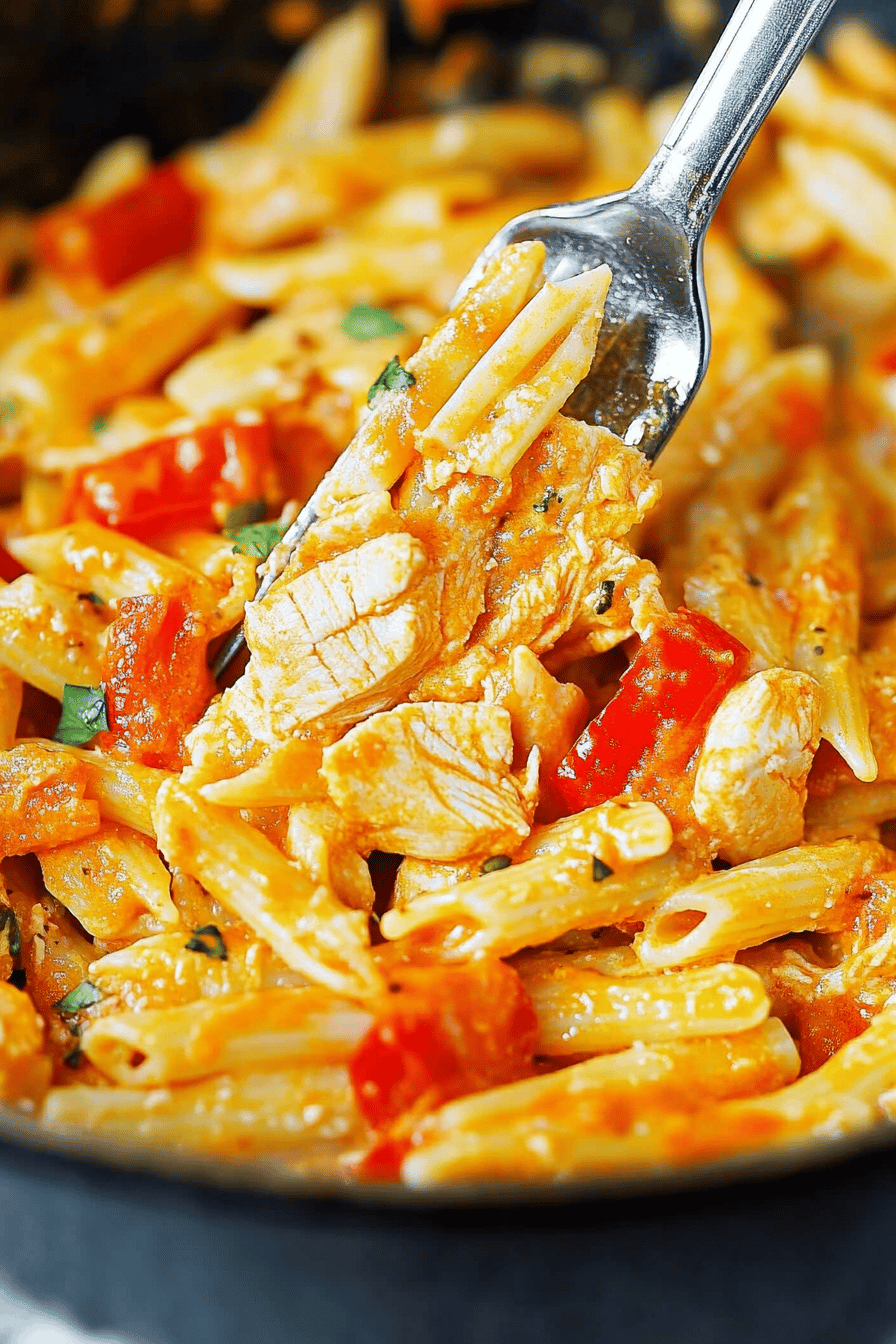
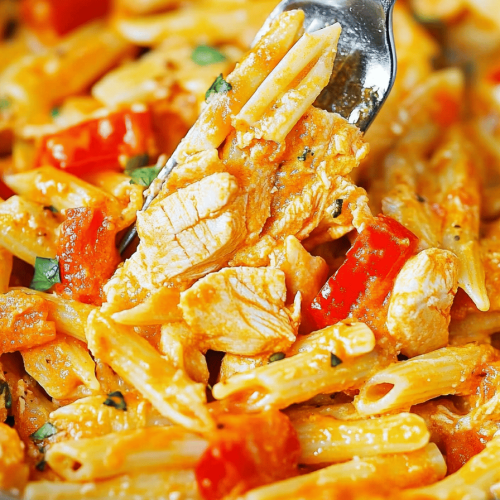
Balsamic Chicken Pasta
When I think back to weeknights at my parents’ table, this is the dish that always pops into my mind first. The kitchen smelled like spent garlic and a gentle sweetness from aged balsamic that made the long day feel forgivable. I’ll admit I used to shy away from sauces that required reducing, but this Balsamic Chicken Pasta changed my mind in the best way. It’s a sauce you can practically bottle, but it’s bright and lively enough that it never tastes heavy. It’s a crowd-pleaser, too — my kids actually ask for seconds, which is basically a miracle on busy nights. Think of this Balsamic Chicken Pasta as the version of a classic weeknight pasta that wears sneakers: comfortable, reliable, and somehow always a little cooler than you expect. I always do this one-pot trick for convenience, and I can’t tell you how many times friends have told me it tastes like a restaurant dish you’d order with a smile. This recipe is a memory in a bowl, and I’m so excited to share it with you.
What is balsamic chicken pasta?
Think of Balsamic Chicken Pasta as a tangy-sweet, deeply savory supper that pairs tender chicken with glossy pasta and a glaze of balsamic that’s been coaxed into a silky, almost caramel finish. It’s essentially a chicken-pasta supper where the star ingredient is a pantry-friendly glaze: balsamic vinegar that’s simmered with garlic, a kiss of honey or Brown Sugar, and a splash of cream to soften the edges. The name is honest: the dish tastes like a vivid, balsamic-forward version of a creamy Italian classic. It’s not a heavy instructions manual moment; it’s the kind of dish you pull together in about the time it takes to boil water for noodles. The sauce clings to every noodle, the chicken stays juicy, and the aroma wraps your kitchen in a warm hug. My approach keeps things straightforward: sear the chicken, cook the pasta to al dente, whisk a glossy glaze, then fold everything together until it shines. It’s comfort with a bright, modern finish, and it’s the kind of supper you’ll reach for again and again.
Why you’ll love this recipe?
What I love most about this Balsamic Chicken Pasta is the balance — the way tangy, slightly sweet balsamic meets creamy richness without tipping into heaviness. The result tastes indulgent, but I can pull it together in roughly the same time it takes to sauté a few vegetables. The flavor payoff feels luxurious, yet the steps are friendly enough for a weeknight when you’re juggling homework, errands, and a calendar that looks like a crossword puzzle. It’s also incredibly adaptable. If you’ve got a few extra veggies sitting in the fridge, you can toss them in for texture and color without fear of overpowering the glaze. The price tag is friendly, too: you’re mostly using pantry staples, a boneless chicken breast or two, and a handful of pasta. What I love most about this is its “base of greatness” — you can riff on it with herbs, swap in cream for a richer mouthfeel, or add a little heat with crushed red pepper. It’s a dish my family requests, and I’ve found it’s a lifesaver on busy nights because everything coasts together in One Pan.
- Flavor:What makes a simple chicken and pasta dish special?
- Simplicity:How do you make a glaze for a chicken dish?
- Cost-efficiency: Pantry staples shine here, and you can stretch the ingredients with a few vegetables or leftover meat.
- Versatility: This is the kind of base you can customize with greens, mushrooms, sun-dried tomatoes, or a squeeze of lemon for brightness.
- Make-ahead potential: The glaze thickens a bit as it sits, so you can cook ahead and reheat gently for effortless leftovers.
How to Make Balsamic Chicken Pasta
Quick Overview
Here’s the clean path: sear chicken until it’s lightly golden and cooked through, cook pasta until just shy of done, then simmer a balsamic glaze with garlic until it’s syrupy and aromatic. Toss the pasta with the chicken and the glaze, finish with a touch of cream and parmesan, and stir until everything is glossy and clinging to each noodle. The magic is in the glaze — a few minutes on the stove and it goes from sharp to lush, coating every inch of the pasta. It’s a simple method that yields restaurant-like results at home, and yes, you can do it on a Tuesday without breaking a sweat. I’ll show you exactly how to pull it off so you’re not guessing the whole time you cook.
Ingredients
For the Main Batter:
– 2 boneless skinless chicken breasts, cut into bite-sized pieces
– 8 oz (about 2 cups) penne or your favorite short pasta
– 1 tablespoon olive oil
– Salt and Black Pepper, to taste
– 2 cloves garlic, minced
– 1/2 teaspoon onion powder (optional, for extra savoriness)
For the Filling:
– 1/2 cup heavy cream or half-and-half for a lighter option
– 1/3 cup freshly grated parmesan, plus more to finish
– 1/4 cup finely chopped fresh parsley (optional, for brightness)
For the Glaze:
– 3/4 cup balsamic vinegar (you can use a good-quality everyday balsamic)
– 1 tablespoon honey or Brown Sugar (adjust to taste)
– 1 tablespoon soy sauce or tamari (for a touch of umami, optional)
– 1 teaspoon Dijon mustard (optional, for depth)
– Pinch of red pepper flakes (optional, for a little warmth)
Step-by-Step Instructions
Step 1: Preheat & Prep Pan
Preheat a large skillet over medium-high heat. While you wait, pat the chicken dry with paper towels — moisture is the enemy here, and you’ll get a nicer sear if the pieces are dry. Season generously with salt and pepper. Set a pot of salted water to boil for the pasta, because timing is everything on weeknights.
Step 2: Mix Dry Ingredients
In a small bowl, whisk together a pinch more salt, pepper, and the onion powder if you’re using it. This is your flavor foundation, so don’t skip it. It helps the chicken stay juicy while the edges get that beautiful caramelized color.
Step 3: Mix Wet Ingredients
In a separate bowl, combine the garlic with a drizzle of olive oil. You’ll use this to perfume the chicken as soon as it hits the skillet — the scent is everything. whisk in the cream, parmesan, and a little salt for the sauce finish. It should feel creamy but not thick like custard; we want a satin-smooth coating.
Step 4: Combine
Slide the chicken into the hot pan and let it sear undisturbed for 2–3 minutes on each side until golden and cooked through. Remove the chicken to a plate and keep those flavorful bits in the pan — they’ll become the base of your glaze. In the same pot, drop the pasta into the boiling water and cook until just shy of al dente; it will finish cooking in the sauce later. Reserve a cup of pasta water in case you need to loosen the glaze later.
Step 5: Prepare Filling
Return the pan to a medium heat. Add the garlic and let it bloom for about 30 seconds, then whisk in the cream and parmesan. Stir until the sauce starts to thicken slightly, then taste and adjust with a pinch of salt. If you’ve got parsley, fold in a good handful toward the end for color and freshness.
Step 6: Layer & Swirl
Now for the star: the glaze. In a separate small saucepan, combine the balsamic vinegar, honey, and Dijon mustard (if using). Bring to a gentle simmer and reduce until it’s thick enough to coat a spoon. It should be glossy and fragrant, with the scent of caramelized garlic and a touch of sweetness. If it gets too thick, splash in a bit of reserved pasta water to loosen.
Step 7: Bake
This dish doesn’t actually bake in the oven, which is nice on a busy night — but you’ll finish everything in the pan. Return the chicken to the skillet with the creamy mixture and toss the drained pasta into the glaze, turning to coat. If you want the sauce even silkier, add a splash more cream and a touch of pasta water to get the consistency you crave. Heat through until everything is hot and the noodles have absorbed a bit of that tangy glaze.
Step 8: Cool & Glaze
Turn off the heat and finish with an extra drizzle of balsamic glaze if you like a brighter bite right before serving. A little extra grated parmesan on top is like the cherry on a sundae — it makes every bite feel special.
Step 9: Slice & Serve
Divide onto plates or a big platter. If you’ve got a little fresh parsley or basil, scatter it over the top for color. A final crack of black pepper sends it over the edge. This Balsamic Chicken Pasta is ready to eat as is, or you can pair it with a simple green salad and crusty bread to mop up every last glossy bit.
What to Serve It With
This is one of those “everything goes” meals, which makes pairing it with other dishes half the fun. I like to keep it simple and let the pasta shine, but here are a few ideas depending on the moment:
For Breakfast: A light, lemony yogurt and berry bowl on the side with a hot cup of coffee — yes, I’ve totally done this and it feels like a brunch hug.
For Brunch: A delicate arugula salad with shaved parmesan and a citrus vinaigrette, plus warm garlic bread for dipping. The brightness of the greens contrasts nicely with the rich glaze.
As Dessert: Okay, this is a savory dish, but if you’re hosting a big dinner, a bite of fresh fruit tart or a little citrus tartlet can end the night with a refreshing note after this creamy main.
For Cozy Snacks: A small antipasto board with olives, roasted peppers, and crisp bread to nibble while you ladle leftovers onto plates. This is a dish that invites seconds rather than a full dessert course, so keep that in mind when planning courses for guests.
Personally, I serve this with a simple sautéed green like spinach or kale, which adds a touch of bitterness to balance the glaze’s sweetness. My kids love it with a side of roasted broccoli that gets a little crispy at the edges. It’s those little additions that turn a weeknight into a memory, and the aroma alone tends to pull everyone into the kitchen.
Top Tips for Perfecting Your Balsamic Chicken Pasta
These are the little tricks I’ve learned after countless dinners in my own kitchen. They’ll help you nail the texture, the balance, and the look you want every time.
Zucchini Prep: If you’re adding zucchini, slice it into half-moons and blot away extra moisture with a clean towel. Moisture is the sneaky villain here — it can water down your glaze faster than you think. Sauté the zucchini briefly with a touch of salt so it stays crisp-tender and vibrant green, then fold it in at the end for color and a fresh bite.
Mixing Advice: The trick to a glossy sauce is to avoid overcooking the dairy. Add the cream or half-and-half gradually, keeping the heat lower than you think you need so the sauce stays silky rather than greasy. If it thickens too much, loosen with a splash of the reserved pasta water.
Swirl Customization: Patterns look pretty, but taste matters more. When you swirl the glaze, aim for a light, even coat rather than heavy ribbons in one spot. A little swirl goes a long way, and it helps the sauce cling to every noodle. If you want more drama, do a quick marbling pass before you finish with the final herbs.
Ingredient Swaps: You can swap in chicken thighs for juicier chicken or use turkey for a lighter take. For dairy-free, use full-fat coconut milk and a dairy-free parmesan substitute. Balsamic quality matters — a big, dark balsamic will intensify the glaze beautifully. If you want more brightness, finish with a squeeze of lemon over the top just before serving.
Baking Tips: If you’re cooking in a hotter oven or a different burner setup, the key is to keep the sauce from scorching. Use a wide, shallow pan for the glaze so it reduces evenly, and keep the heat at a steady medium. Don’t rush the reduction; patience makes the glaze deeply flavorful.
Glaze Variations: If you’re craving a different vibe, swap in maple syrup for honey, or add a teaspoon of balsamic reduction for a more intense finish. A little chili oil can bring a gentle warmth, too.
Lesson learned: this is a forgiving dish. I’ve improvised with what’s on hand and still ended up with something delicious that tasted like it came from a little bistro. The more you cook it, the more you’ll notice the balance you actually want, and that’s when it becomes your own signature weeknight staple.
Storing and Reheating Tips
Here’s how I keep Balsamic Chicken Pasta fresh and tasty, whether you’re saving leftovers for tomorrow or packing it for lunches.
Room Temperature: If you’re not eating it right away, keep it covered in the fridge for up to 2 hours at room temperature to prevent safety issues.
Refrigerator Storage: Store in an airtight container for 3–4 days. The pasta may soak up more sauce as it sits, so you might want to whisk in a splash of cream or a little pasta water to loosen before reheating.
Freezer Instructions: This dish freezes well for up to 2 months. Cool completely, portion into freezer-friendly containers, and freeze. Thaw overnight in the fridge and reheat gently on the stove with an extra splash of cream if needed.
Glaze Timing Advice: If you’re freezing, you may want to reserve the glaze or add it fresh when reheating to preserve that shiny, lacquered finish. If the sauce seems too thick after reheating, loosen with a splash of pasta water or cream.
Taste and texture shift a bit after refrigeration, but the dish remains comforting and satisfying. A quick reheat on the stove is better than microwaving, in my experience, because it helps the sauce stay glossy and coats every piece of pasta evenly.
Frequently Asked Questions
Final Thoughts
If there’s one dinner you want to reach for when the clock is racing and you still crave something that tastes like a warm hug, this Balsamic Chicken Pasta is it. It’s bright, comforting, and remarkably flexible — I’ve used leftover chicken, mixed in some spinach, swapped the dairy for a lighter option, and still ended up with something that feels indulgent without requiring an army of ingredients. The smell alone will draw people to the kitchen, and the first bite will spark gentle smiles around the table. It’s the kind of recipe that earns its place on repeat rotation because it’s easy to memorize, forgiving, and absolutely delicious. If you try it, I’d love to hear how you customized your glaze or what veggies you added to make it your own. Happy cooking, friends — and if you’d like, drop a comment with your favorite twist. Can’t wait to hear how yours turns out!
Easy Balsamic Glazed Chicken Pasta
Ingredients
Chicken
- 1 lb bone-in chicken thighs approximately 4 large
- salt and pepper to taste
Vegetables
- 2 tablespoons olive oil
- 1 large red onion chopped
- 5 cloves garlic minced
- 1 lb asparagus chopped
- 1 cup mushrooms chopped
Balsamic Glaze
- 0.75 cup red wine
- 0.5 cup balsamic vinegar
- 0.5 cup chicken broth
- 15 sprigs thyme tied into a bundle
Pasta & Finishing
- 8 oz dry pasta any kind (we used linguini)
- 3 tablespoons heavy cream
- 0.25 cup shaved parmesan or more to taste
Instructions
Preparation Steps
- Preheat oven to 400ºF.
- Generously season chicken thighs with salt and pepper.
- Heat olive oil in a large Dutch oven over high heat. Brown chicken thighs for 2-3 minutes per side, then remove from the pot.
- Reduce heat to medium. Add onions and garlic and sauté for 1 minute. Add mushrooms and asparagus and mix well.
- Add red wine, balsamic vinegar, chicken broth, and the bundle of thyme. Stir and turn off heat.
- Place chicken thighs back into the Dutch oven on top of the vegetables. Cover and bake at 400ºF for 25-30 minutes, or until chicken reaches an internal temperature of 165ºF.
- While the chicken and vegetables are baking, bring a large pot of salted water to a boil. Add pasta and cook until al dente. Drain, rinse with cold water, and set aside.
- Remove Dutch oven from oven. Take chicken thighs out and place them on a cutting board.
- Add heavy cream to the sauce and vegetables in the Dutch oven and mix well. Add the cooked pasta to the pot. Stir to combine and cover.
- Remove bones from the chicken thighs. Using two forks, shred the chicken. Add the shredded chicken back into the pasta dish and mix again.
- Serve with a generous sprinkle of parmesan cheese.