air fryer cornish hen
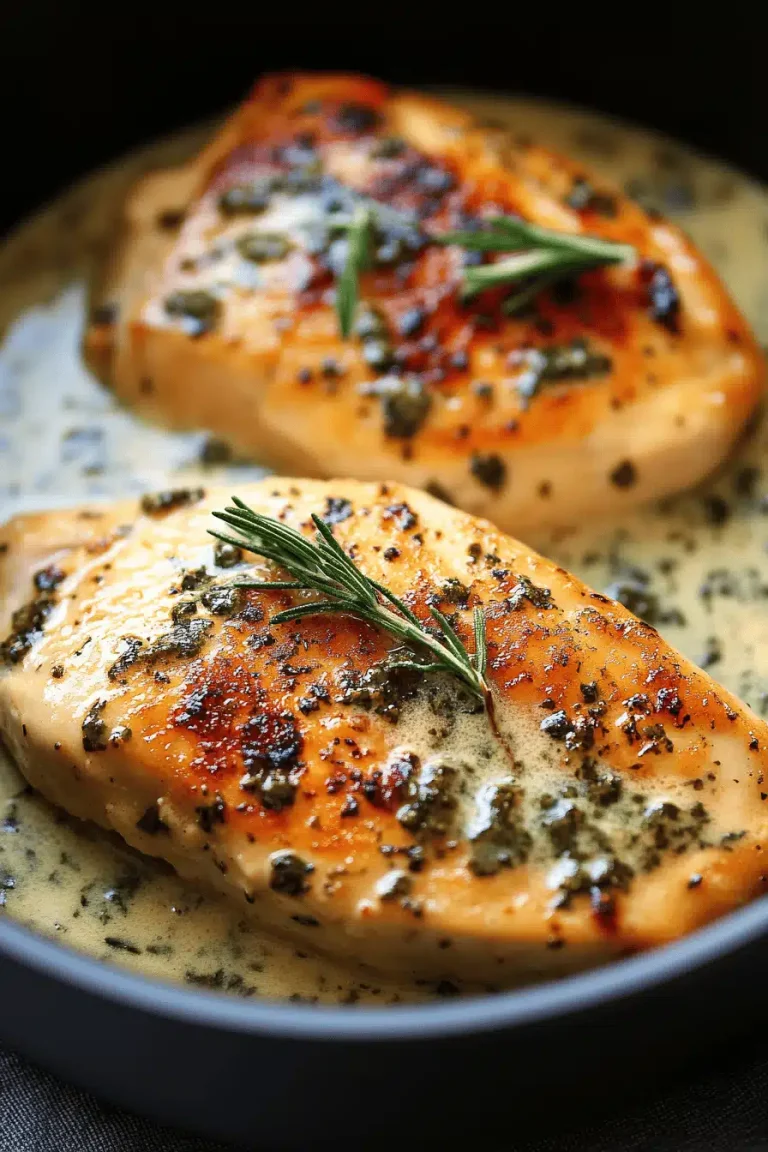
I’ll never forget the first time I cooked a whole cornish hen in my tiny apartment kitchen, your classic oven heyday turned tiny but mighty. The scent curled around the room like a warm invitation—rosemary, citrus, and that toasty skin crackle you can hear from across the hall. Fast forward to today, and I swear the Air Fryer did for this dish what a shortcut did for a long commute: it kept all the charm intact while shaving minutes off the clock. This version, air fryer cornish hen, is my weeknight miracle—crispy skin, juicy meat, and a glaze that makes even weeknight salad feel fancy. It’s a bit like a miniature roast chicken, but quicker, cleaner, and a lot more fun to share. I’ve compared it to my grandma’s legendary roasted bird many times, and while her oven-fired aroma is timeless, this air fryer version hits a different sweet spot: you get the same comfort without preheating the oven for thirty minutes. This one’s a lifesaver on busy nights, and my kids actually beg for seconds. Grab aprons, a bright lemon, and let’s start confiding in the air fryer together.
What is air fryer Cornish Hen?
Air Fryer cornish hen is essentially a tiny bird treated to a bright, herb-forward marinade, a light batter or dry rub, and a quick, high-heat finish in the air fryer. Think of it as a compact, pan-roasted delight that comes out with crisp skin and a glaze that gleams like a sunny afternoon. The name comes from the bird itself—Cornish hens are small, tender, and cook quickly—paired with the modern magic of the air fryer to deliver that satisfying crackle in a fraction of the time. It’s essentially your favorite roast chicken’s easter-egg cousin: still comforting, still with that juicy interior, but a touch more playful and a lot less work. I love that you can stuff a cavity with herbs and citrus and still have the outside crisp in minutes, without the need for a roasting pan or basting marathon. It’s simple, it’s cozy, and it’s surprisingly impressive at the table.

Why you’ll love this recipe?
What I love most about this Air Fryer cornish hen is how consistent it turns out—there’s no guesswork about doneness, and the texture is reliably golden and crisp. The meat stays incredibly juicy because the small birds heat quickly and evenly, so you don’t risk drying out the breast. The skin gets that perfect crackle, not unlike a fried finish, but with far less oil, which makes this feel indulgent without guilt. The aroma alone is a magnet; you’ll notice the citrusy notes and herbs lifting the entire kitchen. It’s also unbelievably versatile. I’ve served it with bright, citrusy sides for a vibrant weeknight dinner, and I’ve also paired it with roasted vegetables and a simple quinoa salad for a more rounded, Sunday-night meal. What I love most about this recipe is its balance: it’s cozy and familiar, yet it’s clean, bright, and modern. It’s budget-friendly, too—the flavor comes from simple pantry staples, and you’re not paying for complicated equipment or fancy ingredients. If you’re feeding a crowd, this dish scales up nicely; just keep your birds organized in batches in the air fryer so you don’t overcrowd the basket. And yes, the glaze is the secret wink—bright, slightly tangy, and glossy enough to warrant a little clinking sound when you ladle it on. This dish has saved my weeknights more times than I can count.
- Flavor: The citrus-herb punch keeps the meat lively and bright, while the glaze adds a touch of sweetness and tang that makes the
- Simplicity: A handful of pantry staples, a straightforward technique, and you’re done in under an hour.
- Cost-efficiency: It uses affordable cuts and pantry ingredients, with minimal waste.
- Versatility: Swap herbs for rosemary or thyme, citrus for a splash of lime, or add a pinch of chili for heat.
How to Make Air Fryer Cornish Hen
Quick Overview
This method is all about a bright rub, a quick batter that clings to the skin, and a hot air fry that seals in juices while delivering that satisfying crackle. You’ll preheat, rub, fill, and glaze in a way that feels almost ceremonial but goes lightning-fast. The result is a centerpiece-worthy bird that blisters beautifully in the Air Fryer, without turning your kitchen into a heat chamber. If you love a pan-roasted chicken but hate the wait, you’ll fall for this trick—juicy meat, crisp skin, and a glaze that gleams with minimal effort.
Ingredients
For the Main Batter:
– 1 cup all-purpose flour or 3/4 cup cornstarch for a lighter crust, sifted
– 1 teaspoon paprika
– 1 teaspoon garlic powder
– 1/2 teaspoon onion powder
– 1/2 teaspoon salt
– 1/4 teaspoon Black Pepper
For the Filling:
– 1 cup bread cubes or stuffing mix, lightly toasted
– 1/4 cup finely chopped onion
– 1/4 cup finely chopped celery
– 2 tablespoons chopped fresh herbs (parsley, thyme, or sage)
– 1/4 cup chicken stock (or water to keep it light)
For the Glaze:
– 2 tablespoons honey or maple syrup
– 1 tablespoon Dijon or whole-grain mustard (optional but gorgeous)
– 1 tablespoon fresh lemon juice
– 1 clove garlic, minced
Step-by-Step Instructions
Step 1: Preheat & Prep Pan
Preheat your air fryer to 380°F (190°C). While it warms, pat the cornish hens dry with paper towels. You want the skin as dry as possible so it crisps. Lightly oil the basket or spray with a neutral oil spray. If you’re using a rack, pop it in so air can circulate under and around the bird.
Step 2: Mix Dry Ingredients
In a small bowl, whisk together the flour (or cornstarch), paprika, garlic powder, onion powder, salt, and pepper. This is your dry rub, so you want it well combined. The paprika is doing double duty here, offering color and warmth.
Step 3: Mix Wet Ingredients
In another bowl, you can opt for a light wet coat if you want extra adhesion—just a tablespoon of oil and a splash of lemon juice. If you’re sticking with a dry rub, you can skip this; the glaze will do the final shine.
Step 4: Combine
If you’re using a wet coat, rub the hens with the wet mixture, then dredge in the dry rub until the skin is evenly coated. If you’re opting for a purely dry rub, press the rub onto the skin to create a crusty layer. Don’t overwork it—you want a light, not a paste, on the surface.
Step 5: Prepare Filling
In a small pan, sauté the onion and celery in a tiny drizzle of oil until they’re just tender and smelling of sweetness—think 3 to 4 minutes. Remove from heat and stir in the bread cubes and herbs with the stock. You want it cohesive but not soggy. This filling will nestle inside the cavity and help keep moisture in during cooking.
Step 6: Layer & Swirl
Stuff the cavity of each cornish hen with a portion of the filling. If you have any leftover, you can tuck it around the bird in the basket for added texture and flavor. For a pretty swirl on the outside, you can brush a tiny bit of glaze onto the breast skin after the first 10 minutes of cooking to set a color that’s glossy and appetizing.
Step 7: Bake
Place the hens in the air fryer basket breast-side up. Cook for 20 minutes, then brush with a light layer of glaze and flip them carefully for even browning. Cook for another 8–12 minutes, depending on the size of your birds. They’re done when the internal temperature hits 165°F (74°C) in the thickest part of the thigh, and the skin is deeply bronzed and crisp. If your air fryer runs a bit cool, give them a couple more minutes, but keep an eye on that glaze so it doesn’t burn.
Step 8: Cool & Glaze
Remove the birds to a cutting board and let them rest for 5 to 7 minutes. This rest period is when the juices settle and the glaze tightens into a glassy coat. If you want extra sheen, brush with a second light glaze right before serving. The balance of sweet and tangy will feel celebratory even on Tuesday night.
Step 9: Slice & Serve
Carve the hens like you would a roasted chicken, keeping the breast meat juicy and the thighs tender. If you’ve got a little extra filling from the cavity, spoon it onto the plate for a rustic, tray-perfect presentation. Serve with lemon wedges, a sprinkle of fresh herbs, and a simple green salad or roasted vegetables for color and crunch. The first bite should offer that crisp skin yielding to tender, well-seasoned meat—a small victory you’ll want to repeat.
What to Serve It With
Air fryer cornish hen shines with a bright, balanced spread. I love keeping things simple and colorful. Here are a few ideas that never fail to please:
For Breakfast: A citrusy herb salad and a hot cup of coffee, plus a slice of warm, crusty bread for dipping into the succulent pan juices. It’s a surprising but delightful morning pairing that somehow feels celebratory.
For Brunch: A light quinoa tabbouleh, roasted cherry tomatoes, and a glass of sparkling water with lemon. It feels fancy without trying too hard, and the lingering aroma of citrus makes the table feel special.
As Dessert: Not typical, I know, but a tiny drizzle of honey-garlic glaze on a roasted carrot side can echo the glaze on the hen in a creative, savory-sweet moment. It’s playful, and your guests will remember the story behind it.
For Cozy Snacks: A little yogurt-herb dip and warm pita, with the leftover skin crunched into bite-sized pieces for dipping. It’s comfort in one bite, perfect for a low-key movie night.
Personally, I always pair this with roasted greens or cauliflower and a grain like farro or barley. The textures play beautifully together, and the citrus-herb perfume lingers in the kitchen long after dinner is cleared. My family loves this dish because it feels like a little celebration on a busy weeknight, something you can pull together in under an hour and still make feel special. There’s something deeply satisfying about cracking into that airy, crisp skin and discovering a juicy, well-seasoned piece of meat underneath. And yes, the kids always finish their plates—one more bite, they say. It’s a simple joy that never gets old.
Top Tips for Perfecting Your Air Fryer Cornish Hen
These tips come from years of tweaking this dish for different pans, sizes, and moods. They’ll help you dial in the texture and those glossy, gorgeous finishes you’re chasing.
Skin & Moisture: Pat the hens dry, then brush with a very light oil before applying the dry rub. Excess moisture is the enemy of crisp skin, so dry it well and let the rub do the rest.
Texture & Coating: If you want a lighter, crispier crust, swap in 3/4 cup cornstarch for 1 cup flour and add an extra pinch of salt. The cornstarch parades a crisper, more delicate surface that crackles beautifully in the air fryer.
Swirl & Color: A light brush of glaze during the middle of cooking sets a glossy finish and helps color deepen evenly. Don’t overdo it—one or two light layers are plenty.
Ingredient Swaps: Fresh herbs can be swapped for dried if you’re in a pinch, but use a little extra dried thyme or rosemary to compensate for that aromatic punch. For a gluten-free version, stick with a cornstarch-based dredge and skip the flour entirely, keeping the rest the same.
Baking Tips: If your air fryer runs hot, lower the temperature to 360°F (180°C) and extend the cooking time by a few minutes. Oven differences vary—trust the interior temperature more than the clock.
Glaze Variations: Swap lemon juice for orange for a brighter, sweeter note, or add a teaspoon of balsamic vinegar for depth. A pinch of chili flakes can wake the glaze right up if you like a little heat.
Lessons Learned: Don’t crowd the basket. Two small hens fry more evenly than one crowded giant. If you’re cooking for a larger crowd, work in batches and keep the first batch warm on a rack in a low oven so the skin stays crisp.
One more personal note: I tested this with almond milk in a light glaze once, and it actually made the glaze feel silkier and a touch creamier without altering the meat’s texture. It’s funny what tiny tweaks do when you’re chasing comfort in a bite. Trust me on this one—this dish is forgiving, friendly, and endlessly adaptable to your kitchen, your mood, and your ingredients.
Storing and Reheating Tips
Leftovers happen, and that’s okay—these hens reheat beautifully with a little care. Here’s how I keep them at their best.
Room Temperature: If you’re only keeping them for a few hours, you can cover them loosely and leave them on the counter for up to two hours. After that, refrigerate to keep them safe and fresh.
Refrigerator Storage: Store in an airtight container or wrap tightly in foil. They’ll stay good for 3–4 days. Reheat in the air fryer or oven to restore crisp skin—about 5–7 minutes at 360°F (180°C) should do it.
Freezer Instructions: You can freeze the cooked bird for up to 2 months. Wrap tightly in plastic and foil to avoid freezer burn. Thaw in the fridge overnight, then reheat gently in the air fryer to re-crisp the skin.
Glaze Timing Advice: If you’re reheating and want a glaze, brush it on after you reheat to keep the finish bright and glossy rather than gummy.
These guidelines keep flavor intact and skin chewy-crisp instead of soggy. If you’re planning a meal prep Sunday, you can cook the hens ahead and reheat with a quick glaze touch-up just before serving. The aroma is half the joy—the rest is a bird that tastes like it just came off the stove, even when it’s reheated.
Frequently Asked Questions
Final Thoughts
There’s something so comforting about a dish that feels like a warm hello at the table. Air fryer cornish hen gave me a new way to think about weeknights: quick, cozy, and still deeply satisfying. It takes less time than a traditional roast, yet it delivers the same satisfaction with crisp skin and juicy meat that makes you want to lean back and smile. The glaze brightens every bite, and the herb stuffing offers a little surprise in every mouthful. It’s become a dish I reach for when friends swing by after work, when I’m cooking for my kids’ sports nights, or when I just want to remind myself that good food doesn’t have to be complicated. If you try this, share your own tweaks—the herbs you love, the level of glaze you prefer, or a different stuffing that makes it uniquely you. I’d love to hear how yours turns out and what you served it with. Happy baking, friends, and may your kitchen always smell like citrus and herbs in the best possible way!
Frequently Asked Questions

air fryer cornish hen
Ingredients
Main Ingredients
- 1.5 pounds Cornish game hen
- 2 tablespoons olive oil
- 2 teaspoons salt
- 1 teaspoon garlic powder
- 0.5 teaspoon ground black pepper
- 0.5 tablespoon dried thyme
- 0.5 tablespoon dried oregano
Instructions
Preparation Steps
- Preheat your air fryer to 375°F for 5 minutes and lightly grease the air fryer basket with cooking spray or oil.
- Rinse the Cornish hen under cold water and pat it dry thoroughly with paper towels, including the inside cavity.
- In a small bowl, whisk together the salt, garlic powder, black pepper, thyme, and oregano to make the seasoning blend.
- Rub the olive oil evenly over the entire surface of the Cornish hen, then sprinkle and pat the seasoning blend all over the bird, inside and out.
- Place the seasoned Cornish game hen in the preheated air fryer basket, breast-side down. Cook for 20 minutes.
- Open the air fryer, carefully flip the hen to breast-side up, and cook for an additional 10 minutes.
- Insert a meat thermometer into the thickest part of the breast. The internal temperature should reach 165°F. If not, cook in 3-5 minute increments until done.
- Once cooked, remove the Cornish hen from the air fryer and let it rest for 5 minutes before carving and serving.