brownie cookie bars
There’s something magical about combining the fudgy richness of a brownie with the chewy, buttery texture of a cookie, and that’s exactly what brownie cookie bars bring to your countertop. I stumbled across this dessert on a hectic afternoon when I wanted something quick, comforting, and absolutely indulgent. The smell of melting chocolate, the slight crackle of cookie edges, and a gooey brownie center all rolled into one slice? It’s like the best parts of two classic treats had a delicious lovechild. If you’re anything like my family, these bars will disappear in minutes—my kids actually ask for seconds before the first batch has cooled down! They’re the perfect ‘grab and go’ sweet, especially when you don’t want to fuss with perfect cookies or a whole cake just to satisfy your sweet tooth.
What is Brownie Cookie Bar?
Think of brownie cookie bars as the best of both worlds, wedged together in one irresistible dessert square. It’s essentially a thick, chewy cookie and a super fudgey brownie baked side-by-side and swirled together to create a marbled masterpiece. The name gives it away—it’s part brownie, part cookie—but it’s so much more than just a combo. This dessert takes the familiar flavors and textures we love and turns them into a hybrid that’s easier to make and share than separate batches. You get the crispy edges of a cookie with the melt-in-your-mouth softness of a real brownie, and the little swirls of chocolate and dough will make you swoon. It’s approachable, fun, and honestly feels like a little celebration in every bite.
Why you’ll love this recipe?
What I love most about these brownie cookie bars is how they satisfy every craving at once without needing a dozen bowls or hours of baking prep. The chocolate flavor is bold and rich without being overpowering, carrying that just-right bittersweet note you want in a brownie, while the cookie part is buttery, soft, and slightly caramelized on the edges.
It’s crazy how easy it is to whip this up. Honestly, I’ve made this dozens of times on busy weeknights, often tossing together the wet and dry ingredients while dinner simmers on the stove. No fancy technique, no tricky steps, just straightforward mixing and layering that anyone can do.
Budget-wise, you’re working with pantry staples here—flour, cocoa powder, some butter, eggs, and sugar—with an optional glaze that’s simple to make or skip. If you already have cookie dough or brownie mix on hand, this recipe becomes even more of a lifesaver.
And versatility? Oh, absolutely. I’ve experimented making these with nuts, adding chopped chocolate, or swirling in peanut butter. Sometimes I fold in oatmeal or swap out half the butter for Greek yogurt to make it a little lighter (and it doesn’t mess with the texture!). They make great grab-and-go breakfast treats, post-dinner sweets, or even desk-side snacks. If you like my classic brownies or chewy chocolate chip cookies, these bars are going to hit a new sweet spot – just trust me and keep a close eye on your pan, or you might just inhale them all in one sitting.
How do I make Brownie Cookie Bars?
Quick Overview
The secret to perfect brownie cookie bars is in the layering and swirling. You start with two simple batters—one brownie, one cookie—and then combine them in a way that you get the best parts of each throughout every bite. The whole process takes under an hour from start to finish, and the results are so worth that little bit of swirling effort. The edges crisp up beautifully while the center stays delightfully soft and fudgy. If you’ve ever felt intimidated by making brownies and cookies from scratch, this recipe will change your mind because it’s straightforward and forgiving.
Ingredients
For the Main Batter:
- 1 cup all-purpose flour – I like to sift it for a lighter crumb
- ¼ cup unsweetened cocoa powder – go for Dutch-processed if you want a richer taste
- ½ teaspoon baking powder – helps with a slight lift
- ⅛ teaspoon salt – balances the sweetness
- ¾ cup granulated sugar – you can swap half for brown sugar for extra chewiness
- ½ cup unsalted butter, melted – room temperature butter makes mixing easier
- 2 large eggs – straight from the fridge, but not cold
- 1 teaspoon vanilla extract – I always use pure vanilla for that authentic flavor
For the Filling:
- ½ cup unsalted butter, softened – this will make the cookie dough tender and moist
- ⅓ cup white sugar – helps set that classic cookie sweetness
- ⅓ cup packed brown sugar – adds a hint of caramel and chewiness
- 1 large egg yolk – you can leave this out to make it a touch firmer, but it’s worth it
- 1 teaspoon vanilla extract – the secret cookie magic
- 1 cup all-purpose flour – measured carefully to keep the cookie dough from getting dry
- ½ teaspoon baking soda – for just a little rise
- ¼ teaspoon salt
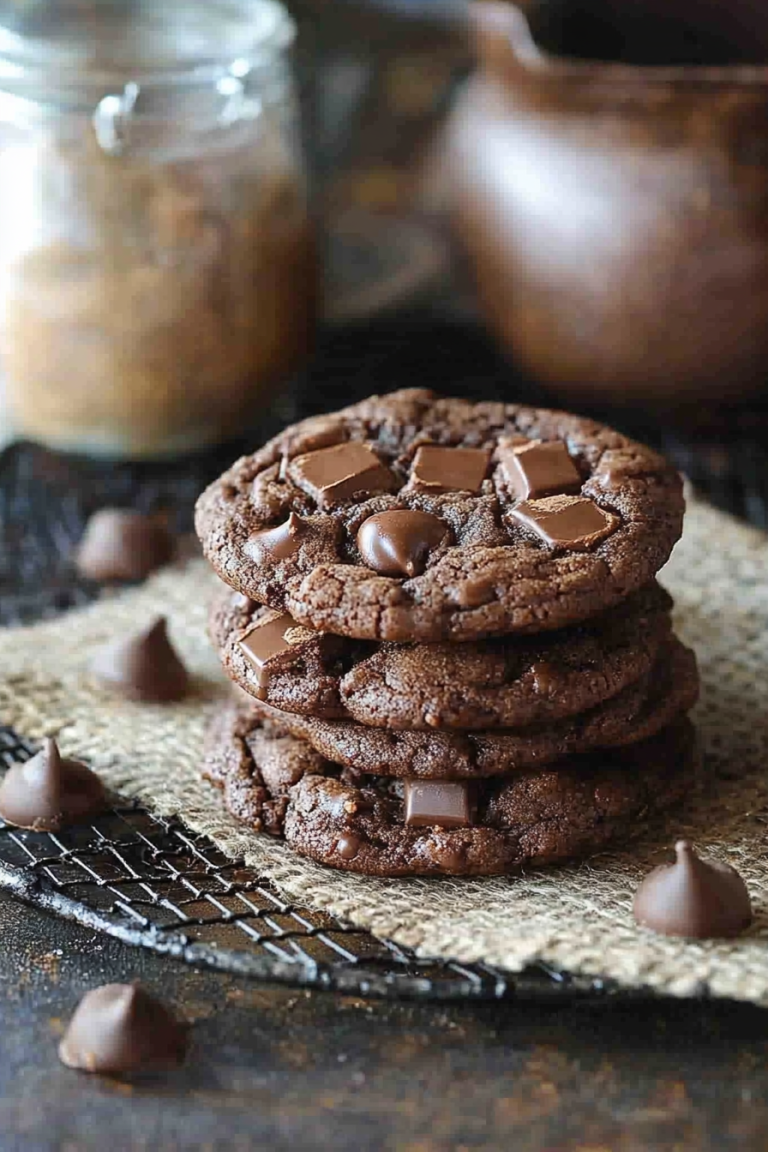
- ½ cup chocolate chips or chunks – optional, but highly recommended
For the Glaze:
- 1 cup powdered sugar
- 2 tablespoons milk (or almond milk for a twist!)
- ½ teaspoon vanilla extract
- Optional dash of espresso powder for a mocha kick
Step-by-Step Instructions
Step 1: Preheat & Prep Pan
Preheat your oven to 350°F (175°C). Line a 9×9-inch square baking pan with parchment paper, leaving an overhang on two sides for easy removal later. Lightly grease the sides so the bars don’t stick, especially where the parchment might not cover well. This little prep step saves you a headache when it’s time to slice.
Step 2: Mix Dry Ingredients
In a medium bowl, whisk together the flour, cocoa powder, baking powder, and salt. I always sift the cocoa powder here to keep it light and lump-free. This mix forms the base of your brownie batter, so it needs to be evenly combined for the best texture.
Step 3: Mix Wet Ingredients
In a separate large bowl, whisk the melted butter and sugar until well combined. This is where your batter starts getting that rich, glossy look. Then, add the eggs one at a time, beating between each to give it a smooth, ribbon-like texture. Finish with vanilla extract. It smells incredible right at this stage – sweet, buttery, and promising.
Step 4: Combine
Slowly add your dry ingredients to the wet, folding gently with a spatula just until combined. I’ve learned over the years not to overmix here; a little flour streak is totally okay and keeps the bars from becoming tough. The batter should be thick but spreadable.
Step 5: Prepare Filling
For the cookie dough layer, cream the softened butter with white and brown sugars until fluffy—this usually takes about 2-3 minutes with a hand mixer. Beat in the egg yolk and vanilla. Then, stir in the flour, baking soda, and salt until just blended. Fold in chocolate chips if you’re feeling adventurous – I promise these little pockets of melty chocolate make a world of difference.
Step 6: Layer & Swirl
Spread half of the brownie batter evenly in the prepared pan, smoothing it out with a spatula. Dollop spoonfuls of the cookie dough on top; it will be thick so just drop it randomly. Then spread the remaining brownie batter over the cookie dough gently. To create that lovely swirl, take a butter knife or skewer and drag it through the batter in a figure-eight or circular pattern a few times. Don’t overdo it, or you’ll lose that marbled effect. The best part is that every slice will have a unique swirl pattern!
Step 7: Bake
Bake for about 30-35 minutes. The timing can vary depending on your oven, so start checking at 28 minutes by inserting a toothpick into the center. A few moist crumbs are perfect here—it’s better to slightly underbake brownies than overbake in my book. The edges will be set and crisp, while the middle stays soft and fudgy. The smell coming off the oven at this point is pure comfort food at its best.
Step 8: Cool & Glaze
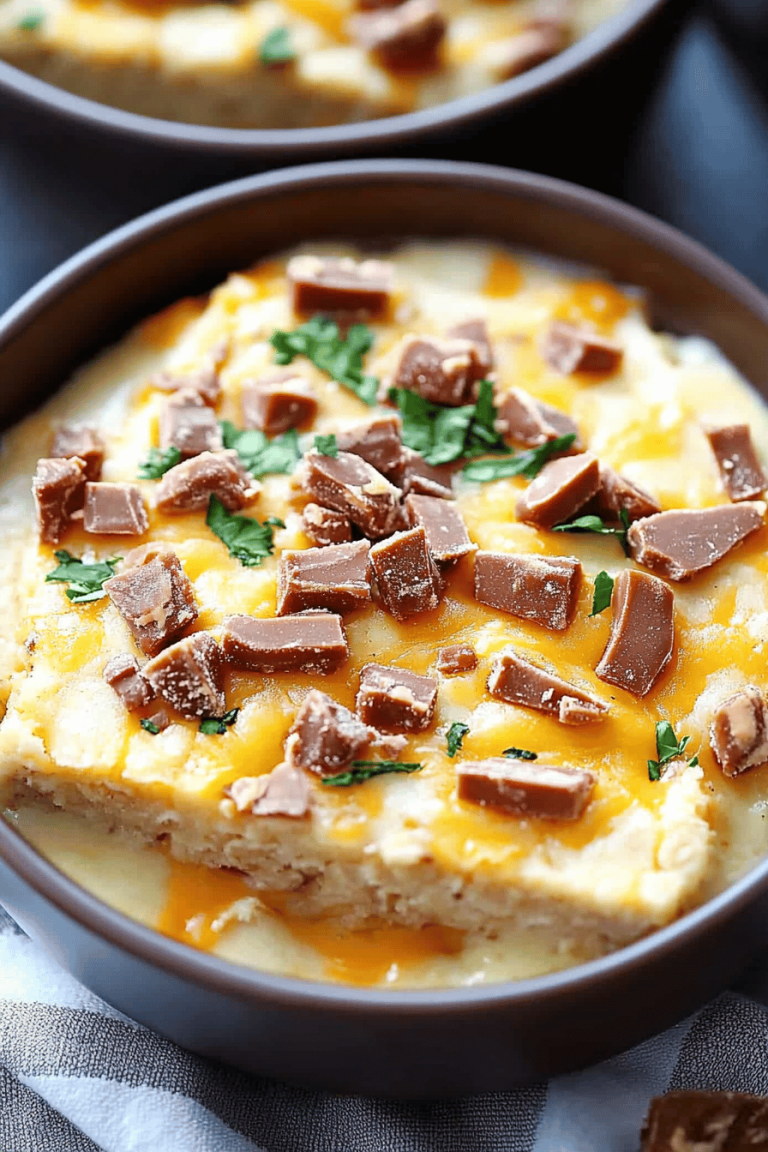
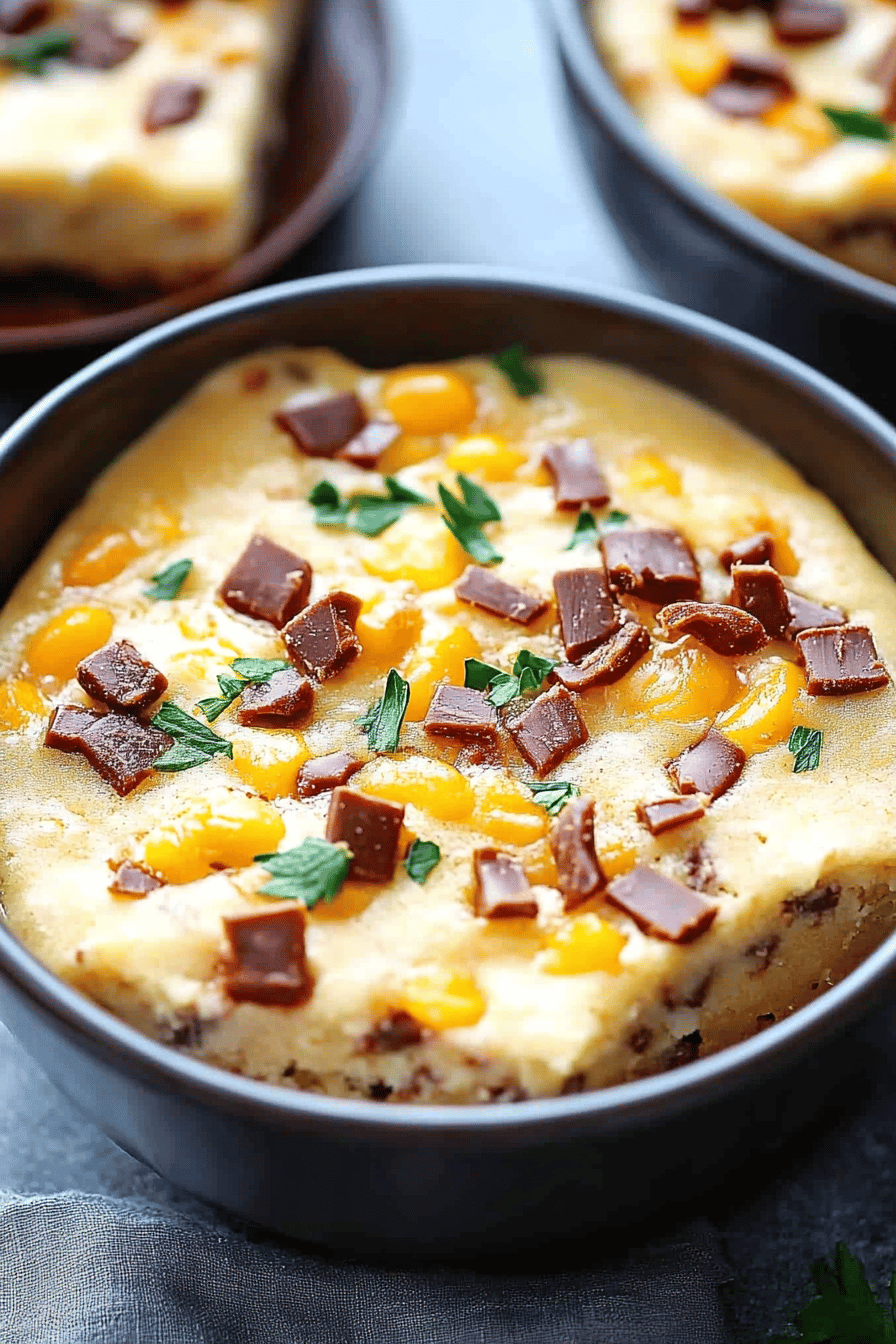
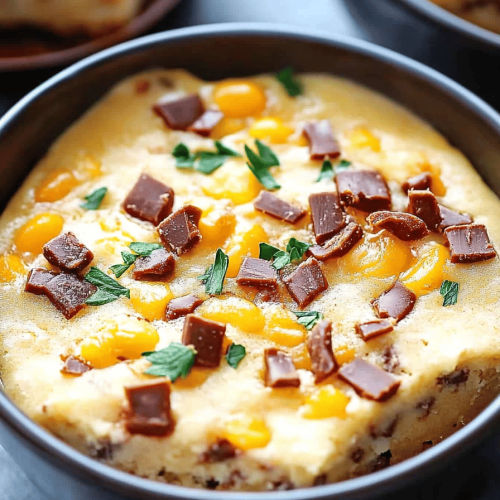
Let the bars cool completely in the pan on a wire rack, about an hour. This step is crucial because cutting hot bars will cause them to crumble or stick badly. Once cool, whisk together your glaze ingredients until smooth. If it’s too thick, add a bit more milk; if too thin, a little more powdered sugar. Drizzle over the top evenly, then let it set for about 15 minutes before slicing. You can totally skip the glaze if you want, but it adds that shiny, sweet finish that makes these bars extra special.
Step 9: Slice & Serve
Using the parchment overhang, lift the entire block from the pan and place it on a cutting board. For clean cuts, use a sharp knife wiped with a warm damp cloth between slices. I usually cut into 12 squares, but feel free to go smaller—after all, these are rich! Serve slightly chilled or at room temperature. The chewy edges with gooey centers are just heavenly.
What to Serve It With
For Breakfast: Pair a warm brownie cookie bar with your favorite morning coffee or a creamy latte – the sweet chocolate flavor pairs beautifully with a robust brew. Sometimes I serve a wedge with a dollop of Greek yogurt and fresh berries for a balanced start that still feels indulgent.
For Brunch: These bars can be dressed up with a light dusting of powdered sugar and a side of macerated strawberries or orange segments. A chilled glass of sparkling wine or prosecco makes for a surprisingly elegant match if you’re entertaining friends.
As Dessert: Serve warm topped with a scoop of vanilla bean ice cream or a drizzle of caramel sauce for a comforting, crowd-pleasing finale. A sprinkle of toasted nuts adds a lovely contrast in texture, especially if you’re sharing with family or guests who love a little crunch.
For Cozy Snacks: Brownie cookie bars are perfect with a mug of hot chocolate or chai tea in the afternoon. We often eat them during movie nights or weekend treats, paired with a soft blanket and good company. They’re the kind of treat that feels like a warm hug on a plate.
My family’s been known to pack these for picnics or school lunches, and they hold up well without drying out. Trust me, the combination is totally versatile and endlessly comforting.
Top Tips for Perfecting Your Brownie Cookie Bars
Brownie Base Prep: Use good quality cocoa powder – it makes a surprisingly big difference in flavor. I once used cheap baking cocoa and regretted it immediately. Also, melting the butter gently helps keep the batter silky instead of grainy.
Mixing Advice: Don’t overmix your batter once you combine wet and dry. I learned the hard way that overmixing toughens the bars and kills that fudgy texture. Fold gently until the flour streak disappears.
Swirling Technique: For a beautiful marbled effect, keep your knife or skewer close to the surface and only swirl 6-8 times at most. Going crazy with swirling tends to blend the two too much and you lose those luscious layers.
Ingredient Swaps: I’ve swapped half the butter for applesauce once to cut fat, and while they were slightly less rich, the bars were still moist and delish. You can also use coconut sugar instead of brown sugar for a deeper, caramel note. Almond milk works well in the glaze and makes it silkier, too.
Baking Tips: Oven temperatures can vary, so keeping a close watch from 28 minutes onward is key. The bars will set around the edges but stay fudgy in the center—don’t wait for a clean toothpick. Letting the bars cool fully before glazing is important; otherwise, the glaze melts into the surface.
Glaze Variations: You can add a pinch of cinnamon or espresso powder for an interesting twist. If you prefer something less sweet, a dusting of cocoa powder or a sprinkle of sea salt can be just as lovely. Sometimes I just drizzle melted chocolate instead of making a glaze for a richer topping.
Overall, this recipe is wonderfully forgiving, so don’t get discouraged if your first batch isn’t textbook perfect. Each time I make it, I learn new little tweaks that make it even better.
Storing and Reheating Tips
Room Temperature: Store cooled brownie cookie bars loosely covered with foil or in an airtight container for up to 3 days. They actually taste better after a day once the flavors meld, but if your house is humid, make sure they’re well covered to avoid drying out.
Refrigerator Storage: If you want to keep them longer, place bars in an airtight container lined with parchment paper between layers and refrigerate for up to a week. Bring to room temp or warm gently before serving. The texture will firm up but the flavor stays excellent.
Freezer Instructions: These bars freeze beautifully. Wrap individual bars tightly in plastic wrap, then place in a freezer-safe zip-lock bag or container for up to 2 months. Thaw overnight in the fridge or defrost gently in the microwave if you’re impatient like me.
Glaze Timing Advice: If you plan on freezing or refrigerating long-term, wait to glaze until closer to serving time, or glaze and allow it to set fully before wrapping. This avoids glaze softening in storage and keeps that perfect presentation.
Frequently Asked Questions
Final Thoughts
Brownie cookie bars are one of those recipes I find myself coming back to when I want something that’s both comforting and quick, sure to disappear fast. The way the fudgy brownie meets the tender cookie in every bite is like a little moment of joy — and the swirling technique means everyone gets a unique treat. You don’t have to choose between a cookie or a brownie ever again, and your kitchen will smell incredible the whole time.
If this recipe sparks your love for hybrids, there are plenty of other swirled desserts and bar bakes you might want to explore — I’ll be sharing some favorites soon! In the meantime, I’d love to hear in the comments how your brownie cookie bars turned out, any twists you tried, or if you have a secret ingredient to share.
Happy baking, and may your sweet tooth always be satisfied!
Brownie Cookie Bars How to Make Them
Ingredients
Main Ingredients
- 18.3 ounce fudge brownie mix prepared according to package directions
- 0.5 cup unsalted butter melted and cooled slightly
- 0.5 cup light brown sugar packed
- 0.5 cup granulated sugar
- 1 large egg room temperature
- 1 large egg yolk room temperature
- 1 teaspoon vanilla extract
- 1.33 cups all-purpose flour
- 2 teaspoons cornstarch
- 0.25 teaspoon baking soda
- 0.25 teaspoon salt
- 0.75 cup semi-sweet chocolate chips
Instructions
Preparation Steps
- Preheat oven to 325°F. Line a 9x13 inch metal baking pan with parchment paper with overhang. Spray lightly with non-stick baking spray.
- Prepare the brownie mix according to package directions by combining the required eggs, water, and vegetable oil.
- Pour the brownie batter into the prepared pan, spreading to an even layer. Set aside.
- In a separate bowl, beat the melted butter, light brown sugar, and granulated sugar on medium speed until fully combined.
- Add the egg, egg yolk, and vanilla extract to the butter-sugar mixture and beat until smooth.
- Add flour, cornstarch, baking soda, and salt. Mix on low speed until no dry flour streaks remain.
- Fold in the semi-sweet chocolate chips until evenly distributed.
- Using two spoons, drop dollops of cookie dough evenly over the brownie batter to ensure even baking.
- Cover the pan with aluminum foil and bake for 20 minutes. Remove foil and bake uncovered an additional 15-20 minutes until a toothpick inserted comes out clean or with a few moist crumbs.
- Remove from oven and let cool completely on the counter.
- Use parchment overhang to lift the brookie from the pan and cut into 12 large or 24 small servings.