Christmas Mints
Oh, I’m so excited to finally share this with you! If there’s one scent that instantly transports me back to my childhood Christmases, it’s the sweet, cool aroma of fresh mint mingling with warm sugar. And these Christmas Mints? They’re not just candy; they’re pure nostalgia. Every year, without fail, my mom would have a big batch of these ready to go, and they’d be the first thing to disappear from the holiday cookie platter. They’re so much simpler than you might think, and honestly, they taste about a million times better than any store-bought version. Think of them as little bursts of winter joy, a perfect little sweet bite to brighten any moment during the busy holiday season. They remind me a bit of those fancy chocolate mints you get after a nice dinner, but these have that wonderful homemade charm that just can’t be beaten. I’ve tried so many candy recipes over the years, but this one for Christmas Mints is the one I come back to again and again, especially when I need a little something sweet but don’t have hours to spend in the kitchen.
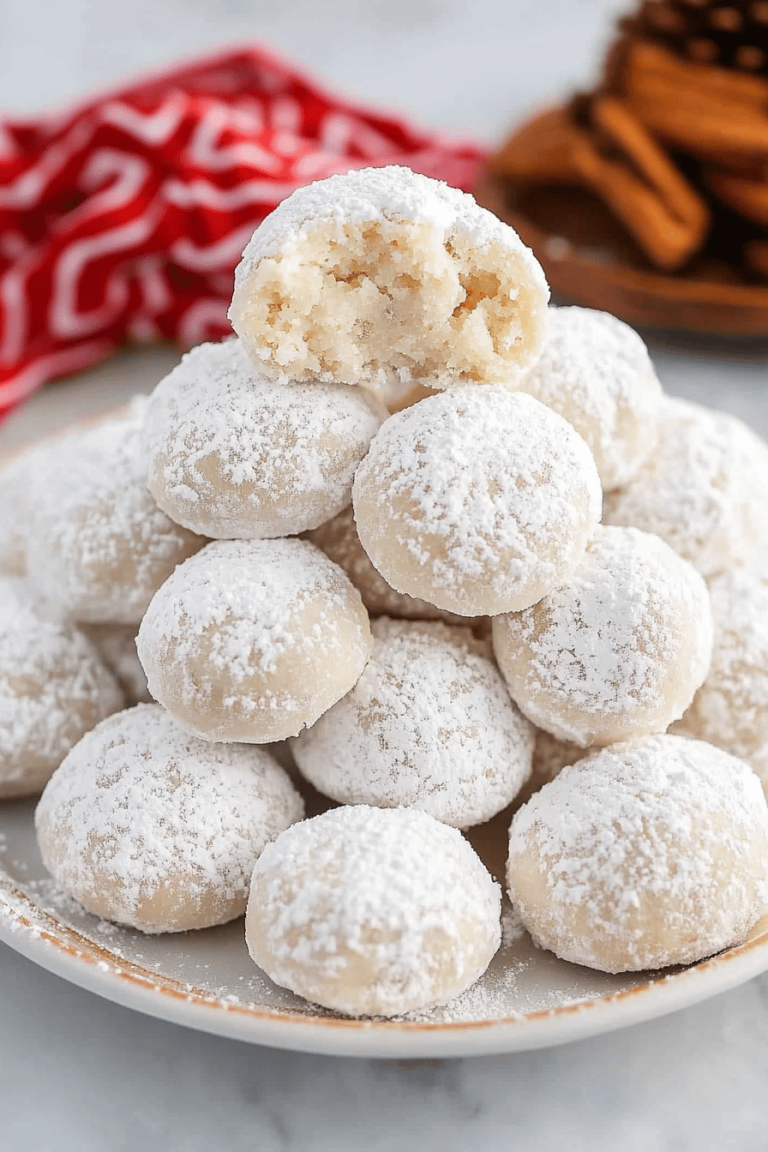
What are Christmas mints?
So, what exactly are these magical little treats? At their heart, Christmas Mints are a type of hard candy, but they’re infused with that unmistakable cool, refreshing peppermint flavor that just screams “holidays.” They’re not overly complicated, which is probably why they’re such a hit. The basic idea is to create a sugar syrup, cook it to a specific temperature, add in the flavoring, and then let it cool and harden. We’re talking about simple pantry staples here, folks! What makes them truly special, though, is that subtle hint of mint that isn’t overpowering, just perfectly balanced to give you that lovely cooling sensation. They’re like tiny, edible snowflakes with a sweet surprise inside. They’re the kind of candy that you can pop one or two and feel instantly festive. Forget those chalky mints; these are smooth, delightful, and bursting with authentic peppermint goodness.
Why you’ll love this recipe?
Honestly, there are so many reasons why this recipe for Christmas Mints has become my absolute go-to. First off, the flavor is just divine. It’s that perfect blend of sweet sugar and bright peppermint that’s so satisfying. It’s not cloying or artificial; it tastes like pure winter magic. Then there’s the simplicity. Seriously, you probably have most of the ingredients in your pantry right now. It’s a lifesaver when you realize you need a last-minute edible gift or a festive treat for unexpected guests. I’ve made these on a super busy weeknight, and they still turned out beautifully. Speaking of gifts, these are so budget-friendly! You can make a huge batch for just a few dollars, and people will think you spent a fortune. Plus, they’re incredibly versatile. You can change up the color, add a touch of edible glitter, or even swirl in some chocolate for a different vibe. What I love most about this recipe, though, is the feeling it evokes. It’s that cozy, happy, festive feeling that only homemade Christmas treats can bring. It’s so much more rewarding than just buying something. I also find that these Christmas Mints are a fantastic alternative to more complicated holiday cookies or baked goods. When you’re short on time but still want to bring something special to a party or just have a little treat for yourself, this is your answer.
How do I make Christmas mints?
Quick Overview
Making these Christmas Mints is surprisingly straightforward. We’ll essentially be cooking sugar syrup to a precise temperature, which is key to getting that perfect hard candy texture. Once it’s ready, we stir in the peppermint extract and, if you like, a touch of food coloring. Then, it’s just a matter of letting it cool and harden before breaking it into bite-sized pieces. It’s a quick process once you get the hang of it, and the results are incredibly rewarding. This method ensures you get that satisfying crunch and clean peppermint finish without any fuss.
Ingredients
For the Main Candy:
2 cups granulated sugar: This is the backbone of our candy. Make sure it’s plain white granulated sugar for the best clarity and texture. I always buy a big bag around the holidays because I use it for so many things! Make sure you measure it accurately; it’s more important than you might think for getting the texture just right.
2/3 cup light corn syrup: This is crucial for preventing crystallization and ensuring your candy comes out smooth and shiny. Don’t skip this! I’ve tried it without, and let me tell you, it’s a grainy mess. A little bit goes a long way for that beautiful texture.
3/4 cup water: Just plain old water to help dissolve the sugar and get our syrup started. Nothing fancy needed here.
1 to 1 1/2 teaspoons peppermint extract: This is where the magic happens! Start with 1 teaspoon and taste your syrup (carefully, it’s hot!) if you want more minty punch, add the extra half teaspoon. Too much, and it can get a bit medicinal, so use your best judgment. I love a good, clear peppermint flavor that isn’t overpowering.
Red or green food coloring (optional): A few drops are all you need to give these festive Christmas Mints that classic holiday look. Gel food coloring works best for vibrant colors without adding too much extra liquid.
Step-by-Step Instructions
Step 1: Prepare Your Baking Sheet
This is a step you absolutely cannot skip. Line a large baking sheet with parchment paper or a silicone baking mat. You can also lightly grease the parchment paper with a neutral oil or cooking spray, but the mat is usually sufficient. Having this ready to go *before* you start cooking the syrup is critical, as you’ll be pouring the hot candy onto it.
Step 2: Combine Sugar, Corn Syrup, and Water
In a heavy-bottomed saucepan, combine the granulated sugar, light corn syrup, and water. Stir gently over medium heat until the sugar is completely dissolved. Don’t stir too vigorously once it starts to bubble, as this can encourage crystallization. Just a gentle swirl is fine.
Step 3: Cook the Syrup
Once the sugar is dissolved, stop stirring. Clip a candy thermometer to the side of the pan, making sure the bulb is submerged in the syrup but not touching the bottom of the pan. Bring the mixture to a boil and cook, undisturbed, until it reaches 300 degrees Fahrenheit (149 degrees Celsius), which is the hard-crack stage. This usually takes about 10-15 minutes. Keep a close eye on it, as it can go from perfect to burnt very quickly!
Step 4: Add Flavor and Color
As soon as the syrup reaches 300°F, immediately remove the pan from the heat. Carefully stir in the peppermint extract. Be aware that the extract can cause the hot syrup to steam up quite a bit, so stand back! If you’re using food coloring, add a few drops now and stir gently until you achieve your desired color. Again, be cautious of the steam.
Step 5: Pour and Cool
Quickly and carefully pour the hot candy mixture onto your prepared baking sheet. Spread it out thinly with a heatproof spatula if needed, but try not to overwork it. Let the candy cool completely and harden at room temperature. This can take anywhere from 30 minutes to an hour, depending on the thickness and your kitchen’s humidity.
Step 6: Break into Pieces
Once the candy is completely hard and brittle, you can break it into smaller, bite-sized pieces. You can do this by hand (it might be a bit sharp, so be careful!), or you can place the hardened sheet of candy in a sturdy plastic bag and gently tap it with a rolling pin or mallet. For really uniform pieces, you could even use a sharp knife or a candy hammer.
Step 7: Store Your Christmas Mints
Store the broken Christmas Mints in an airtight container at room temperature. If your kitchen is very humid, you might want to add a silica gel packet to the container to help absorb any moisture. They’ll stay fresh for a good few weeks, but honestly, they rarely last that long in my house!
What to Serve It With
These Christmas Mints are such a delightful little treat, and they pair wonderfully with so many things, especially during the holidays. For a cozy morning with coffee, they’re a perfect little pick-me-up. Just one or two, along with your favorite brew, feels so decadent. They’re also fantastic as part of a larger holiday dessert spread. Imagine them nestled amongst cookies and brownies on a festive platter – they add a lovely pop of color and a refreshing contrast. I often like to serve them after a big holiday meal, especially after something rich like prime rib or a heavy casserole. They really help to cut through the richness and leave your palate feeling clean and refreshed. For a more casual get-together, I’ll just put a bowl of them out on the coffee table, and they’re always a hit with kids and adults alike. My kids absolutely love them and will sneak them whenever they think I’m not looking! They’re also surprisingly good crushed up and sprinkled over ice cream or yogurt for a quick, festive dessert. Sometimes, I’ll even pack a few in small cellophane bags tied with a ribbon as a little edible stocking stuffer or a thank-you gift for the mail carrier or teachers.
Top Tips for Perfecting Your Christmas Mints
Over the years, I’ve learned a few little tricks that really make these Christmas Mints sing. First, about the corn syrup: it’s really your best friend here for preventing gritty candy. If you happen to forget it, or can’t find it, you can try a different method using a sugar syrup with an acid like cream of tartar, but the corn syrup is by far the easiest and most reliable for home cooks. Make sure your saucepan is heavy-bottomed. This helps distribute heat evenly and prevents scorching, which is crucial when you’re dealing with delicate sugar syrups. And speaking of heat, don’t rush the cooking process! It might take a little longer than you expect to reach that 300°F mark, but patience is key. Trying to speed it up by cranking the heat too high is how you end up with burnt sugar, and that taste is impossible to mask. When you add the peppermint extract, be prepared for steam. It’s a lot of steam! So, remove the pan from the heat *before* you add it, and stand back a bit. Also, taste as you go, but do it carefully! A tiny, tiny drop on the tip of a spoon (let it cool slightly!) is all you need. I once made them too minty for my own good and they were just too intense. For the color, a little goes a long way, especially with gel colors. If you want a marbled effect, you can pour half the colored syrup onto the sheet, then add a different color to the remaining syrup and swirl it on top with a toothpick before it sets.
Storing and Reheating Tips
Storing these Christmas Mints is usually the easy part, but there are a few things that can help keep them in tip-top shape. At room temperature, in an airtight container, they should be perfectly fine for at least 2-3 weeks, sometimes even longer. The key is that airtight container. If they’re left out, they can absorb moisture from the air, which can make them sticky or even start to dissolve. I like to use those good old plastic containers with the snap-on lids, or even good quality Ziploc bags if I’m making a big batch to share. If you live in a particularly humid climate, like I do sometimes, you might want to toss in a food-safe silica gel packet in with the candy. They’re inexpensive and really help to keep moisture at bay. I haven’t found a need to reheat them, as they’re best enjoyed at room temperature when they’re crisp and hard. If for some reason they do get a little soft, you can try spreading them out on a baking sheet and gently drying them in a very low oven (around 170°F or 75°C) for about 15-20 minutes, but honestly, it’s usually easier to just make a fresh batch!
Frequently Asked Questions
Final Thoughts
I really hope you give these Christmas Mints a try this holiday season. They’re more than just a sweet treat; they’re a little piece of holiday magic that’s so easy to bring into your own kitchen. The simple joy they bring, the way they smell filling your home, and the happy faces they bring to your loved ones are truly priceless. They’re a reminder that the best gifts are often the ones made with love and a little bit of time. If you’re looking for other festive treats, you might also enjoy my [link to another Christmas recipe, e.g., Gingerbread Cookies] or my [link to another holiday recipe, e.g., Cranberry Orange Scones]. I can’t wait to hear how your Christmas Mints turn out! Please leave a comment below and let me know your favorite holiday traditions or if you have any variations you love. Happy baking – or should I say, happy candy making!
Peppermint Treats How to Make Christmas Mints
Ingredients
Main Ingredients
- 0.33 cup granulated sugar
- 4 oz cream cheese room temperature
- 2 tbsp unsalted butter room temperature
- 2 tbsp light corn syrup I used Karo brand
- 1 tsp peppermint extract
- 4.25 cup powdered sugar divided plus up to 0.5 cup extra for kneading
- 6 drops green liquid food coloring
- 6 drops red liquid food coloring
Instructions
Preparation Steps
- Line a large rimmed baking tray with parchment paper. Place the granulated sugar into a small bowl. Set aside.
- In a large mixing bowl with a handheld mixer on low speed, beat the cream cheese, unsalted butter, light corn syrup, and peppermint extract for 1 minute or until smooth.
- Slowly add 4.25 cups powdered sugar, half a cup at a time, to the bowl with the mixer on low. When dough becomes very thick, switch to a spatula and finish mixing by hand.
- Lay parchment paper on counter, sprinkle 0.25 cup of the remaining powdered sugar, then turn out dough onto parchment paper.
- Divide dough into three equal parts. Create shallow wells in two parts: add red food coloring to one, green to another, leaving the third natural white.
- Carefully knead red and green dough to distribute coloring; add up to 0.25 cup extra powdered sugar as needed for stickiness. Lightly knead white dough with a tablespoon or two of powdered sugar if sticky.
- Roll each dough ball into ropes about 18 inches long and 1 inch thick.
- Make 0.5-inch slices along each rope until fully cut.
- Roll each piece into small balls using the palm of your hand. Set aside.
- Drop 2-3 dough balls into the granulated sugar bowl, toss to coat, then place on baking tray. Repeat for all balls.
- Lightly press each peppermint ball with the tip of a fork to form discs with striped patterns.
- Allow mints to sit at room temperature on the tray for up to 24 hours to dry and set before serving.