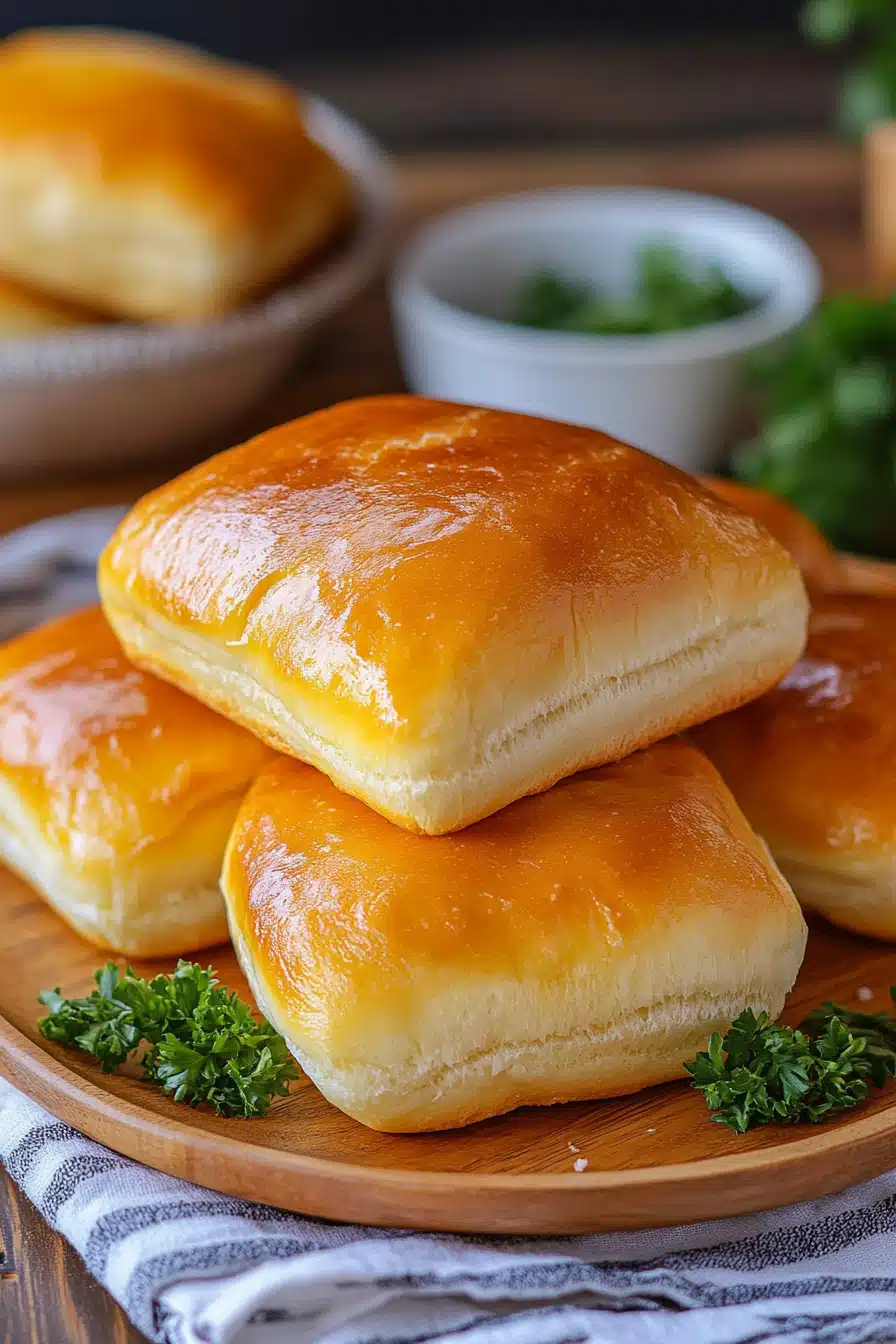
Easy Homemade Dinner Rolls Recipe
There’s something magical about the smell of fresh dinner rolls baking in the oven—like a warm hug wrapping around you and pulling family together at the table. My earliest memories of dinner rolls involve my grandma’s tiny kitchen, flour dust everywhere, and those little golden clouds disappearing almost before she could butter them. If you’ve ever stuck with store-bought rolls, you’re seriously missing out. These dinner rolls are not just soft and pillowy but incredibly easy to make. Honestly, I used to think homemade rolls were this mysterious, complicated thing, but this recipe changed the game for me. It’s friend-grade simple and surprisingly quick. They’re nicer than any bakery rolls I’ve tried and perfect whether you’re serving them alongside a hearty stew or just snacking with butter and honey. Trust me, once you make these, you’ll never want to buy rolls again!
What is dinner roll?
Think of dinner rolls as little soft blankets of bread—small, round, and fluffier than you’d expect. They’re a staple on dinner tables everywhere, especially around holidays and family gatherings, but they’re great any time you want a little bread comfort. The name is pretty straightforward: these rolls are usually served alongside dinner, filling that carb-craving spot but in this irresistible, delicate form. It’s essentially a quick yeast bread shaped into little buns that can be eaten plain, buttered, or with jam. There’s a kind of magic in those soft centers and slightly browned tops that’s perfect for soaking up gravy or just enjoying straight out of the oven. Simple, versatile, and downright delicious—dinner rolls can be humble, but to me, they’re a dinner party showstopper.
Why you’ll love this recipe?
What I absolutely adore about this dinner rolls recipe is how it ticks all the boxes without making me climb a baking mountain. First off, the flavor is a gentle buttery hug with just a kiss of richness that isn’t overpowering. They’re soft on the inside, golden on the outside, with a tender crumb that slices perfectly without any crumbling. Unlike some heavier rolls I’ve tried, these keep that cloud-like texture even after a day or two.
Secondly, the simplicity is a lifesaver when I’m juggling a million things in the kitchen. No fancy ingredients or complicated steps—just basics you likely already have in your pantry. The yeast proofing is straightforward and forgiving, which means even my not-so-patient self can make it without disaster.
Cost-wise, it’s pretty budget-friendly too. Flour, sugar, butter, a little yeast—pricey ingredients like cream cheese or fancy seeds aren’t needed here. And that versatility? Don’t get me started. They’re perfect smashed with jam for breakfast, paired with soup for lunch, or served with dinner as a buttery sidekick. Plus, I’ve even used the dough to make little sliders for a family-friendly dinner twist. Honestly, this recipe quickly became my go-to, and the kids ask for these rolls over any other bread every single time.
How do I make dinner rolls?
Quick Overview
Here’s the skinny: you start by waking up your yeast with warm milk and a touch of sugar, then mix in your dry ingredients to form a soft, tacky dough. After a little resting and rising, you shape the dough into perfect little balls and let them puff up again before sliding them into a warm oven. The aroma will draw everyone near—if you can hold out that long! Finish with a brushing of melted butter and maybe a sprinkle of salt, and you’re golden. The steps are simple but build on each other beautifully, so even beginners can nail this. Trust me, the first time I made these, I was surprised at just how *easy* it was to get bakery-worthy rolls at home.
Ingredients
For the Main Batter:
- 3 ½ cups all-purpose flour (go for a good quality brand — it really impacts texture)
- 1 cup warm whole milk (anywhere between 105-115°F; not too hot or it’ll kill the yeast!)
- 2 ¼ teaspoons active dry yeast (one packet is perfect)
- ¼ cup granulated sugar (adds just the right hint of sweetness)
- 1 large egg (helps with richness and structure)
- ¼ cup unsalted butter, melted + extra for brushing (soft, not browned)
- 1 teaspoon salt (to balance flavor)
For the Glaze:
- 2 tablespoons unsalted butter, melted (for that glossy, soft finish)
Step-by-Step Instructions
Step 1: Preheat & Prep Pan
Start by preheating your oven to 375°F (190°C). Grease a 9×13-inch baking pan with a little butter or non-stick spray, or line it with parchment paper. This roll recipe loves a snug pan; it helps them rise upwards instead of outwards, so you get those cute pull-apart rolls.
Step 2: Mix Dry Ingredients
In a large bowl, whisk together the flour, sugar, and salt. Doing this before adding the wet ingredients ensures even distribution—trust me, my first bake had uneven salt pockets from skipping this step!
Step 3: Mix Wet Ingredients
In a separate bowl, combine the warm milk and yeast. Let it sit for 5 minutes until it’s foamy—this signals your yeast is awake and happy. Then whisk in the melted butter and egg until blended.
Step 4: Combine
Slowly add your wet mixture to the dry ingredients, stirring with a wooden spoon (or a dough hook if you’re fancy) until a formable dough appears. It’ll be tacky but not sticky. If it’s too sticky, sprinkle a tablespoon of flour at a time; but don’t obsess over “perfect” — softer dough means softer rolls!
Step 5: First Rise
Cover the bowl with a clean kitchen towel or plastic wrap and let it rise in a warm spot for about an hour, or until doubled in size. This step is crucial for those lovely airy rolls.
Step 6: Shape Rolls
Once risen, punch down the dough gently to release air bubbles. Divide it into 12 equal pieces—my method is to weigh them so they’re consistent—and shape each into a tight ball. Place them side-by-side in the prepared pan, slightly touching.
Step 7: Second Rise
Cover the pan loosely and let the rolls rise again for 30-40 minutes. They’ll puff up nicely and almost double again.
Step 8: Bake
Pop the pan into the oven and bake for 18-22 minutes, until the tops are beautifully golden brown. My trick: if they look too pale at the 20-minute mark, give them a minute or two more rather than pulling too soon.
Step 9: Cool & Glaze
As soon as the rolls come out of the oven, brush the tops generously with melted butter. This step adds such a beautiful shine, softness, and just that little boost of flavor that makes these rolls addictive.
Step 10: Serve
Let the rolls cool for about 10 minutes before serving—or dive in right away if you’re like me and just can’t wait! They’re best warm but still taste lovely at room temp.
What to Serve It With
For Breakfast: These rolls are dreamy paired with a steaming cup of coffee, slathered in cream cheese or your favorite fruit jam. I love slicing them open and adding a little honey butter for an extra-special morning treat.
For Brunch: Serve alongside scrambled eggs, smoked salmon, or a fresh fruit platter. A light mimosa or freshly squeezed orange juice rounds it out perfectly.
As Dessert: Believe it or not, these rolls make a great base for warm bread pudding or can be split and filled with chocolate spread and fresh strawberries. Drizzle some honey or maple syrup on top, and you’ve got yourself an unexpectedly delightful dessert.
For Cozy Snacks: Nothing beats tearing apart a warm roll, dunking it into a bowl of homemade chili or thick stew. If you want to make it a little fancy, a side of garlic butter or herbed olive oil dipping sauce will blow your mind.
My family once declared these rolls the “best part of Thanksgiving” (before dinner even started!). We’ve turned this into a tradition that I really cherish—it’s the smell, the softness, and the way everyone’s hands reach for the basket. A simple comforting joy that somehow keeps bringing us back.
Top Tips for Perfecting Your Dinner Rolls
Yeast Activation: Make sure your milk is warm but not hot—too hot and your yeast will die. If your yeast doesn’t foam after 5 minutes, it’s time for a fresh packet.
Mixing Dough: I always mix gently by hand or slow speed with a dough hook. Overmixing creates tough rolls, so stop as soon as the dough comes together and feels soft but pliable.
Rising: Patience is key here. A warm, draft-free spot can make or break the rise. I often use my oven light on for a little warmth or set near a sunny window.
Shaping Rolls: Roll the dough into smooth balls sitting snugly in the pan for that nice pull-apart effect. If you space them apart, you’ll end up with more separate rolls, which is fine but changes the texture.
Butter Glaze: Don’t skip this! It makes the rolls extra soft and adds depth. I’ve tried glazing before and after baking and prefer right after—they soak in better.
Ingredient Swaps: I tested this with almond milk and found it surprisingly creamy and adds a subtle nutty backdrop. Using all whole wheat flour made them heavier, so I stick to white flour for that cloud-like fluff. For a dairy-free version, try oat milk and vegan butter—you’ll need to watch rising times closely.
Baking Variations: Oven temperatures can be tricky. If your rolls brown too fast, lower the temp by 10-15 degrees and extend baking time slightly. For softer crusts, cover loosely with foil after 15 minutes.
Over the years, I’ve learned not to rush any step but especially the second rise—it really makes the difference between “meh” rolls and melt-in-your-mouth ones. Also, weighing dough pieces each time (I use a little kitchen scale) gives me evenly sized rolls, which bake more consistently.
Storing and Reheating Tips
Room Temperature: Store rolls in an airtight container or tightly wrapped in foil or plastic wrap at room temp for up to 2 days. This keeps them soft and fresh—just warm slightly before serving.
Refrigerator Storage: Rolls keep up to 5 days in the fridge, but refrigeration tends to dry breads out faster. Keeping them sealed well helps, and reheating in a warm oven or microwave with a damp towel around them brings back some moisture.
Freezer Instructions: If you want to freeze, wrap individual rolls tightly in plastic wrap and place in a freezer bag. They freeze well for up to 3 months. Thaw overnight in the fridge or for a few hours on the counter, then reheat wrapped in foil in a 350°F oven for 10-15 minutes until warm and soft.
Glaze Timing Advice: For stored rolls, it’s best to add the butter glaze fresh after reheating. The glaze soaks beautifully into warm bread but tends to dry and harden if pre-applied and stored.
Frequently Asked Questions
Final Thoughts
These dinner rolls might just sneak into your family’s regular rotation like they did in mine. There’s something about the way they bridge simple ingredients with that bakery-worthy softness that makes every meal that much cozier. Whether it’s a spontaneous weeknight dinner or a holiday feast, these rolls bring smiles and satisfy those everyday carb cravings. Plus, the recipe is forgiving and adaptable, so you can tweak it without stress until it’s just how you like it.
If you love a good homemade bread, try pairing this recipe with my favorite homemade soups or even a sweet cinnamon roll version for breakfast treats. I’d really love to hear how your rolls turn out—drop a comment, share pictures, or let me know your own special touches. Happy baking, friend! Can’t wait to see your kitchen filled with that warm, buttery aroma too.