Fruity Cherry Cocktail Bombs How To Make
I remember the first time I stumbled upon this Cherry Bombs recipe—it was one of those chilly afternoons where you just want something cozy, sweet, but not overly complicated. The kitchen filled with that slightly tangy, fruity aroma that teased the senses before you even take a bite. You know, like when you bake blueberry muffins but with a little extra oomph? These Cherry Bombs are exactly that for me: the perfect balance of tender cake with this surprise cherry punch in the middle. Honestly, it’s the kind of treat that sneaks its way into your heart—and your snack stash—before anyone even notices. If you’ve ever wished for something a little less conventional but totally crave-worthy, these will be your new obsession. My kids actually ask for seconds, which is impressive since cherry anything is usually hit or miss in our house!
What is a cherry bomb?
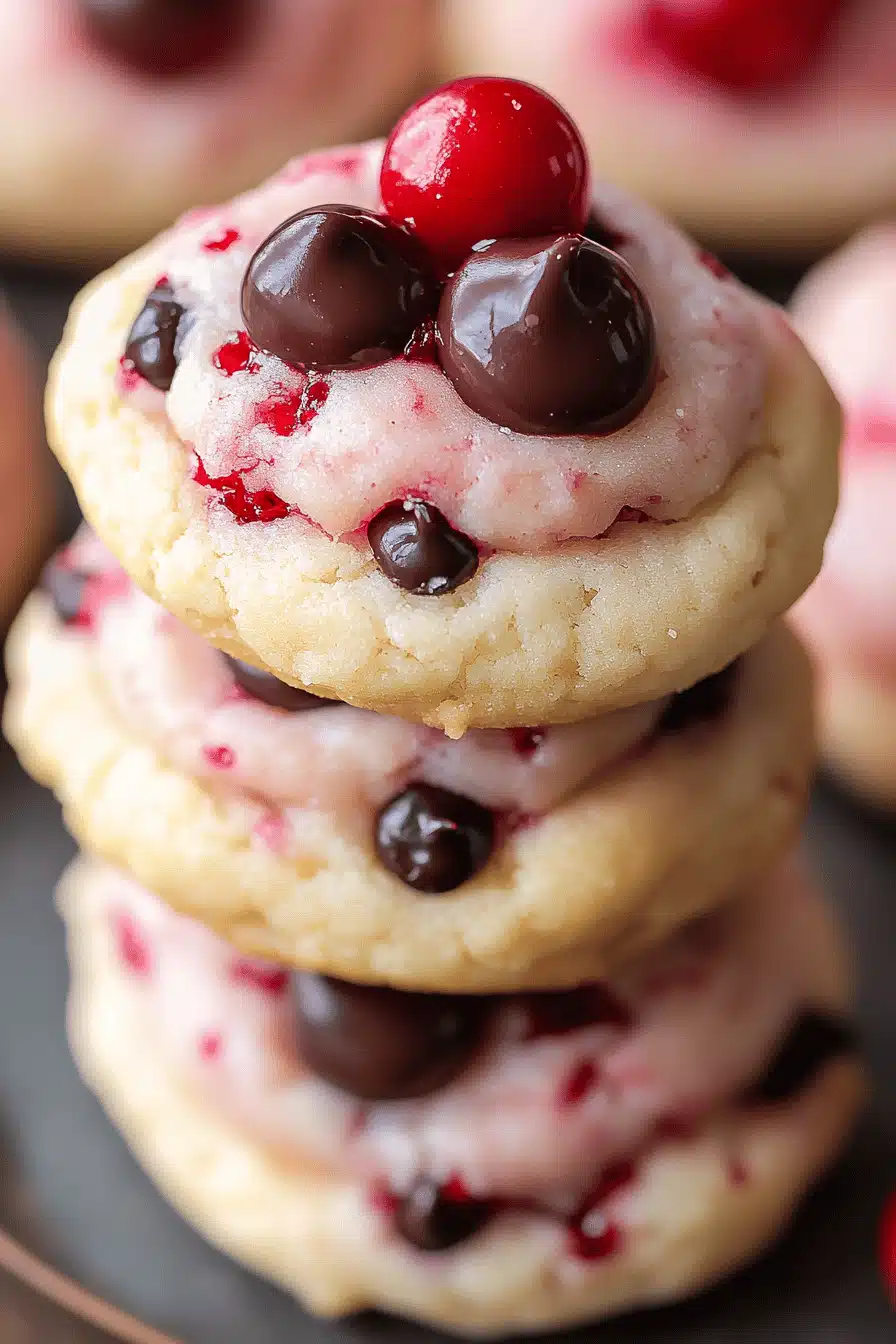
Okay, so what exactly are Cherry Bombs? Think of these as little pockets of pure cherry delight nestled inside a soft, lightly spiced batter. The name comes from that explosive burst of cherry flavor you get when you bite into one—like a tiny, edible firecracker. It’s essentially a muffin or cupcake base loaded with fresh or preserved cherries and sometimes a surprise swirl or filling that makes every mouthful feel like a mini celebration. The whole point is to give you a simple, approachable recipe that feels a bit gourmet but is actually so easy and fun to make at home. If you love classic cherry desserts but want to switch things up from the usual cherry pie or cobbler, these are your go-to.
Why you’ll love this recipe?
What I adore about this Cherry Bombs recipe is how effortlessly it falls together and the surprise it delivers on every bite. First, the flavor is just magical—the bright tartness of cherries perfectly balances the mellow sweetness of the batter, giving you this beautiful harmony that never gets old. I always say flavor is king, and I can’t stop thinking about the juicy explosions within these little cakes.
Secondly, it couldn’t be easier. You don’t have to fuss over dozens of steps or complicated techniques. Even if you’re new to baking, these Cherry Bombs are ridiculously forgiving—I’ve had batches turn out just fine when I accidentally overmixed or used frozen cherries instead of fresh. It’s pretty bulletproof and ideal for busy weeknights or those times when you suddenly crave something sweet but don’t want a ton of bother.
Money-wise, they’re a win too. Most ingredients are things you probably already have on hand, and cherries can be fresh or canned without sacrificing much flavor. Plus, they’re versatile—you can tweak the cherries to suit your mood, add nuts for crunch, or switch up the glaze for a personal twist. If you’ve enjoyed recipes like berry-studded crumble bars or lemon poppy seed muffins, these Cherry Bombs offer a similar kind of comfort with a little zing. Honestly, my family has made these a weekend staple and I can’t recommend them enough.
How do you make cherry bombs?
Quick Overview
Making Cherry Bombs is as relaxing as it is rewarding. You start with a tender, vanilla-scented batter that’s easy to whip up in one bowl. Then, you prepare a luscious cherry filling or topping that transforms each bite into a joyful surprise. The batter and filling come together in a swirl or layered effect before baking until golden, moist, and irresistible. The process is straightforward, ensuring even busy home bakers can embrace it without stress. The beauty is how these little treats offer that ‘wow’ factor without hours of prep—just pure, simple joy.
Ingredients
For the Main Batter:
- 1 ¾ cups all-purpose flour – I always recommend sifted for super fluffiness
- 1 tsp baking powder – fresh batches always rise better
- ¼ tsp baking soda – for the perfect crumb
- ½ tsp salt – balances the sweetness
- ½ cup unsalted butter, softened – room temperature is best for smooth mixing
- ¾ cup granulated sugar – you can reduce slightly if you prefer less sweet
- 2 large eggs – straight from the fridge works fine
- 1 tsp pure vanilla extract – trust me, quality vanilla makes a difference
- ½ cup buttermilk – adds moisture; I tested almond milk with lemon juice and it was surprisingly creamy
For the Filling:
- 1 ½ cups fresh or jarred cherries, pitted and roughly chopped – fresh is fabulous in season
- 3 tbsp sugar – adjust to cherry sweetness
- 1 tbsp lemon juice – brightens up the cherries
- 1 tbsp cornstarch – thickens the filling nicely
- Optional: ¼ tsp almond extract – intensifies cherry notes
For the Glaze:
- 1 cup powdered sugar – sifted to avoid lumps
- 2–3 tsp fresh lemon juice or milk – for a thin but spreadable consistency
- Optional: ½ tsp vanilla or almond extract – adds a lovely aroma
Step-by-Step Instructions
Step 1: Preheat & Prep Pan
Set your oven to 350°F (175°C) and grease a muffin tin or line it with paper liners. I like to butter the cups and dust a bit of flour in, which gives the Cherry Bombs a beautiful, golden edge. This little prep step helps them come out cleanly and look bakery-perfect. Preheating early ensures even baking, so don’t rush it.
Step 2: Mix Dry Ingredients
In a medium bowl, whisk together your flour, baking powder, baking soda, and salt. Mixing these well upfront is key—try to get an even distribution so your Cherry Bombs rise uniformly and avoid any bitter baking soda bites. I learned that one the hard way after a batch that tasted a little… off.
Step 3: Mix Wet Ingredients
In a larger bowl, beat the softened butter and sugar together until light and fluffy—this usually takes about 3-4 minutes with an electric mixer. Then, add the eggs one at a time, beating after each addition. Stir in the vanilla extract and buttermilk. If your butter isn’t soft enough, the mix can look a bit curdled but keep going — it’ll smooth out once combined with the dry ingredients.
Step 4: Combine
Gradually add your dry mix to the wet mixture, folding gently with a spatula or mixing on low speed. The key here is to not overmix. You want everything just combined; overworking the batter can lead to tough, dense Cherry Bombs, which nobody wants! A few lumps here and there are totally fine—that’s your ticket to tender texture.
Step 5: Prepare Filling
While mixing is happening, pop your cherries, sugar, lemon juice, and cornstarch into a small saucepan over medium heat. Stir constantly as it thickens—around 3-5 minutes until luscious and glossy. Remove from heat and add almond extract if you’re feeling fancy. The filling should remain thick but scoopable, not runny.
Step 6: Layer & Swirl
Spooning half the batter into each muffin cup, dollop a spoonful of cherry filling on top, then cover with the remaining batter. For that pretty marble effect, take a knife or toothpick and gently swirl the filling through the batter—don’t overdo it or you’ll lose that explosive cherry surprise. A tight swirl gives the perfect marbled look and teasing hints of cherry throughout.
Step 7: Bake
Pop your tray in the oven and bake for about 20-25 minutes. Start checking at 18 minutes with the classic toothpick test—insert in the center, and if it comes out clean or with just moist crumbs, they’re done! Your kitchen will start smelling like cherry heaven, which is always the best cue to get ready.
Step 8: Cool & Glaze
Allow your Cherry Bombs to cool in the pan for about 10 minutes before transferring to a wire rack. If you try to glaze while too warm, it’ll melt off too fast. Make your glaze by whisking powdered sugar with lemon juice or milk until smooth and pourable. Drizzle it over the cooled treats and let it set—this adds a little tangy sweetness that perfectly accents the cherries.
Step 9: Slice & Serve
If you baked them in a muffin tin, serve as is for that grab-and-go appeal. If you prefer a more cake-like presentation, you can bake in a square pan, slice into squares, and present with an extra drizzle of glaze or even a little whipped cream. These are best enjoyed slightly warm or at room temperature—cold tends to dull the cherry punch a bit, so trust me on this. Serve with your favorite cup of coffee or tea and watch how fast they disappear.
What to Serve It With
For Breakfast: Pair your Cherry Bombs with a strong cup of black coffee or a subtly spiced chai latte. The fruity brightness of the cherry compliments the bold coffee flavors perfectly. I like serving them with a dollop of Greek yogurt on the side for a creamy contrast.
For Brunch: These are fabulous alongside a fresh citrus salad and perhaps a sparkling rosé or a mimosa. Arrange them on a tiered dessert stand for a little wow factor and watch guests reach for seconds.
As Dessert: Serve Cherry Bombs with vanilla ice cream or a spoonful of mascarpone cheese dusted with cinnamon. A drizzle of melted dark chocolate makes this feel ultra indulgent—perfect after a cozy family dinner.
For Cozy Snacks: On a rainy afternoon or lazy weekend, I love grabbing one warm with a mug of hot cocoa. Sometimes I even toast them lightly and spread a bit of salted butter on top because, why not? It’s these little comfort combos my family talks about long after the crumbs are gone.
Top Tips for Perfecting Your Cherry Bombs
Cherry Prep: Fresh cherries work beautifully but make sure they’re pitted well—no one wants a surprise crunch! If using frozen cherries, thaw and drain any excess juice to avoid a soggy batter. Grating freeze-dried cherries into the batter is a trick I sometimes use for extra punch.
Mixing Advice: Mixing is where many trips go sideways. Remember, fold dry ingredients gently into wet just until combined. If the batter looks too thick, a splash more buttermilk can save the day. I learned patience is key here—overmix and your bombs can turn dense.
Swirl Customization: For a more dramatic look, dollop extra filling on top before baking or add a handful of chopped nuts like pistachios or walnuts for delightful texture contrast. Use a toothpick to swirl in figure eights or circles for artistic flair.
Ingredient Swaps: Tried this with coconut oil instead of butter and loved the slight tropical twist. You can also substitute plain yogurt or sour cream for buttermilk in equal amounts and keep the texture moist and tender. I sometimes slip in a teaspoon of cinnamon or almond extract to vary the flavor.
Baking Tips: Oven temperatures can vary so keep an eye for color and moisture cues. Placing your baking rack in the center gives the most even heat. If your tops brown too quickly, loosely tent with foil partway through.
Glaze Variations: Lemon glaze is classic, but you can swap it out for an orange or cherry juice glaze for more zing. For a richer finish, try cream cheese frosting thinned slightly with milk. Always glaze when the bombs are mostly cooled to keep that perfect drizzle texture.
Storing and Reheating Tips
Room Temperature: Store Cherry Bombs in an airtight container on your counter for up to 2 days. Covering them well keeps the crumb soft and prevents drying. If they ever feel a bit tough, a quick 10-second zap in the microwave revives them nicely.
Refrigerator Storage: These last 4-5 days refrigerated wrapped tightly or in a sealed container. I usually remove the glaze before storing as it can get sticky, then re-glaze before serving. Just bring them back to room temp for the best flavor.
Freezer Instructions: Wrap individually in plastic wrap and then place in a freezer bag. They hold well for up to 3 months. Thaw overnight in the fridge or for a few hours on the counter, then rewarm gently before enjoying.
Glaze Timing Advice: If freezing, it’s best to glaze after thawing to avoid cracking or melting issues. For room temp snacking, glaze once cooled but not fully chilled for the smoothest finish.
Frequently Asked Questions
Final Thoughts
Cherry Bombs have become one of those cherished recipes I keep returning to when I want something that feels both special and utterly comforting. They’re the perfect balance between a humble muffin and a luscious dessert, with that explosive cherry center that makes every bite memorable. I can’t get enough of how the flavors play beautifully together with minimal fuss, and I hope you’ll find the same joy when you make them. Whether it’s a quick breakfast, a cozy snack, or an elegant brunch treat, these Cherry Bombs have your back. Don’t forget to share your own twists or stories—I love hearing how this recipe fits into your kitchen rhythm. Happy baking, and here’s to many delicious moments ahead!