Easy Peanut Butter Cup Pie Magic
Okay, confession time: I have a serious weakness for anything chocolate and peanut butter. Seriously, it’s a love affair that’s lasted my entire life. And when that craving hits, especially on a warm afternoon when the thought of turning on the oven feels like a chore, there’s one recipe that always saves the day: my no-bake Peanut Butter Cup Pie. It’s not just a dessert; it’s a hug in a pie dish. I remember the first time I made it, years ago, trying to impress some friends. I was so nervous, but it turned out to be an absolute hit! My youngest son, who is the pickiest eater on the planet, declared it the best thing he’d ever tasted. That’s when I knew I’d struck gold. It’s the kind of dessert that looks fancy enough for a special occasion but is so ridiculously easy, you can whip it up for a Tuesday night treat. Think of it as a cheesecake’s cooler, more fun-loving cousin who skipped all the complicated steps and went straight for the good stuff. If you’re a fan of those iconic chocolate and peanut butter cups, you are going to *adore* this. It’s honestly my go-to when I just need a little bit of sweet, creamy perfection without all the fuss.
What is a peanut butter cup pie?
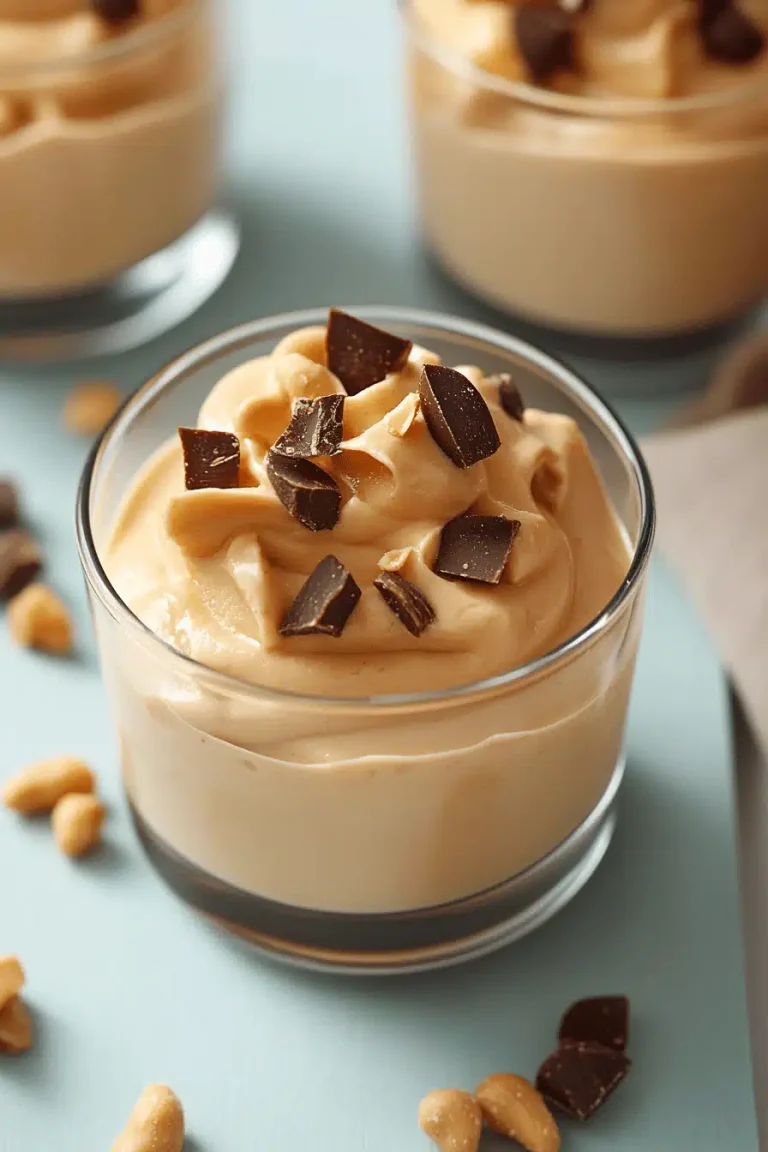
So, what exactly is this magical creation I’m raving about? At its heart, my Peanut Butter Cup Pie is a glorious symphony of smooth, rich, creamy goodness with pockets of pure, unadulterated peanut butter cup bliss. It’s a no-bake dessert, which is a huge win in my book, especially during those sweltering summer months or when I’m just feeling a little bit lazy (which, let’s be honest, happens more often than I’d like to admit!). It’s essentially a luscious, velvety filling made with cream cheese, peanut butter, and a touch of sweetness, all nestled inside a crunchy, chocolatey cookie crust. And the best part? It’s studded with chopped peanut butter cups, so every single bite delivers that perfect combination of smooth and chunky, creamy and crunchy, sweet and salty. It’s the kind of pie that makes people ask for the recipe before they’ve even finished their first slice. It’s got all the flavor of your favorite candy bar, transformed into an elegant (but still super casual) dessert. It’s simple, it’s decadent, and it’s ridiculously satisfying.
Why you’ll love this recipe?
I have a recipe for Peanut Butter cup pie and I know you will too. I know it’s a good recipe,flavor. Oh. My. Goodness. It’s that classic, irresistible pairing of rich, smooth peanut butter and sweet, decadent chocolate. The filling is incredibly creamy, almost like a no-bake cheesecake, but with that distinctive peanut butter tang that just sings. Then you have those little bursts of melted peanut butter cup goodness throughout – it’s pure heaven! Secondly, the simplicity is a game-changer. We’re talking no oven required! This means less fuss, less cleanup, and crucially, less heat in the kitchen. It’s the perfect make-ahead dessert; you can whip it up the day before a party or when you know you’ll have a busy week. It’s also surprisingly cost-efficient. You probably already have most of the ingredients in your pantry. And even if you need to grab a few things, the ingredients are all pretty budget-friendly, especially considering the gourmet taste you get. Finally, its versatility is fantastic. While it’s perfect on its own, you can totally customize it. Want a darker chocolate crust? Use chocolate wafer cookies. Prefer a milk chocolate swirl on top? Go for it! It’s also wonderful for feeding a crowd. I’ve taken this to potlucks, barbecues, and holiday gatherings, and it always disappears in minutes. Honestly, what I love most about this peanut butter cup pie is that it tastes way more complicated and indulgent than it actually is. It’s a guaranteed crowd-pleaser that delivers maximum deliciousness with minimal effort. It’s the kind of dessert that makes you feel like a baking superstar, even if you barely broke a sweat!
How do I make a peanut butter cup pie?
Quick Overview
Making this incredible Peanut Butter cup pie is almost embarrassingly easy! You’ll start by creating a simple, crunchy chocolate cookie crust, then whip up a luxuriously smooth peanut butter filling. We’ll fold in chopped peanut butter cups for those delightful surprises, and then it’s just a matter of chilling it until firm. It’s all about combining a few key ingredients and letting the refrigerator do the hard work. The beauty of this no-bake method is that it preserves the creamy texture of the filling and ensures every bite is perfectly cool and refreshing. It truly is a stress-free dessert that looks and tastes like you spent hours in the kitchen.
Ingredients
For the Crust:
2 cups chocolate cookie crumbs (like Oreos, with the filling removed if you want a less sweet crust, or use chocolate graham crackers for a slightly different flavor)
6 tablespoons unsalted butter, melted
1 tablespoon granulated sugar (optional, if your cookies are very sweet)
A pinch of salt
For the Filling:
8 ounces cream cheese, softened (this is crucial for a smooth filling!)
1 cup creamy Peanut Butter (the smooth kind works best for texture, but natural peanut butter will work if you stir it very well)
1 cup powdered sugar, sifted (sifting prevents lumps!)
1 teaspoon vanilla extract
1/2 cup heavy cream, cold (for whipping)
For the Mix-ins and Topping:
1 cup chopped peanut butter cups (about 10-12 standard-sized cups), plus more for garnish
2 tablespoons melted chocolate (for drizzling, optional)
A few whole peanut butter cups, halved (for garnish, optional)
Step-by-Step Instructions
Step 1: Preheat & Prep Pan
First things first, grab your 9-inch pie plate. You don’t need to grease it, as the cookie crust will prevent sticking. If you’re using a springform pan, make sure it’s securely latched. Set this aside for now.
Step 2: Mix Dry Ingredients
In a medium bowl, combine your chocolate cookie crumbs, optional sugar, and a pinch of salt. Give it a good stir to make sure everything is evenly distributed. This simple step ensures your crust has great flavor and a nice texture.
Step 3: Mix Wet Ingredients
Add the melted butter to the crumb mixture. Stir with a fork or spatula until all the crumbs are moistened and the mixture resembles wet sand. It should hold together when you squeeze a bit of it.
Step 4: Combine
Pour the crumb mixture into your prepared pie plate. Use the bottom of a measuring cup or your fingers to press the crumbs firmly and evenly into the bottom and up the sides of the pie plate. This is important for creating a sturdy crust that won’t crumble when you slice the pie. Pop this crust into the freezer for about 10-15 minutes while you prepare the filling. This helps it set up nicely.
Step 5: Prepare Filling
In a large bowl, beat the softened cream cheese until it’s completely smooth and creamy. This is where the magic starts! Then, add the peanut butter and beat again until it’s well combined and smooth. Now, gradually beat in the sifted powdered sugar until everything is nicely incorporated. Stir in the vanilla extract. Finally, in a separate, clean bowl, whip the cold heavy cream until stiff peaks form. Gently fold about half of the whipped cream into the cream cheese and peanut butter mixture until just combined. Then, gently fold in the remaining whipped cream. Be careful not to overmix; you want it to stay light and airy!
Step 6: Layer & Swirl
Retrieve your chilled pie crust. Gently spoon about two-thirds of the peanut butter filling into the crust, spreading it evenly. Sprinkle the chopped peanut butter cups over the filling. Top with the remaining peanut butter filling, spreading it gently to cover the peanut butter cups. If you’re feeling fancy, you can melt a little chocolate and drizzle it over the top, then swirl it gently with a toothpick for a decorative effect.
Step 7: Bake
This is the best part: there’s no baking involved! Just cover the pie loosely with plastic wrap or foil and place it in the refrigerator to chill for at least 4 hours, or preferably overnight. This chilling time is crucial for the pie to set up properly and for the flavors to meld beautifully.
Step 8: Cool & Glaze
Once the pie is completely chilled and firm to the touch, you can add any optional garnishes. If you’re using melted chocolate for drizzling, do that just before serving. You can also arrange some halved peanut butter cups on top for a pretty presentation. The pie is best served chilled!
Step 9: Slice & Serve
To get clean slices, I like to run a sharp knife under hot water, dry it, and then slice. Repeat between each cut. This helps the knife glide through the creamy filling and the chocolate crust. Serve each slice cold and get ready for the compliments!
What to Serve It With
This Peanut Butter Cup Pie is so wonderfully versatile, it’s not just for dessert! I love finding new ways to enjoy it, and my family always has opinions on their favorites.
For Breakfast: Hear me out! A small slice of this with a strong cup of coffee is actually divine. It’s like a decadent breakfast treat, perfect for those days when you just need a little something special to start your day. I sometimes slice off a really thin piece and pair it with a small glass of cold milk – it feels like a special indulgence that doesn’t weigh you down.
For Brunch: This pie is a showstopper on a brunch table. I like to serve it with fresh berries – raspberries or strawberries really cut through the richness beautifully. A dollop of whipped cream or a drizzle of raspberry sauce on the side makes it feel extra elegant. It’s always a hit when we have friends over for a lazy weekend brunch.
As Dessert: This is its most obvious role, and it excels at it! For a classic dessert, serve it with a scoop of vanilla bean ice cream or a drizzle of hot fudge sauce. If you want to get fancy, a little dusting of cocoa powder or some chocolate shavings on top looks lovely. It’s the perfect ending to any meal, whether it’s a casual weeknight dinner or a more formal gathering.
For Cozy Snacks: Honestly, sometimes I just crave a bit of that peanut butter and chocolate goodness in the afternoon. A small wedge of this pie with a glass of cold milk is my ultimate comfort snack. It’s satisfying without being too heavy, and it always hits the spot. My kids sneak slices when they think I’m not looking, especially after school!
My family has a tradition where we have this pie on the last day of school each year. It signifies freedom and fun, and the joy on their faces when they see it is priceless. Another favorite combination is serving it alongside a warm brownie – the contrast in textures is just incredible!
Top Tips for Perfecting Your Peanut Butter Cup Pie
I’ve made this Peanut Butter Cup Pie countless times, and over the years, I’ve picked up a few tricks that really help ensure it turns out perfectly every single time. These are the little things that make a big difference!
Crust Prep: The key to a great crust is making sure your crumbs are evenly moistened. If you find your mixture seems too dry, add a tiny bit more melted butter, just a teaspoon at a time, until it holds together. Pressing it firmly into the pan is also super important – use the flat bottom of a glass or measuring cup to get a really compact and even layer. Don’t skip the freezer step for the crust; it helps it set up firmly and gives you a good base.
Mixing Advice: For the filling, make sure your cream cheese is truly softened. If it’s cold, you’ll end up with lumps, and nobody wants a lumpy peanut butter pie! Beat it well until it’s completely smooth *before* you add anything else. When you add the whipped cream, fold it in gently. You want to incorporate it without deflating all that lovely air you whipped into it. Overmixing at this stage can make the filling dense.
Swirl Customization: While my recipe is simple with just the chopped peanut butter cups mixed in, you can absolutely get creative! If you’re swirling melted chocolate on top, don’t go too crazy. A few gentle swirls with a toothpick are enough to create a pretty pattern without making the top too dense. You can also use different kinds of candy bars chopped up – think Reese’s Pieces for a crunchy pop, or even mini chocolate chips.
Ingredient Swaps: For the crust, if you don’t have chocolate cookies, chocolate graham crackers work well, or even a combination of graham crackers and cocoa powder. For the peanut butter, smooth is generally best for texture, but if you use natural peanut butter, make sure it’s very well stirred before measuring, as the oil separation can affect the consistency. I’ve also tested using almond butter or cashew butter, and while the flavor profile changes, it’s still delicious!
Baking Tips: This recipe is no-bake, so there are no baking tips! The “baking” here is really the chilling time. Make sure you give it ample time in the refrigerator. If you’re in a hurry, you can speed up the chilling process a bit by placing it in the freezer for an hour or two, but it’s best to let it set up slowly in the fridge for the creamiest texture.
Glaze Variations: The melted chocolate drizzle is optional, but it adds a nice visual touch. You can also skip it entirely. If you want to add a bit more flavor, consider stirring a tablespoon of peanut butter into the melted chocolate before drizzling. For a simpler topping, a dusting of cocoa powder or a sprinkle of crushed peanut butter cups is always a winner.
One of my biggest lessons learned was about the importance of softened cream cheese. The first time I made this, I was impatient and didn’t let it soften enough, and the filling had a slightly grainy texture. Now, I always leave it on the counter for at least an hour, or even microwave it in very short bursts (like 10 seconds at a time) until it’s pliable. Trust me, it’s worth the wait!
Storing and Reheating Tips
Proper storage is key to keeping this Peanut Butter Cup Pie tasting as amazing as it does on day one. Since it’s a no-bake pie with cream cheese and whipped cream, it needs to be kept chilled for the best texture and safety.
Room Temperature: I really don’t recommend leaving this pie at room temperature for extended periods, especially in warmer weather. The cream cheese and dairy components need to stay cold. If you’ve just taken it out to slice, it’s best to serve it within an hour or two and then get it back into the refrigerator.
Refrigerator Storage: This is the primary way to store your Peanut Butter Cup Pie. Once it’s fully set, cover it tightly with plastic wrap or aluminum foil, or better yet, an airtight container if you have one that fits. It will stay fresh and delicious in the refrigerator for up to 3 to 4 days. After that, while it’s still safe to eat, the texture might start to change slightly, and the crust can become a bit softer.
Freezer Instructions: You can freeze this pie, but I find the texture is best when it’s fresh. If you do want to freeze it, wrap it very, very well in a couple of layers of plastic wrap, followed by a layer of aluminum foil. It should be fully frozen and firm before wrapping. It can be stored in the freezer for up to 1 to 2 months. To thaw, transfer the frozen pie to the refrigerator and let it thaw overnight. It might release a little liquid, which is normal. You can gently blot it with a paper towel if needed before serving.
Glaze Timing Advice: If you’ve drizzled melted chocolate on top, it’s best applied just before serving or when the pie is fully chilled. If you’re planning to freeze the pie, I’d recommend skipping the chocolate drizzle before freezing and adding it after thawing, right before you serve it. This prevents the chocolate from cracking too much during the freezing and thawing process.
I’ve found that when storing in the fridge, using those pie keepers with a lid works wonders. If you don’t have one, just be sure to get a good seal with your plastic wrap so it doesn’t absorb any other fridge odors. The quality indicators to look for are a firm center and a crust that still has a slight crunch, even after a few days.
Frequently Asked Questions
Final Thoughts
So there you have it – my absolute favorite no-bake Peanut Butter Cup Pie. It’s one of those recipes that just makes me happy every time I make it, and even happier when I get to share it. It truly is the perfect blend of decadent chocolate, creamy peanut butter, and effortless execution. It’s proof that you don’t need a complex process to create something truly show-stopping and delicious. Whether you’re looking for a quick dessert fix, a crowd-pleaser for your next gathering, or just a way to satisfy that irresistible sweet tooth, this pie has got you covered. It’s a hug in a pie dish, plain and simple.
If you love this recipe, you might also enjoy my other no-bake treats or chocolate-lover favorites. I’m always experimenting in the kitchen and sharing what I find!
I can’t wait to hear how your Peanut Butter Cup Pie turns out! Please leave a comment below and let me know your thoughts, or share your own amazing variations. Happy baking (or, in this case, happy no-baking)!